Introducing a new capability, Marvis network reporting, this enables the android mobile devices to send network information to the Mist cloud, along with location data, when using Mist experience. This client provides complete network data from the end client’s perspective and can help to troubleshoot client-specific network connectivity issues. Mist Experience will allow you to run the Marvis agent either as stand-alone or along with location services.
Getting Started
1. Login to Mist Portal to create a Mobile SDK secret. [refer Where can I find the secret key]
2. Org should have an active SUB-VNA subscription to view client data in the Mist portal. Please contact support@mist.com for further information.
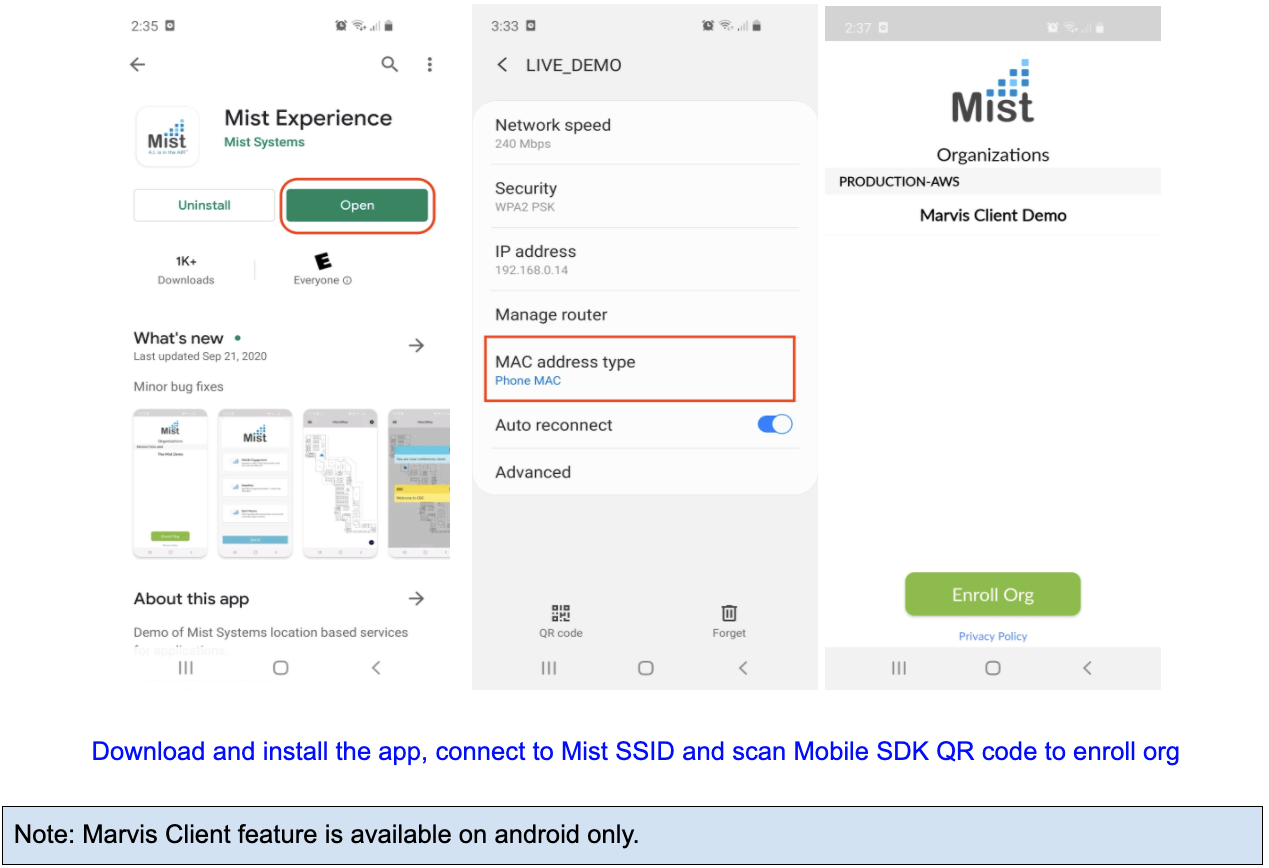
3. On an Android device, search for Mist Experience on the Play store.
4. To download and install the app, click on install.
5. Make sure your device WiFi is connected to Mist AP. This step is required.
6. If the device OS version is Android 10 or later and Mac address type is “Randomized Mac”, we recommend to change it to “Phone Mac” for better results.
7. Go to Organization > Mobile SDK > view QR code and scan the QR code to enroll the Org.
Start Marvis Client
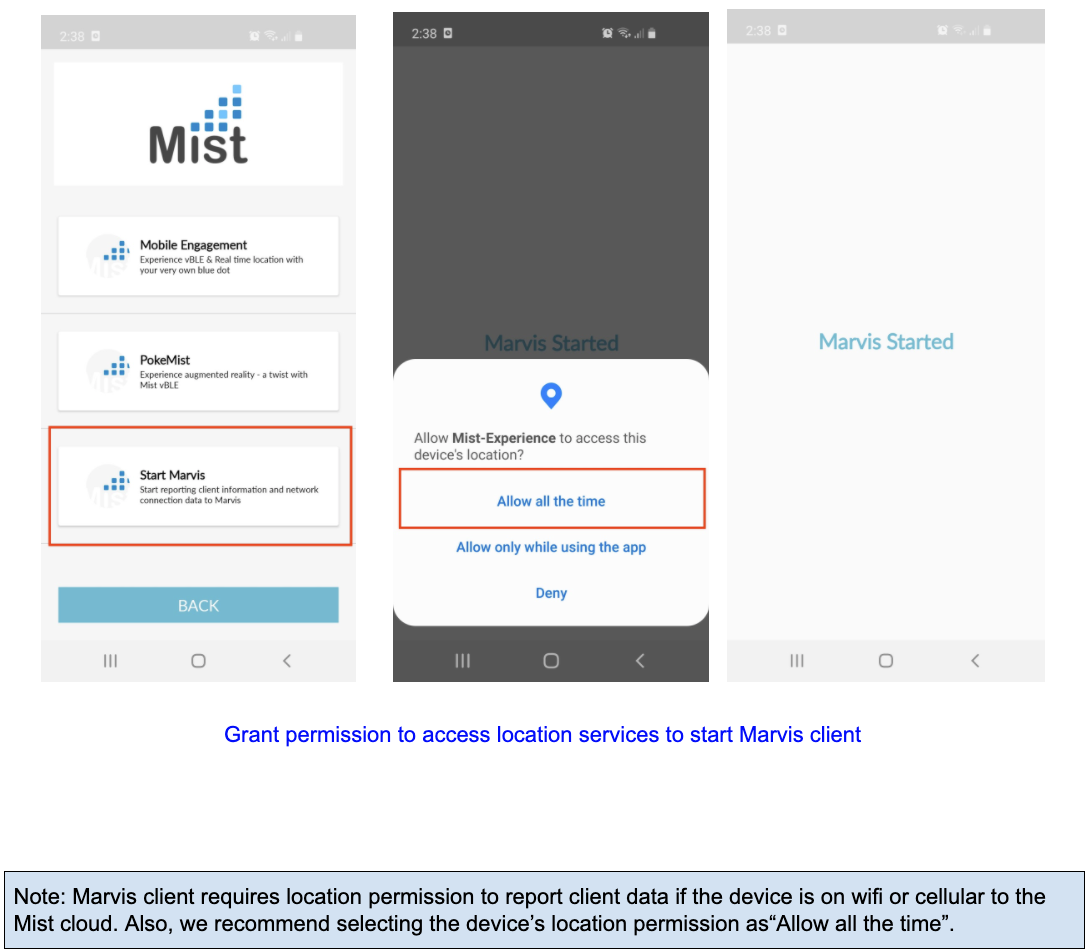
1. After you select Org, the app will navigate to the Engagement screen.
2. Select Start Marvis.
3. Mist Experience app will ask for location permissions – select “Allow all the time”
4. Marvis client is started now. You can move the app to the background.
5. Marvis client will report data to the cloud until the app is active in the background or foreground.
6. Mist Experience app will stop working when force removed by the user from the background or killed by the operating system.
Start Marvis Client with Location Feature
To start location with Marvis client along with location feature (Wayfinding), follow the steps below:
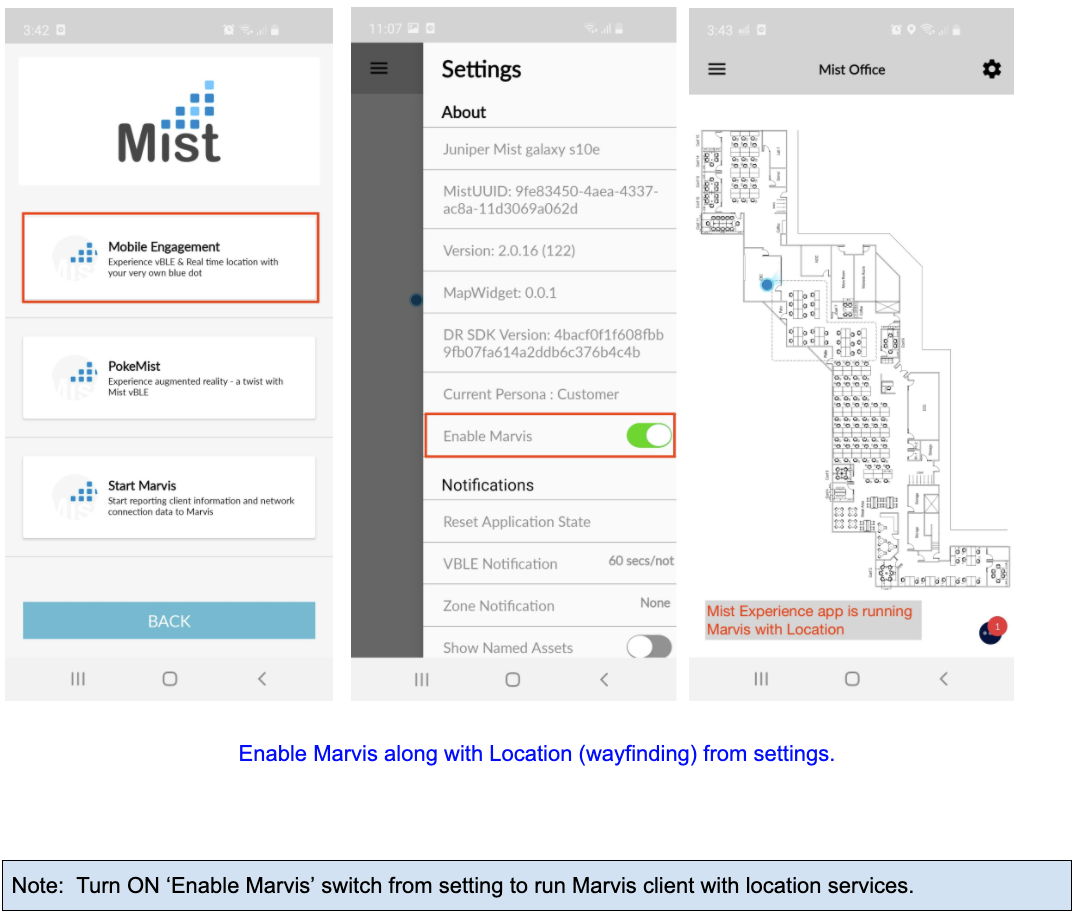
1. After you select Org, Mist experience app navigates to the Engagement screen.
2. Select ‘Mobile Engagement’
3. Go to settings( ⚙️), you can see the ‘Enable Marvis’ option. By default, Marvis is disabled.
4. Toggle the switch button to turn ON Marvis on the client-side.
5. Marvis will start reporting connection data to the Mist cloud along with Location.
Mist SDK makes the location based real time blue dot experience come to life. For turn by turn navigation and underlying path routing logic for wayfinding, we work with 3rd party mapping systems, and have an ecosystem as well: https://www.mist.com/
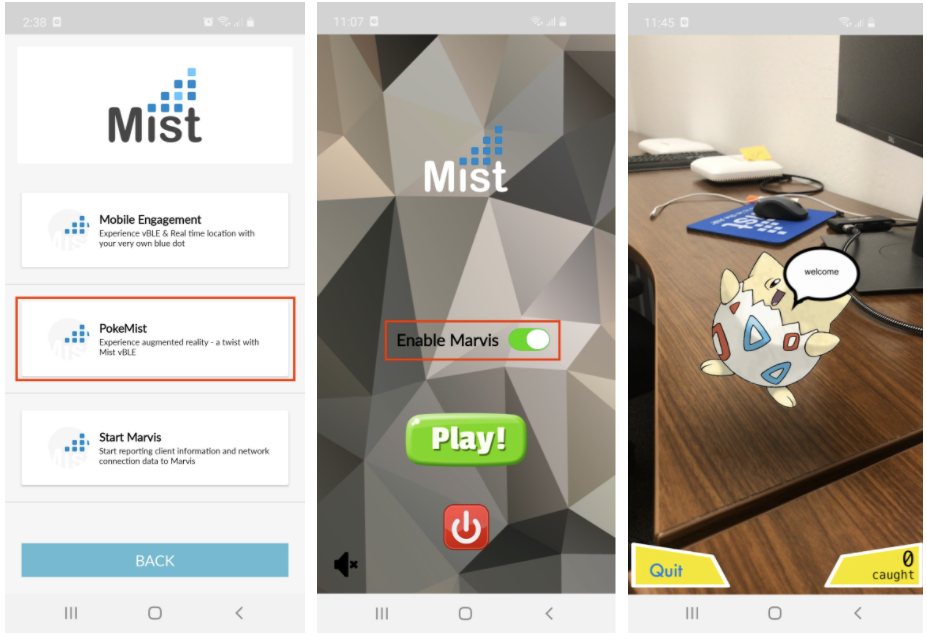
Start Marvis Client with PokeMist
To start location with Marvis client along with PokeMist, enable the switch to turn ON Marvis before you start.
Device on Wi-Fi or Cellular
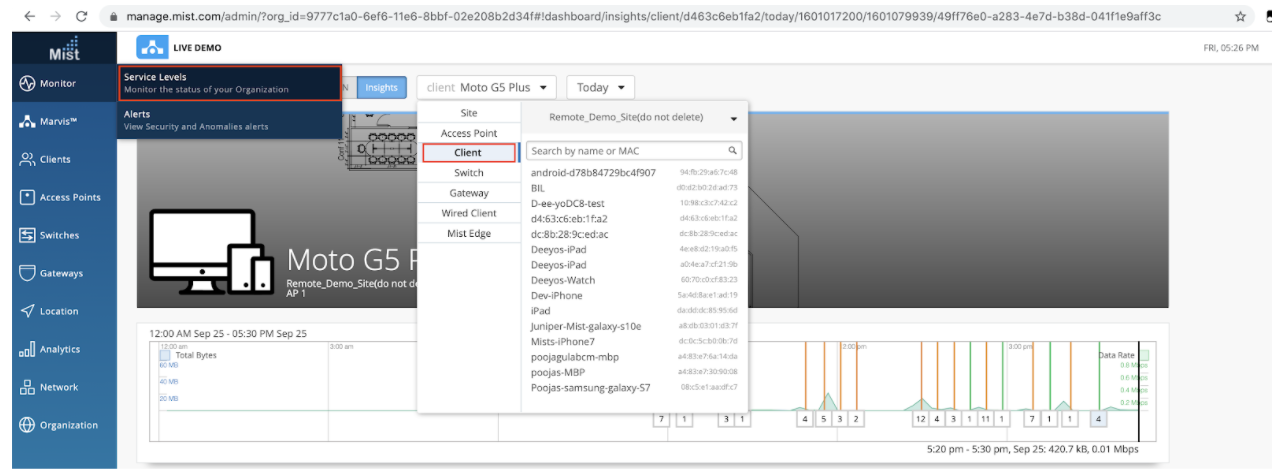
To view the client connection data and troubleshoot any Wifi problem, you can go to Monitor > Service Level > Insights > Select your Client.
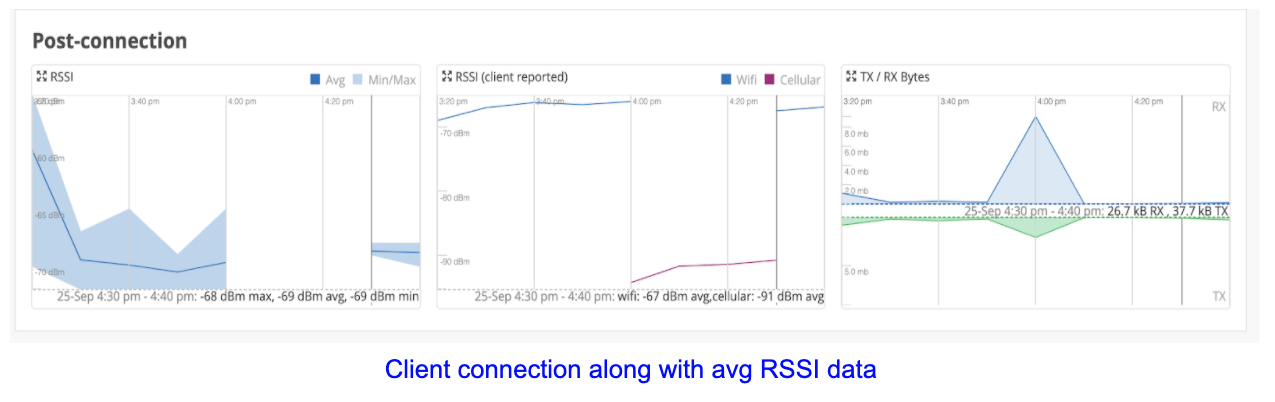
- In Insights > Post-Connection section, you can see AP connection with client and client reported RSSI data in the trend chart.
- The client reported RSSI chart provides data on how the client saw the access point signal during the selected time interval.
- This information can be helpful to troubleshoot Wi-Fi roaming and sticky client problems.
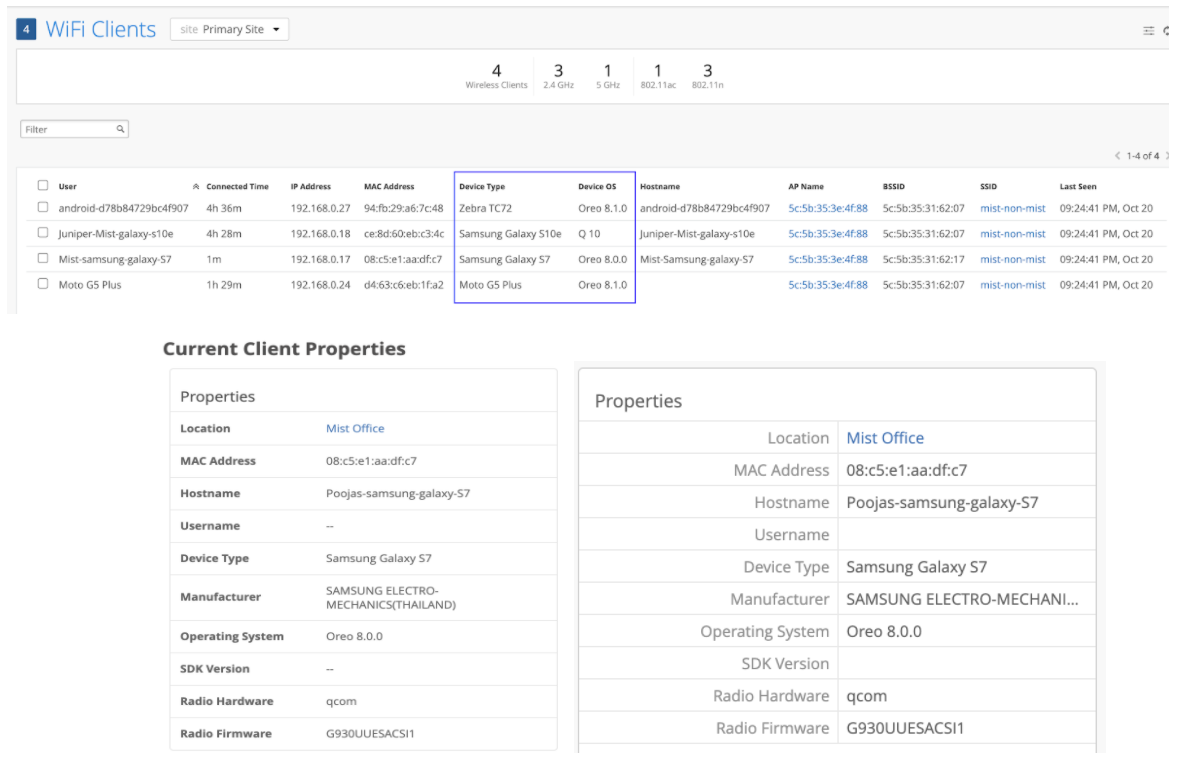
Wi-Fi Clients Properties
Marvis client sends device information such as device type, OS version, hostname, manufacturer, radio firmware, and hardware information.
AppClient on Live View
When you are running Marvis with location, Location > Live View on the Mist portal can tell you the current connection type.
- If your device is cellular, you can see App client in Orange.
- If your device is on WiFi, you can see App client in blue.
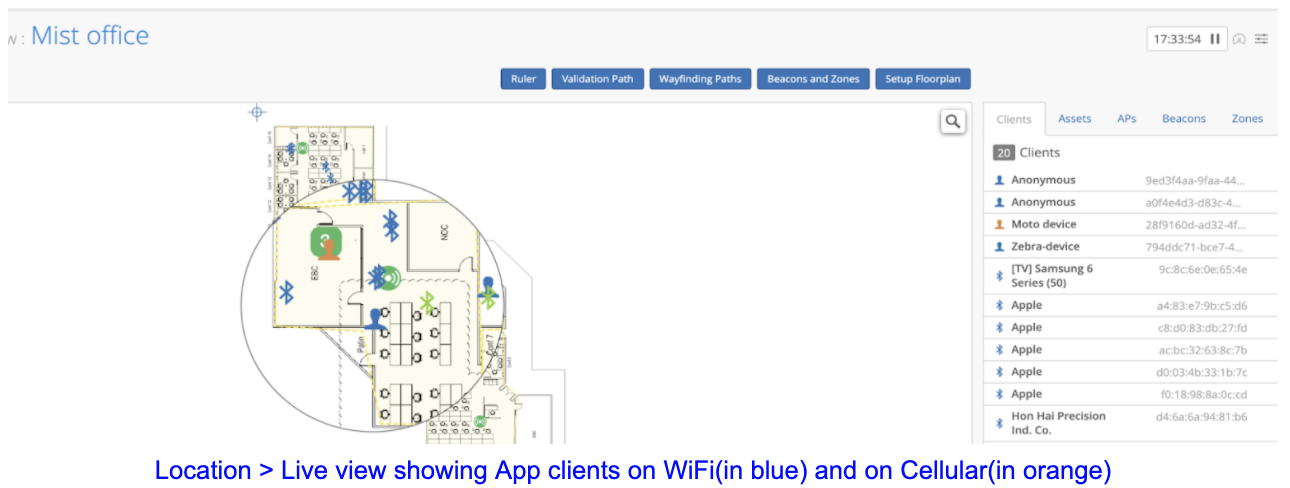
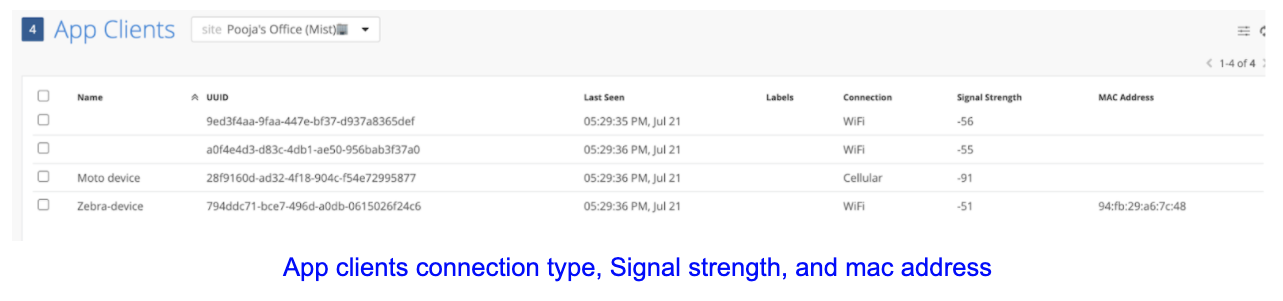
- On the Clients > App Clients page, you can view the device’s current connection type, signal strength, and mac address (if available). Location SDK and Marvis SDK can help to troubleshoot location issue if encountered while wayfinding.