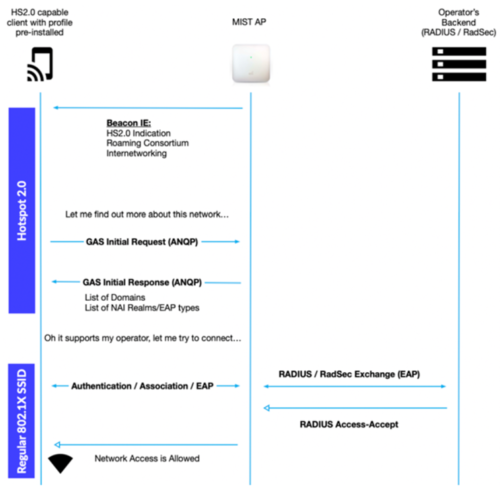
Hotspot 2.0 (or Passpoint) allows automatic secured connections for mobile devices to enable seamless user experience for various use-cases, such as public guest networks, carrier WiFi offload, Eduroam services and many more. Passpoint enables automatic network connection regardless of the SSID name, rather relying on 802.11u information received in the beacon or via ANQP exchange (3GPP, RCOI,
The following snippet outlines a typical connection flow for a Hotspot 2.0 enabled network:
Mist enables customers to easily deploy Hotspot 2.0 / Passpoint networks by providing pre-canned templates for each operator and service provider, removing the complexity that was historically associated with Hotspot 2.0 configuration. With Mist, no manual 3GPP, NAI Realm, RCOI, Domain Name configuration is required.
A Hotspot 2.0 WLAN mainly needs two components to function:
- Enable Hotspot 2.0 support on the WLAN.
- Configure RADIUS or RadSec authentication server towards your operator or service provider.
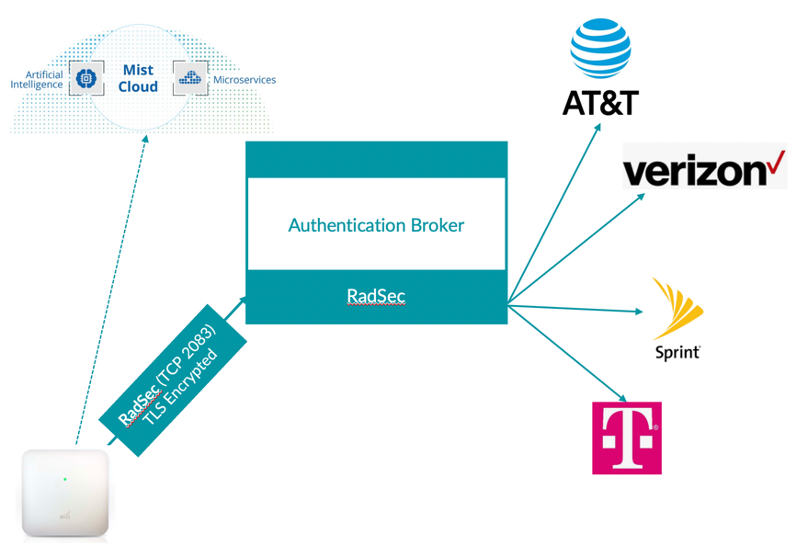
In cases where multiple Passpoint operators are selected, an authentication broker is required to proxy different operator realms to the correct destination. One of the examples of an authentication broker can be Boingo, who can proxy authentication traffic for each mobile carrier (T-Mobile, AT&T, Sprint etc) to the correct destination:
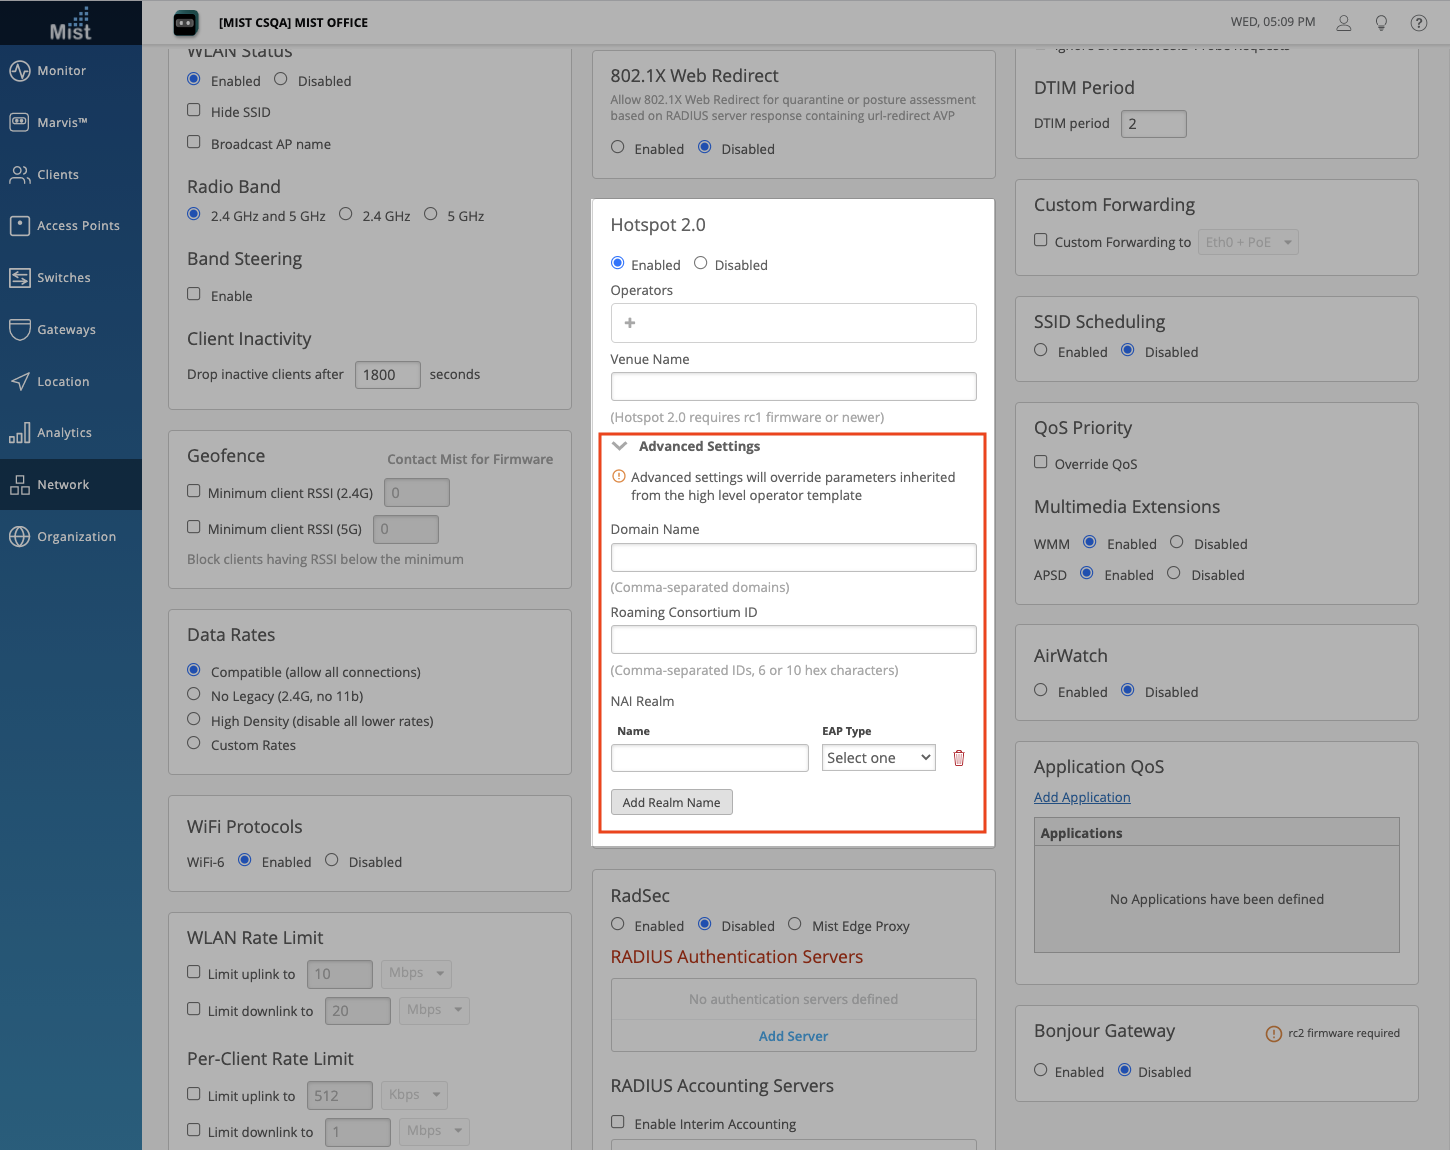
Enable Hotspot 2.0:
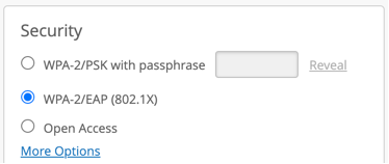
To enable Hotspot 2.0 first configure your WLAN security as 802.1X. Note, by design Hotspot2.0 is only supported on 802.1X secured WLANs:
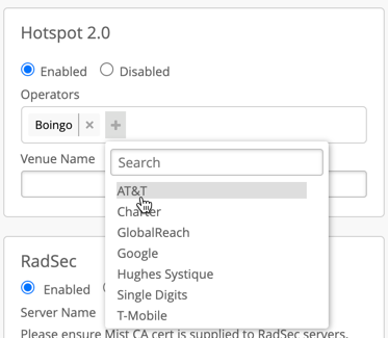
After that Hotspot 2.0 section will appear, select “Enabled” and pick your Operator or Operator List you would like to enable.
Selecting an operator would load pre-canned Mist-verified 802.11u settings required by a given operator. Typically, mobile carriers such as AT&T or T-Mobile will use SIM based credentials performing EAP-AKA, while other providers will use either username/password-based credentials or certificate installed on the device (for example, Google Orion, Globalreach, OpenRoaming etc):
Venue Name field is used to advertise name of the location in the beacon, if not configured, Mist AP will automatically advertise Site Name as Venue Name.
Advanced Settings
Click on Advanced Settings to reveal even more customizability for your Hotspot 2.0 configurations. Here, you can configure Domain Names, Roaming Consortium IDs, and NAI Realm for your Hotspot 2.0 WLAN. Type out your Domain names and Roaming Consortium IDs in a comma-separated list. Add NAI Realms for the following EAP Types: TLS, AKA, and TTLS. You can add, delete, and name each NAI Realm.
Please note that configuring these advanced settings will override parameters inherited from the high level operator template.
Configure Authentication Server:
Please consult with your Passpoint service provider to configure correct RADIUS or RadSec settings.
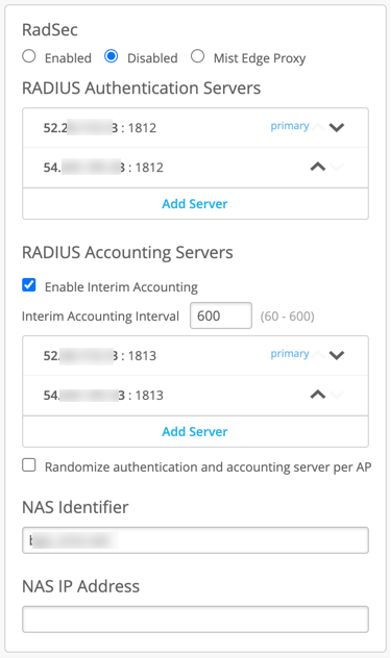
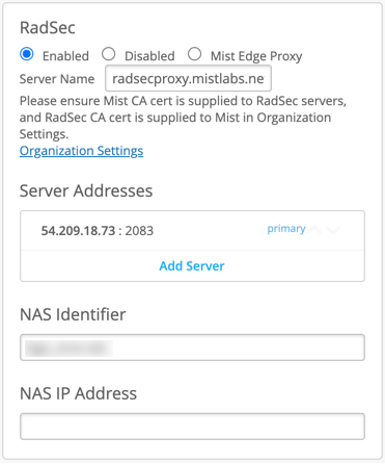
RadSec as Authentication Server
Mist APs provides native support for RadSec authentication, which allows secured end-to-end authentication path, which is critical in any Hotspot 2.0/Passpoint deployment, as authentication typically traverses Internet and unsecured network. RadSec uses secured TLS persistent connection authenticated by certificates, which not only provides unprecedented security, but also reliability of authentication, since its TCP session-based connection as opposed to a traditional UDP based clear-text RADIUS.
To enable RadSec, provide RadSec endpoint IP or an FQDN, and Server Name, where name must be equal to the RadSec server name indicated on the server certificate.
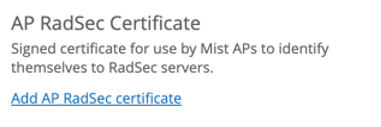
In order to provision certificates required for a successful RadSec connection establishment, navigate to Organisation > Settings:
Add RadSec cerver certificate under RadSec Certificates field (certificate should be provided by the RadSec server provider):
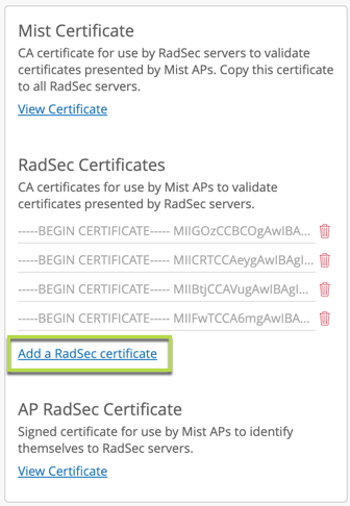
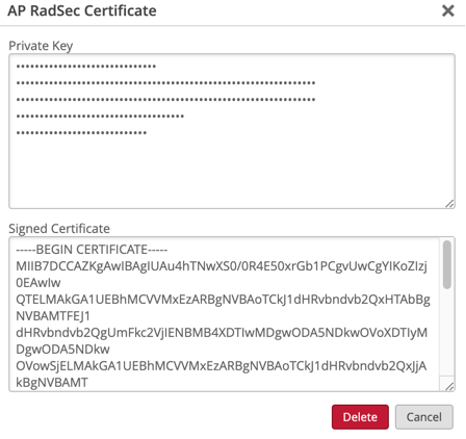
Provision AP certificate by clicking Add AP Certificate and loading private key and signed certificate provided by your Passpoint Provider or Authentication broker:
Additional setup documents: