By default Mist drops unknown DHCP responses to wireless clients, essentially the client must be directly associated to the AP for DHCP to be forwarded. This will cause bridged virtual machines to fail DHCP. Mist has a knob called enable wireless bridging which will allow bridged VMs to be able to connect to a Mist access point. Follow these steps to enable wireless bridging. Wireless bridging must be enabled on the WLAN via API.
It’s worth noting that there are side effects for enabling wireless bridging, meaning there are reasons the feature is not enabled by default. Most notably broadcast and unicast DHCP packets will be forwarded over the air on every AP the WLAN is enabled on, without filtering. This will lead to increased channel utilization. As such, Mist recommends caution when enabling this feature outside of home, lab, and small scale/niche production use. Typically Mist APs only forward DHCP when the corresponding client is directly associated to the AP. There’s also the security aspect to consider of allowing the VM to bridge onto the network.
How to enable wireless bridging mode:
Overview:
Wireless bridging can be configured on template and site WLANs via API
put /api/v1/orgs/:org_id/wlans/:wlan_id

put /api/v1/sites/:site_id/wlans/:wlan_id

{

     "enable_wireless_bridging": true

}
Detailed Instructions:
There are many ways to modify the API, such as writing a script, using a tool like Postman, or what is probably the easiest for a simple change like this is to use the browser.
-
For a config template WLAN, identify org_id and wlan_id
- The URI we will need to modify is /api/v1/orgs/:org_id/wlans/:wlan_id
- We can use the browser developer tools to help us easily identify org_id and wlan_id
- In chrome, to open the developer tools Right click on the Page -> Inspect Elements -> Then click on the Network Tab
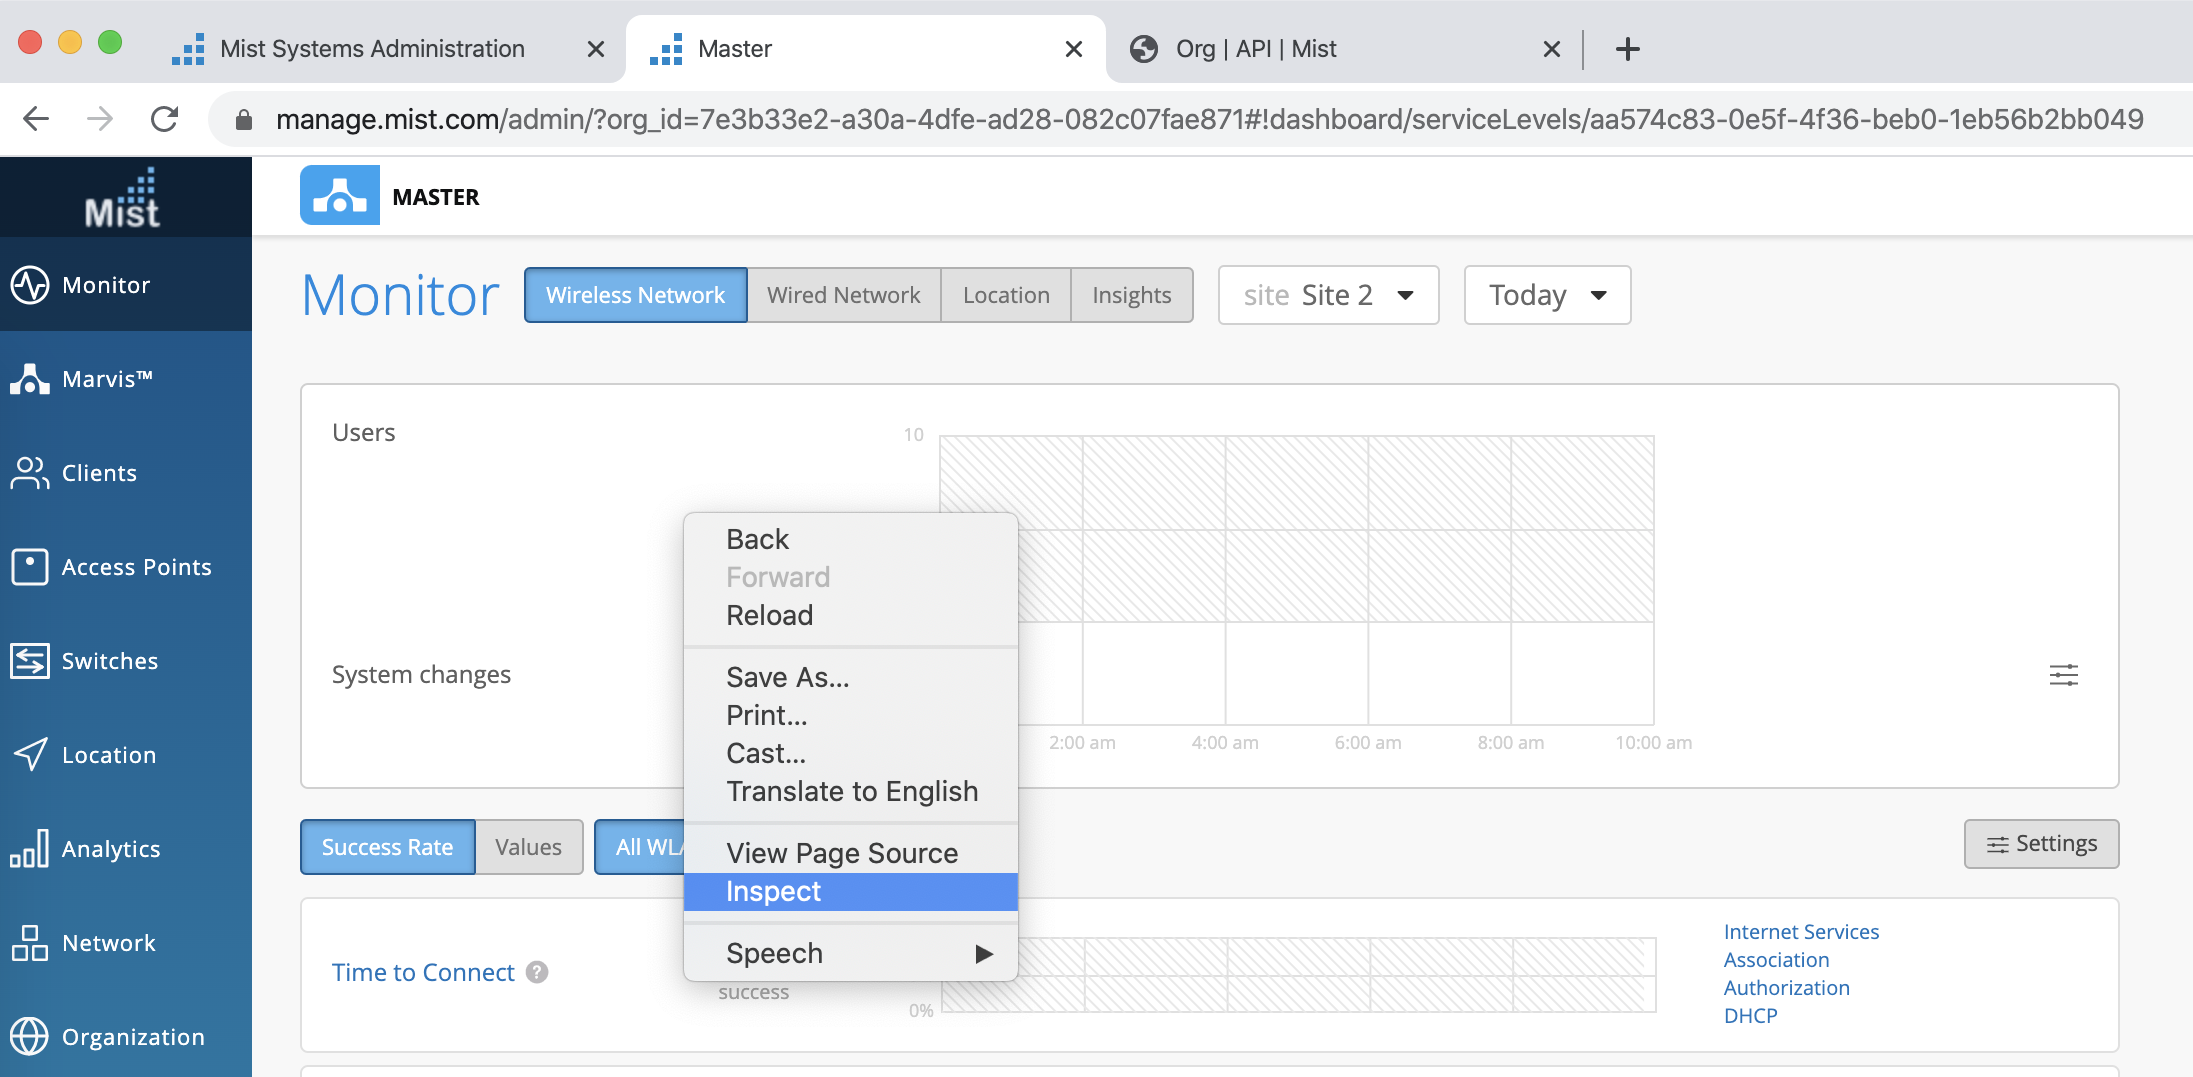
- Once the developer tools are open, navigate to Organization -> Config Templates. Then double click on wlans in the developer tools.
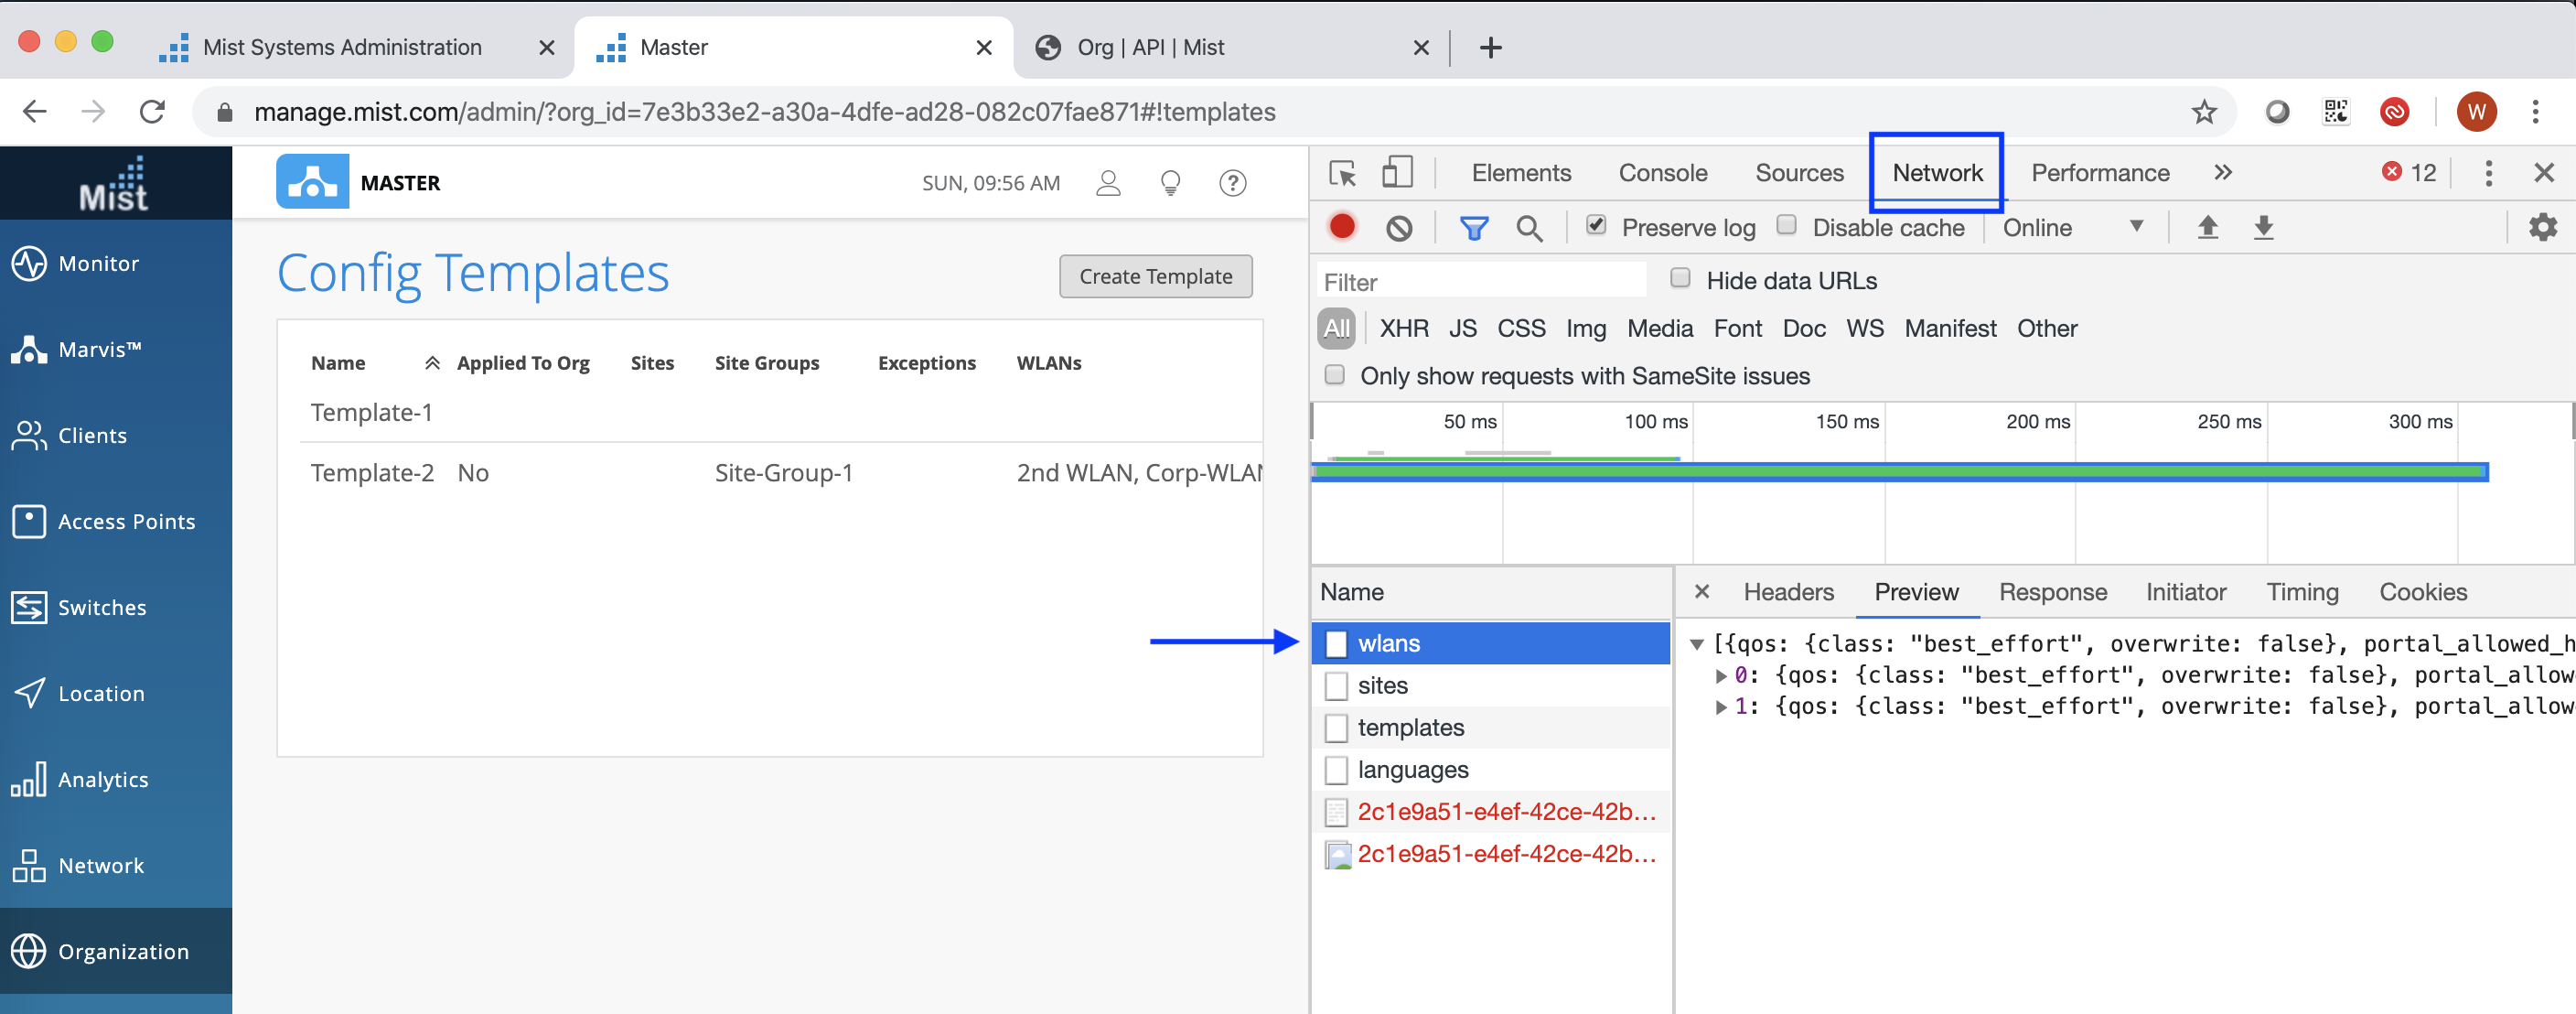
- From here, it’s just a matter of finding your WLAN and the corresponding “id”. You may have to scroll down
[
    {
        …
        "ssid": "Template-WLAN",
        …
        "id": "6ea0375f-206b-4502-849a-05636c3226ee",
        "for_site": false,
        "template_id": "0115a41f-7260-4ec4-b8cf-38a9032b0ec8",
        "site_id": "00000000-0000-0000-0000-000000000000",
        "org_id": "7e3b33e2-a30a-4dfe-ad28-082c07fae871",
        "created_time": 1544119106,
        "modified_time": 1549345128,
        …
    }
 ]
-
- Then copy the “id”, and add a “/” and paste the id to the end of the URL in the browser.
-
For example: https://api.mist.com/api/v1/orgs/7e3b33e2-a30a-4dfe-ad28-082c07fae871/wlans/6ea0375f-206b-4502-849a-05636c3226ee
-
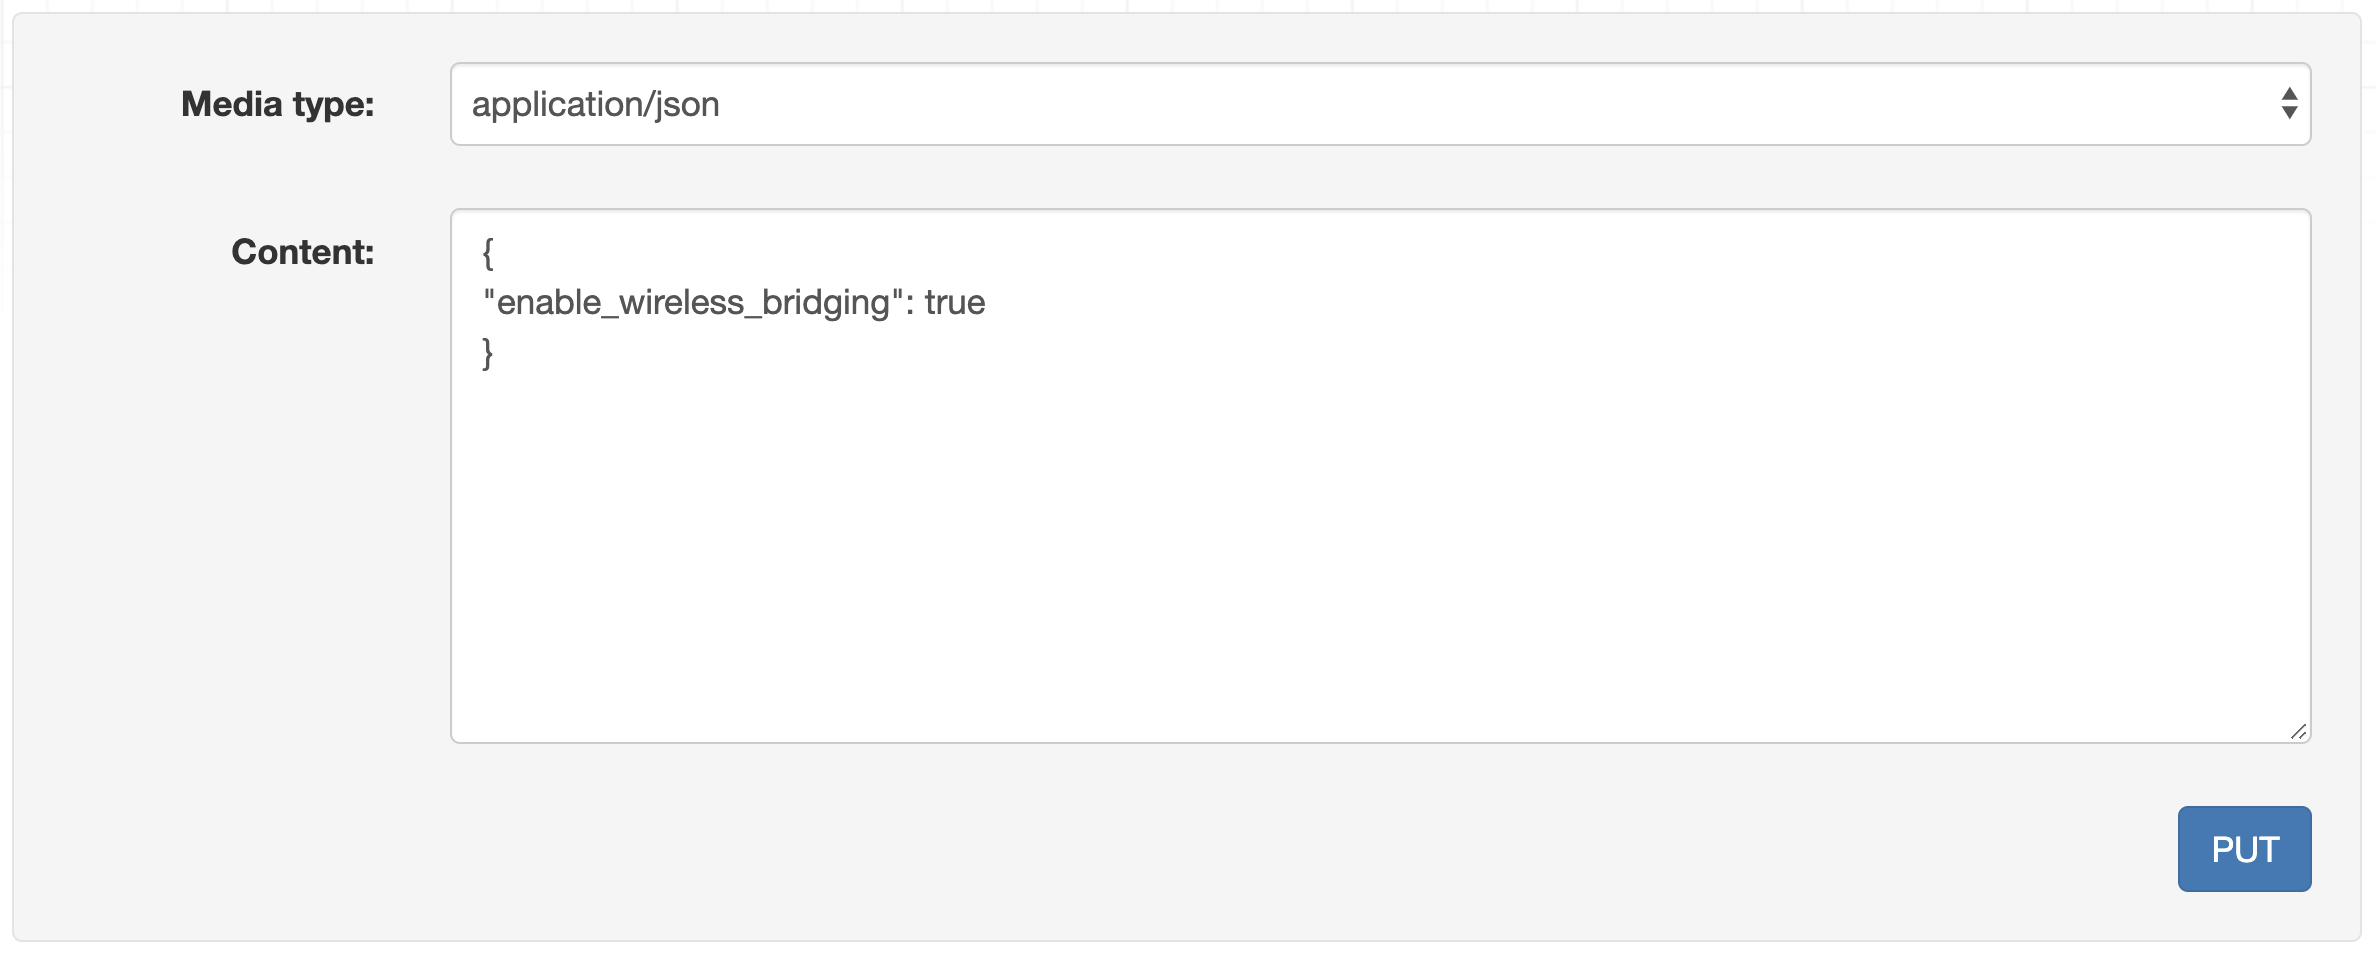
- Now we are at the correct endpoint and we can put the configuration and enable wireless bridging. Note, this will cause the WLAN to bounce.
- Then copy the “id”, and add a “/” and paste the id to the end of the URL in the browser.
{

     "enable_wireless_bridging": true

}
-
For a site WLAN, identify site_id and wlan_id
- The URI we will need to modify is /api/v1/sites/:site_id/wlans/:wlan_id
- We can use the browser developer tools to help us easily identify site_id and wlan_id
- In chrome, to open the developer tools Right Click on the Page -> Inspect Elements -> Then click on the Network Tab
- Once the developer tools are open, navigate to Network -> WLANs. Then double click on derived in the developer tools. This will open derived wlans for the site.
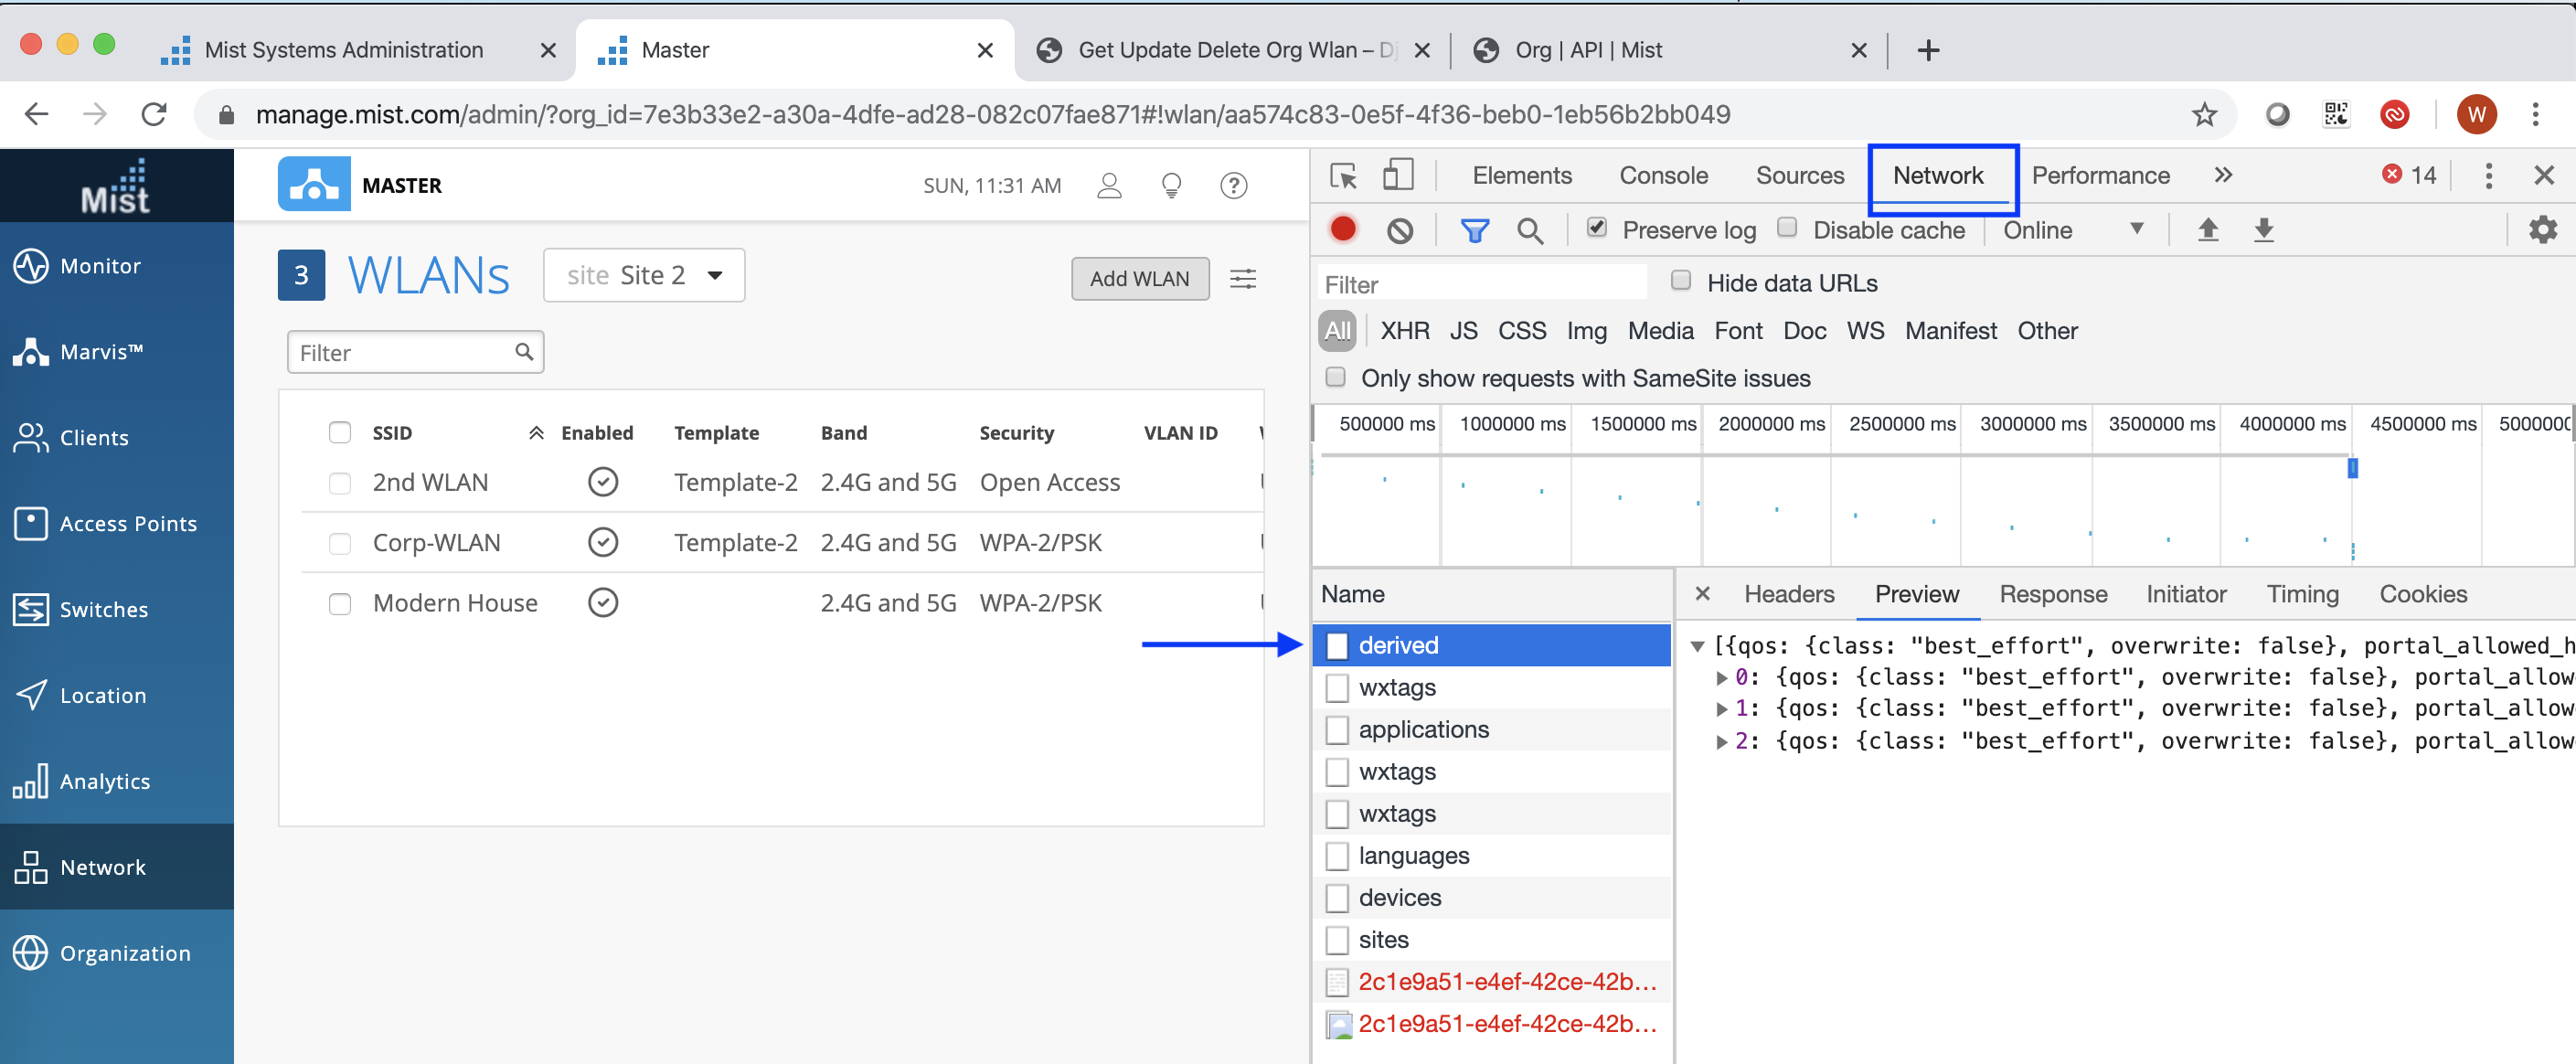
- From here, it’s just a matter of finding your WLAN and the corresponding “id”. You may have to scroll down
[
    {
…
"ssid": "Site-WLAN",
…
"id": "51341a3d-15a3-42a9-9f8e-c2be588f4e4e",
"for_site": true,
"template_id": null,
"site_id": "aa574c83-0e5f-4f36-beb0-1eb56b2bb049",
"org_id": "7e3b33e2-a30a-4dfe-ad28-082c07fae871",
"created_time": 1545512444,
"modified_time": 1549345098,
…
    }
]
-
- Then copy the “id”, and replace derived in the browser URL with the id
-
For example: https://api.mist.com/api/v1/sites/aa574c83-0e5f-4f36-beb0-1eb56b2bb049/wlans/51341a3d-15a3-42a9-9f8e-c2be588f4e4e
-
- Now we are at the correct endpoint and we can put the configuration and enable wireless bridging. Note, this will cause the WLAN to bounce.
- Then copy the “id”, and replace derived in the browser URL with the id
{
     "enable_wireless_bridging": true
}
You can find more information about enable_wireless_bridging in the API docs