This section will focus on why walls are used, how to insert walls, how to create exclusion zones and Exclusion Zones Rules. Typically for many location cases you don’t need walls but walls are a good feature to help contain SDK clients and assets inside a desired section of a floor plan if needed. Sometimes there will upload images with a bunch of white space in the image, which means a location estimate can be made outside parts of the image, and create a sense of location inaccuracies even though location is most likely doing what it should be doing. This applies only for SDK clients and assets.
Why are Walls used
Walls are used to give the location engine on the backed-end an idea of where walls are in the real deployment. Since humans can’t go through walls it is sometimes silly to see your location estimate close to a wall in real life is being made out side the building. Our location accuracy is, for SDK clients, is between 1 to 3 meters of accuracy so when standing near a wall there is a chance the estimate can be made of the other side of wall, which gives the miss impression location accuracy is degraded. So we can insert walls to give the system and understanding of walls in the real world. And as already stated above walls will do the opposite and tend to push the location estimate way when the estimate gets close to the newly inserted wall.
How to insert Walls
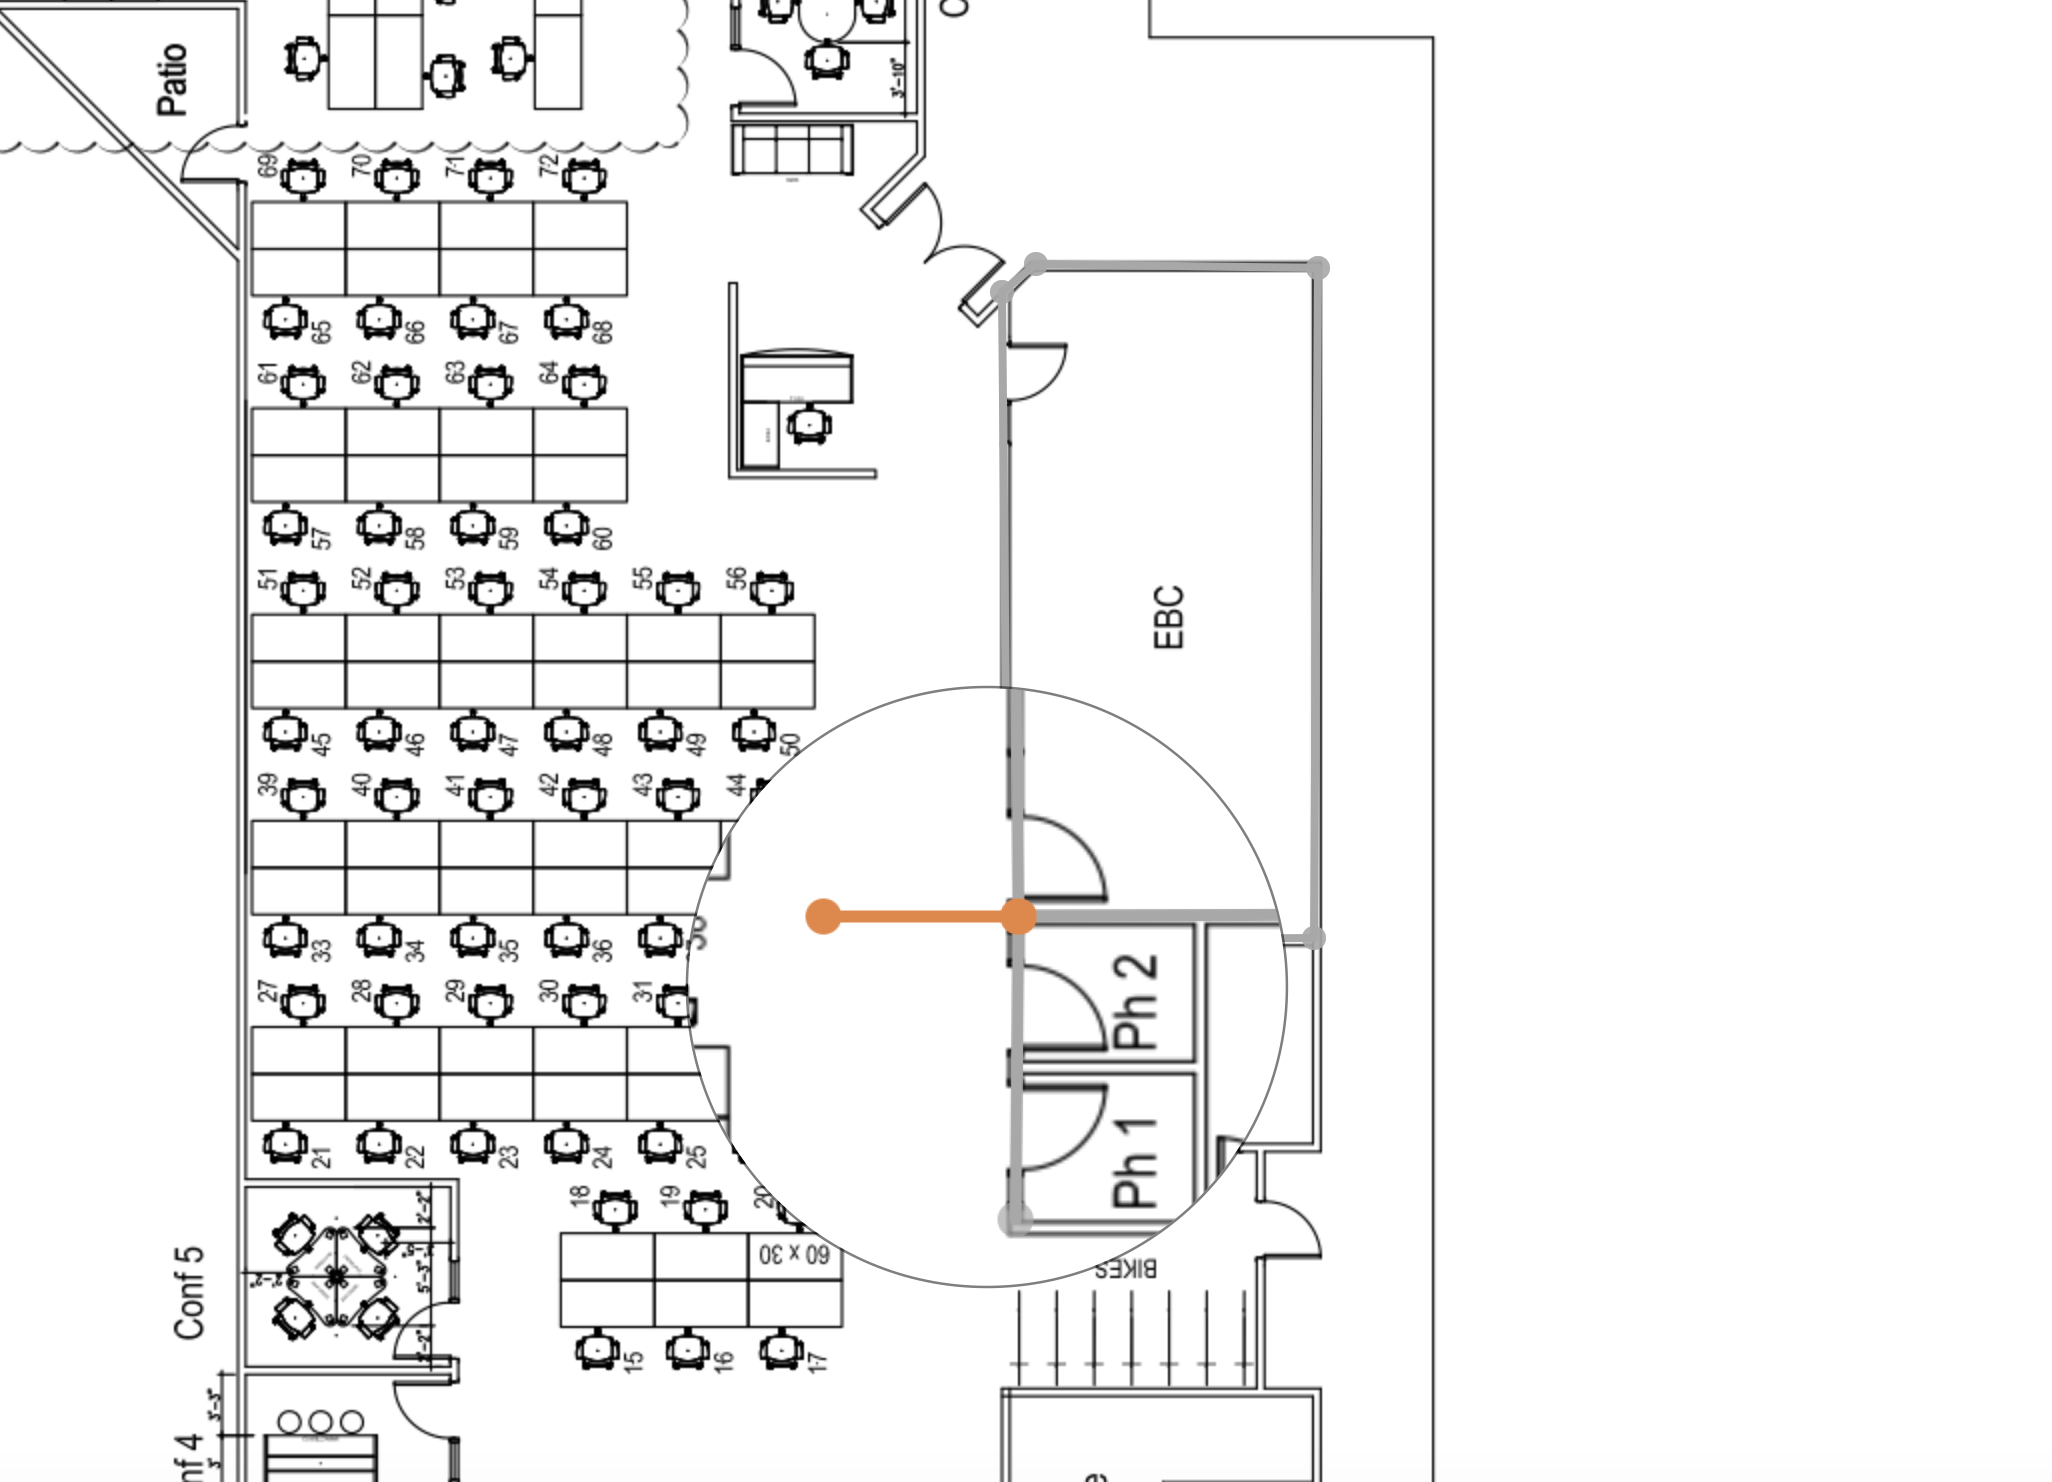
To insert walls go to Wayfinding Paths and select Insert Wall, similar to inserting paths you select the points you want to set the nodes on points of the image that resemble walls. Although unlike wayfidning paths where the location estimate will gravity towards the nearest path walls will do the opposite and tend to push the location estimate way when the estimate gets close to the newly inserted wall. Also similar to way finding paths walls can be intersected, however the difference is this creates Exclusion zones, which a location estimate can’t be located in the zone.

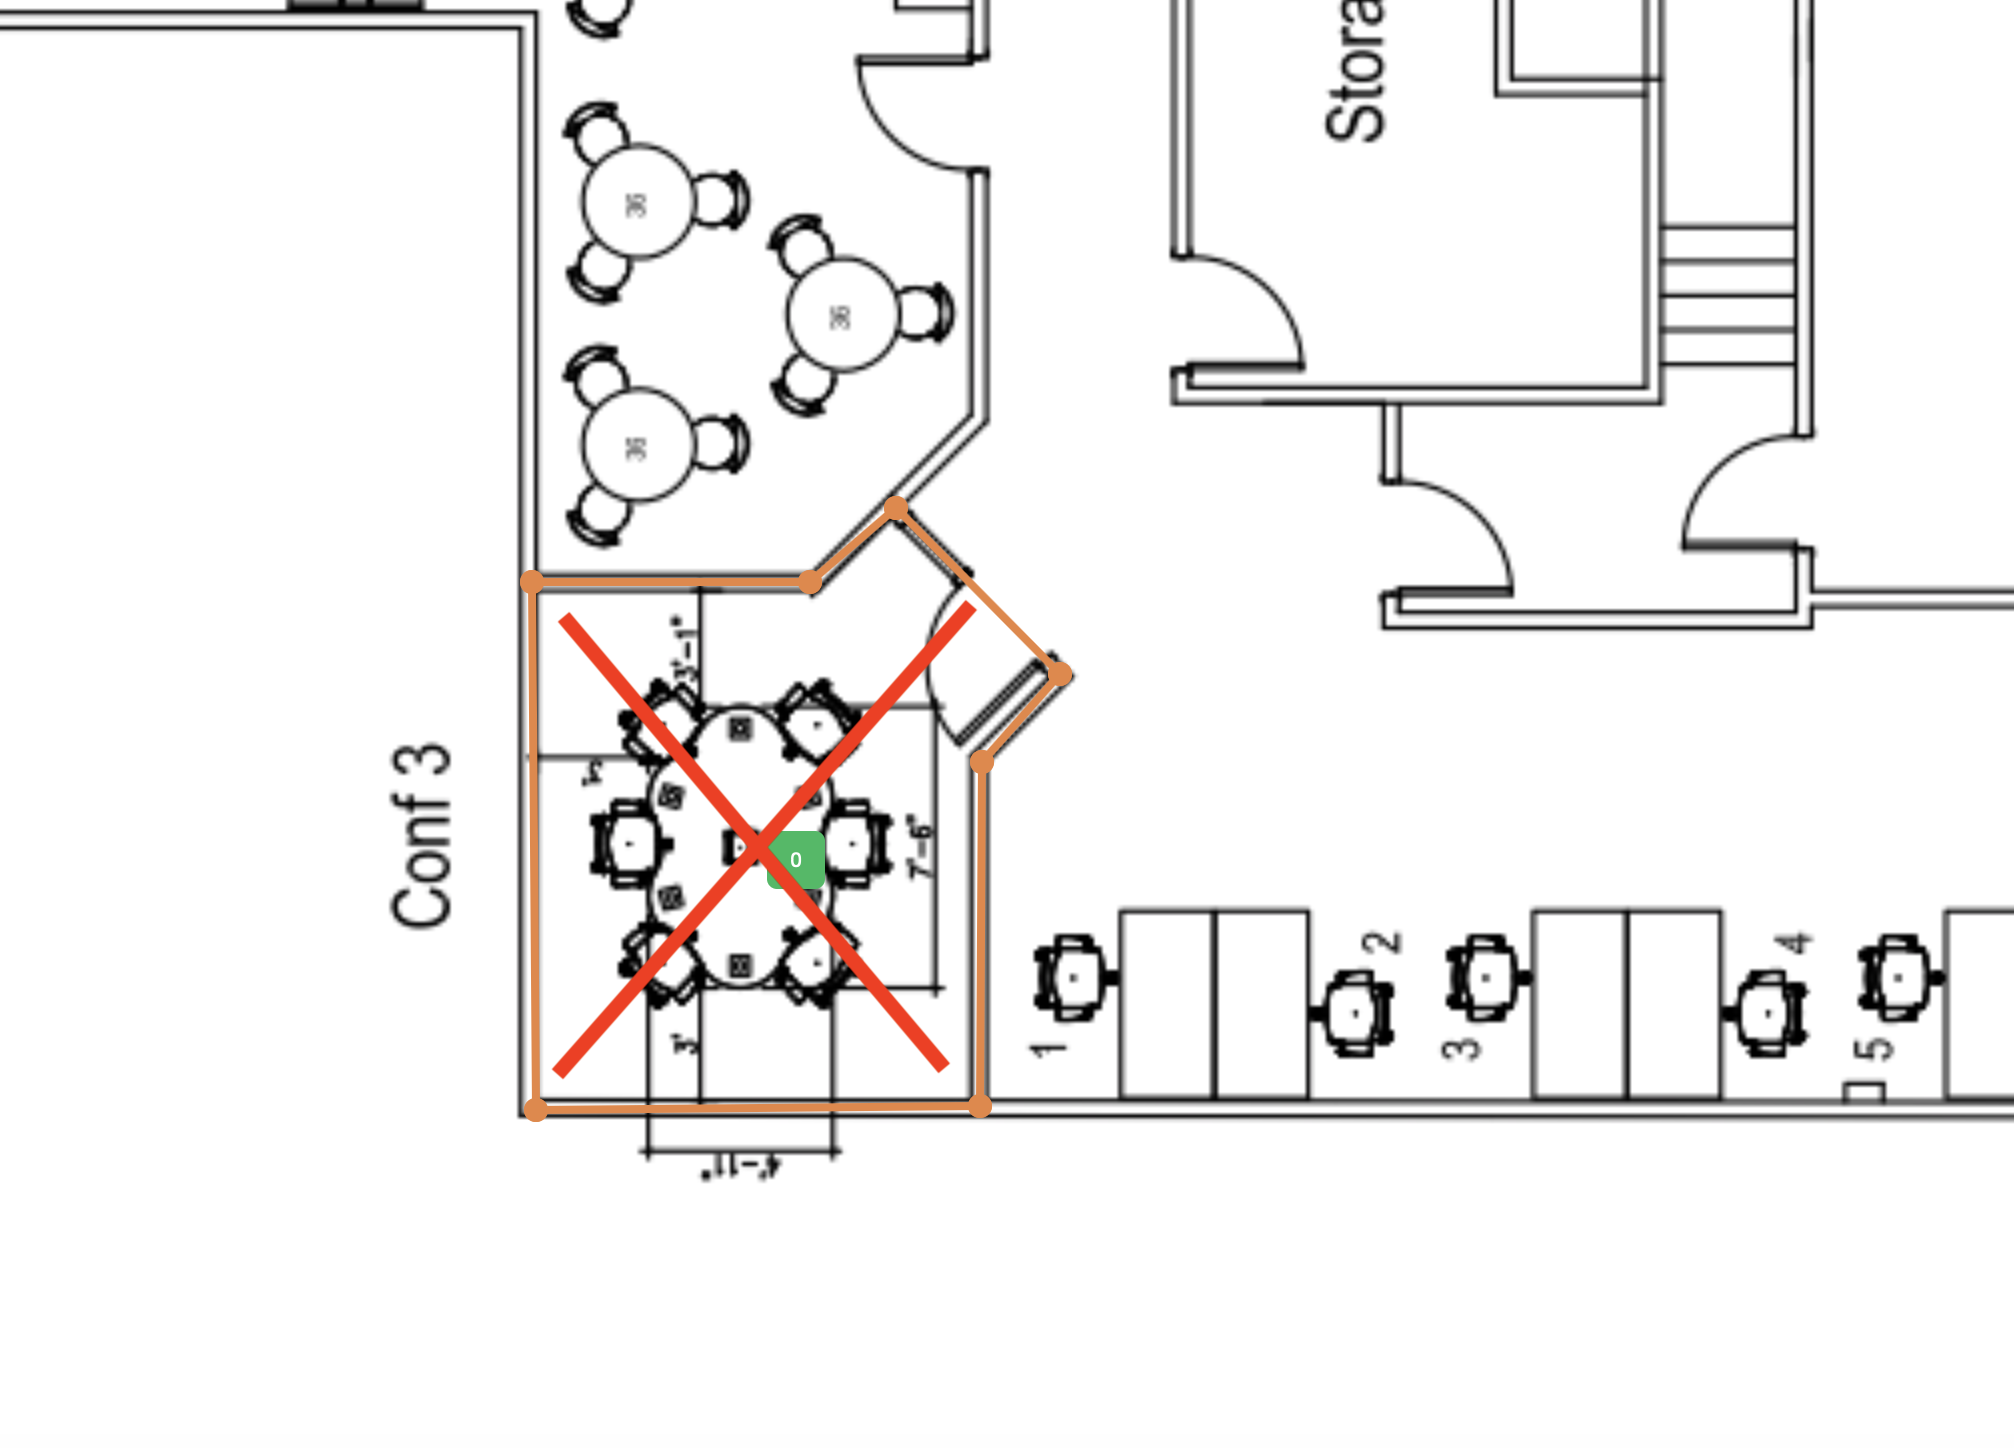
How to create Exclusion Zones
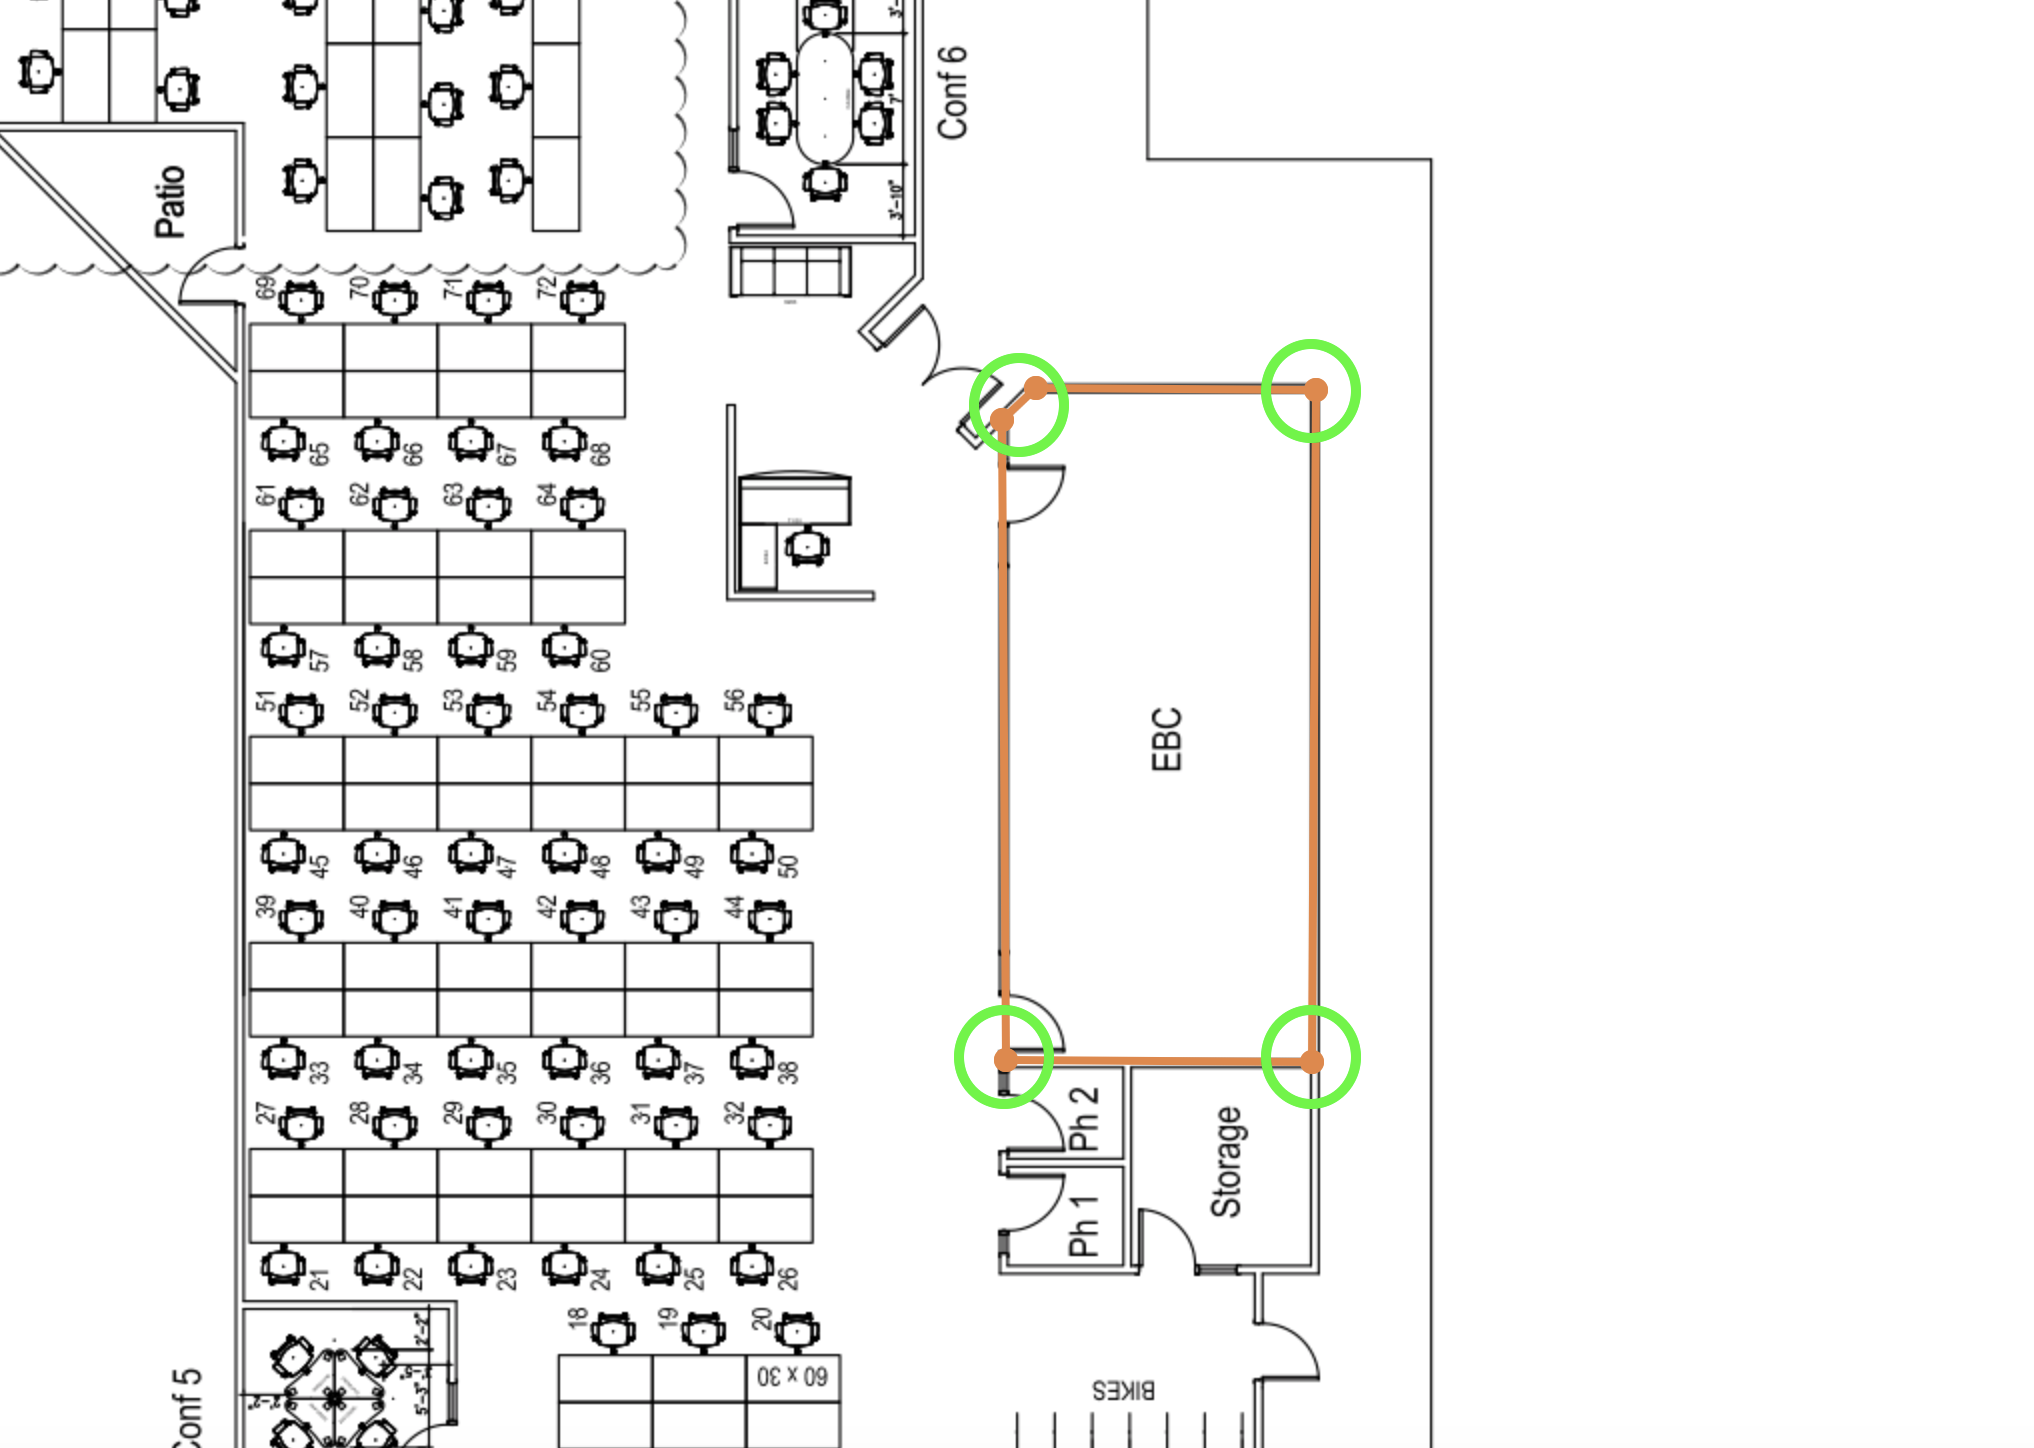
Exclusion Zones are walls that are fully enclosed, where each node is connected, and used primary to close off a space where location estimates can’t go to. To create an Exclusion Zone go to Wayfinding Paths and select Insert Wall, select the points on the map and enclose the walls so that if creates and Exclusion Zone. You know the Exclusion Zone is good when by selecting each node and the corresponding segments follow as you select/move the nodes around.
Exclusion Zones Rules
Here are some rules when creating an Exclusions Zone(s):
- All wall nodes need to be fully enclosed.
- Wall segments that aren’t fully enclosed will be treaded as normals walls and location estaminets can occur.
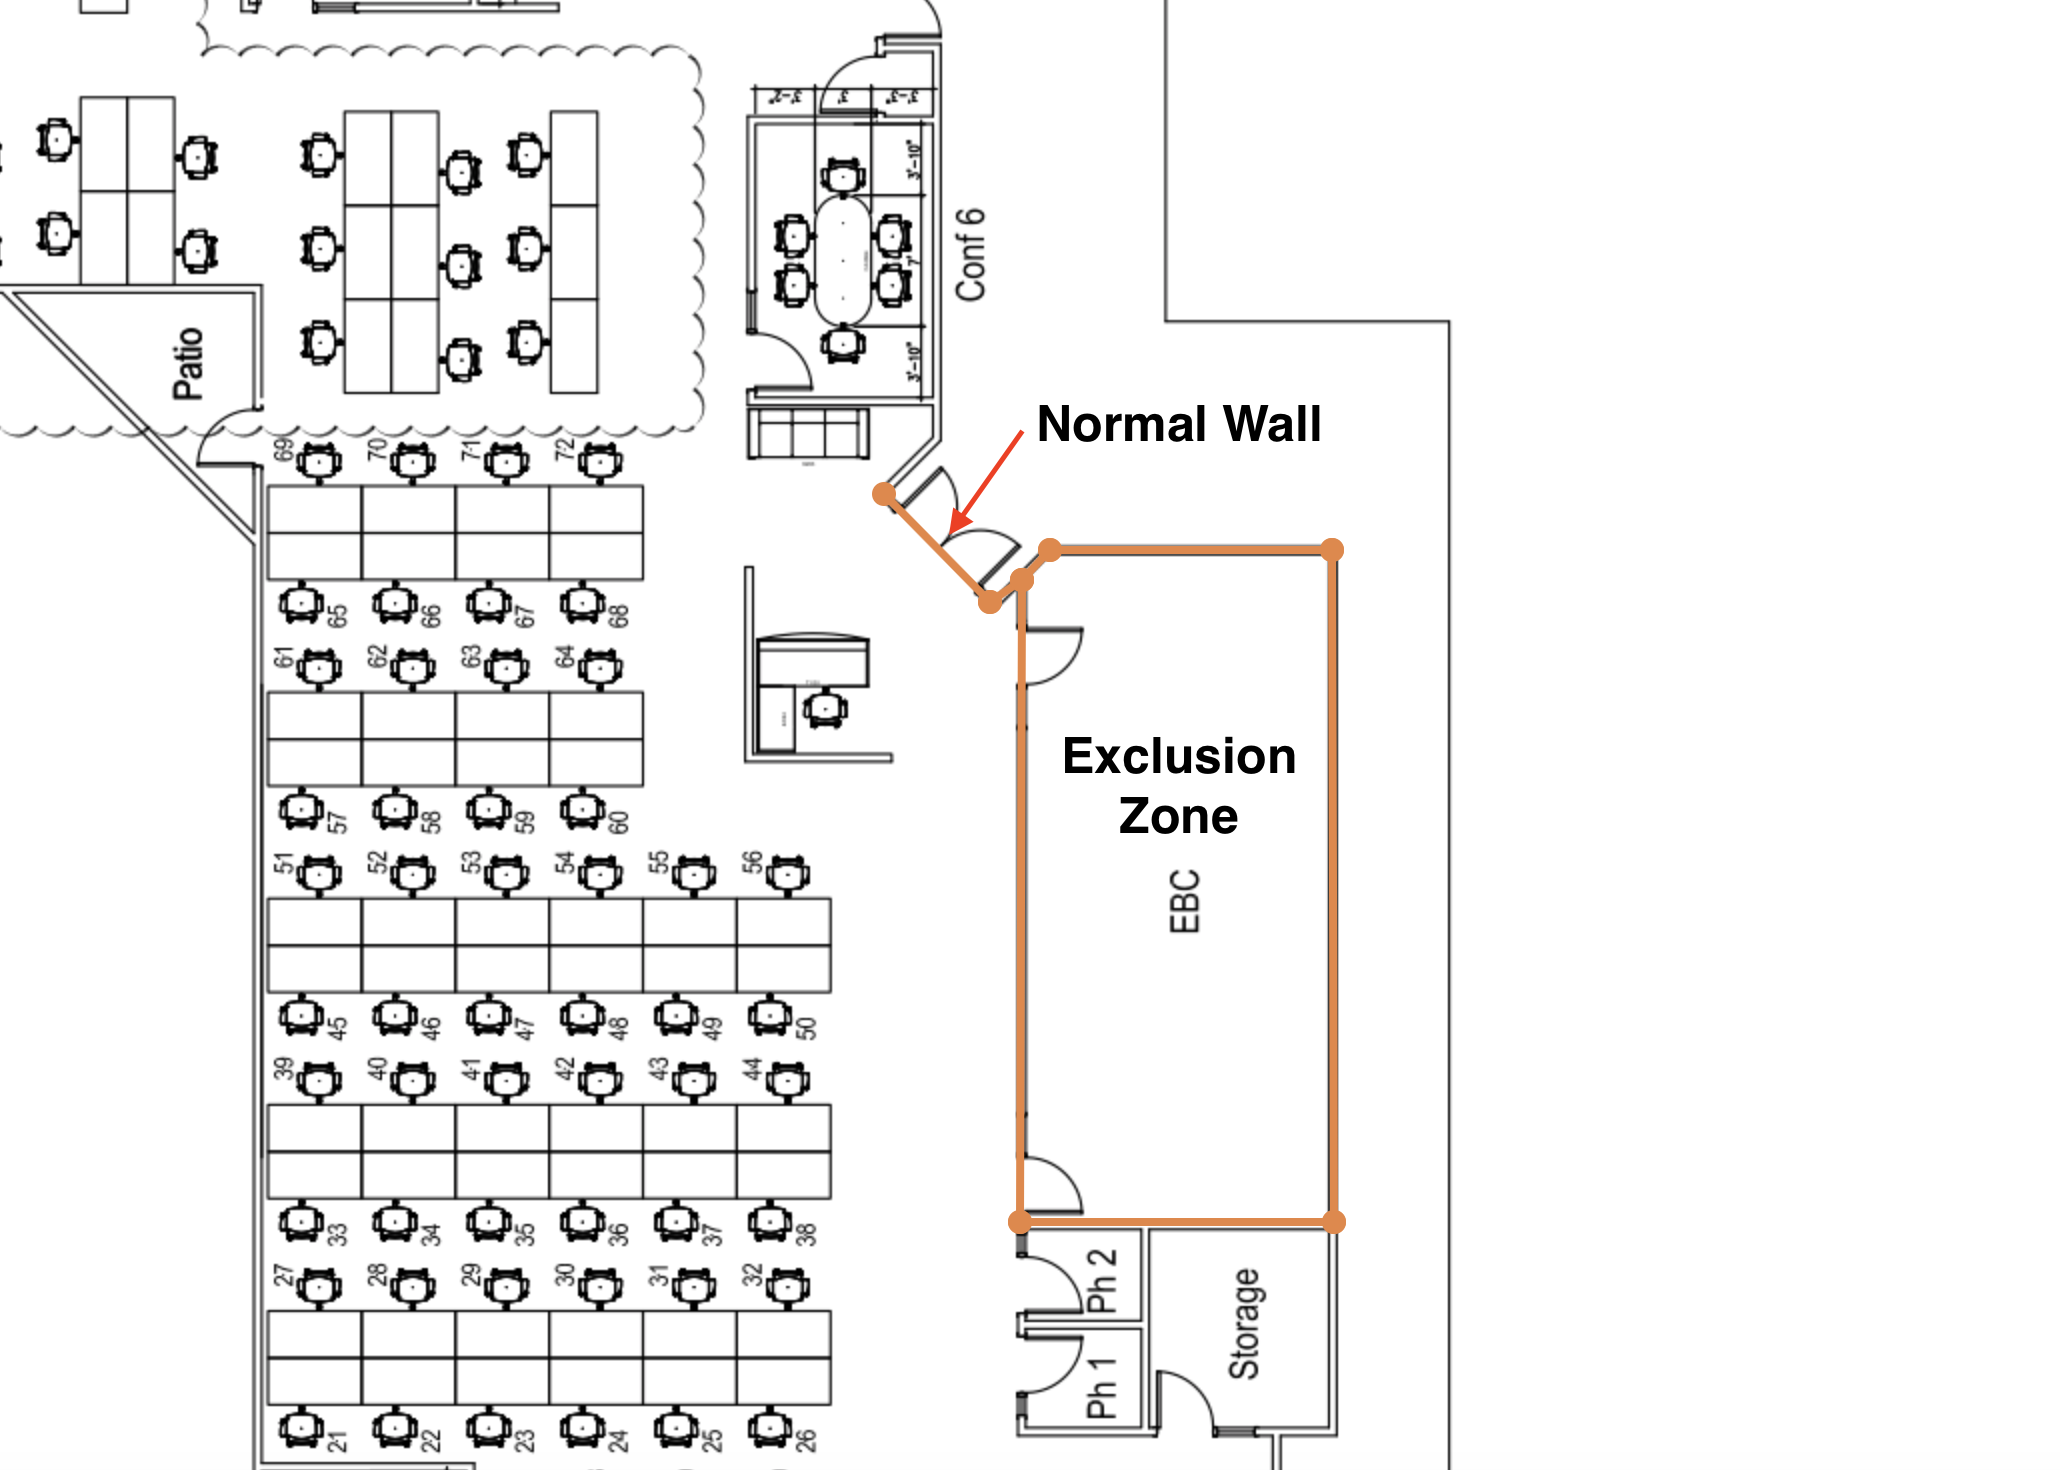
- No AP(s) can be placed inside the Exclusions Zone(s). If AP(s) are in an Exclusions Zone(s) we will discard the walls entirely.
- It is a good habit to delete extra wall segments if not needed. This just helps make the walls/exclusions look more clean and can be done by simply selecting the segment or node and selecting Delete Selected Walls or pressing Delete button.