Wired Assurance
Assign Role
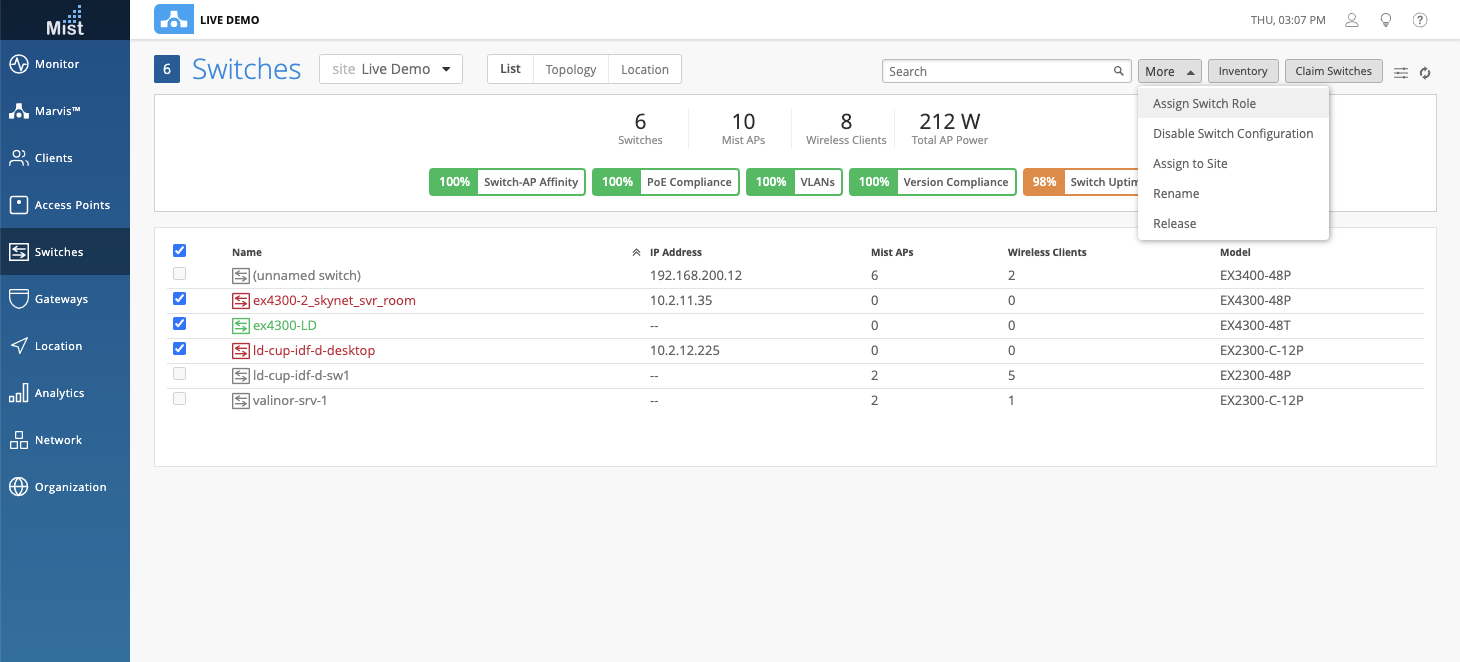
Assigning roles for your switches are now easier than ever with the ability to do so when selecting multiple switches at once. From your Switches page, select the switches you wish to assign a role for. From the More dropdown menu, select Assign Switch Role. Here, you can name a role that will be applied to all switches you selected from the list.
Switch Name Matching in Template
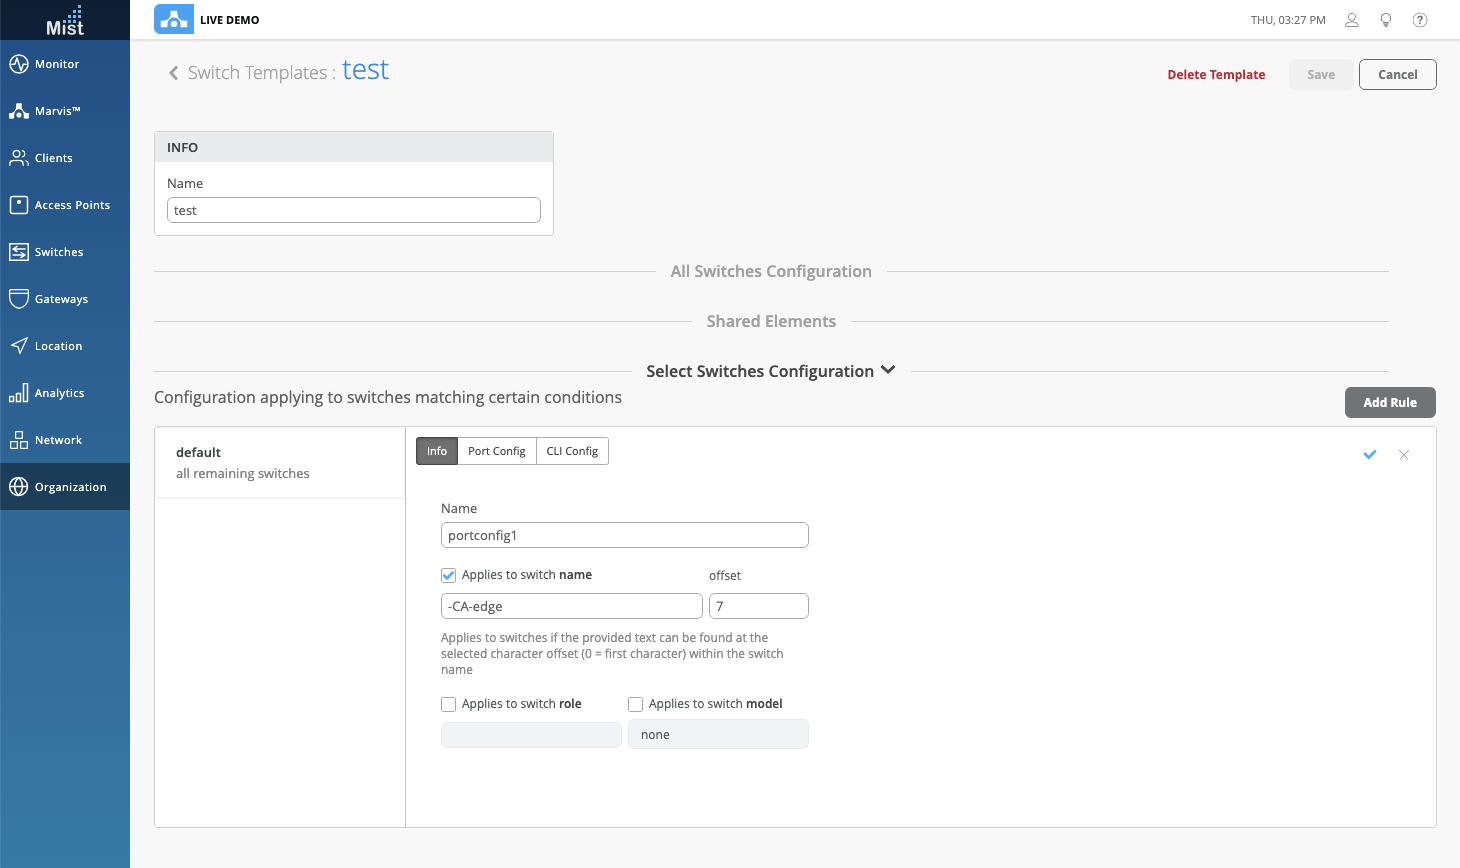
This week we have made it easier for you to select switches to assign when configuring a switch template. Applying templates to switches are done by filtering switch roles, switch models, or the prefix of a switch name. We are improving the “Apply by Switch name” function by allowing you to specify an offset (in number characters) for where the name matching will start, instead of just limiting you to prefix matching. This will be very useful for those sites with switch names with formats where the switch name does not come first e.g. “Building # – Room # – Switch #”. To apply a template to all switches with a certain name, just enter your offset for which character to begin the name matching. Access your Switch Templates through Organization > Switch Templates.
Search Function in Templates
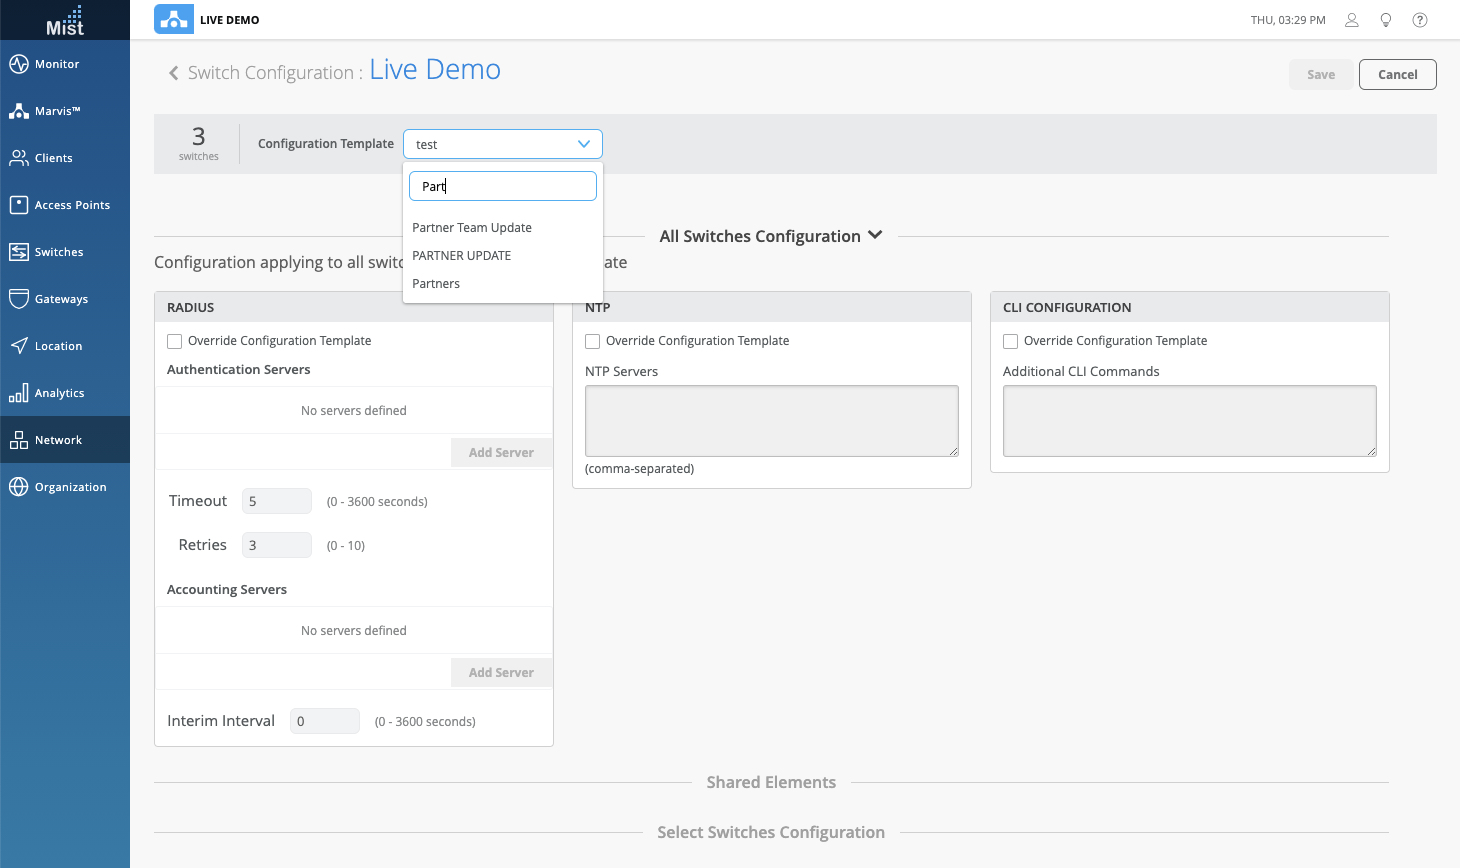
You can now search through the Configuration Template list in the Switch Configuration page (Network > Switch Configuration). Simply start typing in the search bar to find your switch template. Search full or partial names to quickly find the template you are looking for.
Webhooks for Configuration Status [API]
Configuration Status for switches are now included in the webhook topic ‘device-events.’ Using this webhook, you can monitor the status of your switch configurations and know if your status is either failing or succeeding. Please note that this webhook is only available via API for now. Please reference our Webhooks documentation section to learn more about configuring through the API: https://www.mist.com/documentation/category/webhooks/
Marvis
Alerting and Webhooks
This week we are enabling all Email and Webhook alerting for our Marvis Actions Dashboard events! Enable these to get notified in real time whenever your site encounters any Marvis Actions that need to be looked at. Follow these steps to get your Webhooks and Alerts set up:
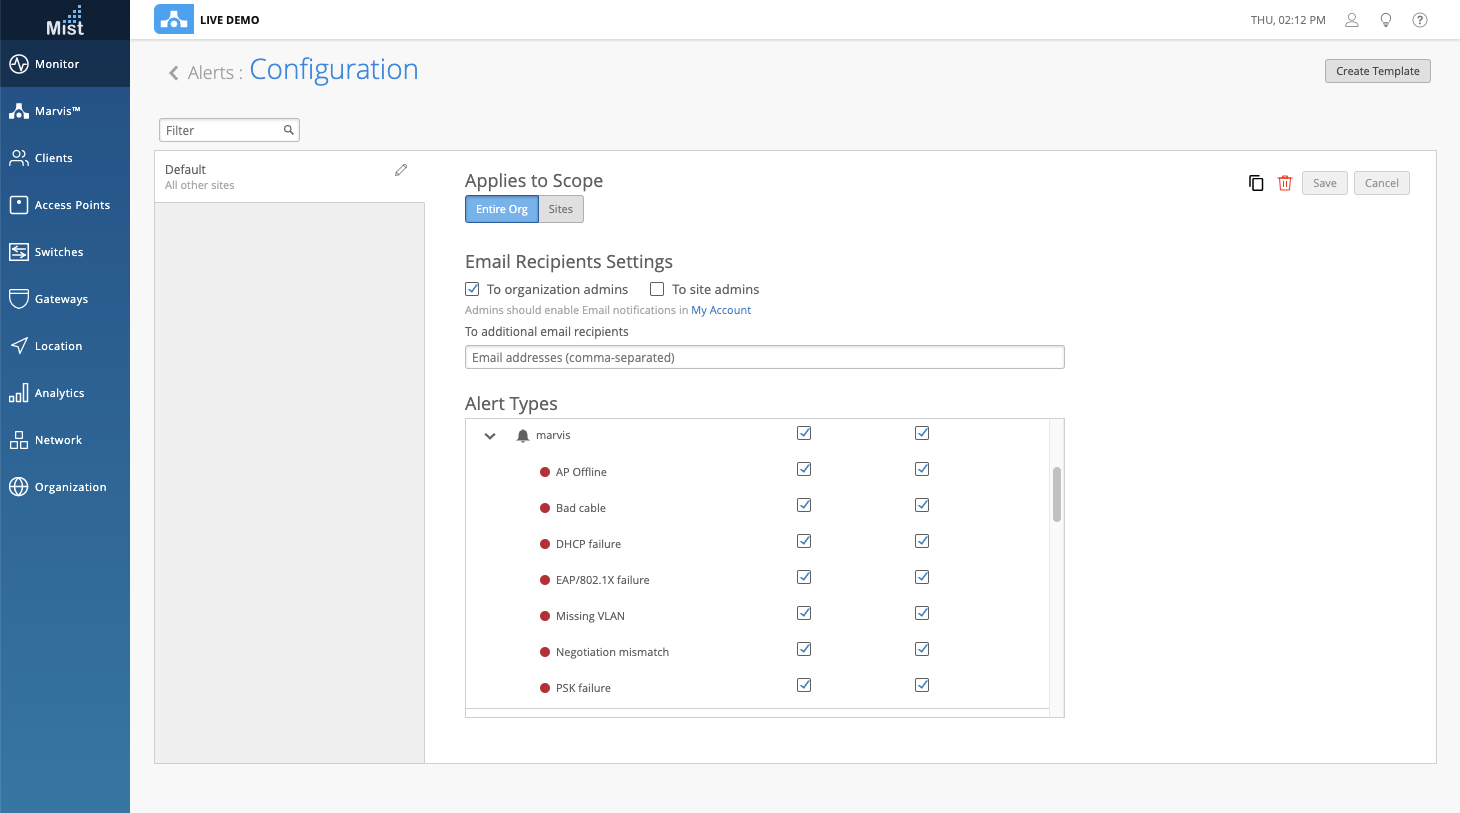
Navigate to the Alerts page (Monitor > Alerts), and Create a Template if you don’t have one yet. Otherwise, you may edit your existing template with the Alerts Configuration button. Select the Alert Types you with to enable. The first column is to enable the Alert and the second column will enable Email Notifications for that Alert.
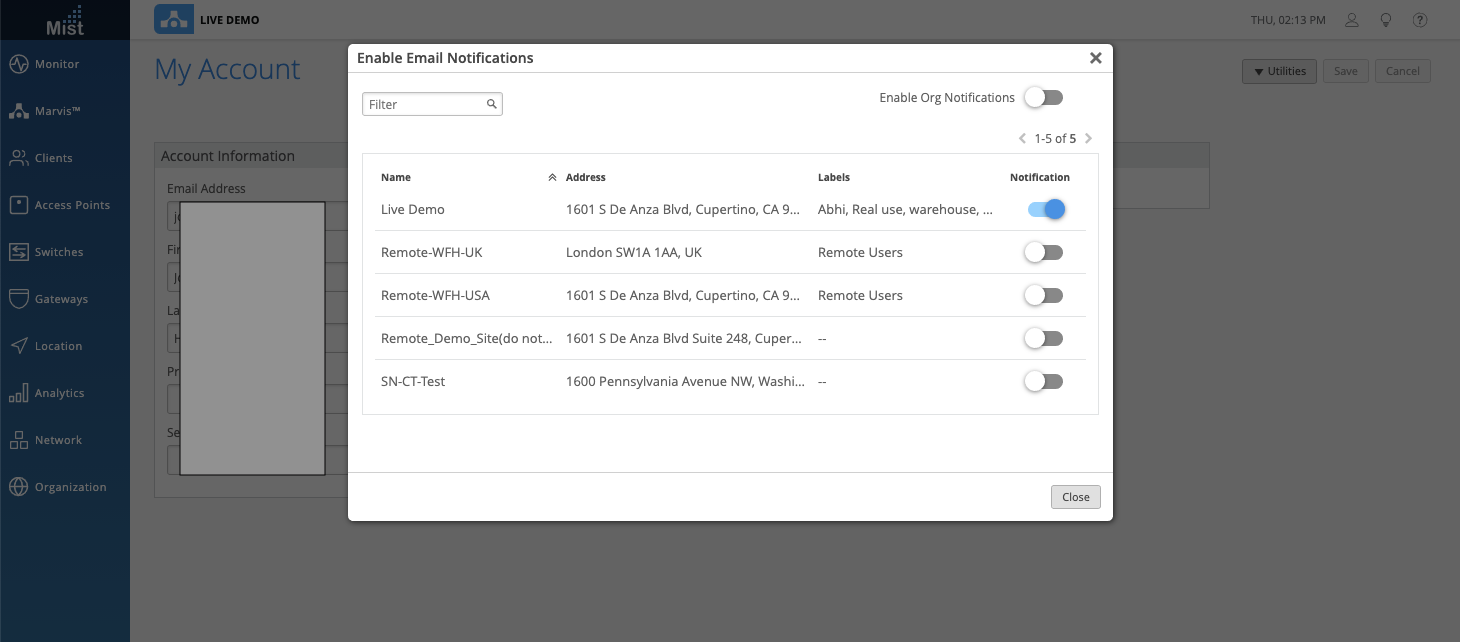
Make sure email alerts for the site are enabled in your Account Settings page as well in order to actually receive these email notifications.
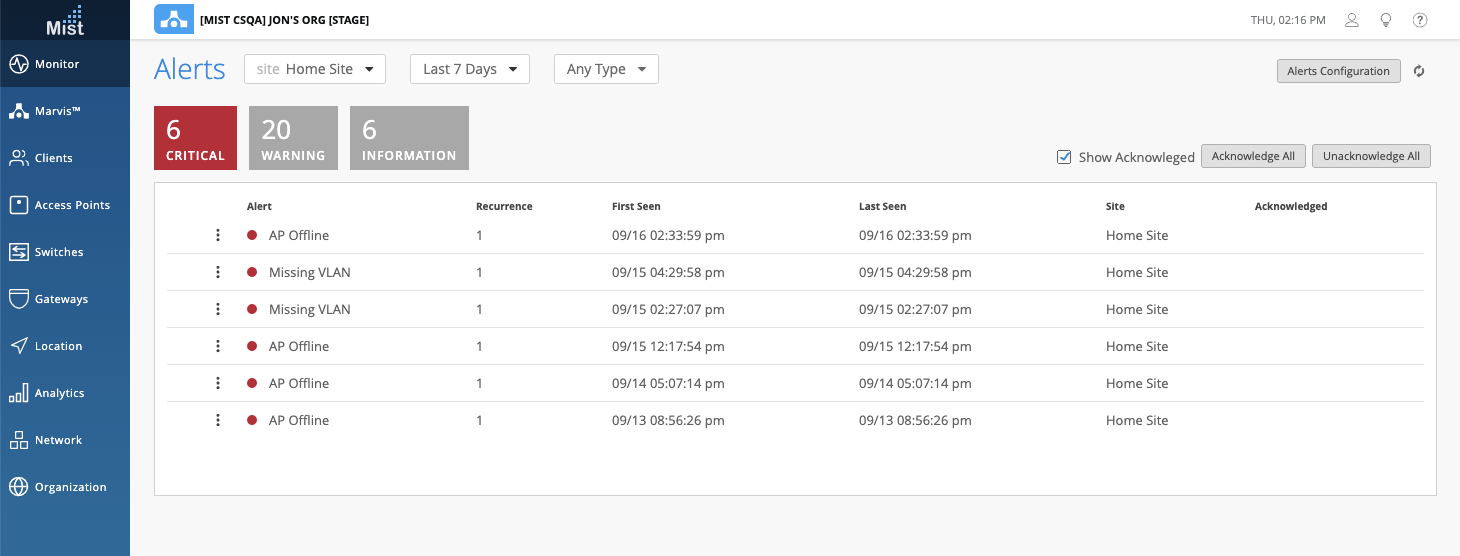
These alerts will also appear in your main Alerts page and labeled as critical alerts:
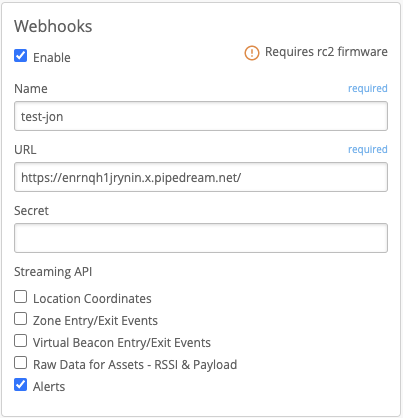
To enable Webhooks for your marvis actions, please first follow the above steps. Alerts must be enabled in order for Webhook Alerts to go through. Navigate to your Site Settings page (Organization > Site Configuration > Select your site) and find the Webhooks section. Marvis Actions will fall under the Alerts option, so enable this and provide your webhook URL.
Here is a sample output from a Webhook notification for Missing VLAN:
{
    "topic": "alarms",
    "events": [
        {
            "details": {
                "action": "config_vlan",
                "category": "switch",
                "details": {
                    "impacted_ap": [
                        "5c5b35XXXXXX"
                    ],
                    "impacted_site": [
                        "7eb71ac5-0780-48bc-a399-8d5dXXXXXXXX"
                    ],
                    "impacted_switch": [
                        "HP-2530-8G-PoEP"
                    ],
                    "impacted_tuple": [
                        {
                            "ap_id": "5c5b35XXXXXX",
                            "end_time": 1600206391781,
                            "firmware": "0.7.20277",
                            "model": "AP41-US",
                            "org_id": "77007390-2c08-477d-84c3-1040XXXXXXXX",
                            "port_id": "1",
                            "site_id": "7eb71ac5-0780-48bc-a399-8d5dXXXXXXXX",
                            "start_time": 1600205227889,
                            "switch_id": "HP-2530-8G-PoEP",
                            "vlan_id": [
                                "10"
                            ]
                        }
                    ]
                },
                "status": "open",
                "symptom": "missing_vlan"
            },
            "group": "marvis",
            "id": "32bdced4-1cc2-49f7-8e35-XXXXXXXX",
            "org_id": "77007390-2c08-477d-84XXXXXXXX",
            "severity": "critical",
            "site_id": "7eb71ac5-0780-48bc-a399XXXXXXXX",
            "site_name": "Home Site",
            "timestamp": 1600205227,
            "type": "missing_vlan"
        }
    ]
}
To learn more about Webhooks, please visit this section in our documentation site: https://www.mist.com/documentation/category/webhooks/
Simplified Operations
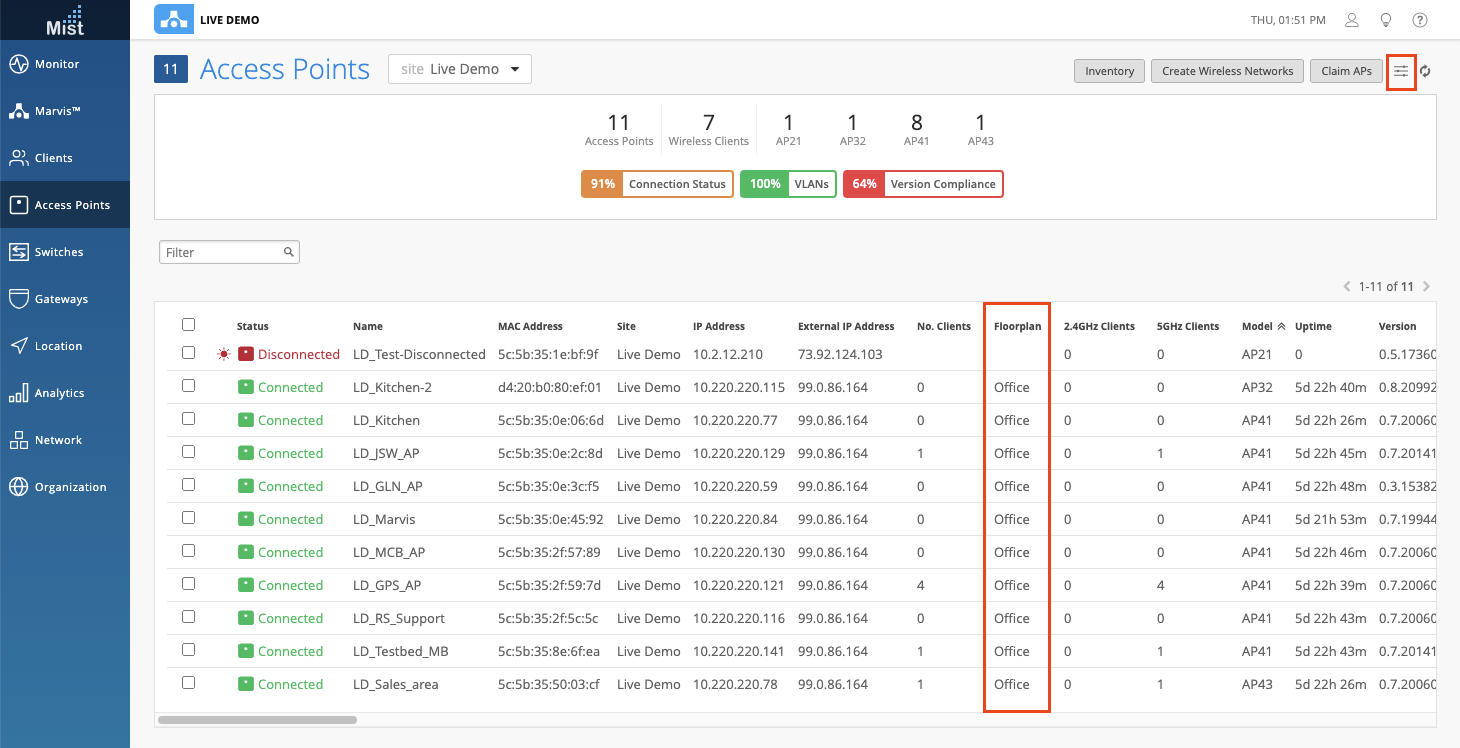
View Floorplan on AP List page
We are adding a new Floorplan column in the Access Points List Page that shows which floorplan each individual AP is configured for. Previously on larger sites with multiple floorplans, there was no easy option to find an AP on the AP List page and identify which floorplan it resides in. It was also difficult to see which APs were missing from your floor plan. With this new column, you can easily look at your entire AP List and know exactly which floorplan each AP is configured for.
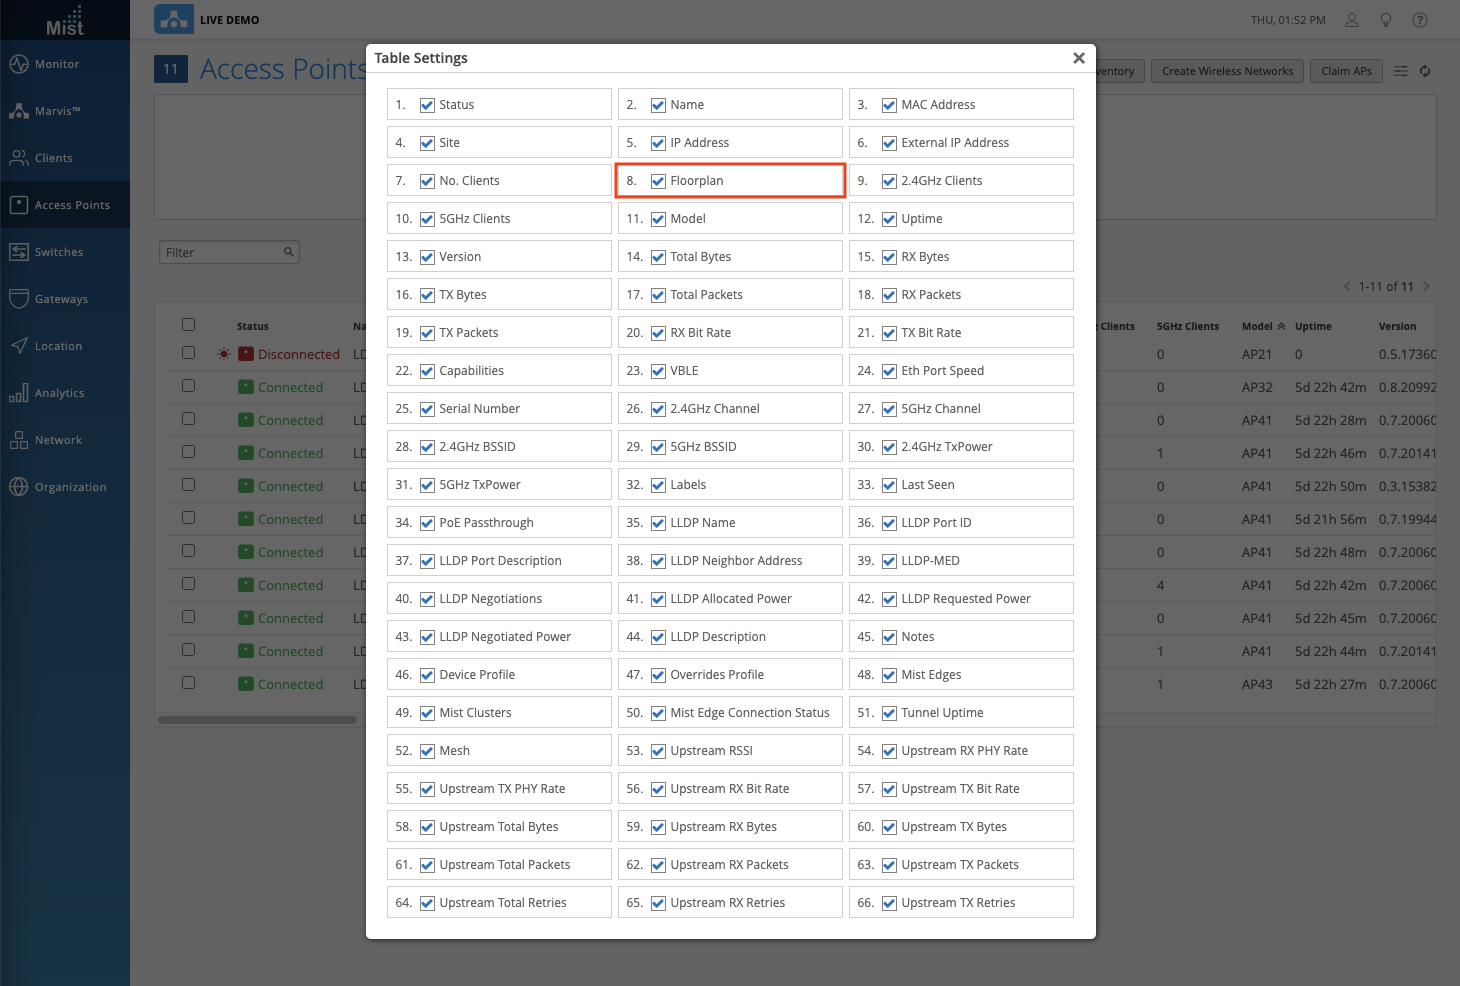
Be sure to enable this column in your AP list table settings. You can drag the column in the settings window to set your preferred column order: