This article covers steps required to integrate PingID as an SSO provider for admin access to the Mist Dashboard.
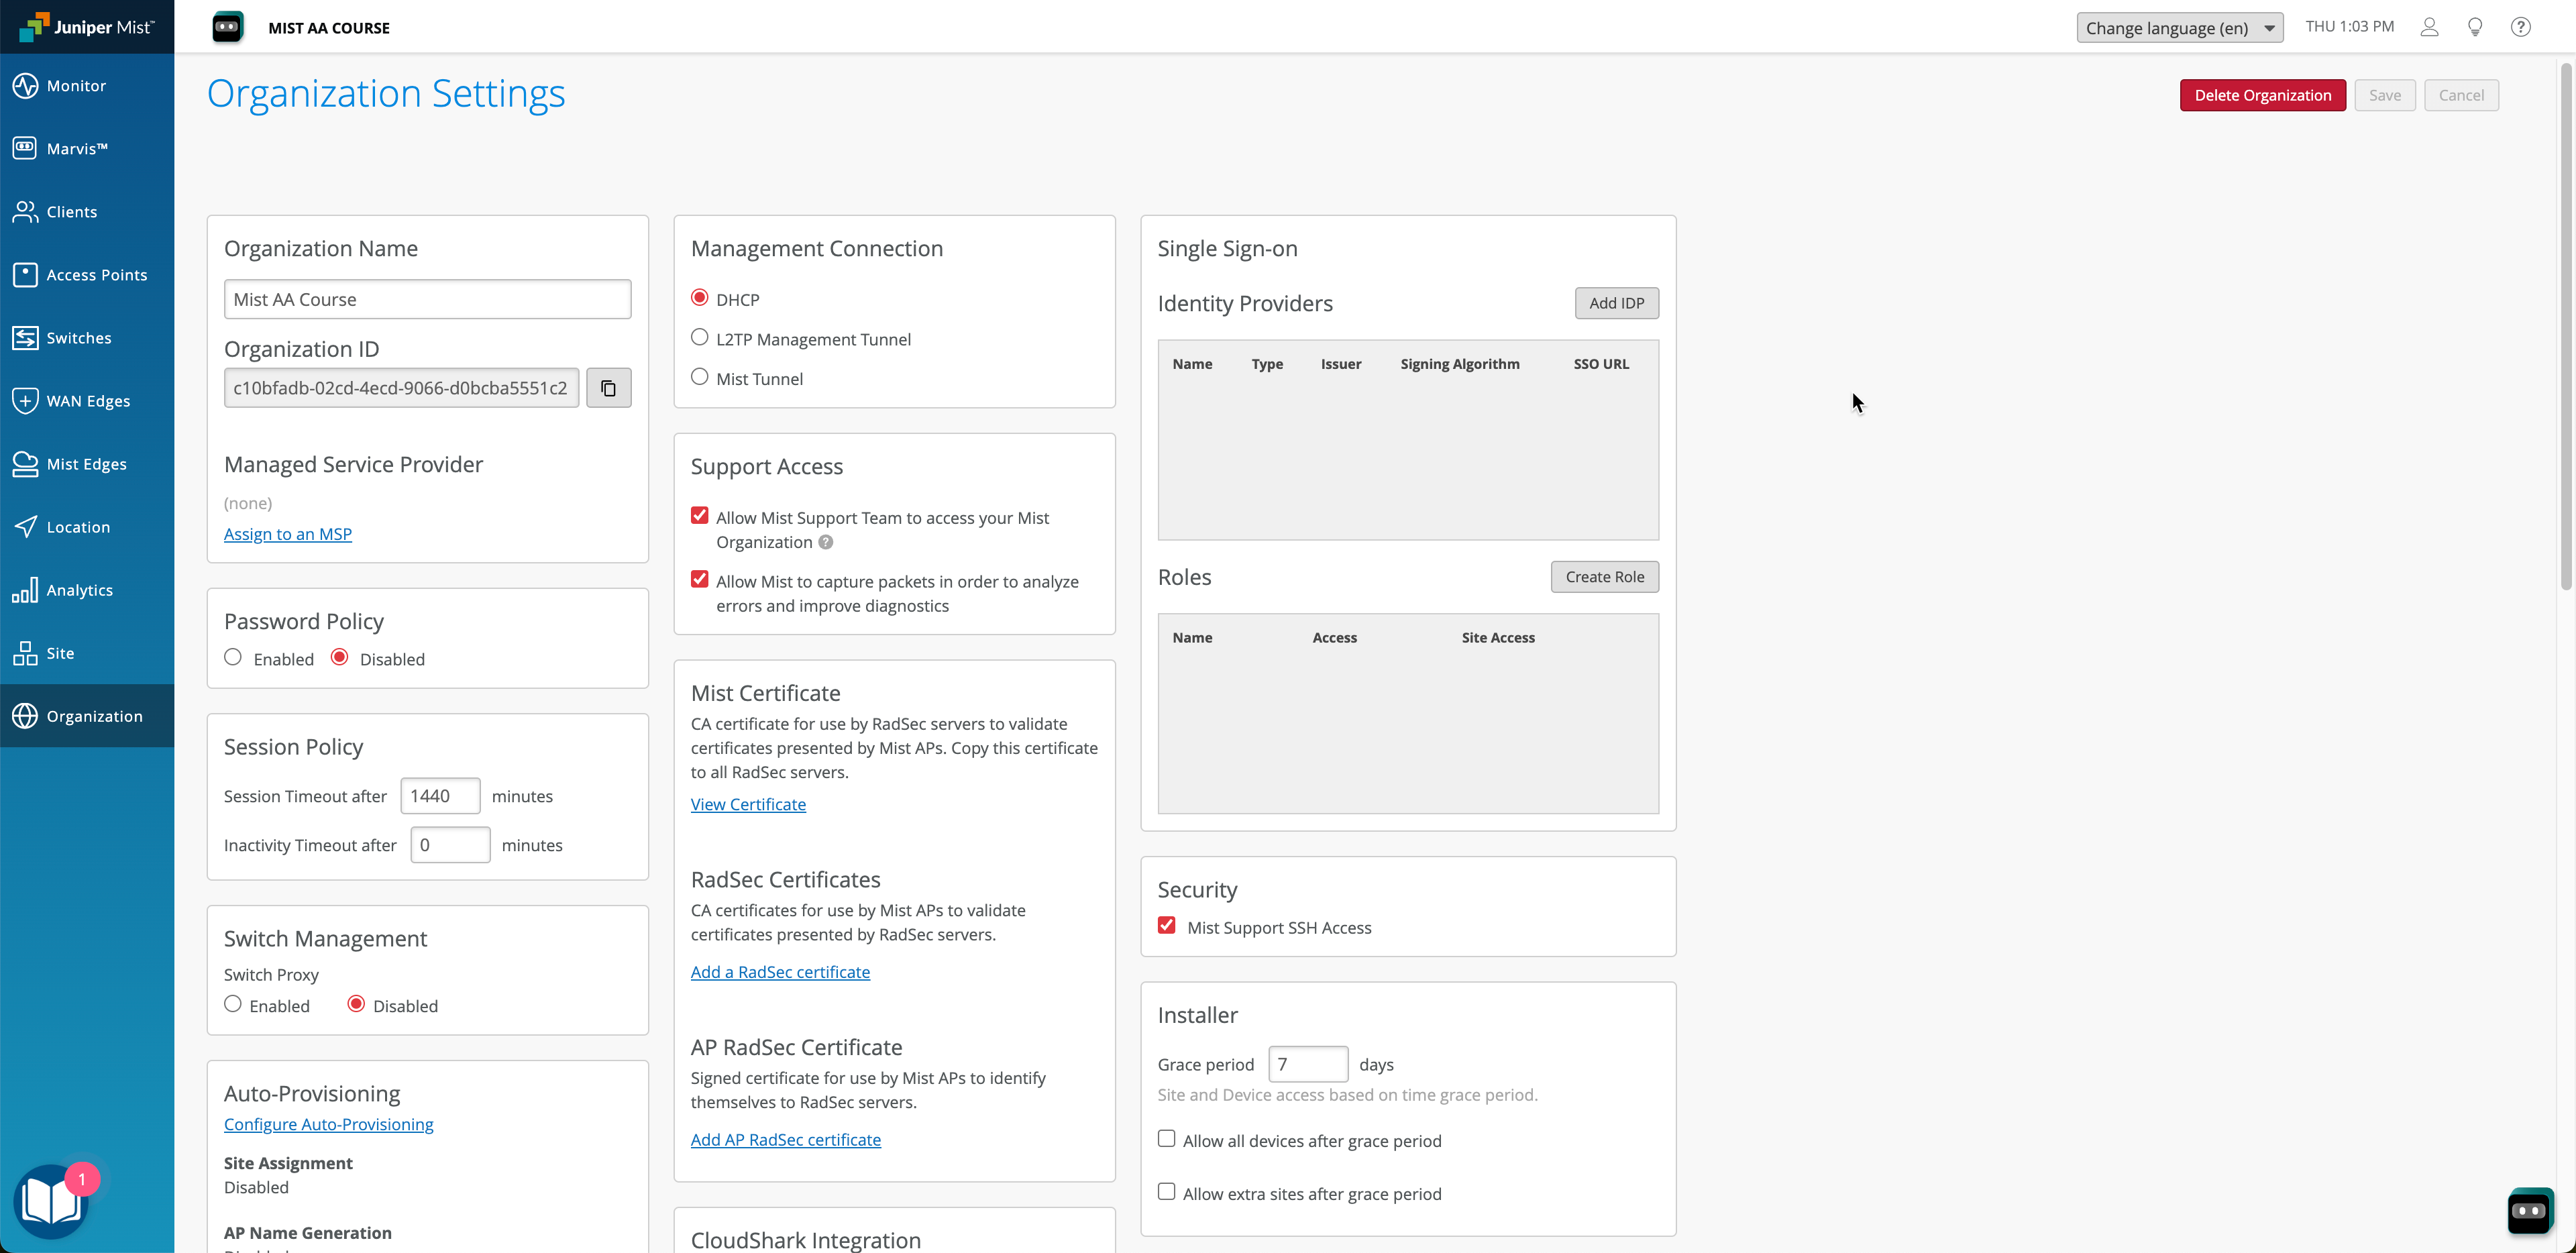
Step 1 – Mist Dashboard: Create SSO
Navigate to Organization > Settings. Click Add IDP:
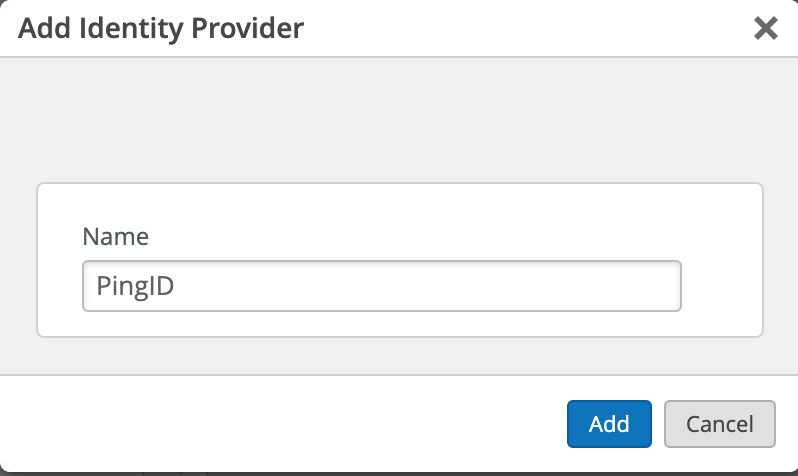
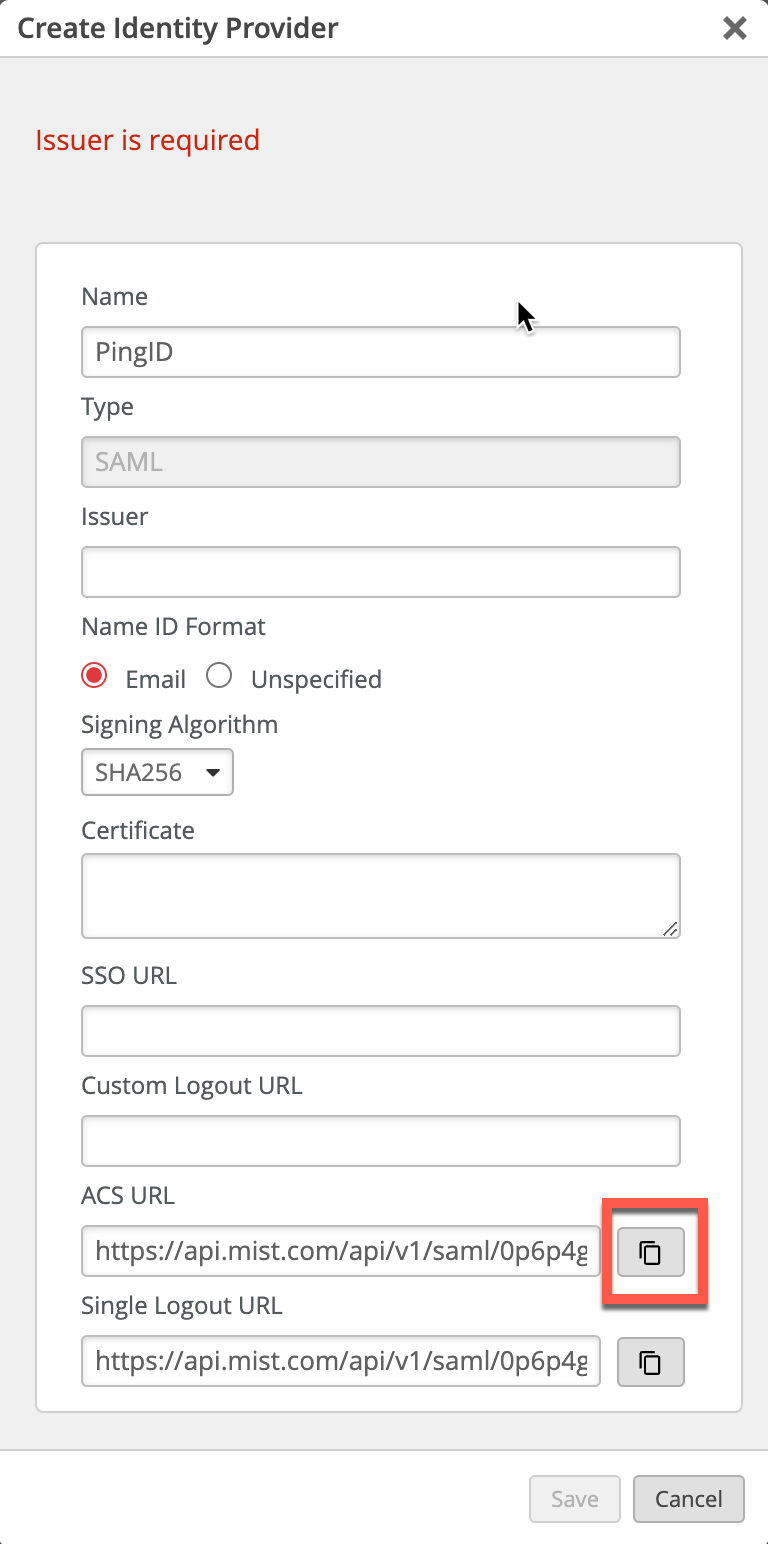
Copy generated ACS URL:
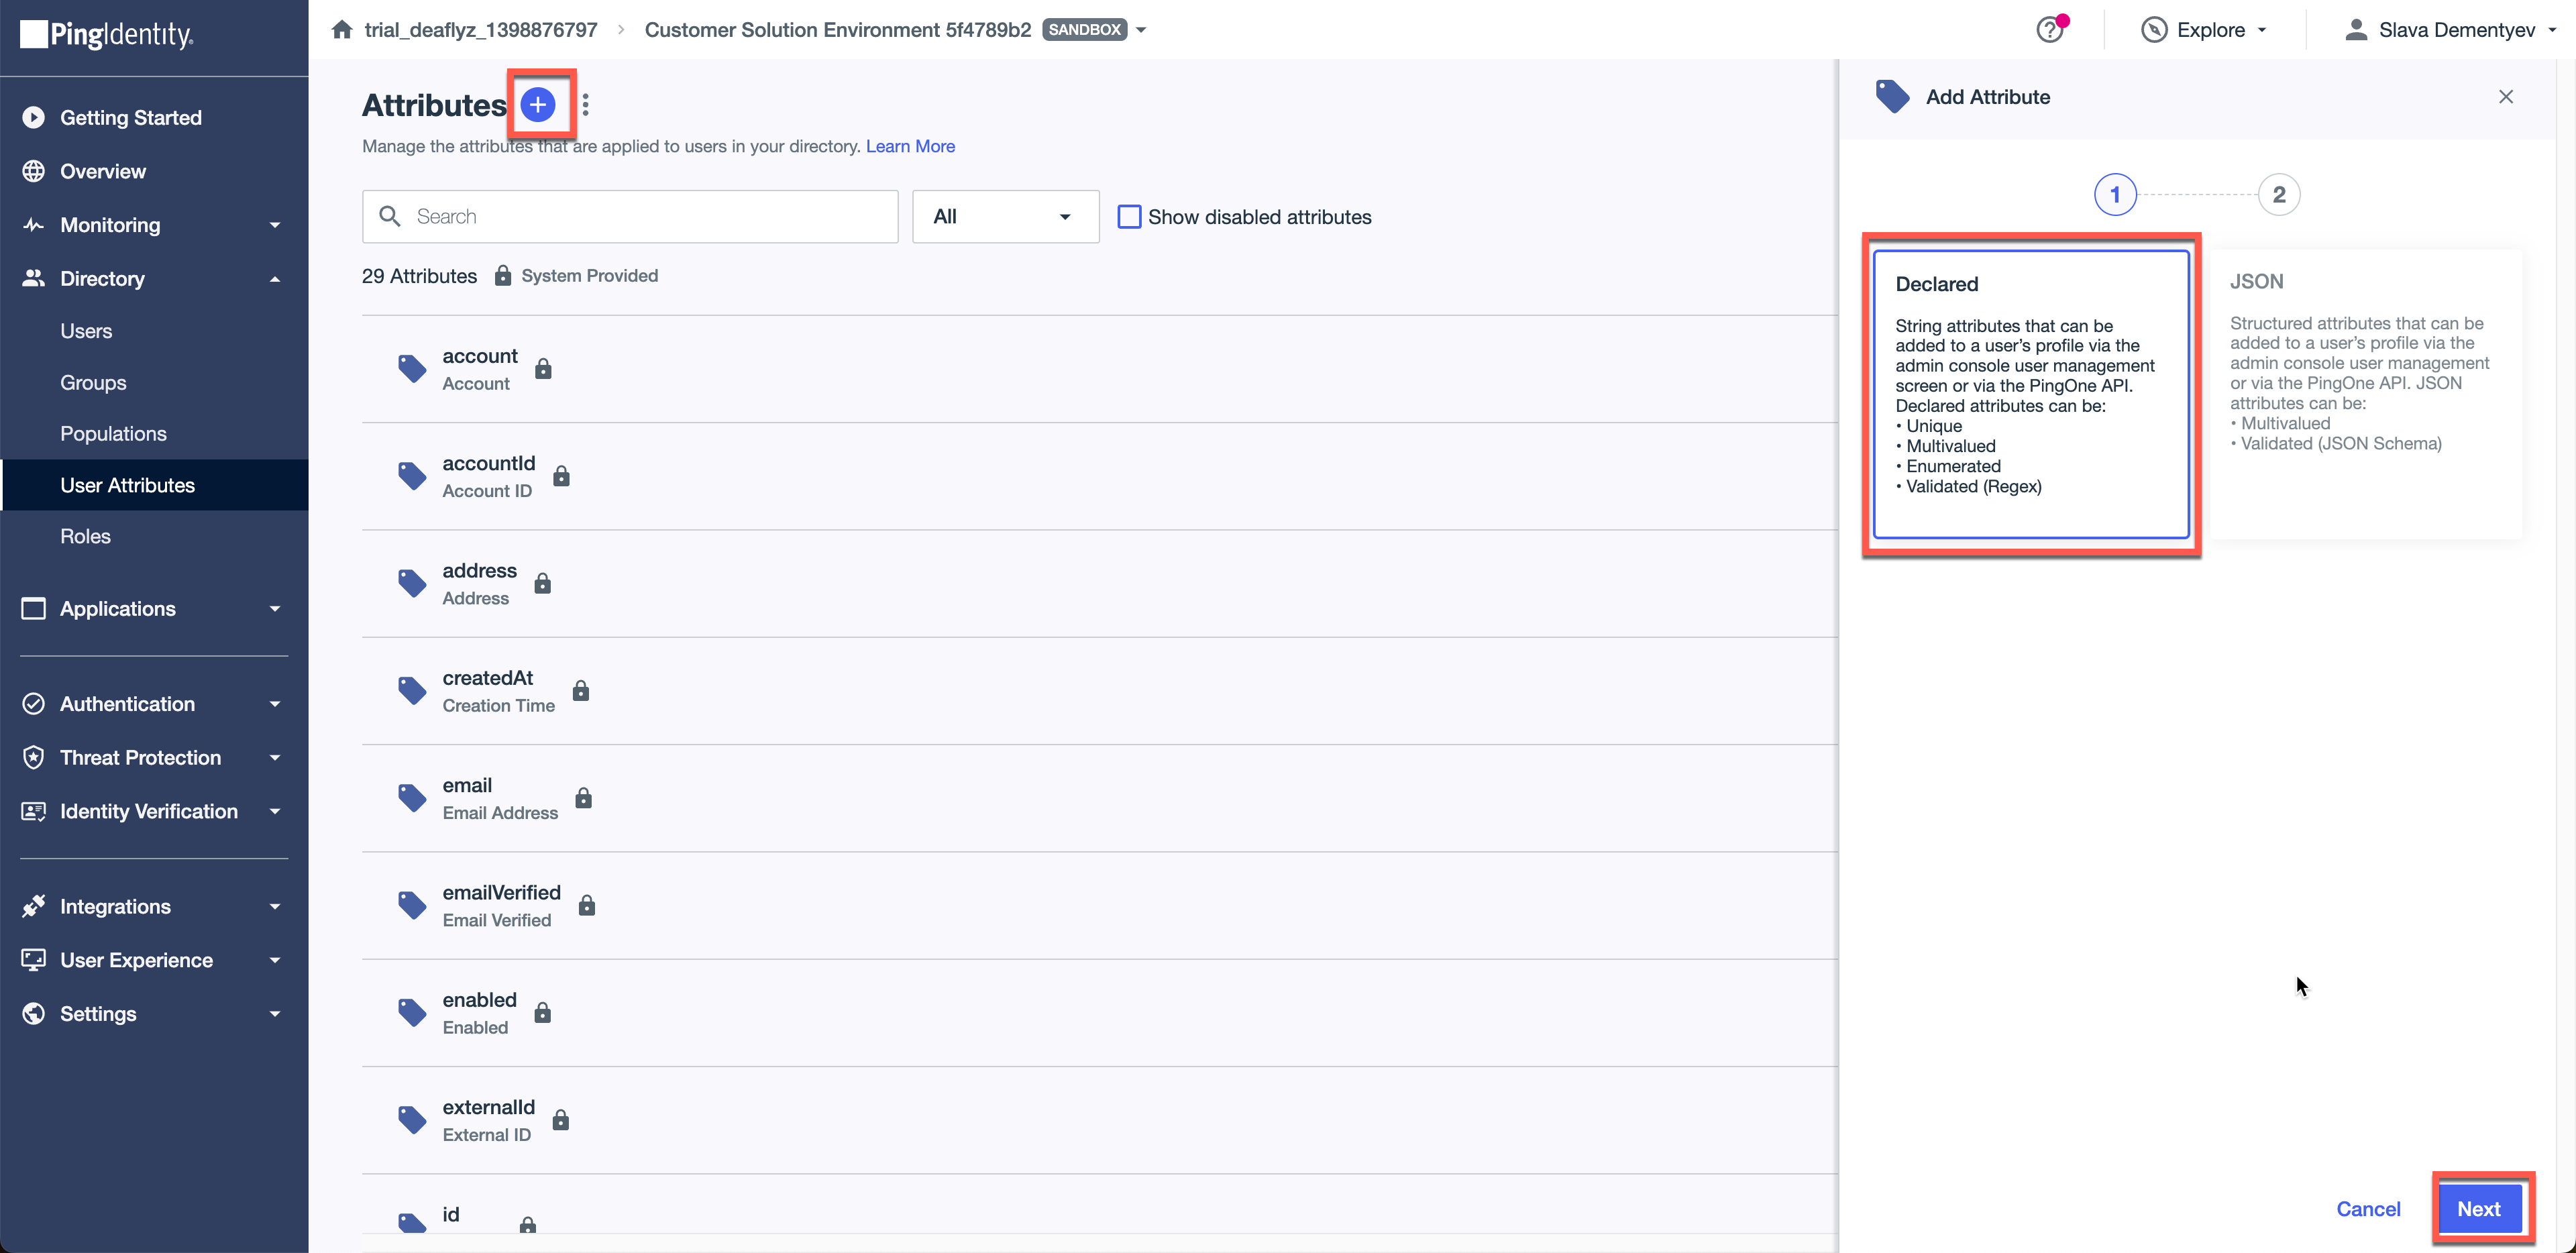
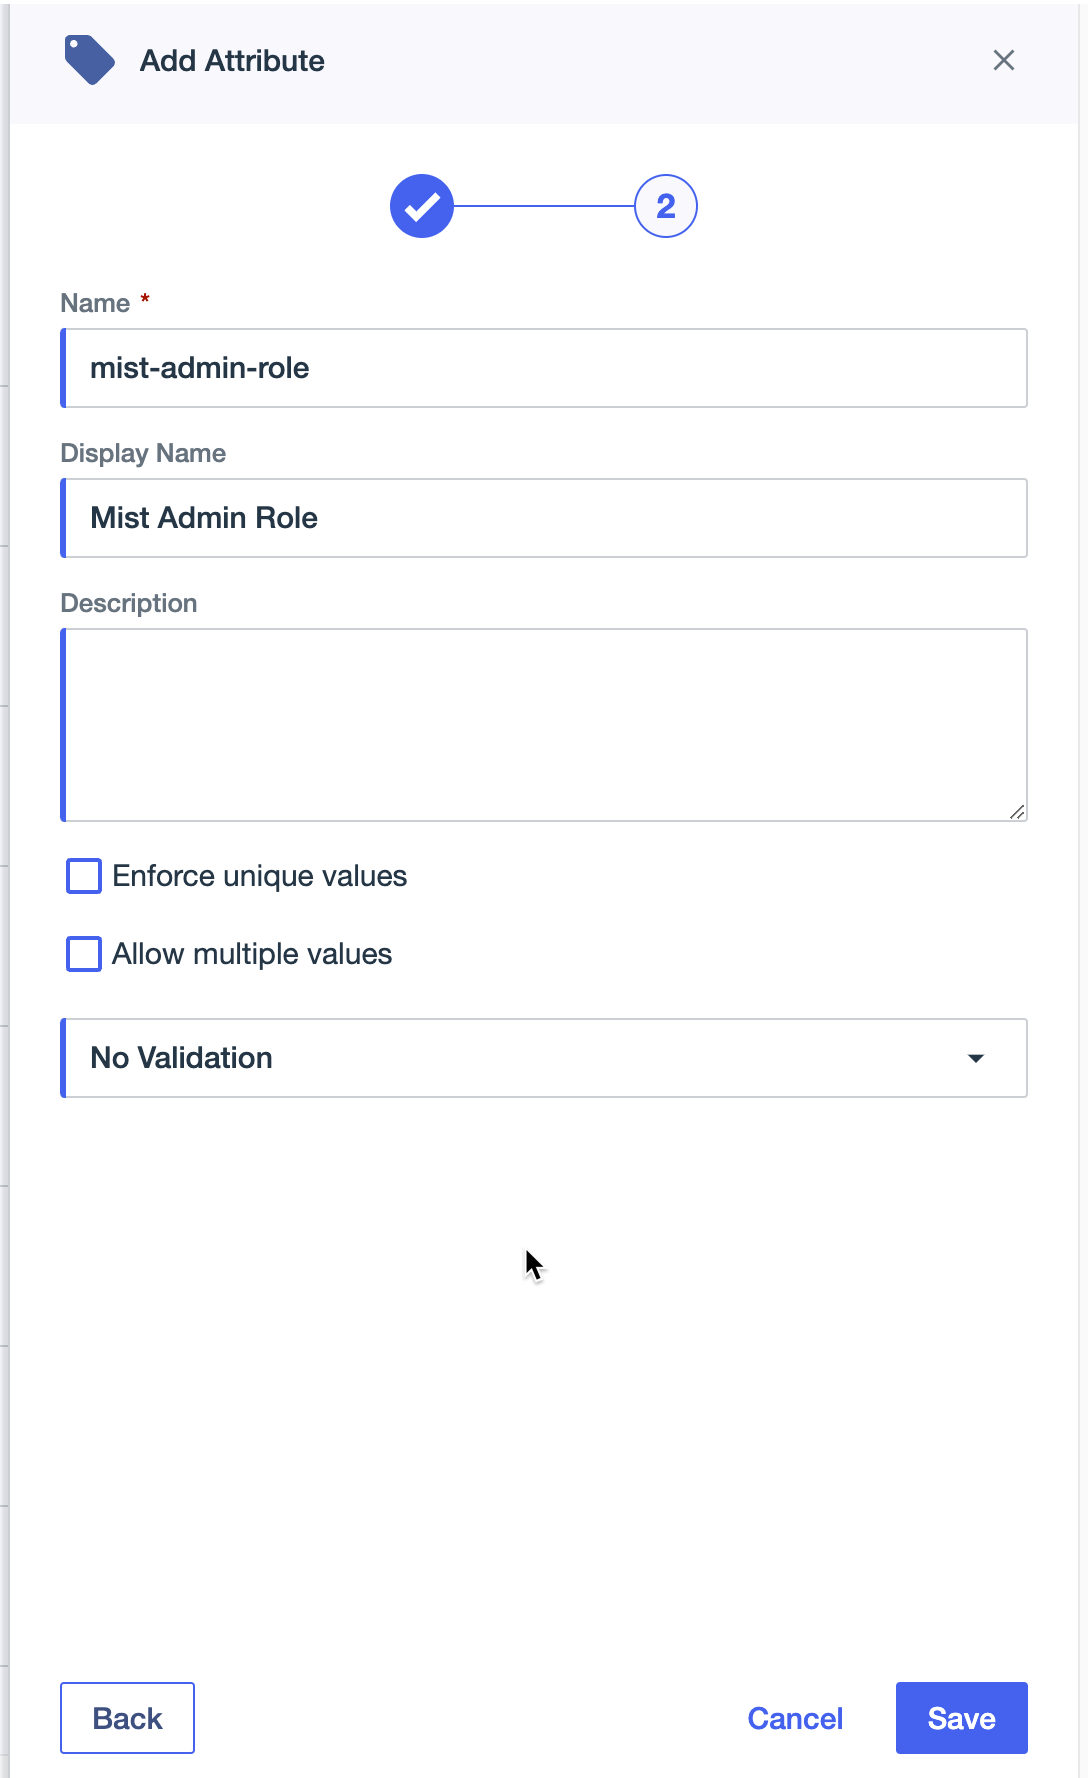
Step 2 – PingID Dashboard: Create Custom User Attribute
Now switch to PingID dashboard.
Navigate to Directory > User Attributes. Add a new declared attribute and call it Mist Admin Role (name does not matter):
Step 3 – PingID Dashboard: Create Custom SAML Application
Now, navigate to Applications and add new SAML application:
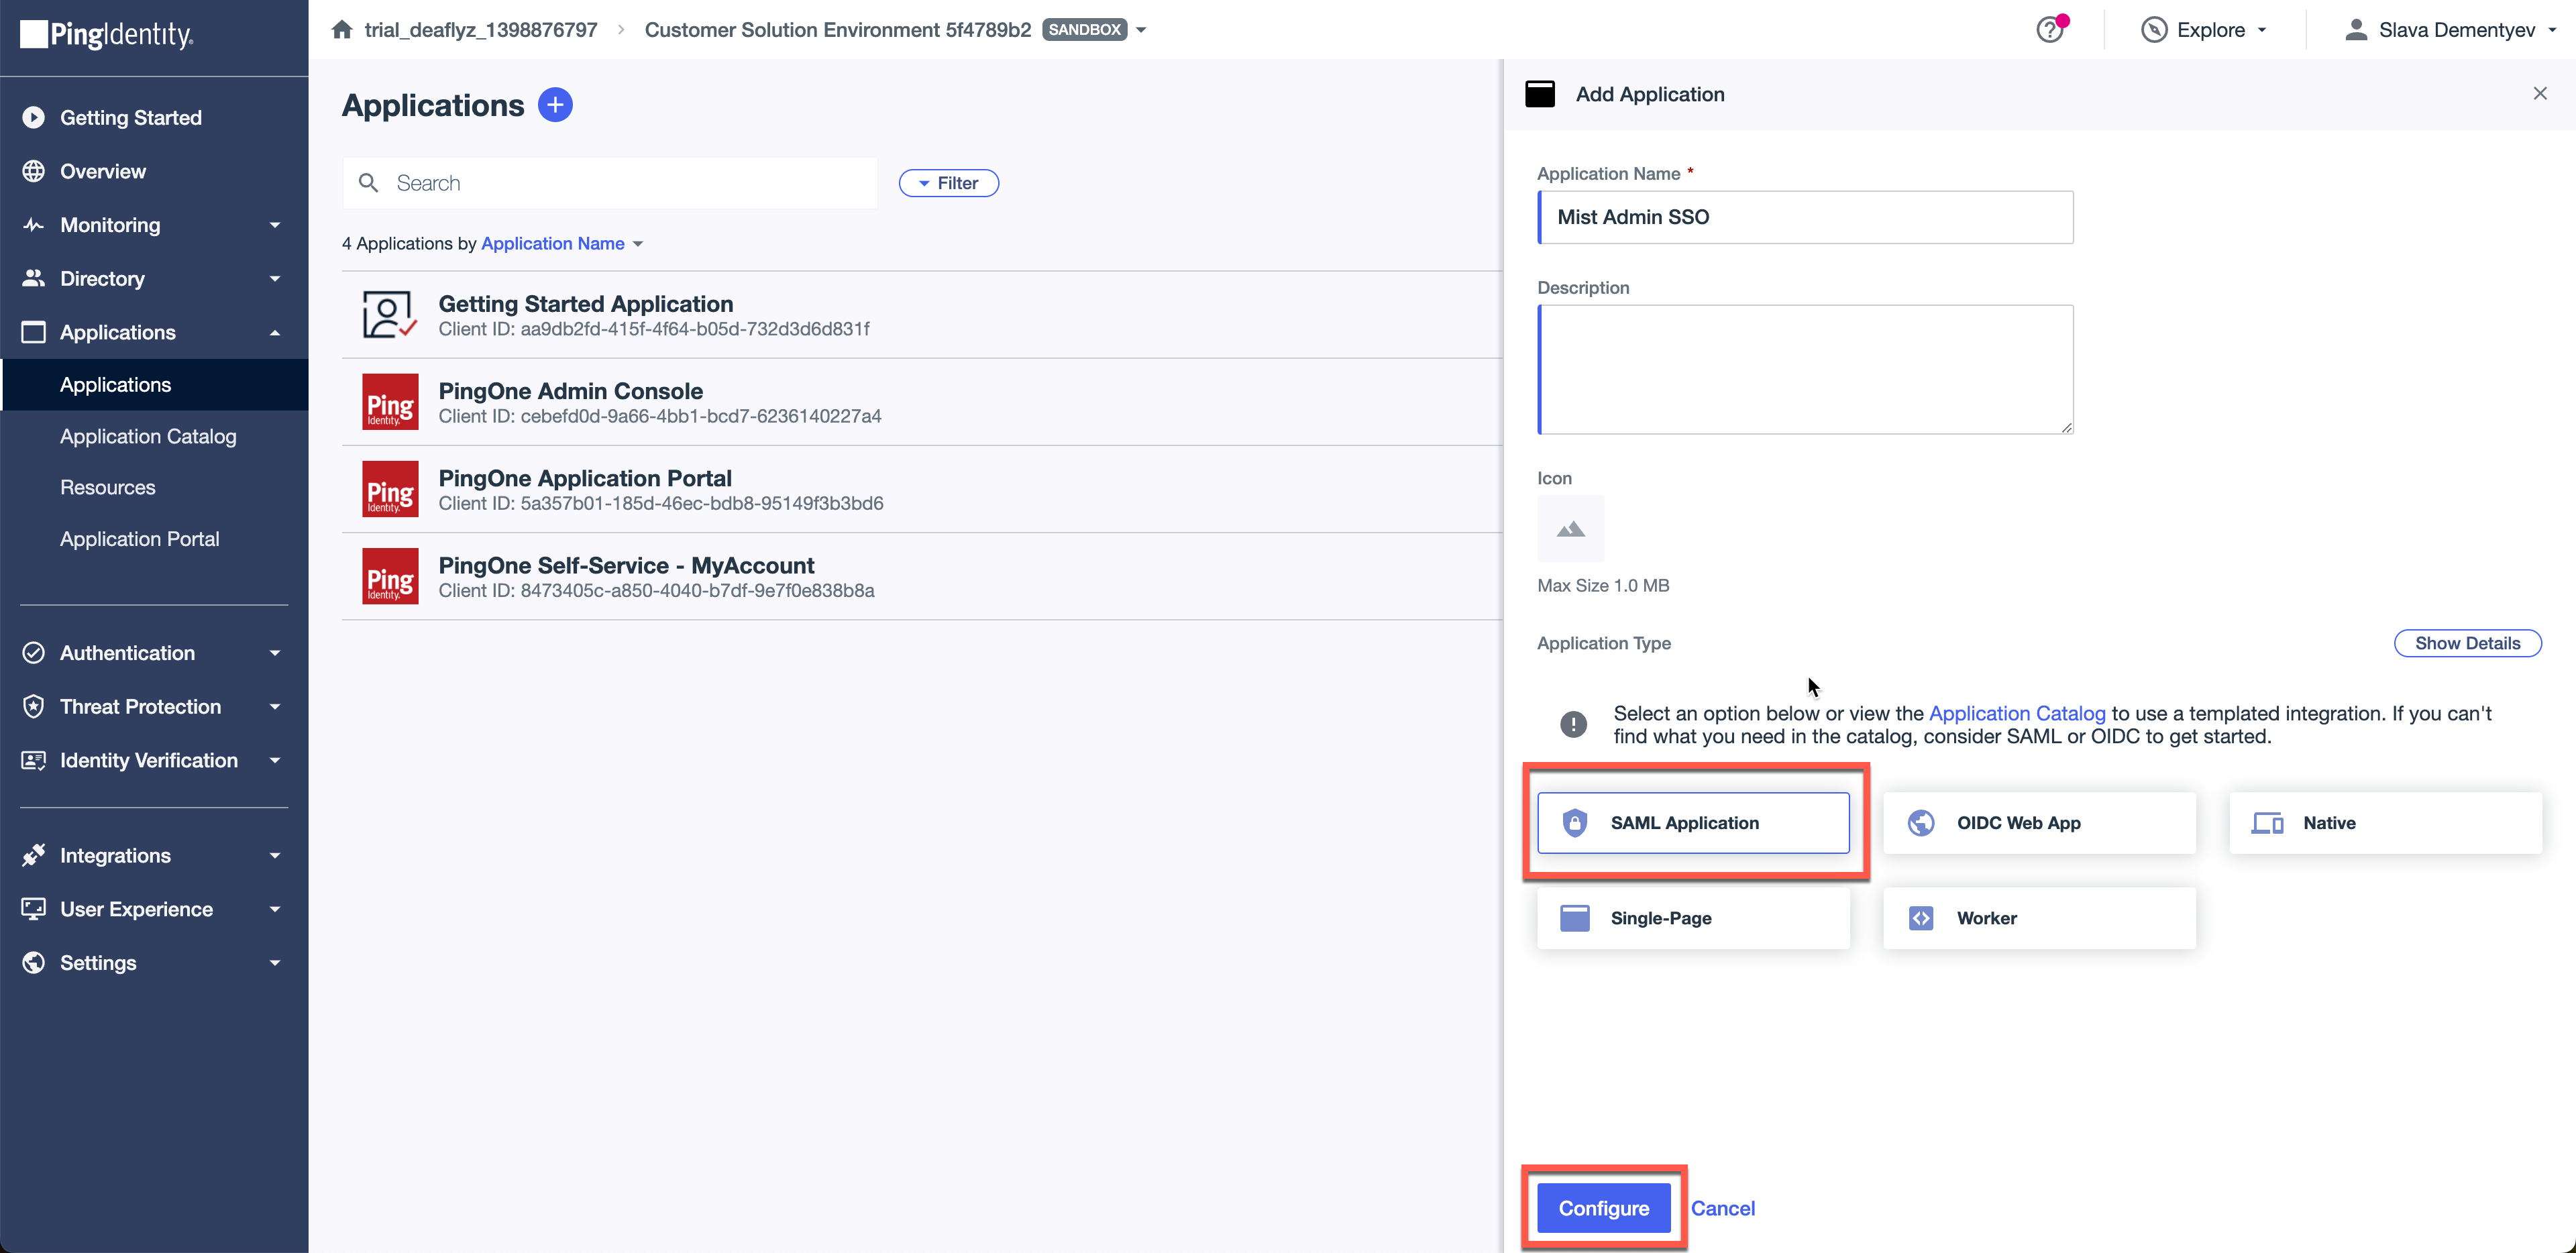
Select manually enter the configuration and paste the ACS URL you copied in Step1.

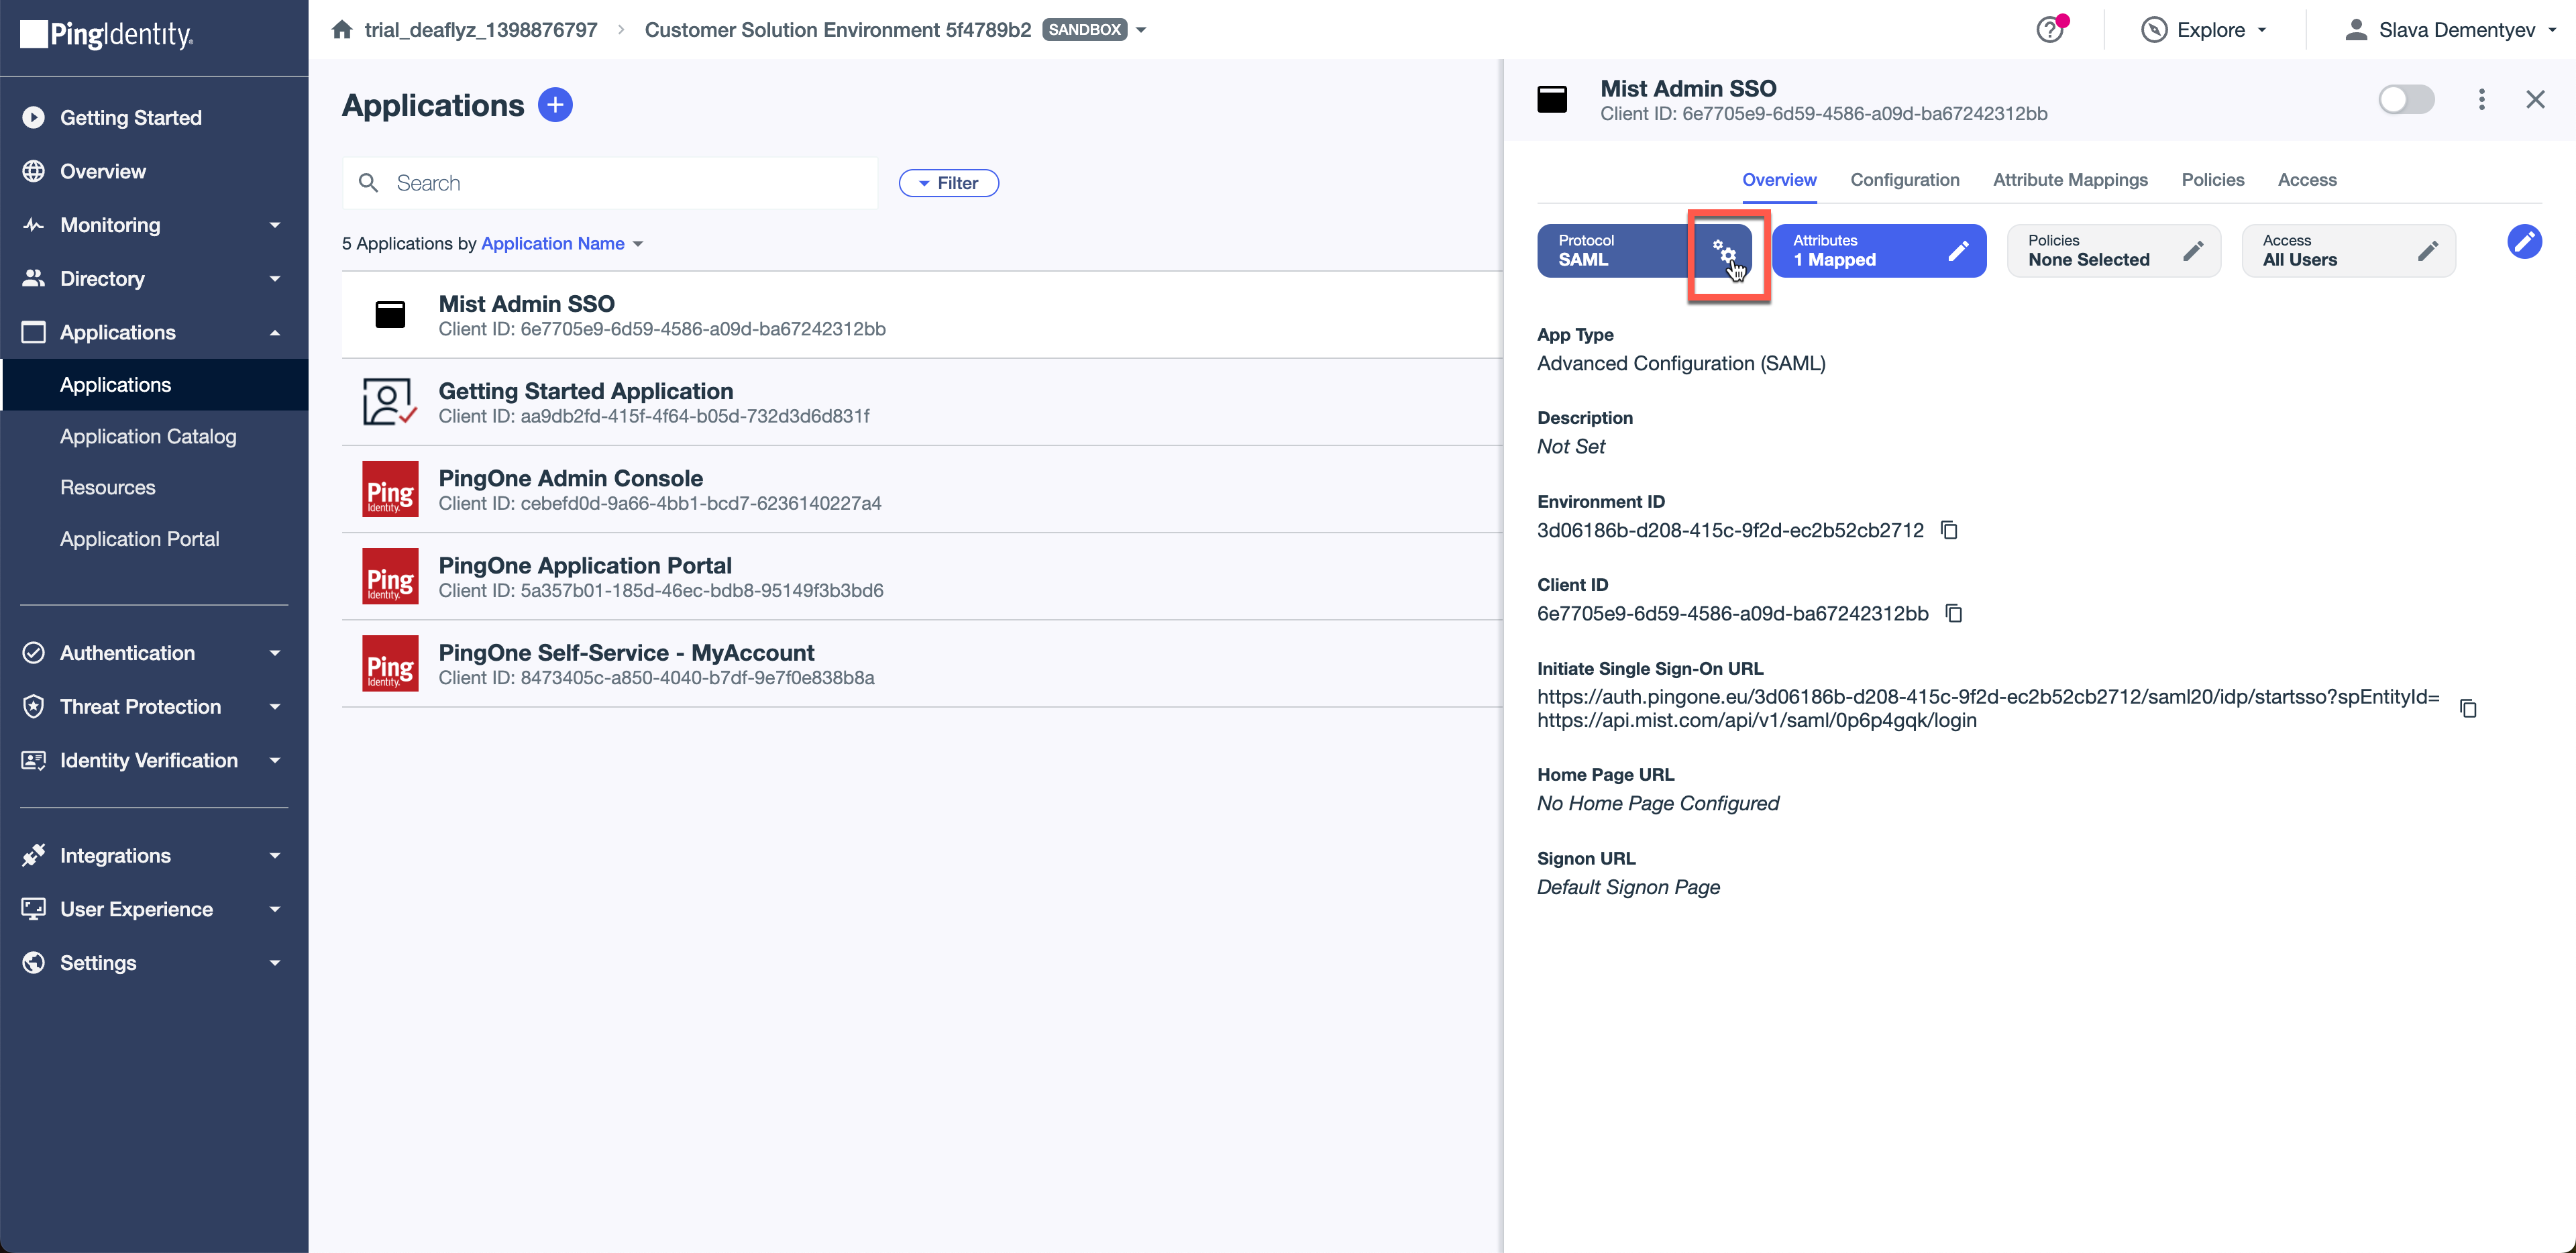
On the next screen click to edit SAML settings.
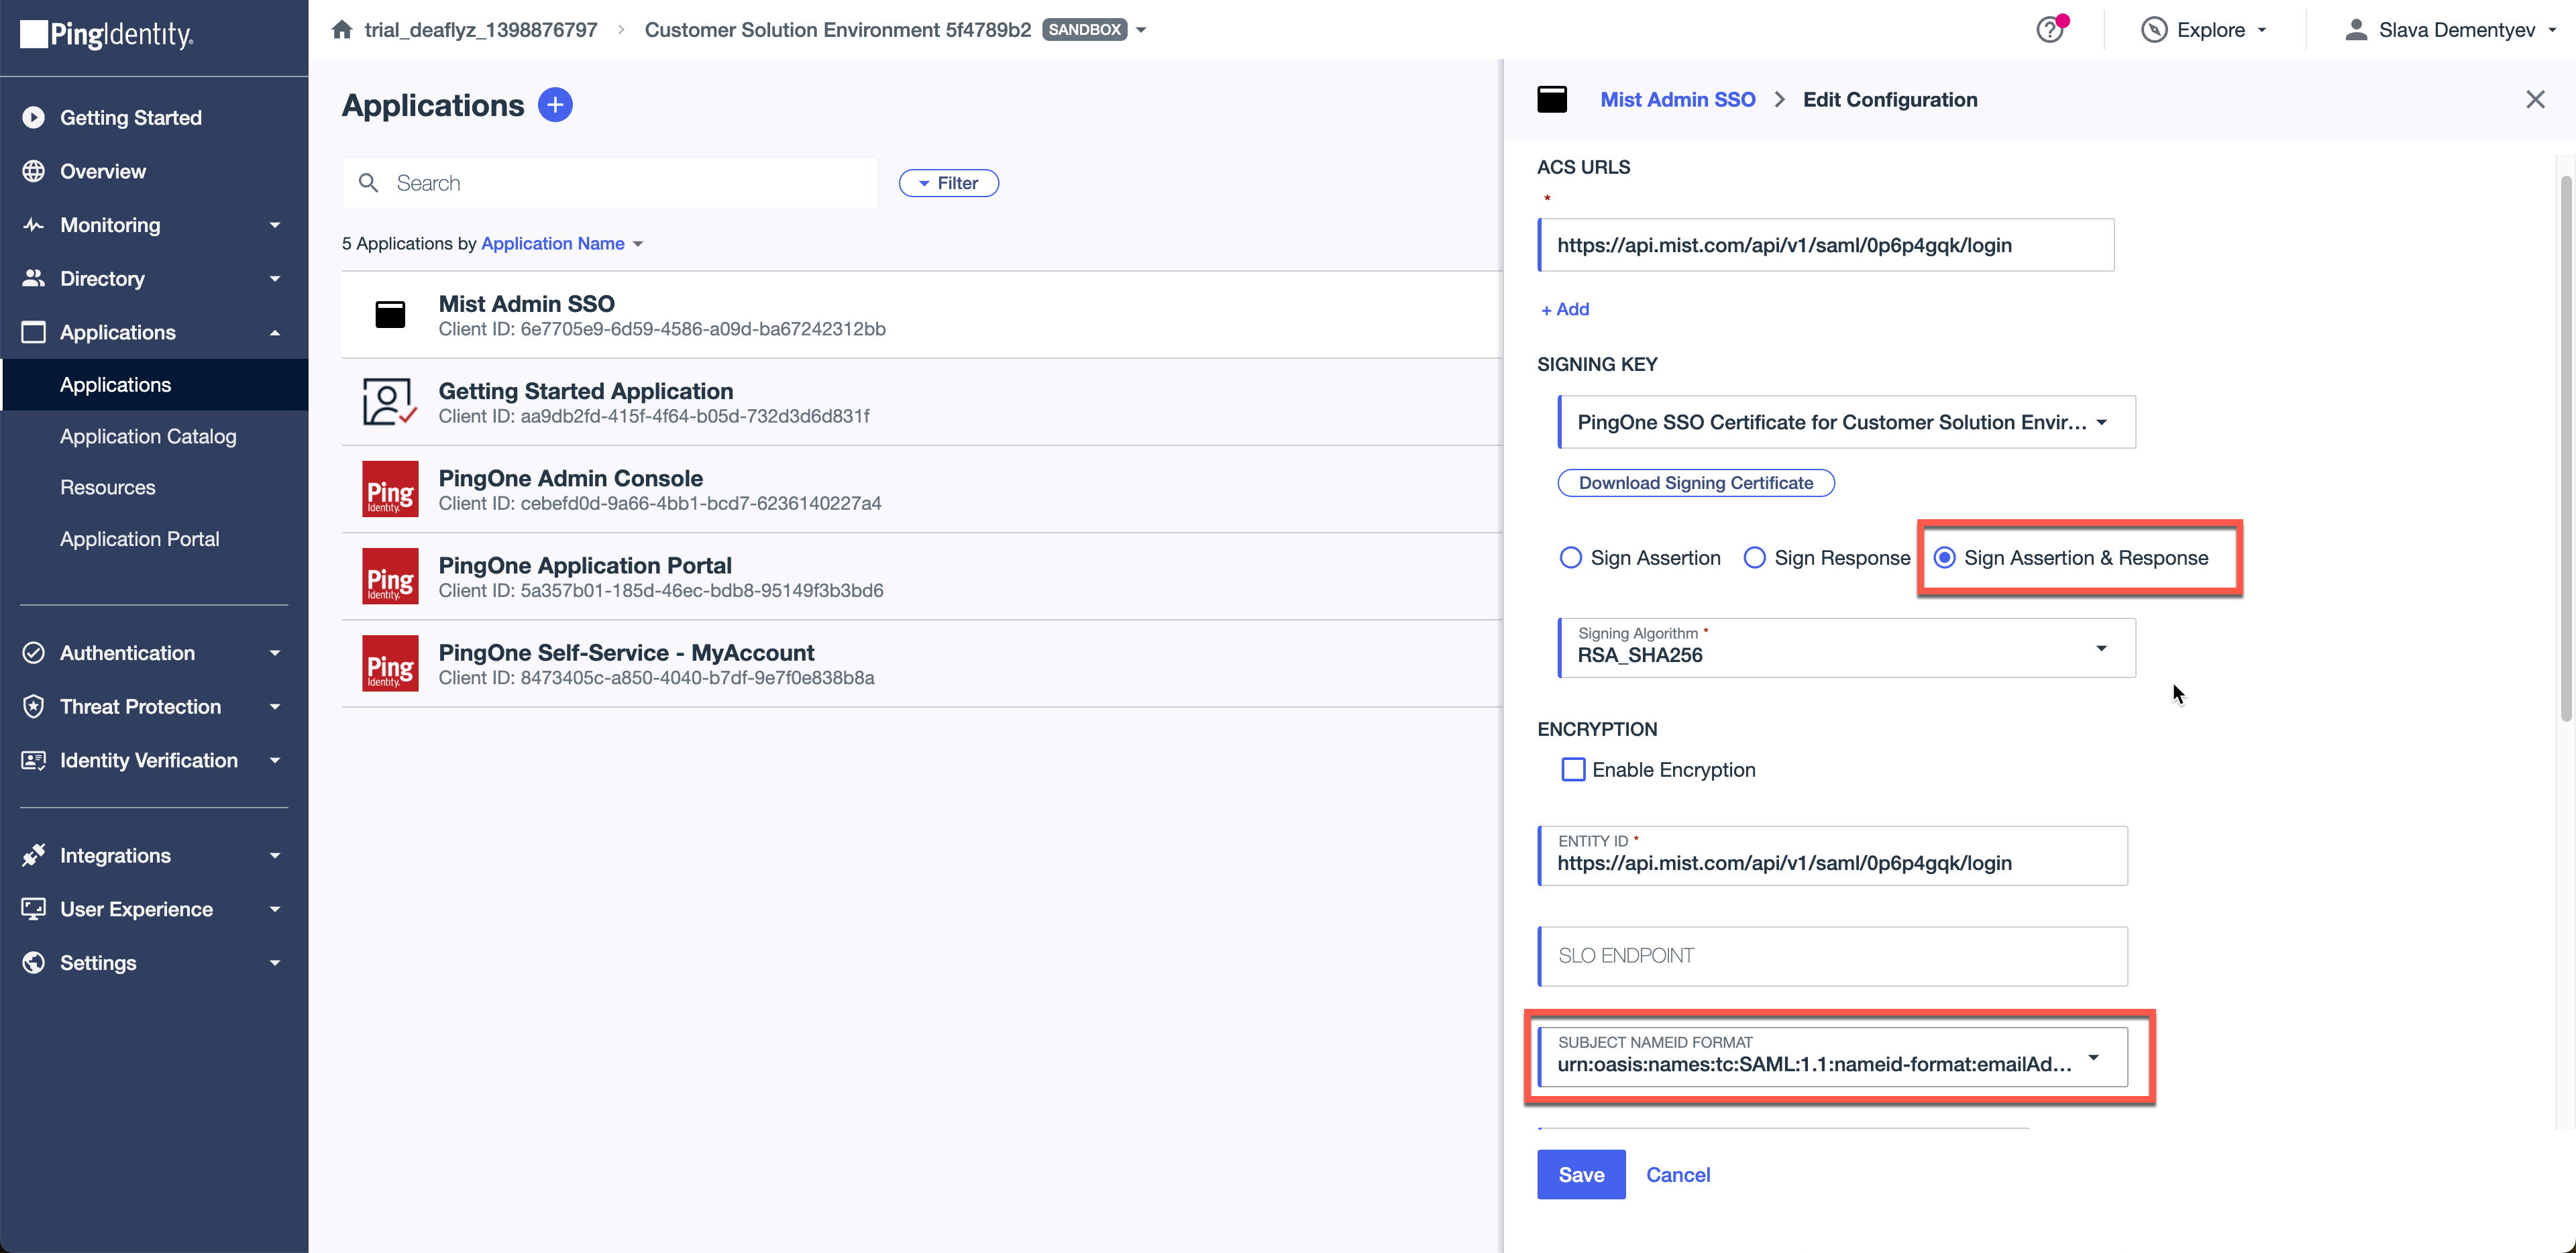
Select Sign both Response and Assertion and set NameID format as EmailAddress:
Move to Attribute Mappings tab and add the following attributes:
saml_subject = EmailAddress
Role = Mist Admin Role (custom attribute we have created in Step2)
FirstName = Given Name
LastName = Family Name

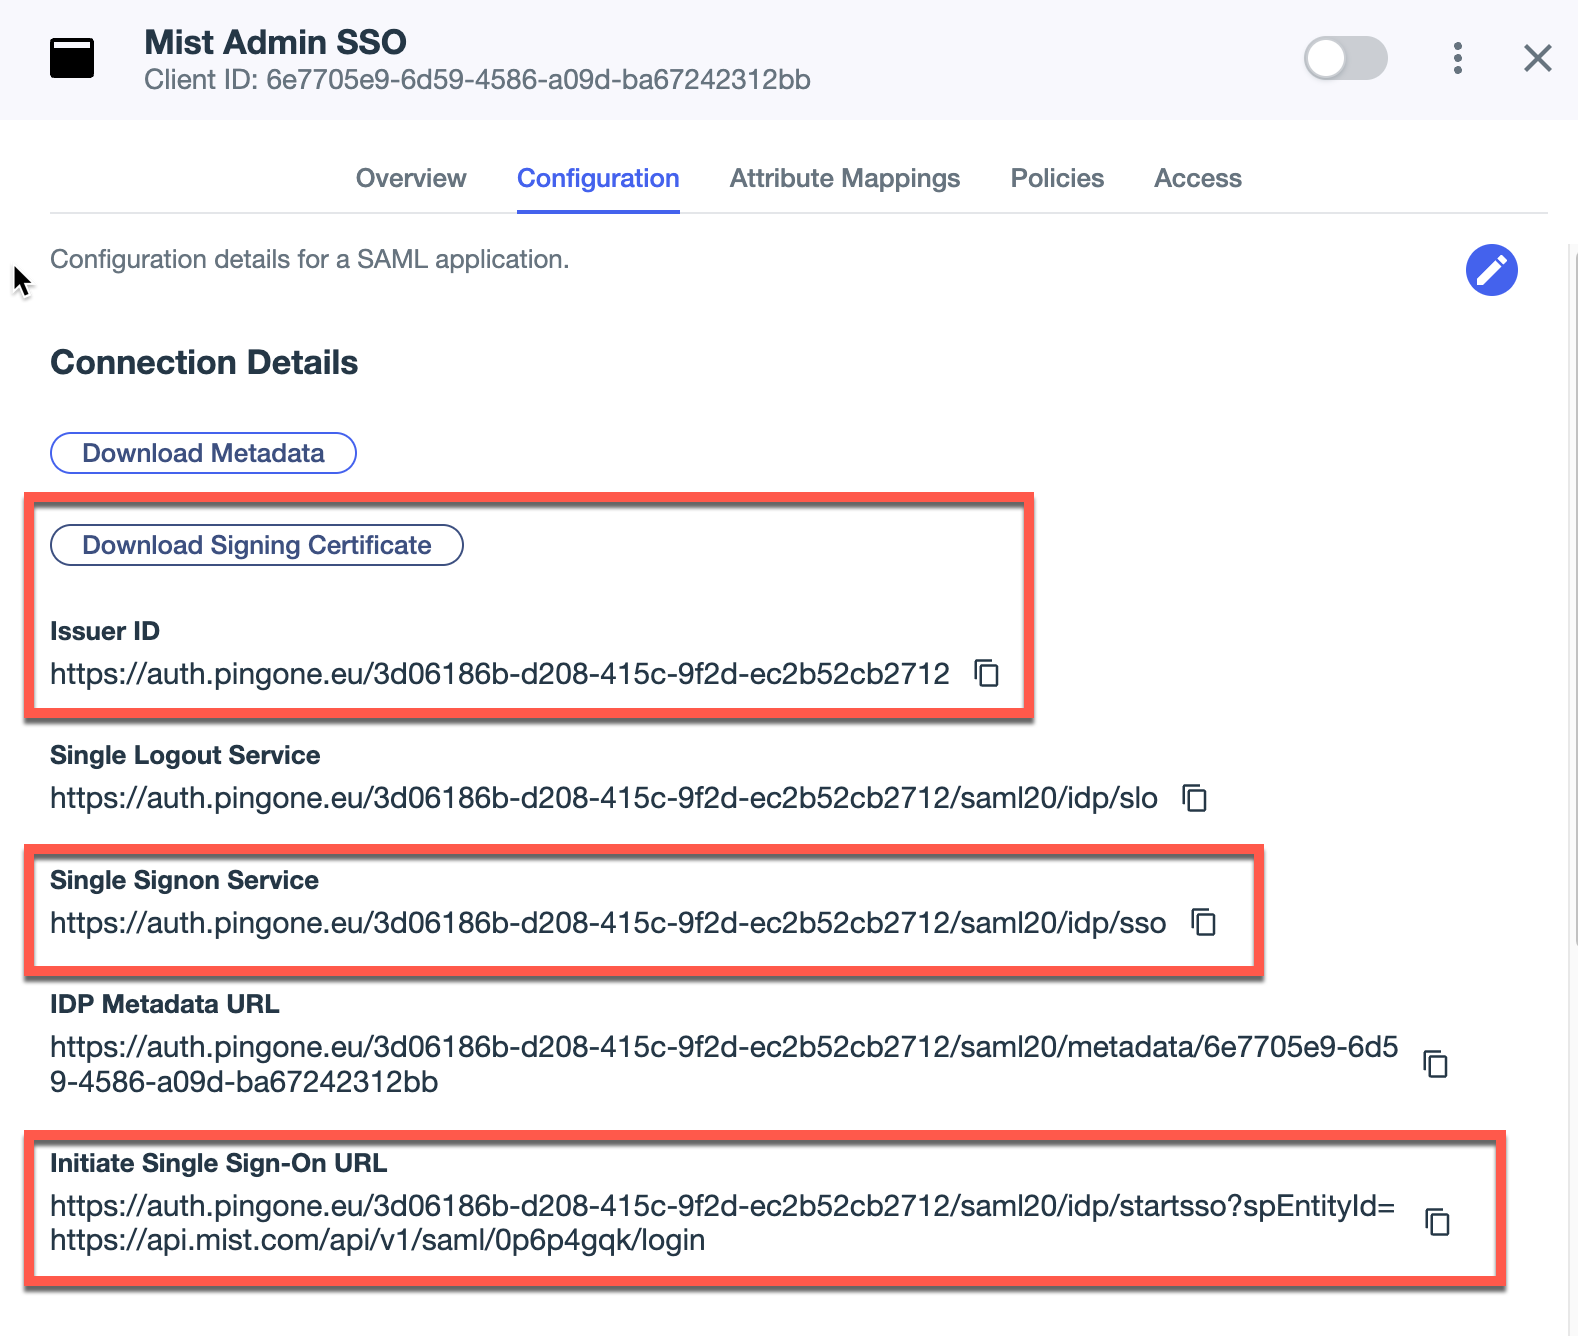
Go back to Configuration tab in the PingID dashboard and now copy the following fields into the Mist SSO configuration:
Issuer ID > Issuer
Single Signon Service > SSO URL
Download Signing Certificate (as .crt) > Certificate
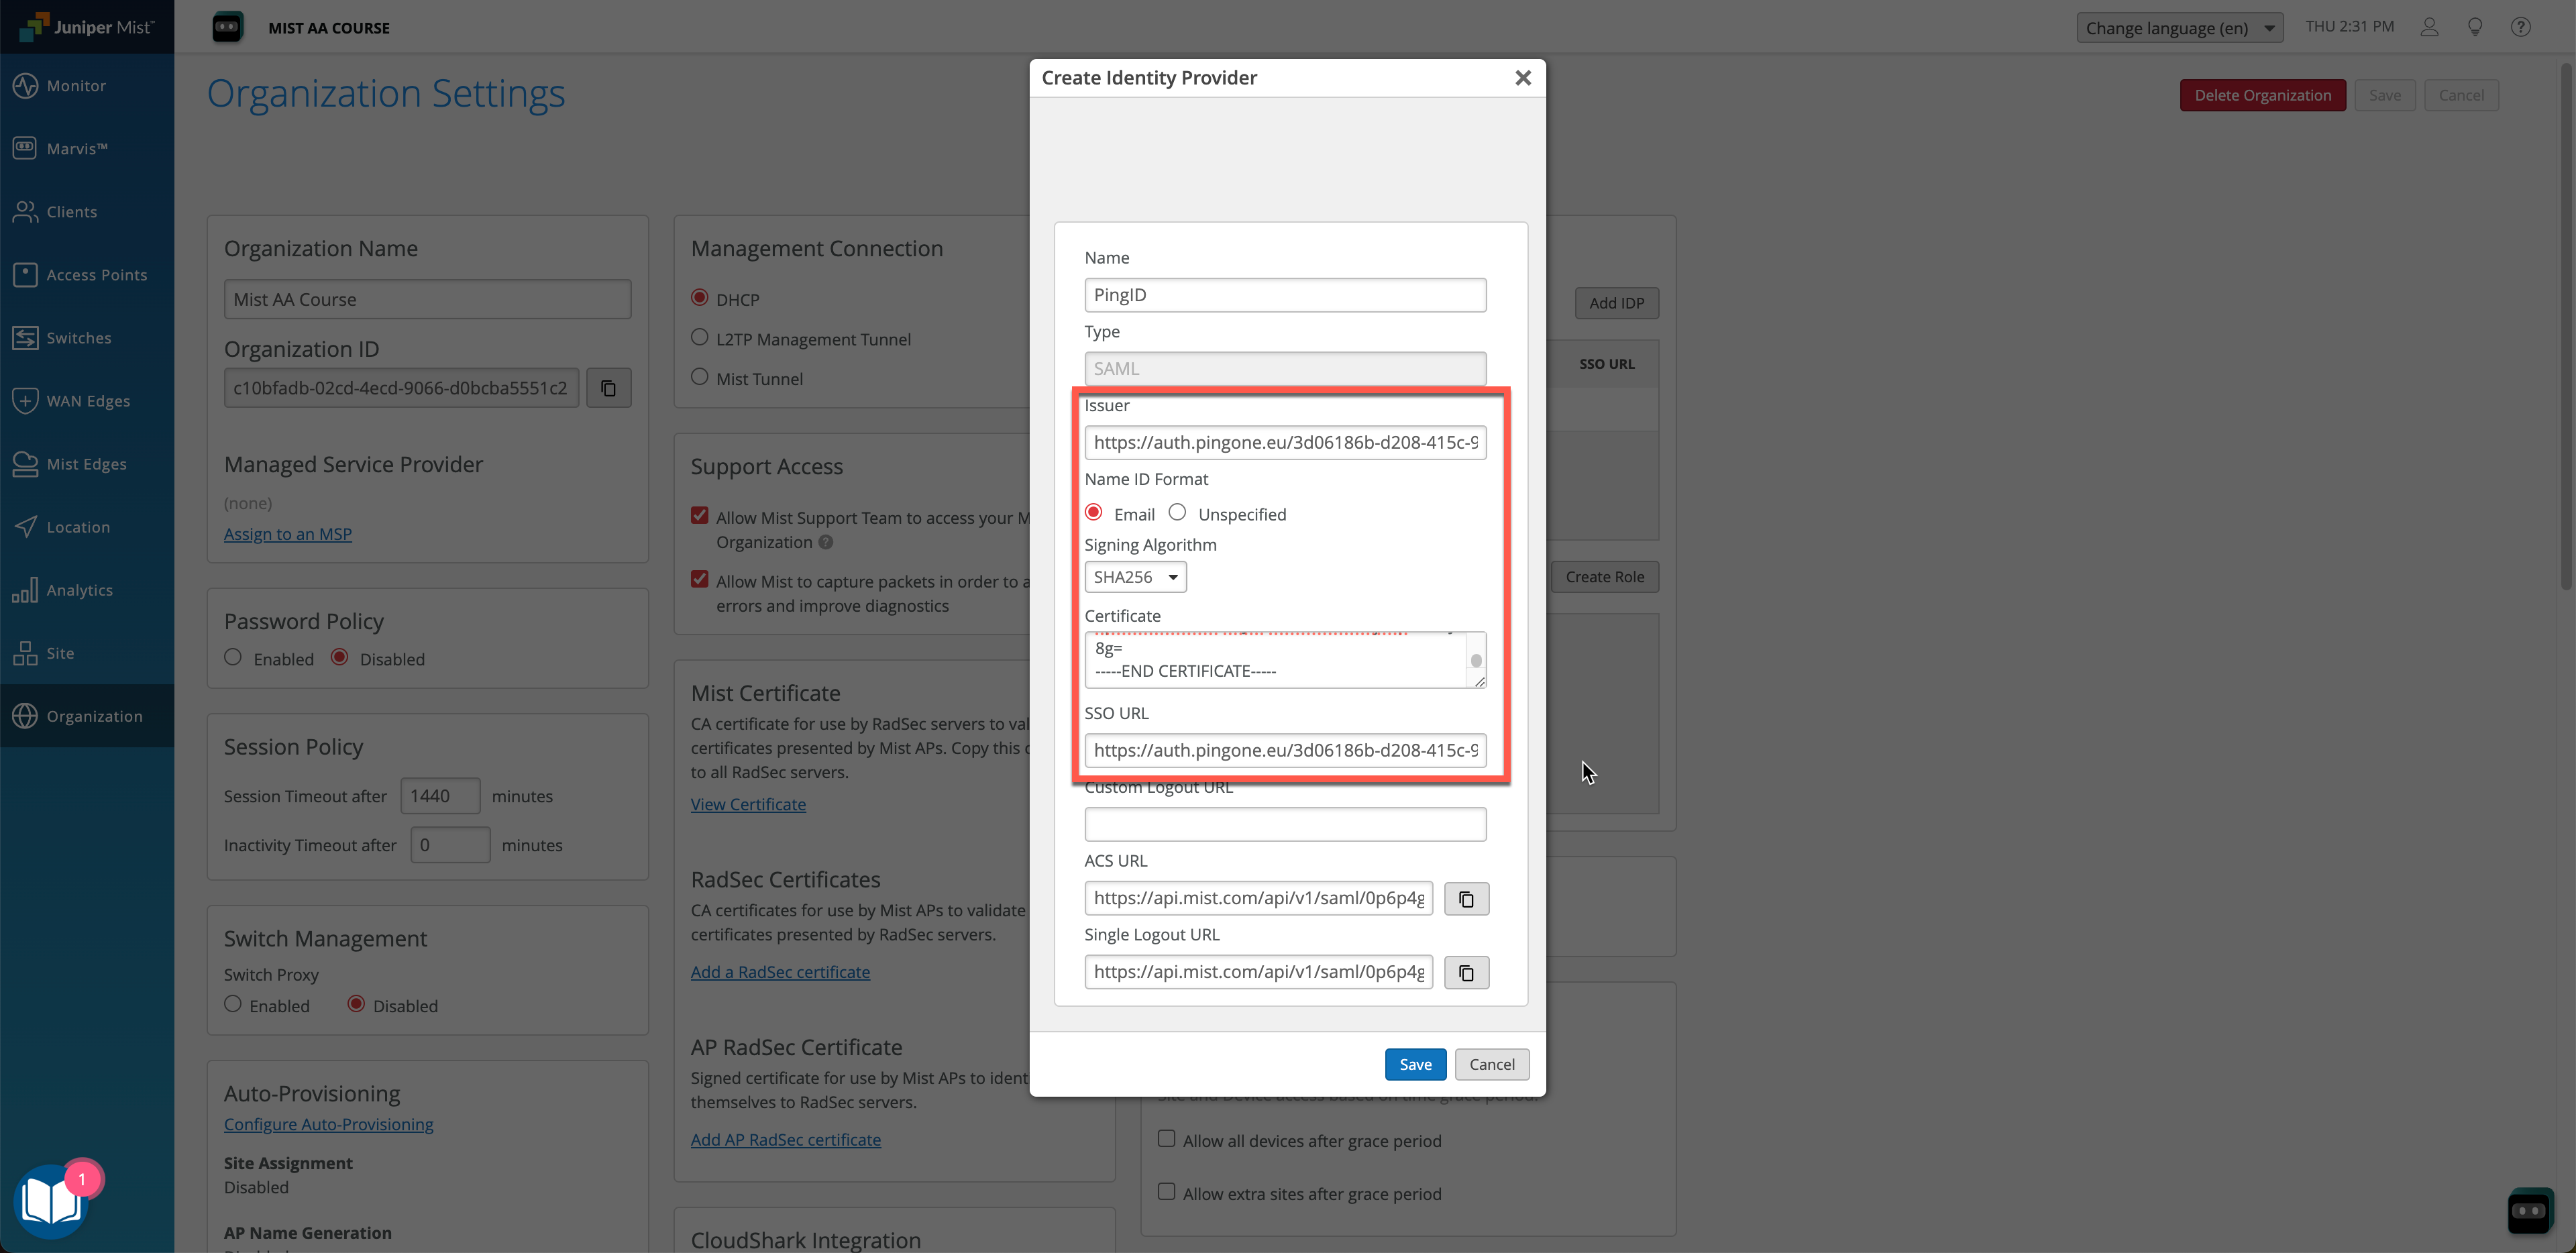
Step 4 – Mist Dashboard: Continue IDP Configuration
Issuer ID > Issuer
Single Signon Service > SSO URL
Download Signing Certificate (as .crt) > Certificate
Click Save.
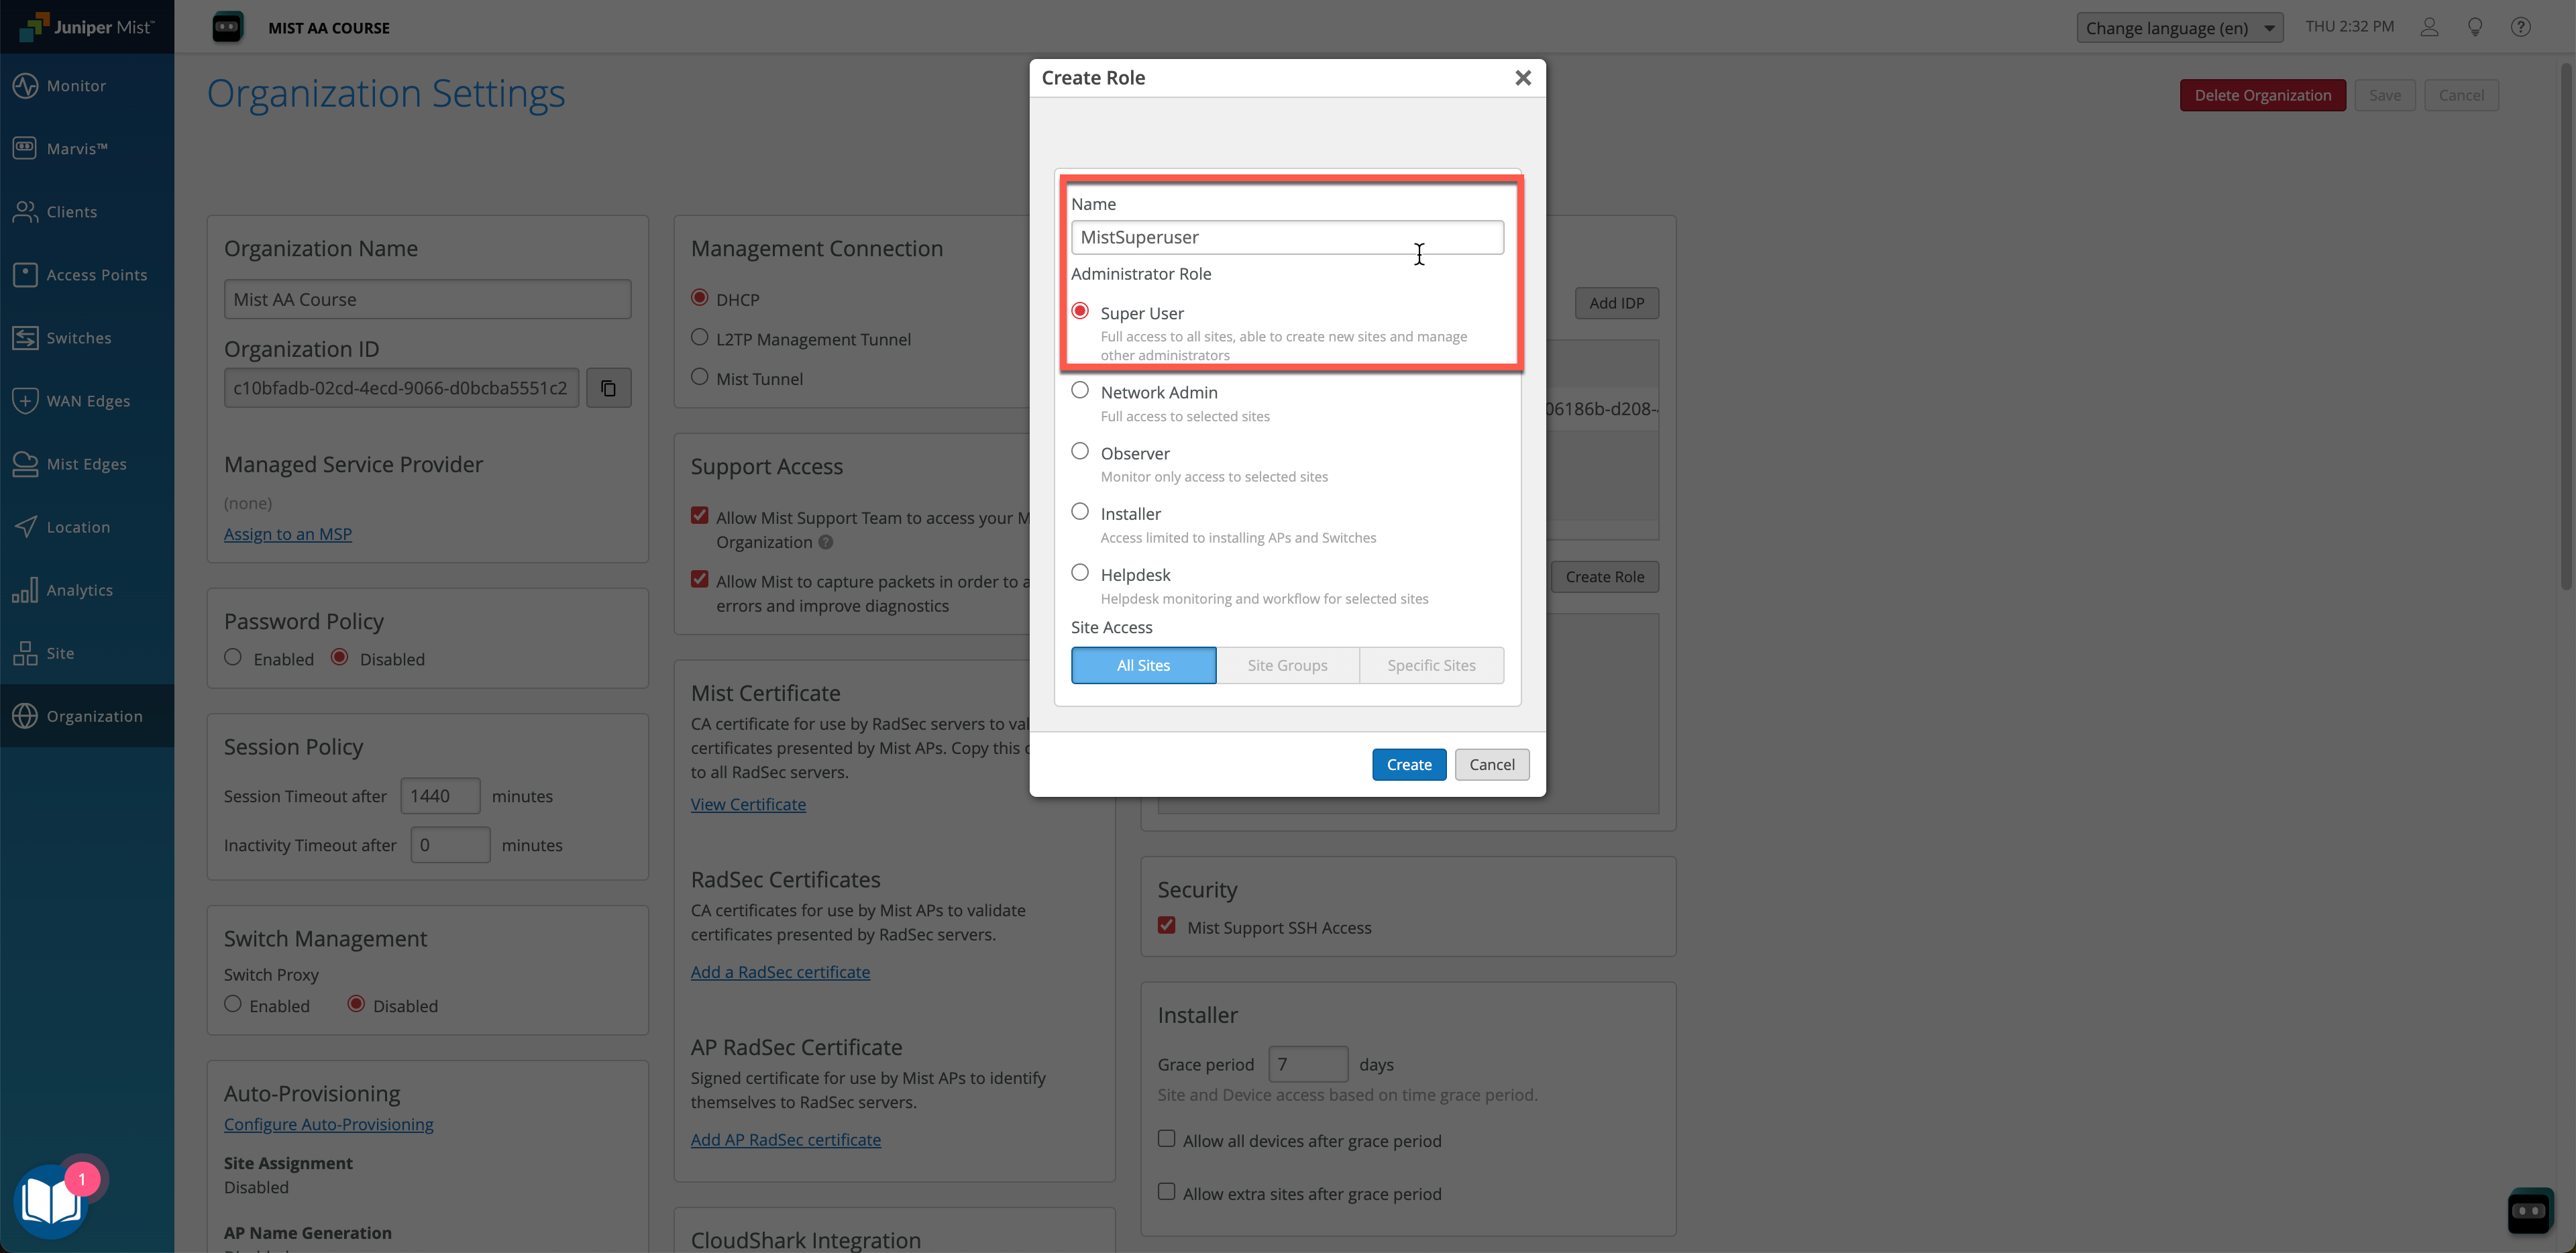
On the Mist Organization Settings page we also need to create an admin Role. Admin Roles define the level of privileges individual users would get based on their SSO identity. In our example we will use MistSuperuser as a Role name.
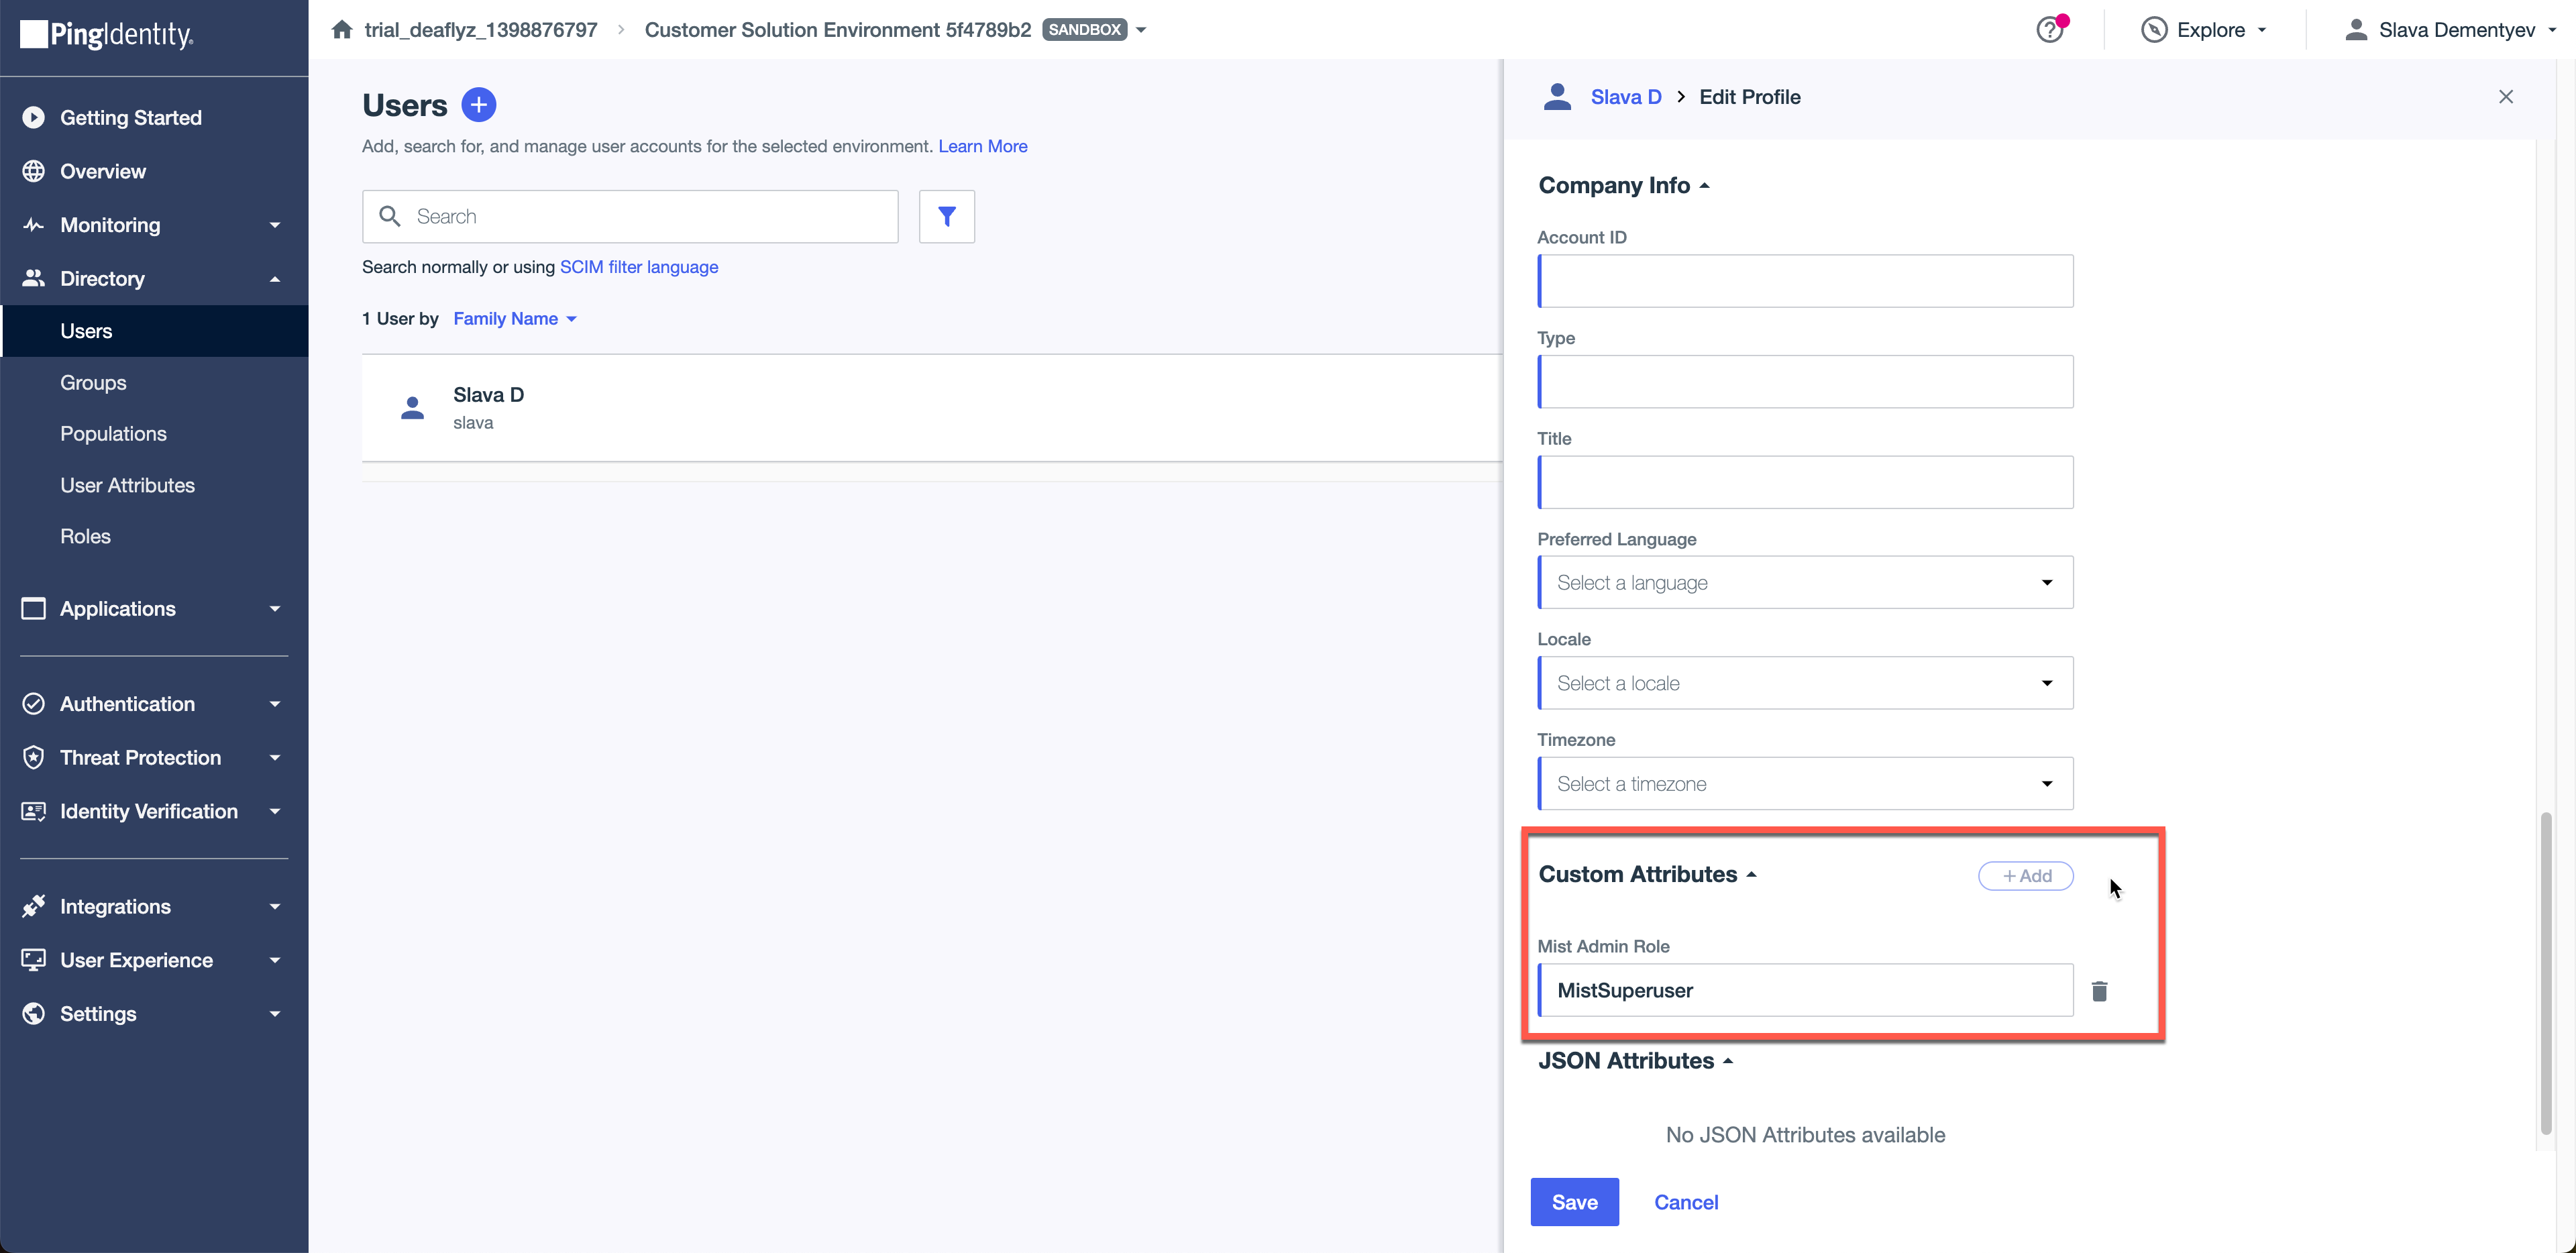
Step 5 – PingID Dashboard: Assign Mist Roles to Users
Go back to PingID dashboard and navigate to Directory > Users. In our example will assign a custom attribute (Mist Admin Role) to our test user that we have created in the Step 1 and give it value of MistSuperuser to match what we have configured on the Mist side.

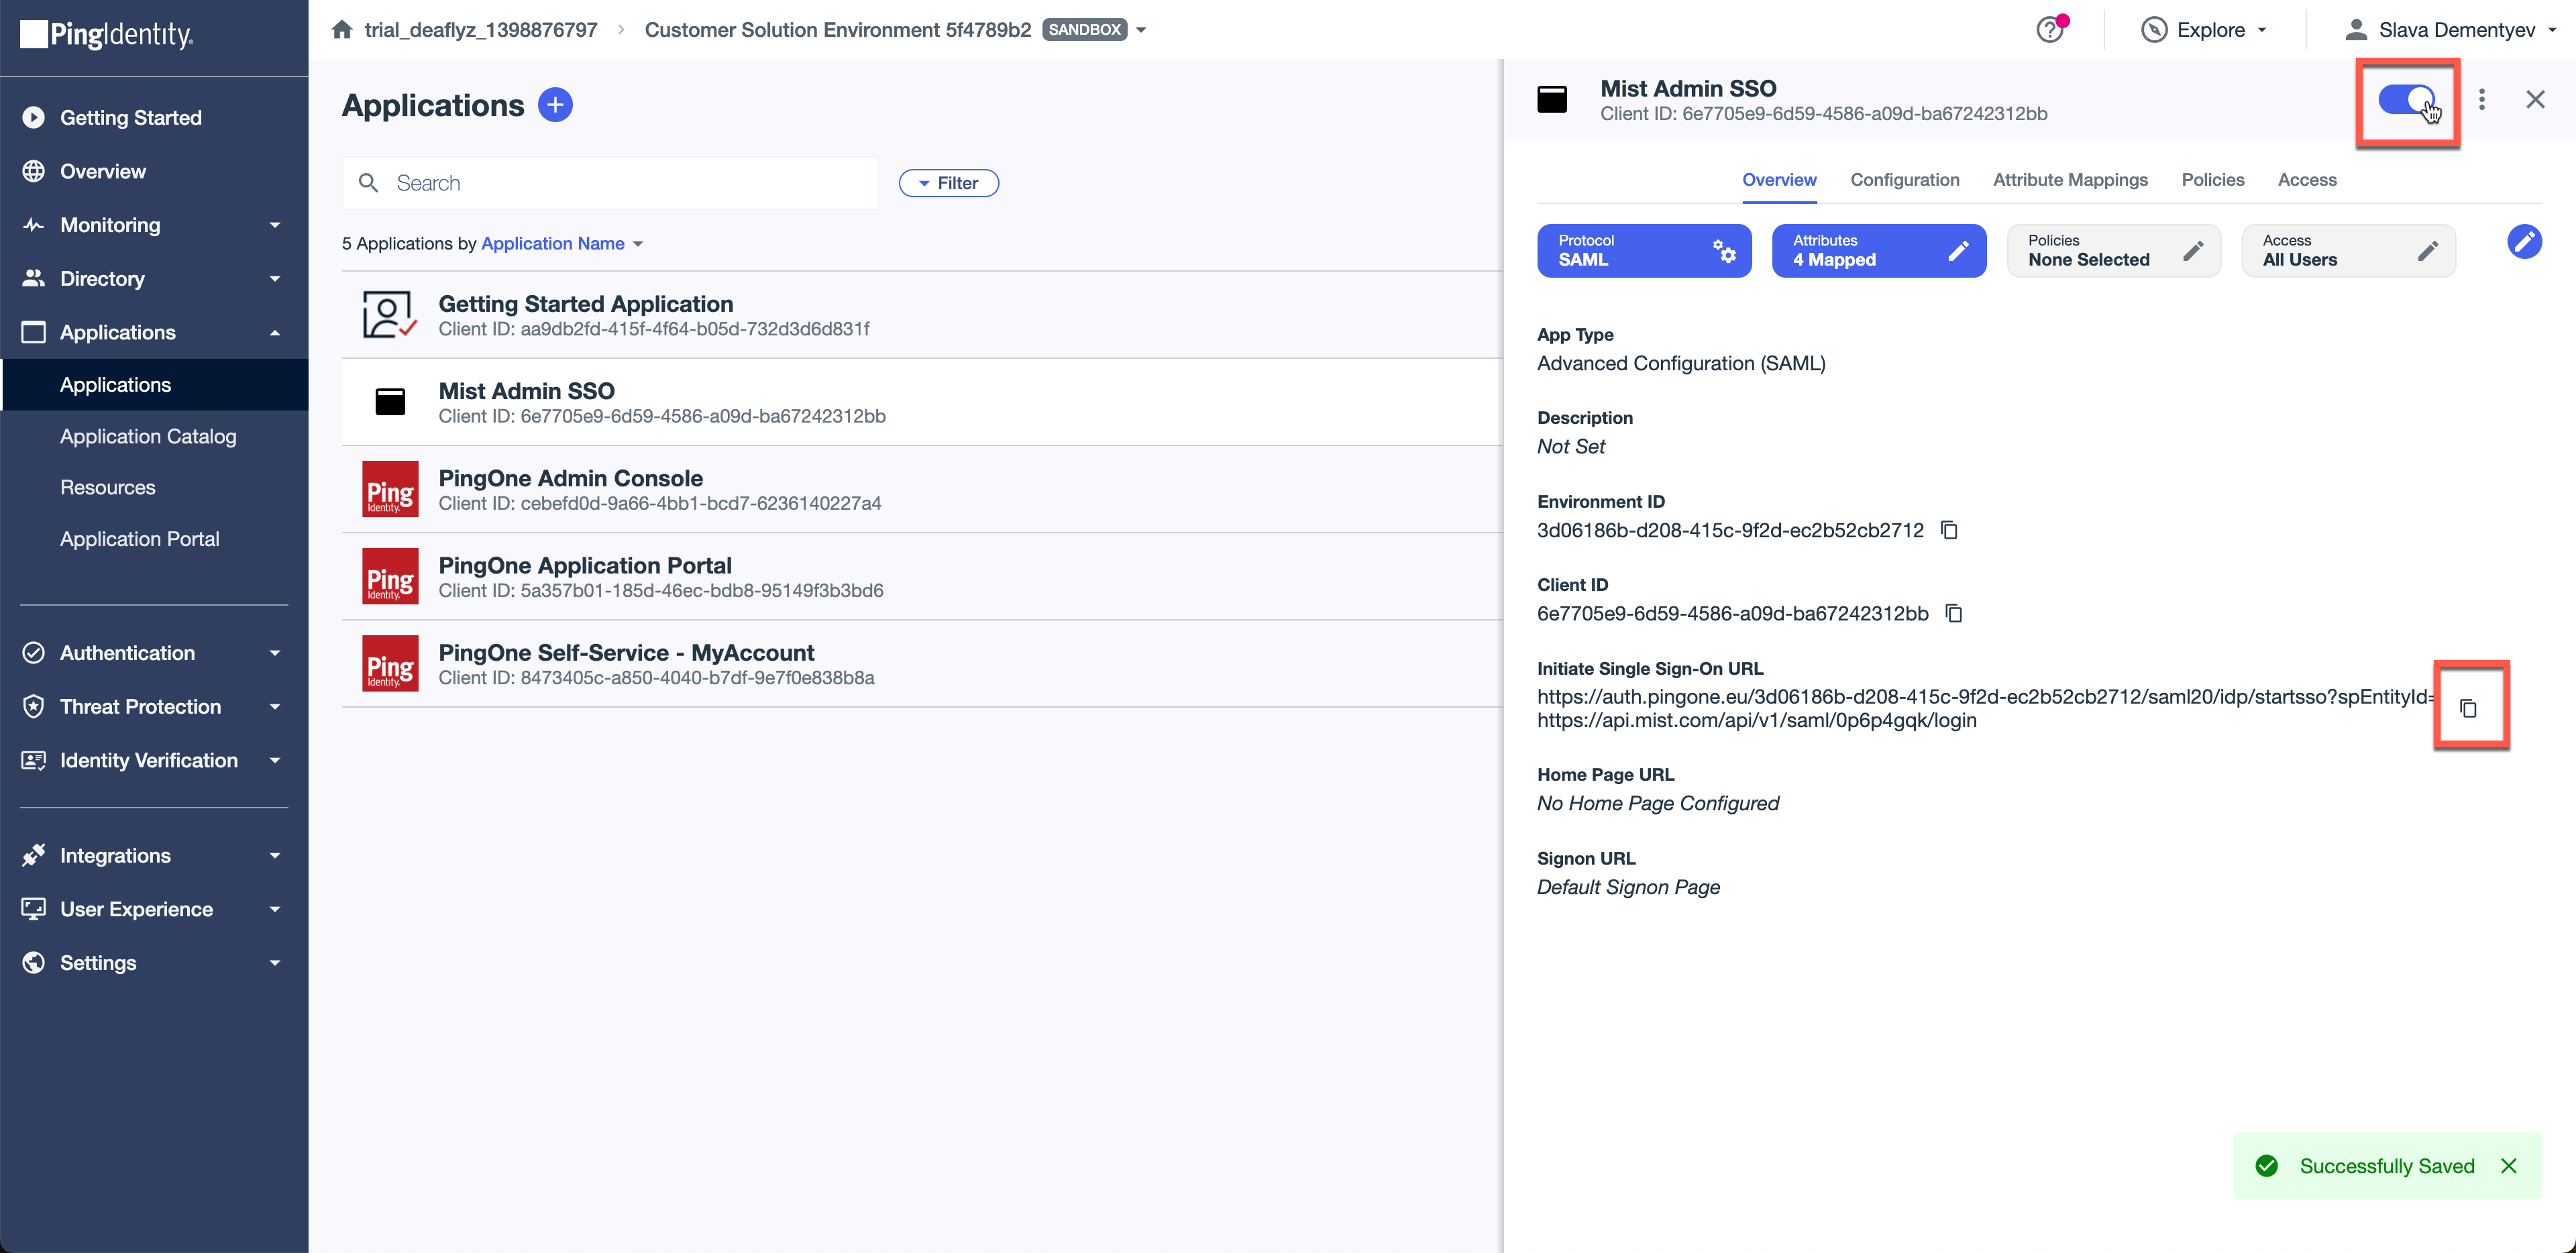
Step 6 – PingID Dashboard: Enabling the Application and Verification
The last step is to enable the Application we have created and testing the user authentication via PingID into the Mist Dashboard.
Navigate to Applications, select your Mist Admin SSO app and click toggle to enable. Also copy the Intitate Single Sign-On URL and use it to test user authentication:
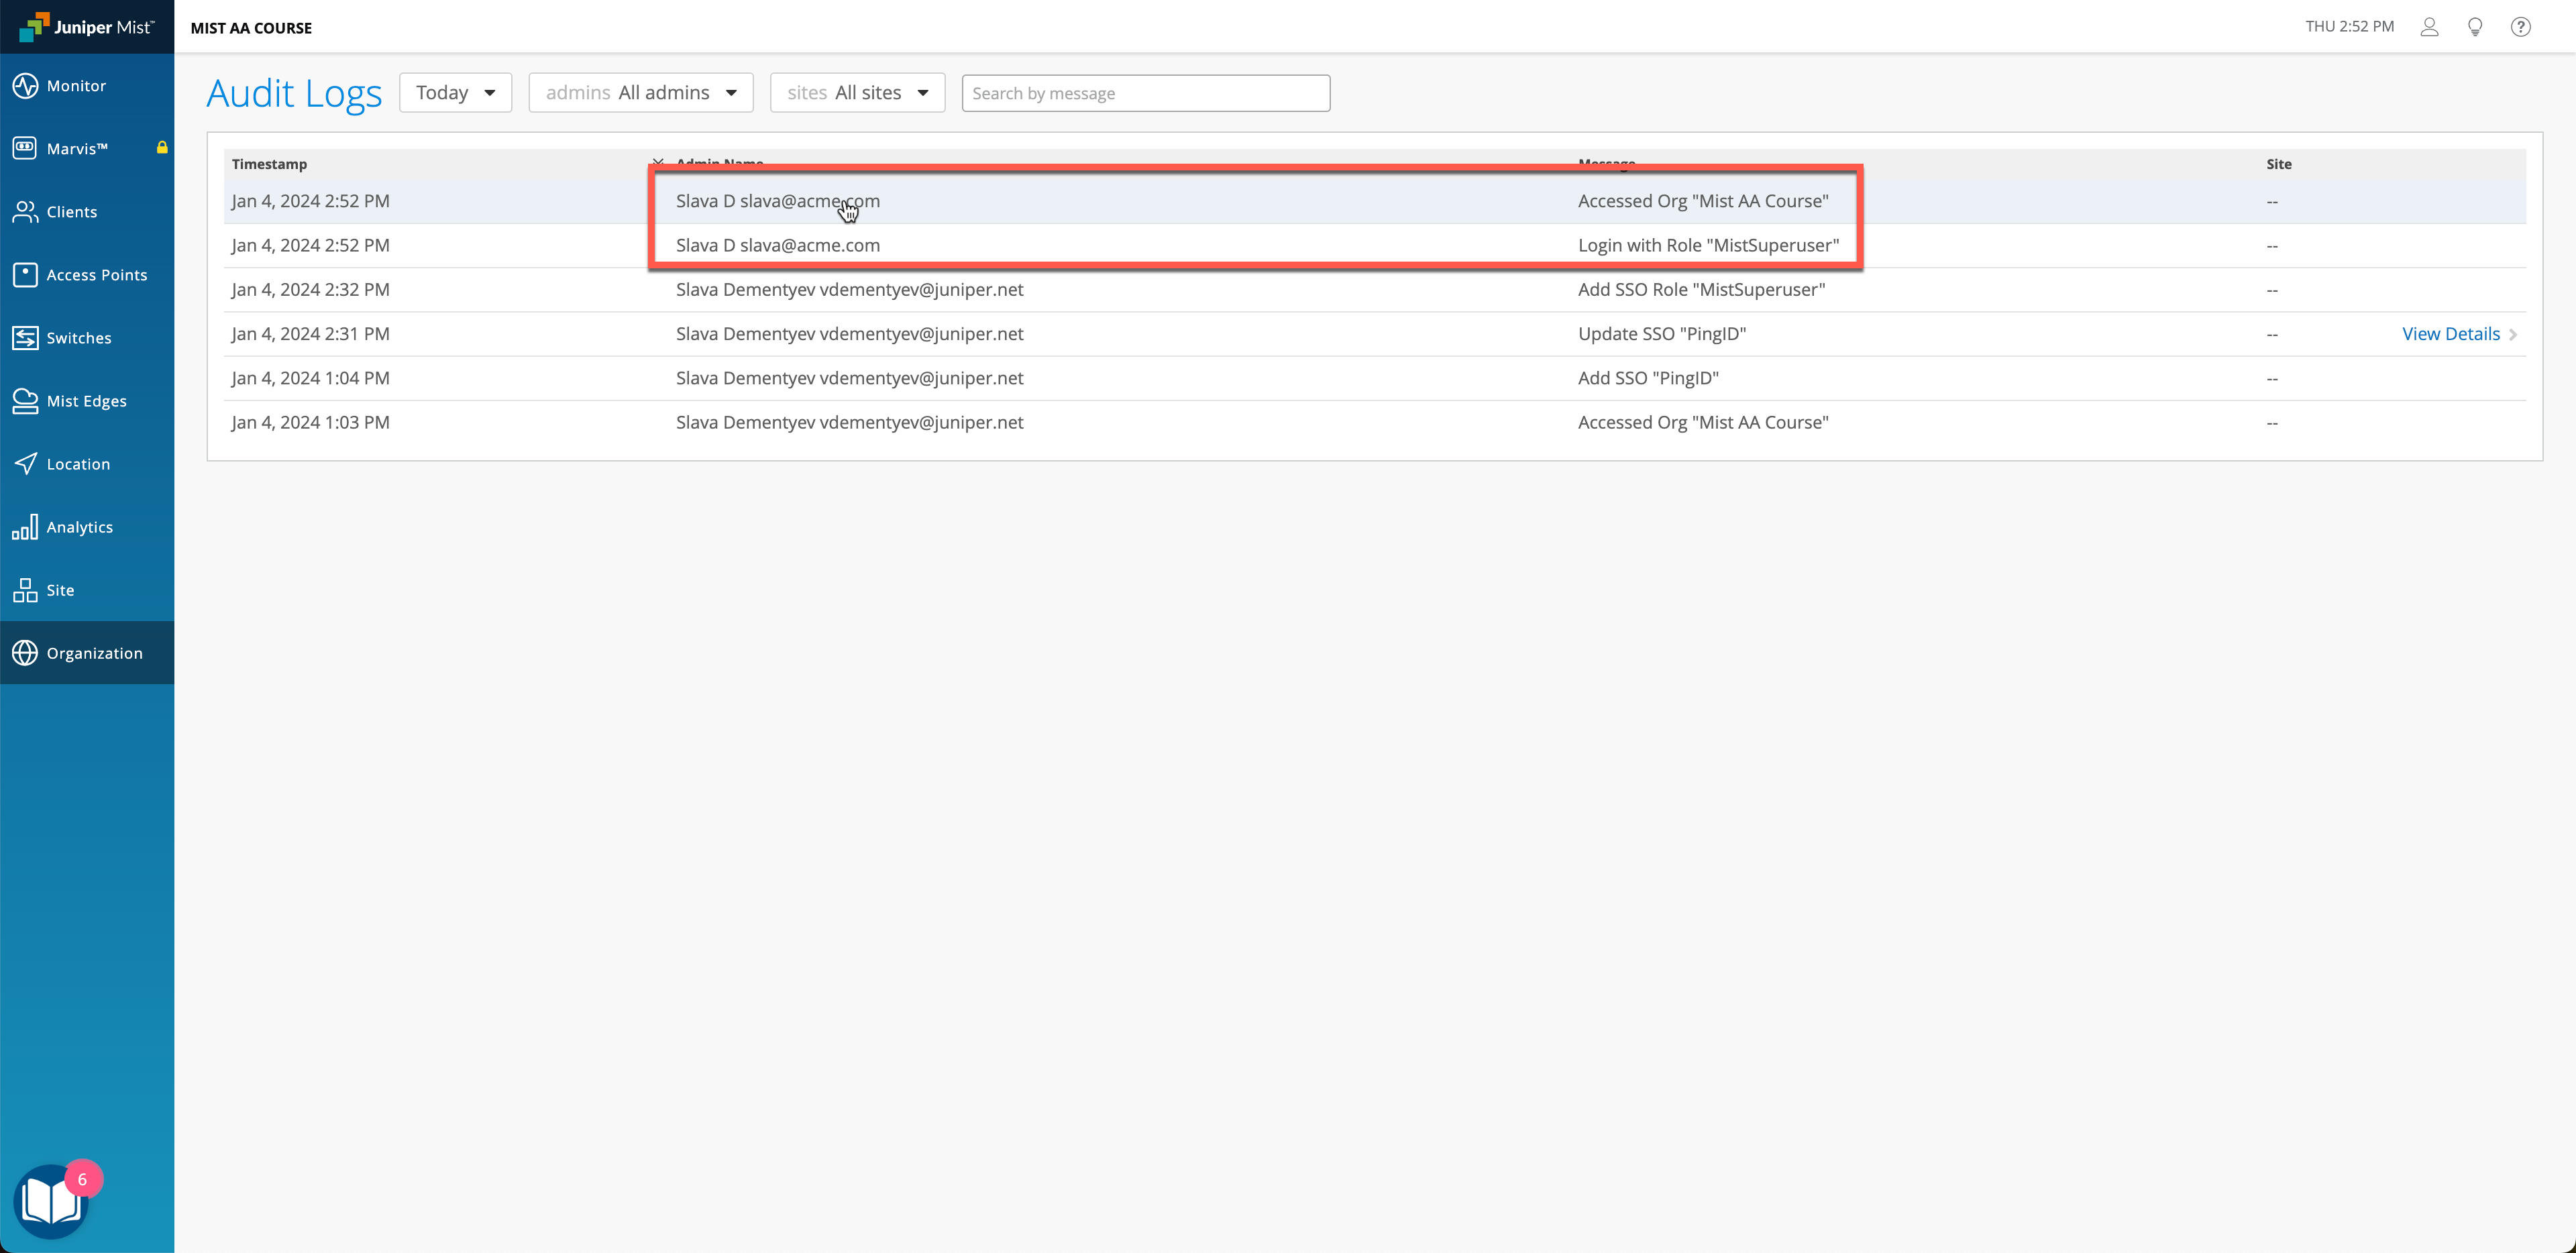
You should now be able to login with your PingID users, provided they have the correct Role attributes passed back.
Few Notes:
- Mist supports both IdP initiated and SP initiated logins. For the SP initiated login to work, at least one login needs to be performed via IdP for each user.
- Roles can be assigned using any attributes or groups that are part of PingID, we used custom attributes as an example. More on how Mist is parsing Role attributes in the following doc: https://www.mist.com/documentation/mist-sso-faq/