During our WAN Design, we will create Networks that can later be used in Interfaces, Templates and Application Policies.
A Network is defined with:
- a unique Network Name
- Subnet IP/Prefix
- VLAN (optional)
- plus a list of options
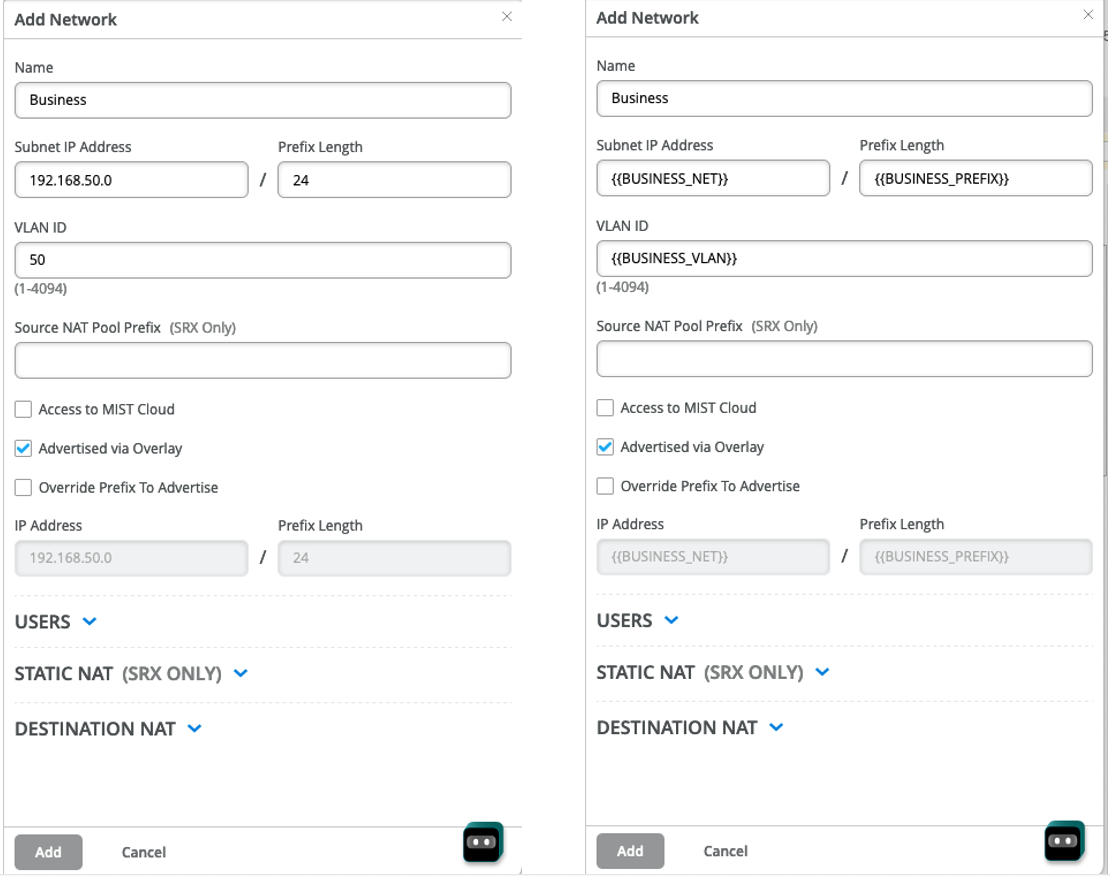
The Subnet IP/Prefix and VLAN can be defined with absolute values (e.g. 192.168.50.0/24, VLAN 50) or more typically using site variables so that the same network definition can have different values for each site without having to define multiple networks. Variables have the format {{variable_name}}
Below is an example of a network (named “Business”) created using absolute values and the same network created using site variables:
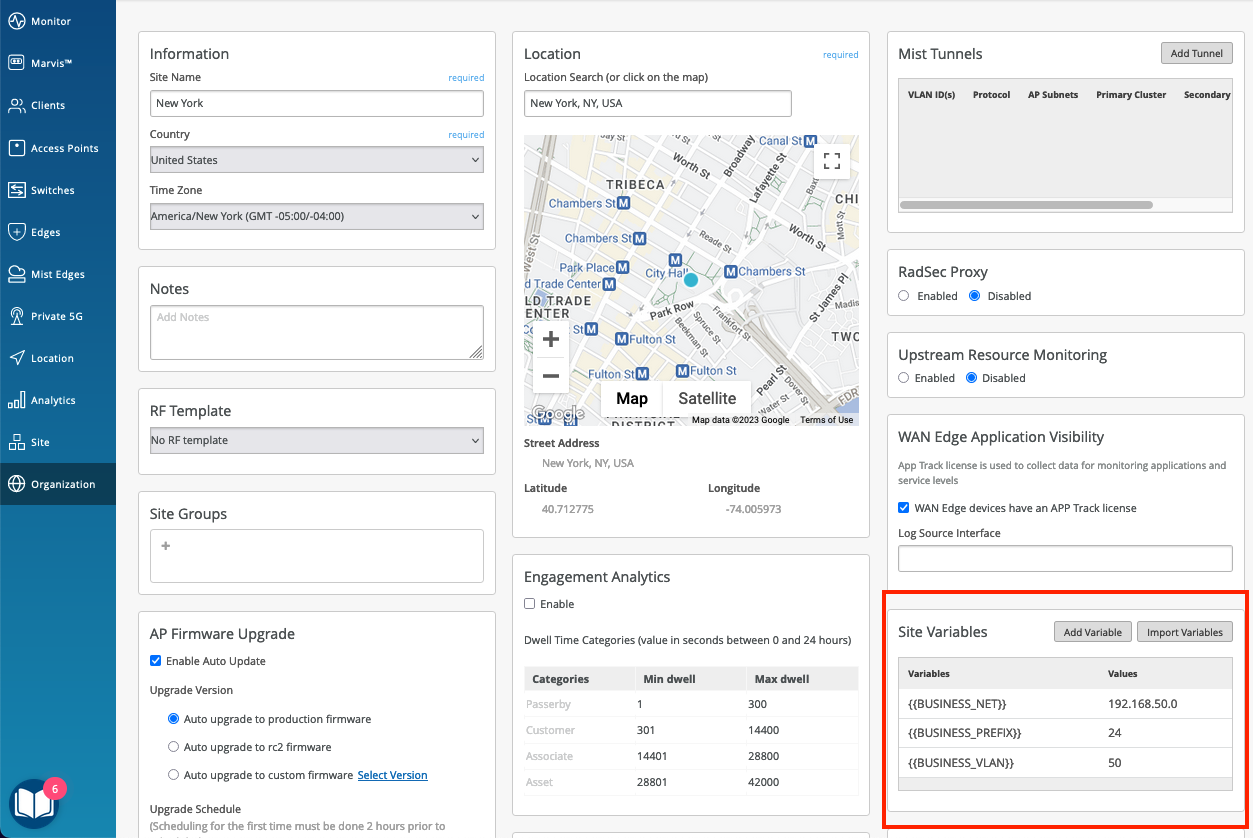
The Site Variables used in the Network definition are defined in the Site menu as shown below.
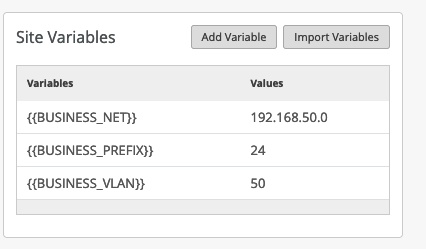
Another Site can have the same variables with different values. The advantage of defining Networks with variables is common practice when using Networks in WAN Edge Templates.
Network settings can also include:
- Access to MIST Cloud
- Enabled when this network should be allowed to access Mist in the Cloud.
- A Policy will automatically be created to permit this traffic.
- Advertised via Overlay
- Enabled when this network prefix will be advertised to the Hubs and will be routed via the Overlay tunnels.
- Override Prefix to Advertise
- Enabled when the prefix to advertise to the Hubs is not the original network but a different prefix. This is typically used when enabling NAT options.
- USERS
- Allows to define additional Networks or Users, e.g. remote networks/users connected to the main network.
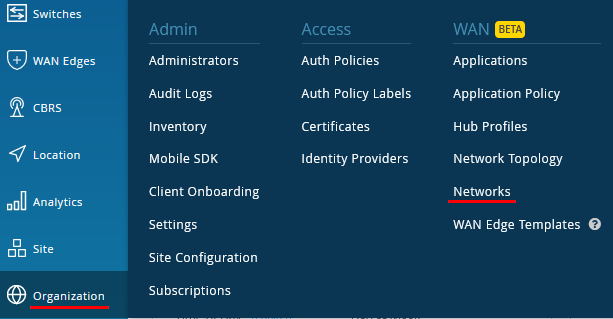
To configure Networks in our Lab example:
Go to Organization -> Networks.
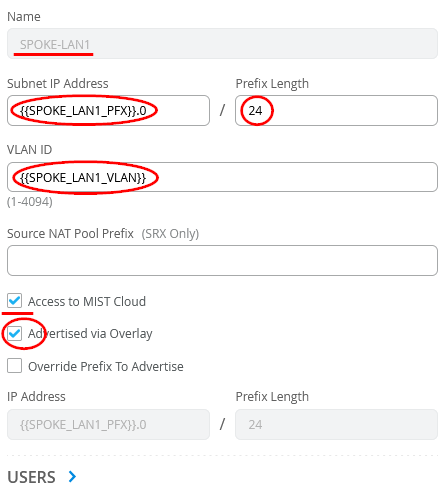
Configure the first network in the following way:
- Name=SPOKE-LAN1
- Subnet IP Address={{SPOKE_LAN1_PFX}}.0 this will substitute via site-variables that contain the first three octets.
- Prefix Length=24 (we hardcoded this)
- VLAN ID={{SPOKE_LAN1_VLAN}} to automatically use the right tag via site-variable.
- Make sure the default check box “Access to Mist Cloud” is set. We want possible future devices to be able to be managed by the Mist Cloud and have the right policy set.
- Activate the Check box “Advertised via Overlay”.
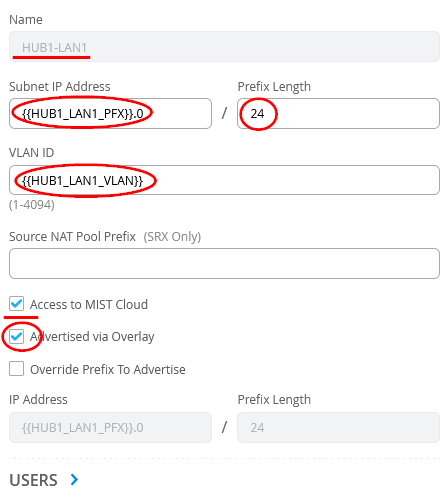
Configure the second network in the following way similar to the same definition we did as Application (so we also use the same name as it’s less confusing then).
- Name=HUB1-LAN1
- Subnet IP Address={{HUB1_LAN1_PFX}}.0 this will substitute via site-variables that contain the first three octets.
- Prefix Length=24 (we hardcoded this)
- VLAN ID={{HUB1_LAN1_VLAN}} to automatically use the right tag via site-variable.
- Make sure the default check box “Access to Mist Cloud” is set. We want possible future devices to be able to be managed by the Mist Cloud and have the right policy set.
- Activate the Check box “Advertised via Overlay”.
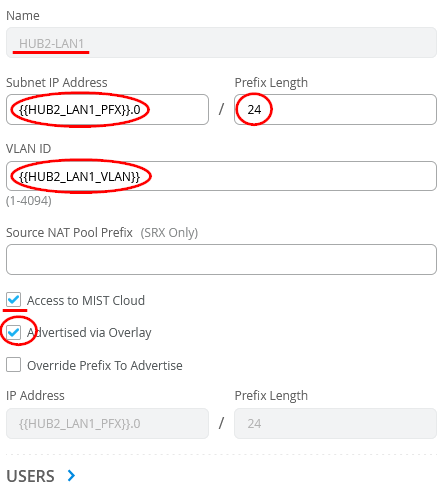
Configure the third network in the following way similar to the same definition we did as Application (so we also use the same name as it’s less confusing then).
- Name=HUB2-LAN1
- Subnet IP Address={{HUB2_LAN1_PFX}}.0 this will substitute via site-variables that contain the first three octets.
- Prefix Length=24 (we hardcoded this)
- VLAN ID={{HUB2_LAN1_VLAN}} to automatically use the right tag via site-variable.
- Make sure the default check box “Access to Mist Cloud” is set. We want possible future devices to be able to be managed by the Mist Cloud and have the right policy set.
- Activate the Check box “Advertised via Overlay”.
The end result overview should look like the below summary picture.
