This article covers requirements and installation instructions of a Mist Edge VM for the purposes of Mist Auth Proxy functionality.
The following are the minimum hardware requirements for a Mist Edge VM for Mist Auth Proxy feature.
Supported Hypervisor: VMware ESXi, tested versions – 6.7.0 and 7.0.
Sizing for a Production is as below:
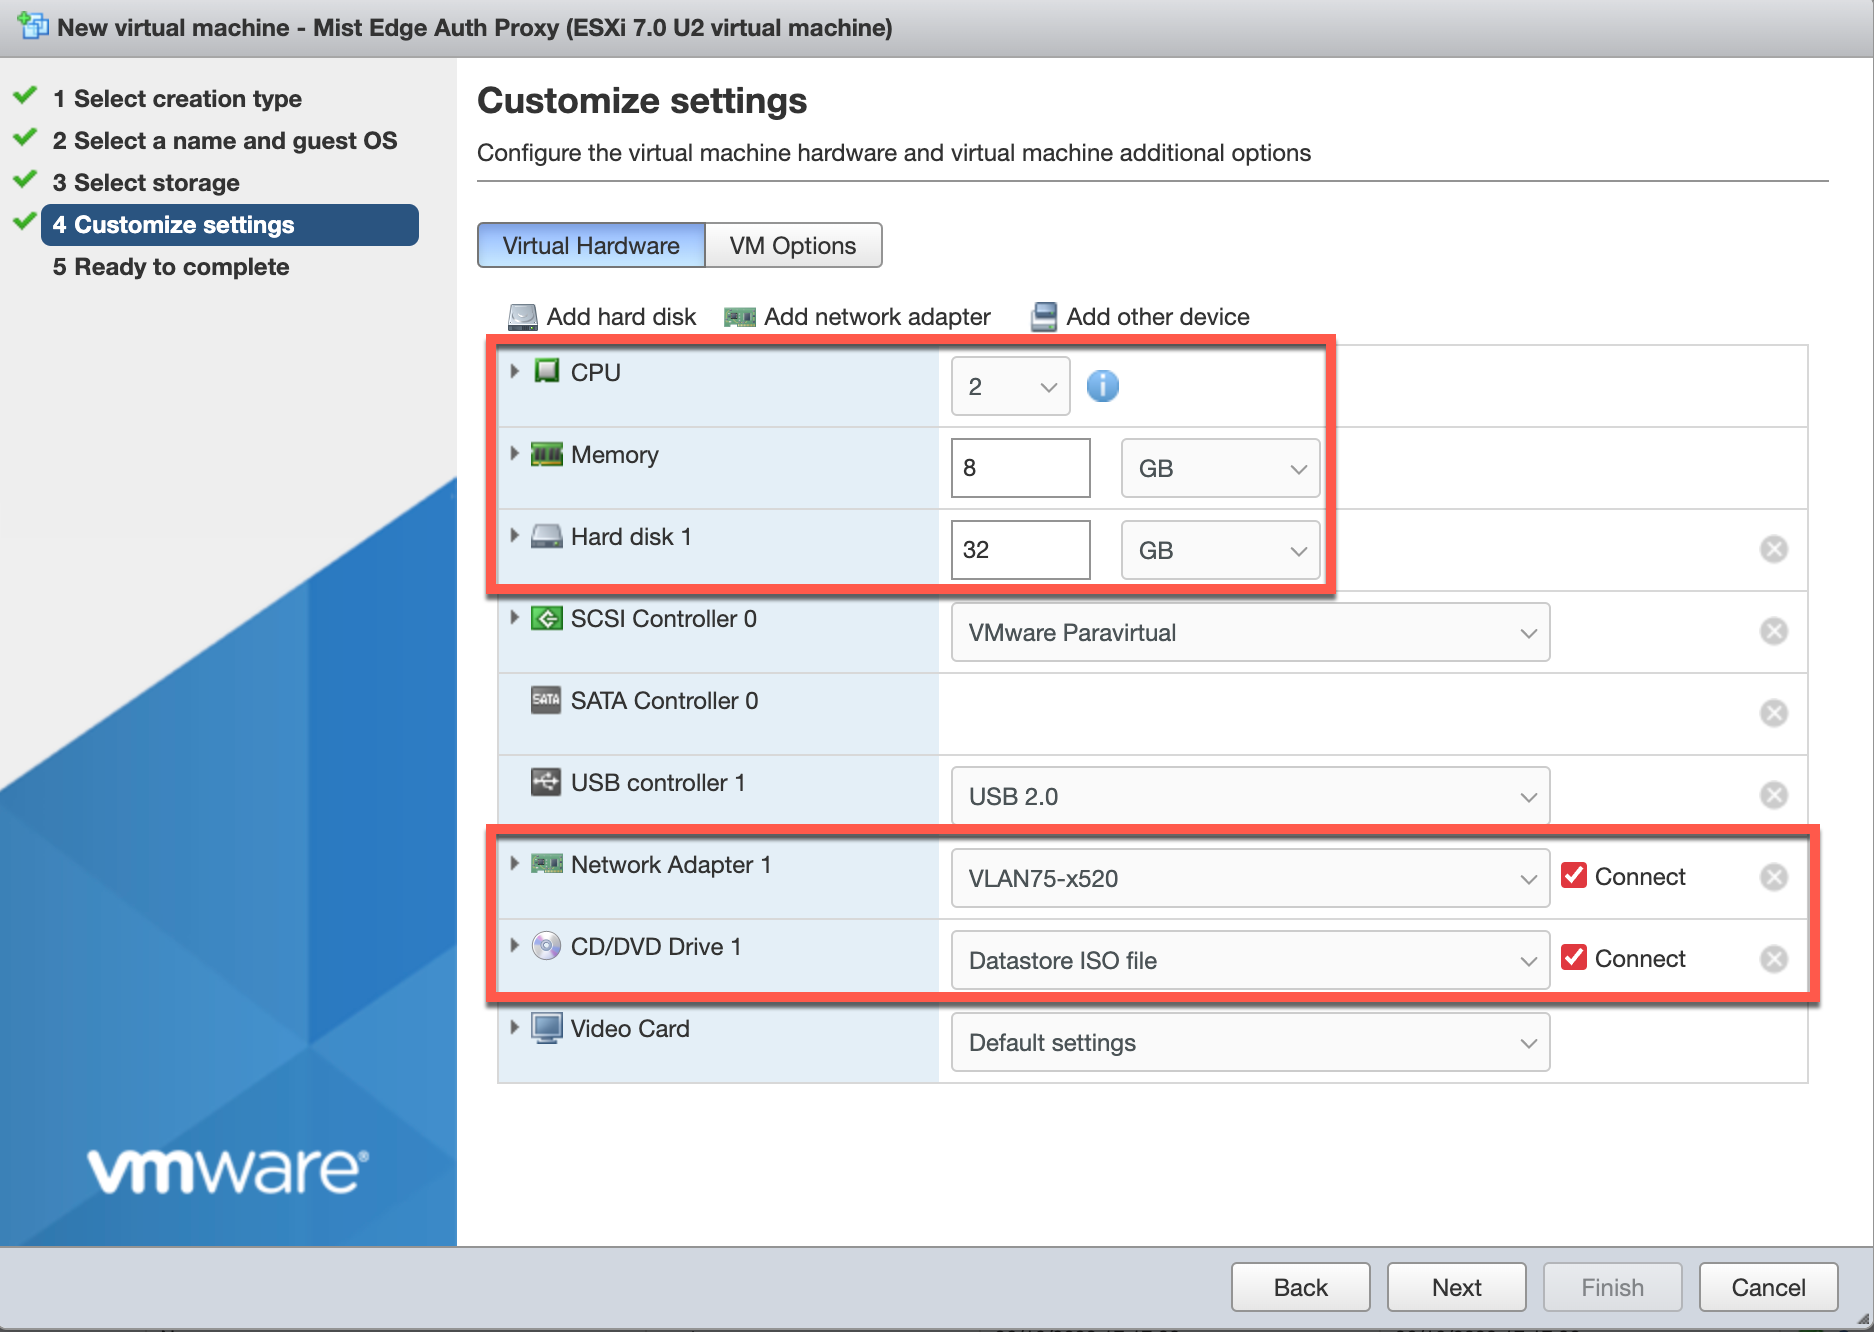
CPU: 2 vCPUs
RAM: 16GB RAM
Hard Disk: 32GB Thick Provisioned
NIC: Single virtual NIC
Mist Edge acting as Mist Auth Proxy

Virtual Mist Edge only requires OOBM Interface to act as Mist Auth Proxy.
OOBM IP would listen on RADIUS ports 1812 (authentication) and 1813 (accounting), and will communicate to Mist Access Assurance cloud at radsec.nac.mist.com over TCP Port 2083.
In addition, Mist Edge VM would also need access to the Mist Cloud EP-Terminator service, according to the following article
Mist Edge VM Installation
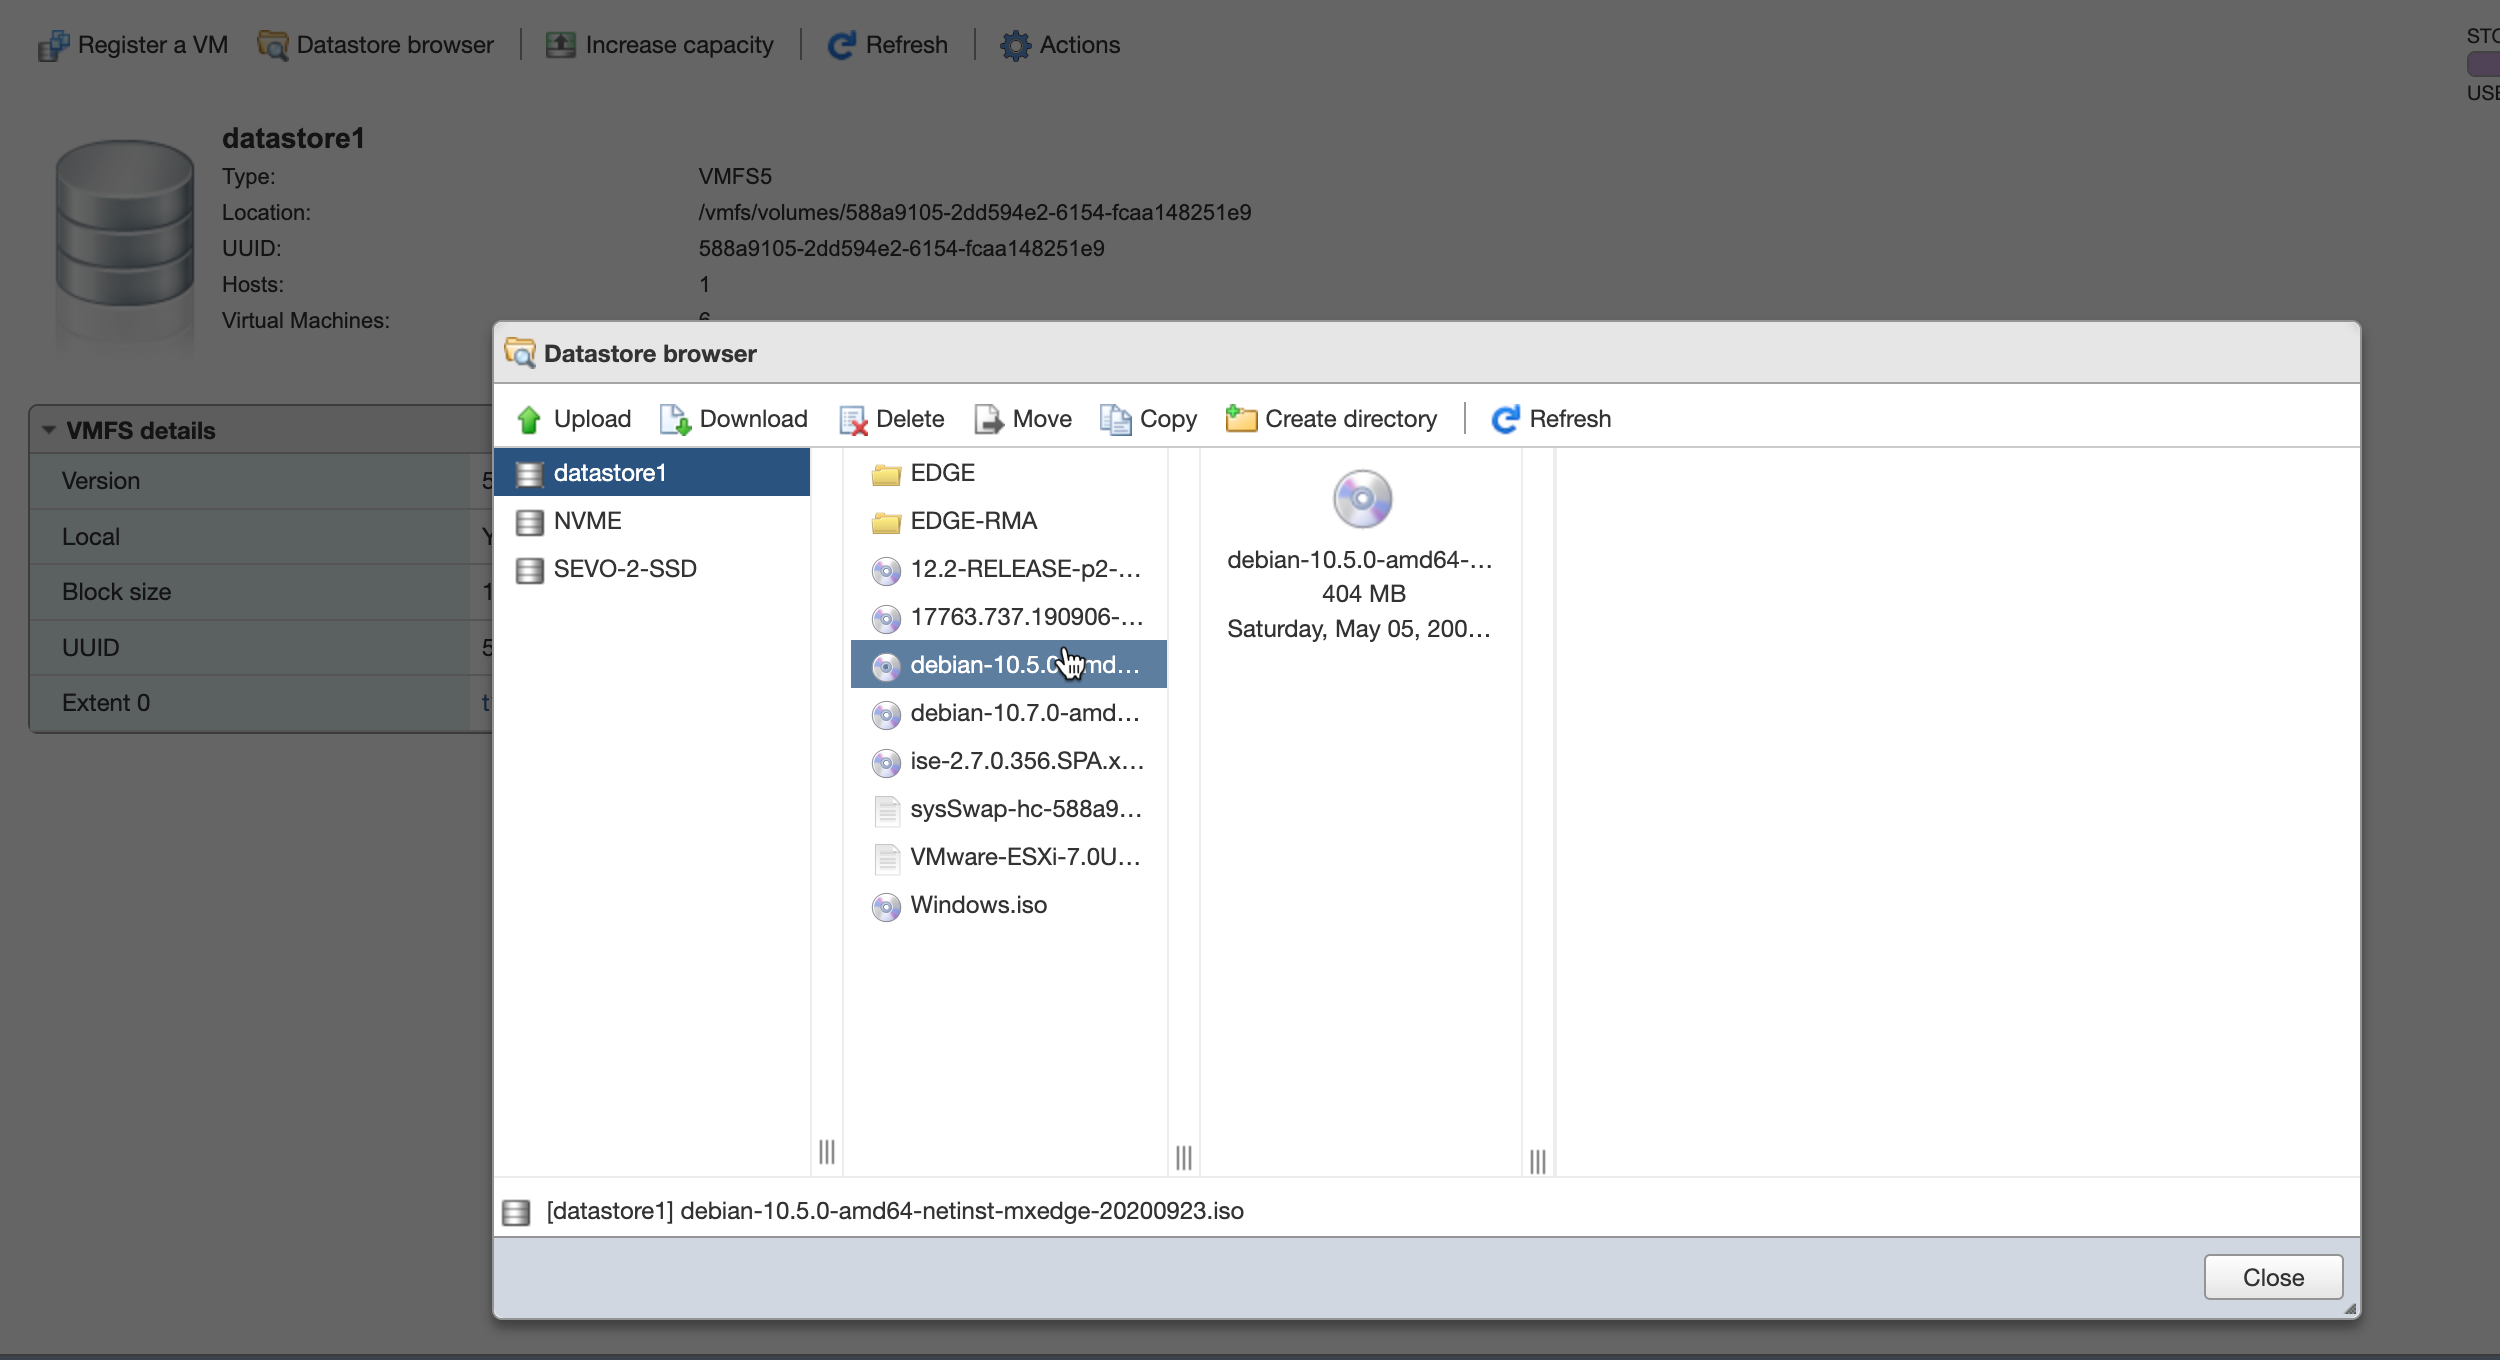
Download a Mist Edge ISO:
debian-10.5.0-amd64-netinst-mxedge-20200923.iso
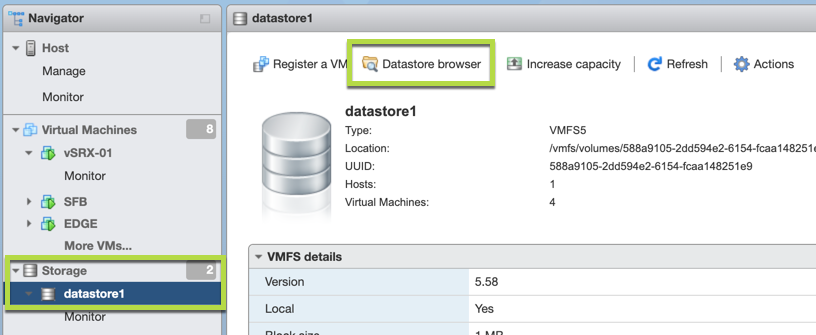
Upload the ISO to the VMWare storage:
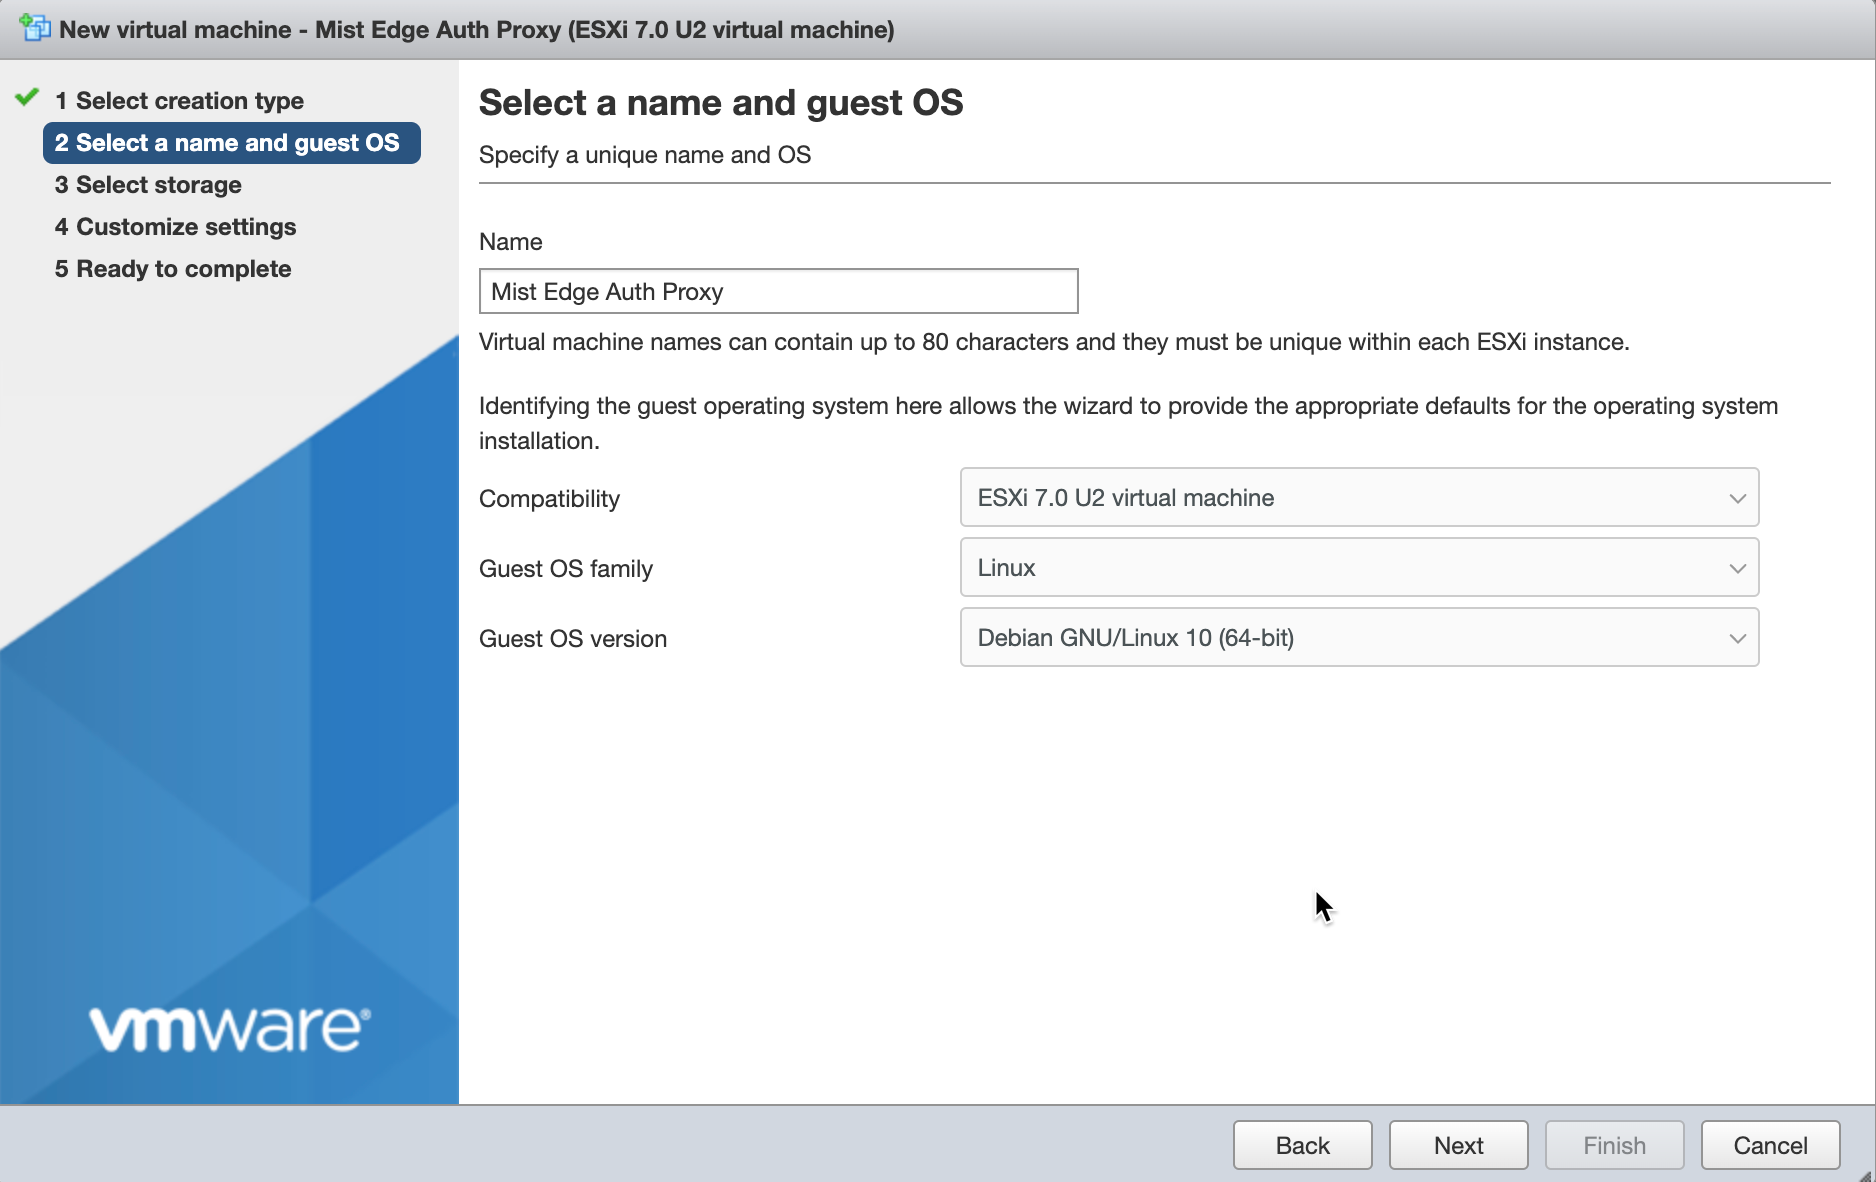
Create a new VM with the following settings:
Refer to Virtual MIST EDGE Footprint section for resource guidelines
Once the VM is created, click Finish and Start it.
Select ‘Install’ when the Mist Edge VM is powered on.
Please note the default selection on the Mist Edge VM install screen is ‘Graphical install’, change it to ‘Install’ and press Enter key.
After this selection no other input needed, and Mist Edge VM will get installed in a minute or two and will display ‘mxedge login:’ prompt.
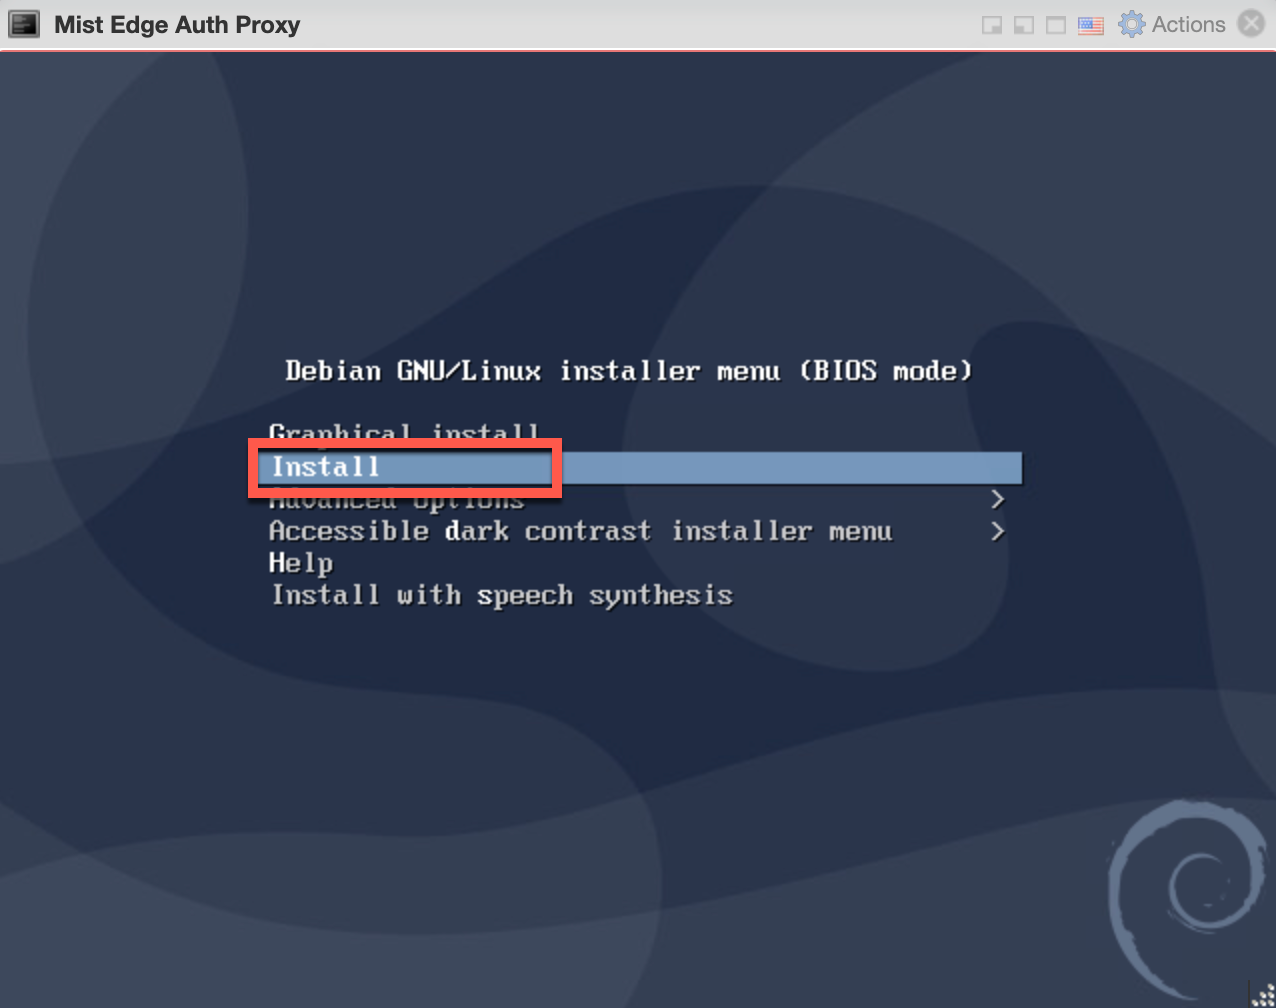
Note: Mist Edge VM install will stay 30 seconds to a minute on this screen and request to wait, since it will go ahead by itself. The VM installation is automated, there is no user intervention needed after one selects the Install option.
Step 3 – Create a Mist Edge on the Mist Dashboard
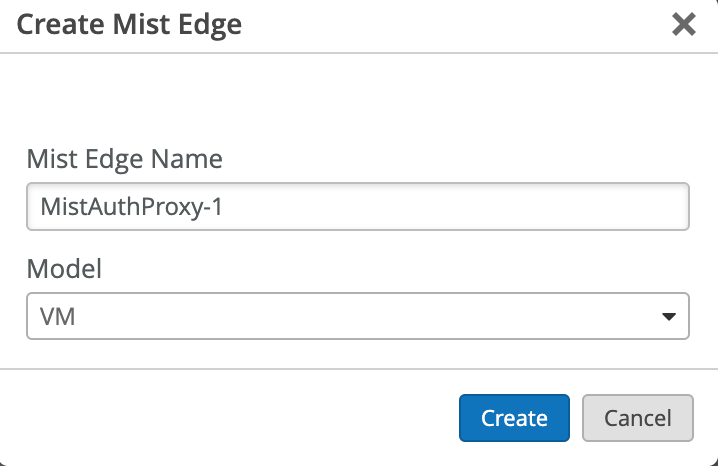
Register a new Mist Edge
Navigate to Organization > Mist Edges and select create Mist Edge:

Select VM as a model:
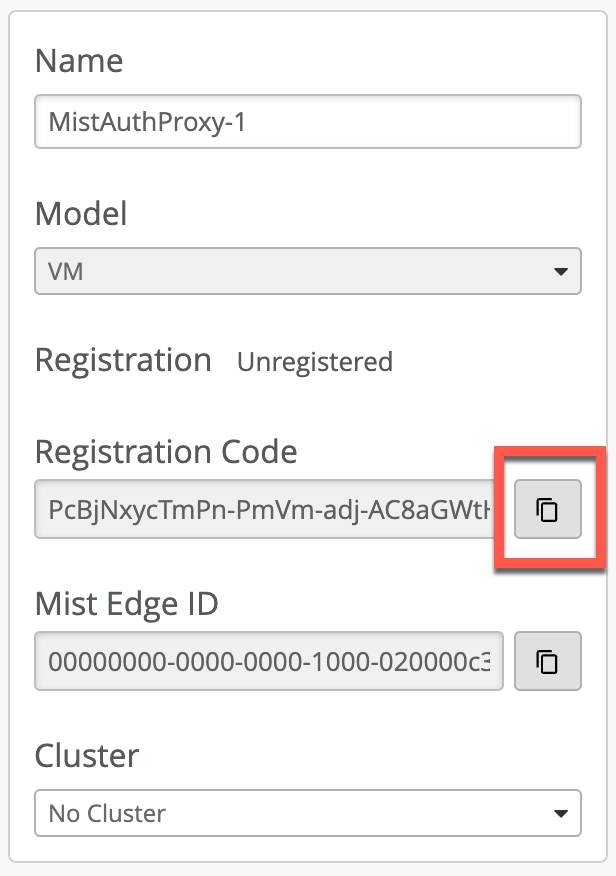
Edit and Configure your Mist Edge:
First, copy the registration code and save it:
Note that Out of Band management IP is by default provided through DHCP. Static OOBM IP assignment configuration is available from the cloud dashboard as shown below. We recommend static OOBM IP Address for Mist Auth Proxy use-case
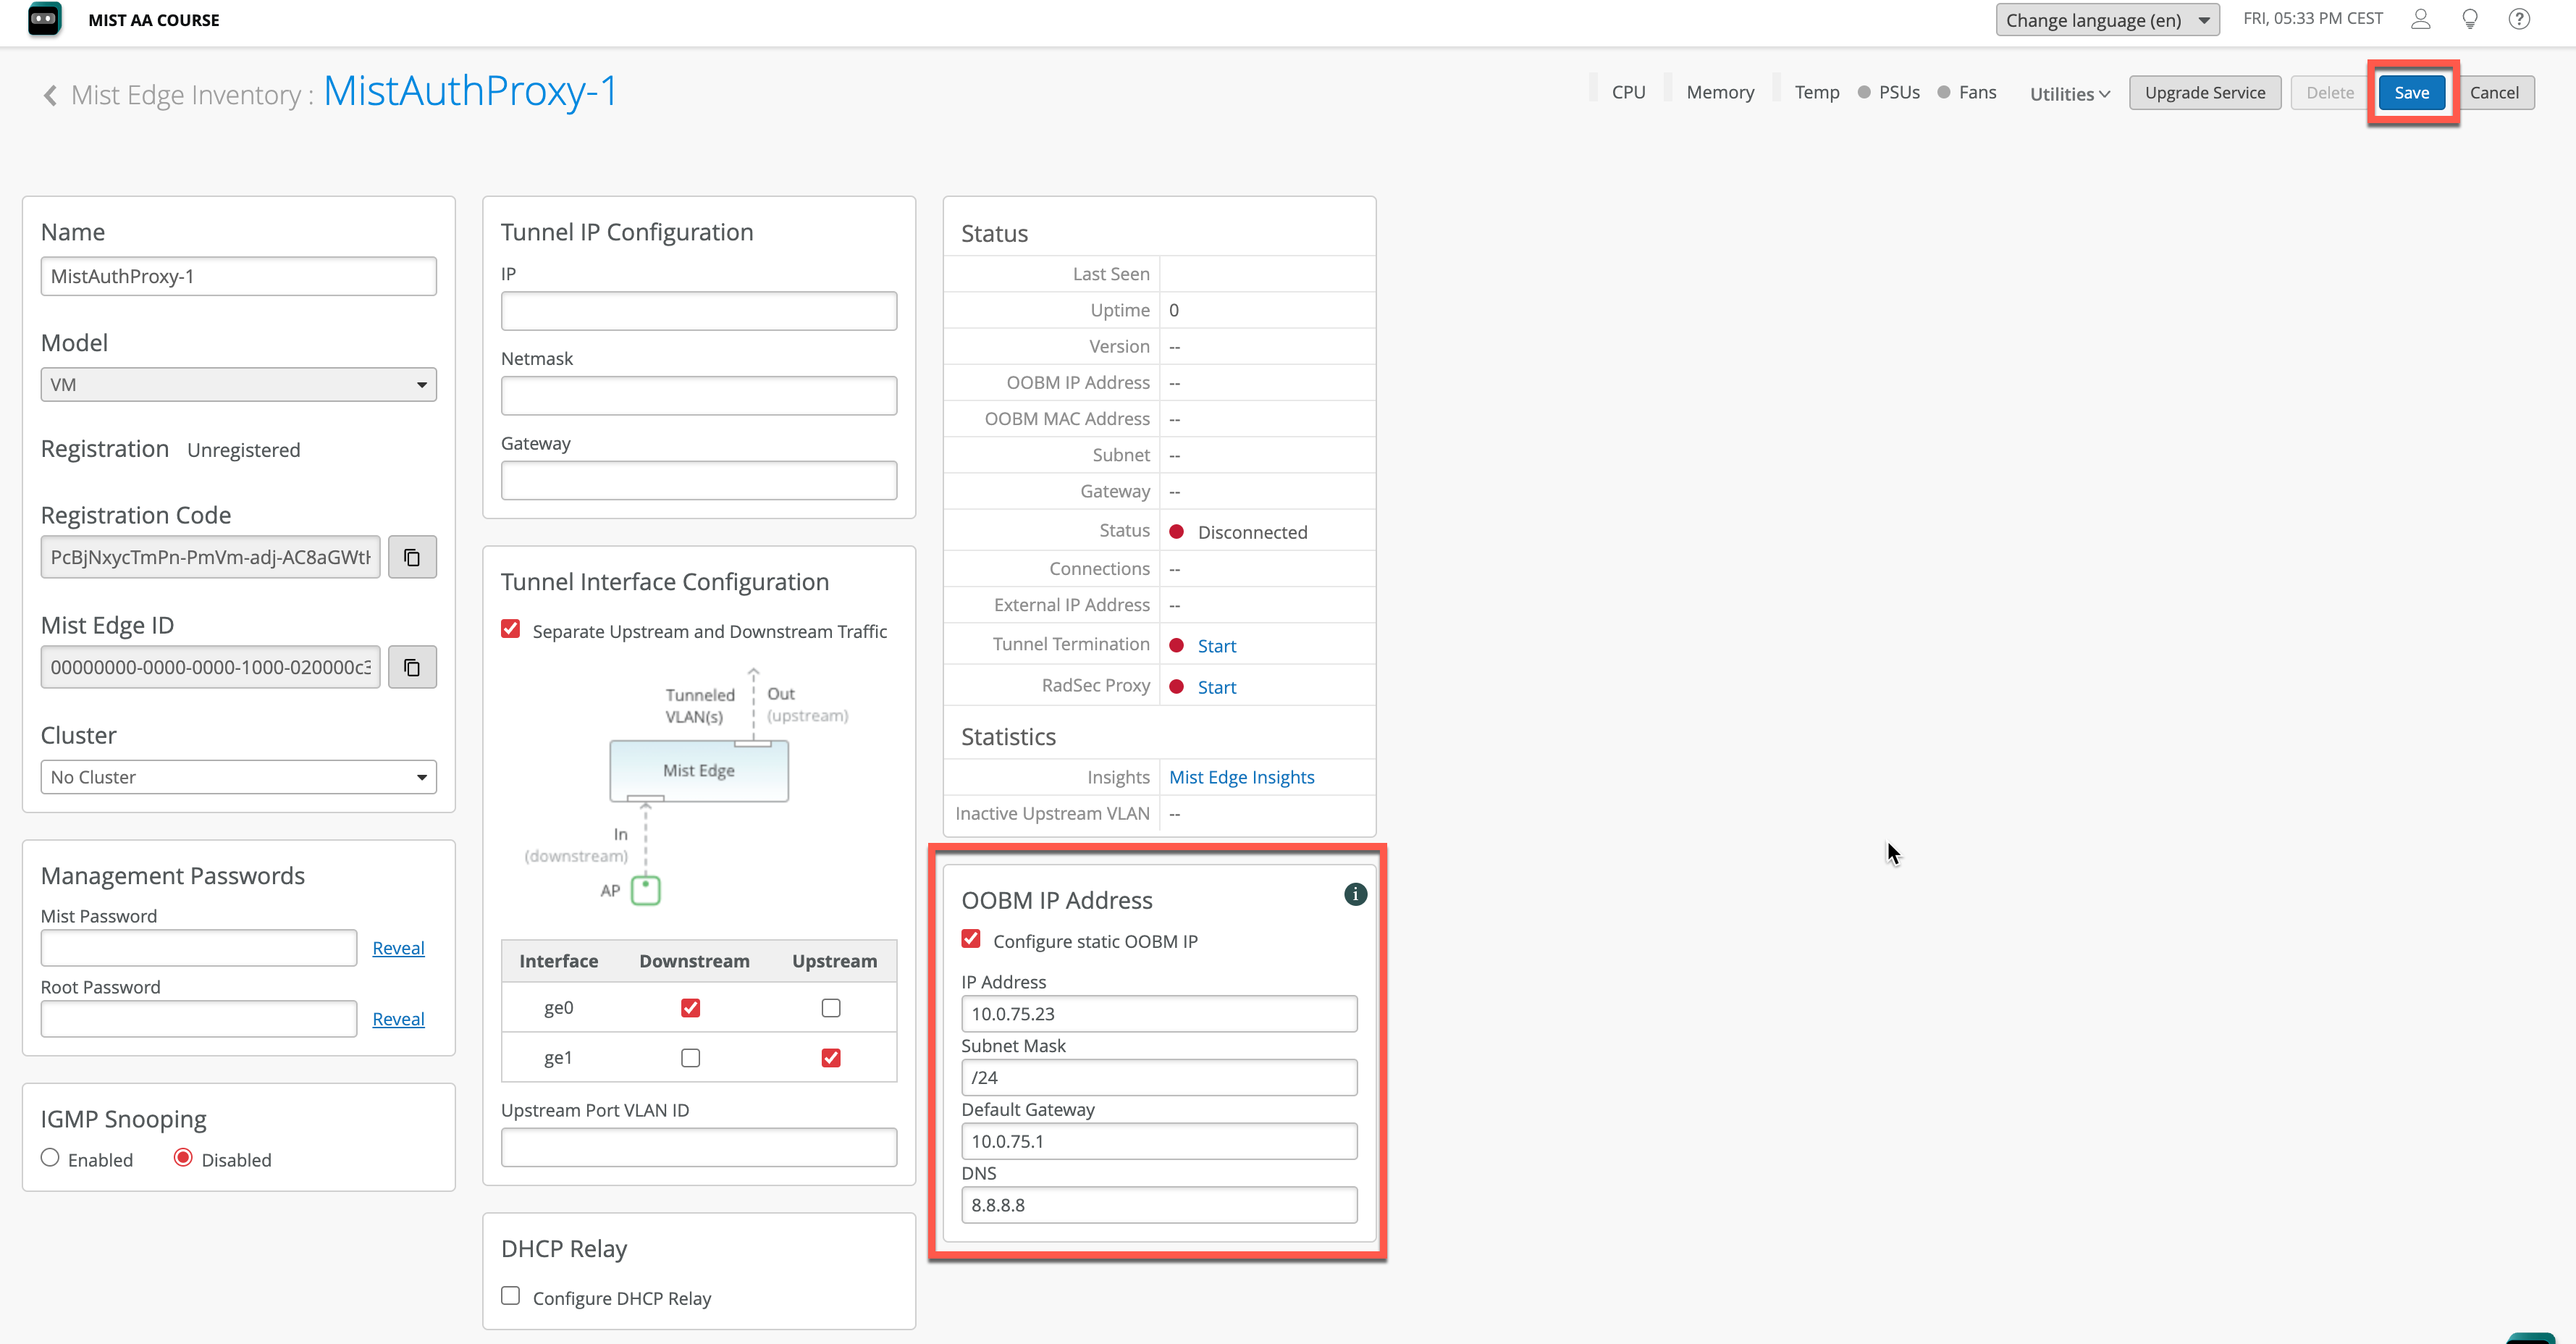
Note: for Mist Auth Proxy you do not need to configure Tunnel IP interface.
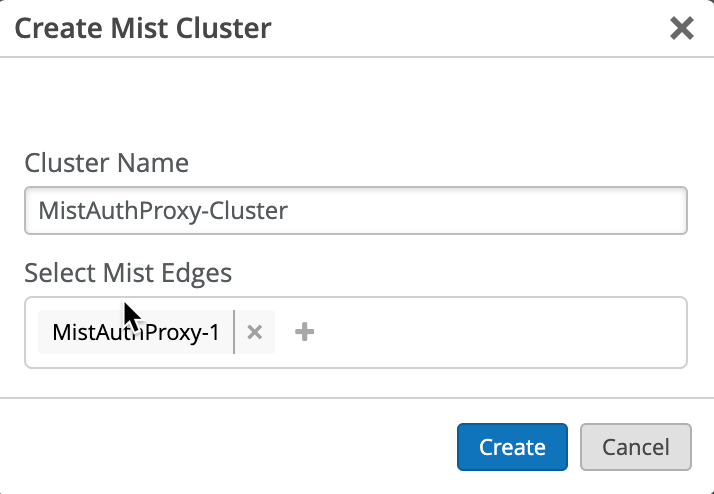
Step 4 – Create Mist Edge Cluster and assign Mist Edge
Create a Mist Edge Cluster:

Step 5 – Provision your VM Mist Edge
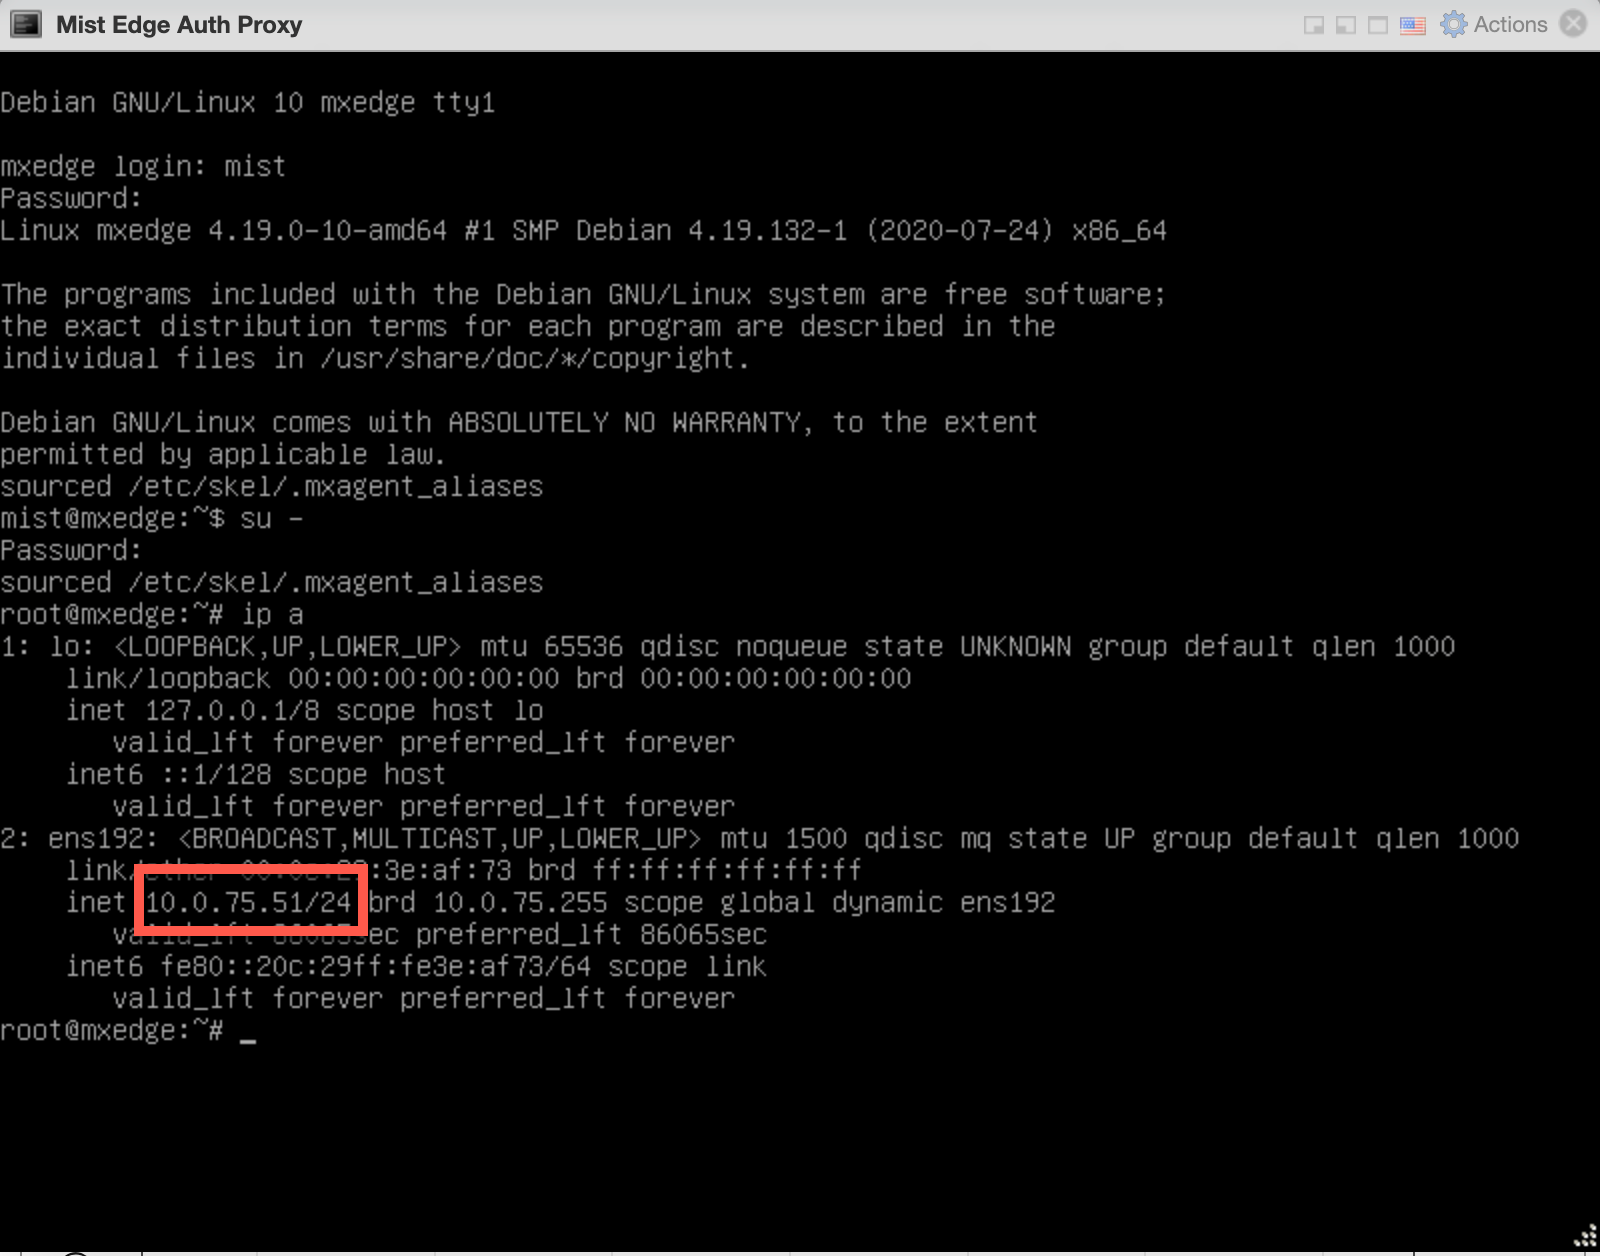
Login to the Mist Edge VM Console
Once your Mist Edge VM boots up for the first time, login to the VM using the following credentials:
Username: mist
Password: Mist@1234
Root (su -) password: mist
Get the current management IP address (it will be obtained via DHCP) by issuing ‘ip a’ command, the Out of Band management interface will be ens192:
At this point you can SSH into the Mist Edge using the mist user.
ssh mist@<OOBM-IP>, password is Mist@1234
Switch to root by issuing ‘su –’ password is mist.
SSH into the Mist Edge and Bootstrap it:
To bootstrap the mist edge and onboard it to the Mist Cloud, please issue the following commands from CLI:
mist@mxedge:~$ su –
Password: mist
root@mxedge:~# apt-get update
root@mxedge:~# mxagent-helper configure --registration-code <paste registration code from step 3>
At the end of the process, you should see:
registration finished successfully. (regfile at /var/lib/mxagent/mxagent.reg
Once the above process is complete the Mist Edge will automatically reboot. At this point there is no need to SSH into the Mist Edge anymore. It will pull the config from the Mist Cloud.
Once the Mist Edge is rebooted it will show up on the dashboard in “Connected” state with orange icon:
