Overview
Mist Access Assurance allows you to integrate our authentication service natively into Okta directory using OAuth. How can you leverage OKTA as Identity Provider in combination with Mist Access Assurance?
- User authentication via EAP-TTLS
- Authenticate User by doing delegated authentication checking username and password via OAuth
- Obtain user group memberships to leverage them in Auth Policies
- Obtain user account state information (active / suspended)
- User authorization via EAP-TLS or EAP-TTLS
- Obtain user account state information (active / suspended)
- Obtain user group memberships to leverage them in Auth Policies
Okta Dashboard
First, get your Okta tenant ID and save it. You can see it if you click in the top right corner of your screen in the Okta dashboard:
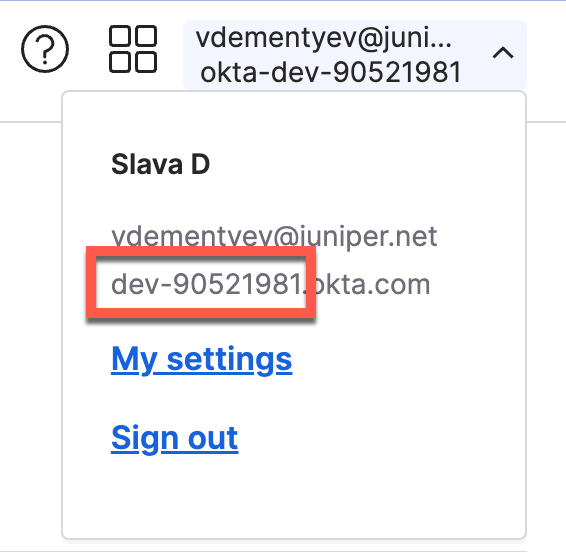
Note: Tenant ID must not include okta.com
Section 1: OKTA Resource Owner Password Credential App Integration
Step 1 – Create App Integration
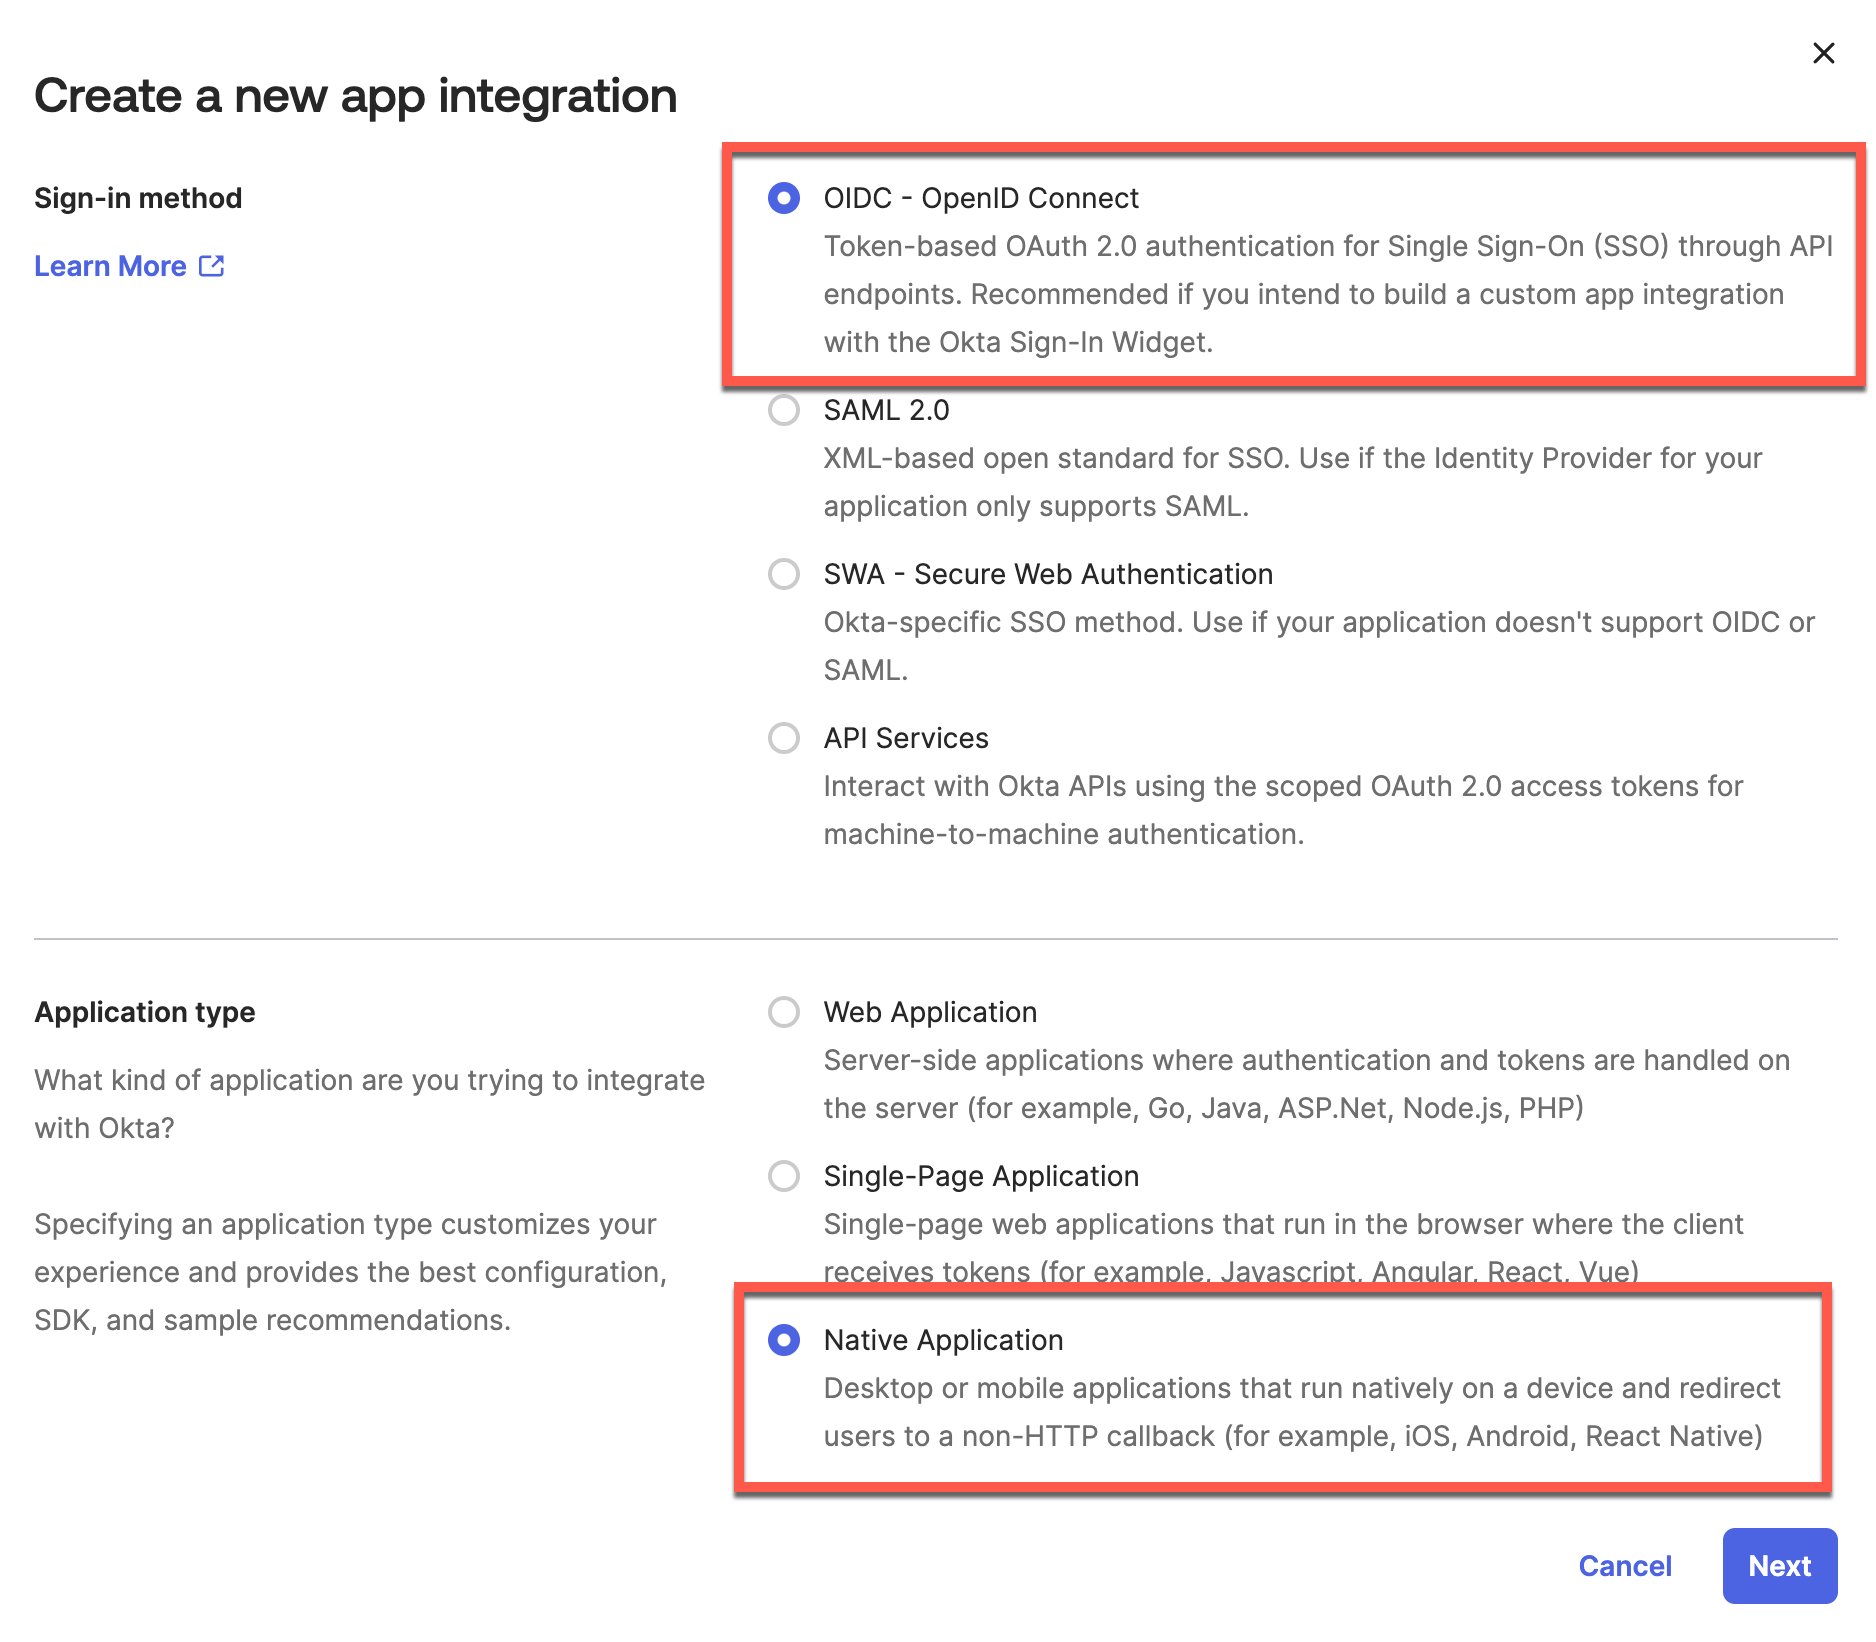
Navigate to Applications > Create New App Integration
Step 2 – Configure App Grant type and user assignments:
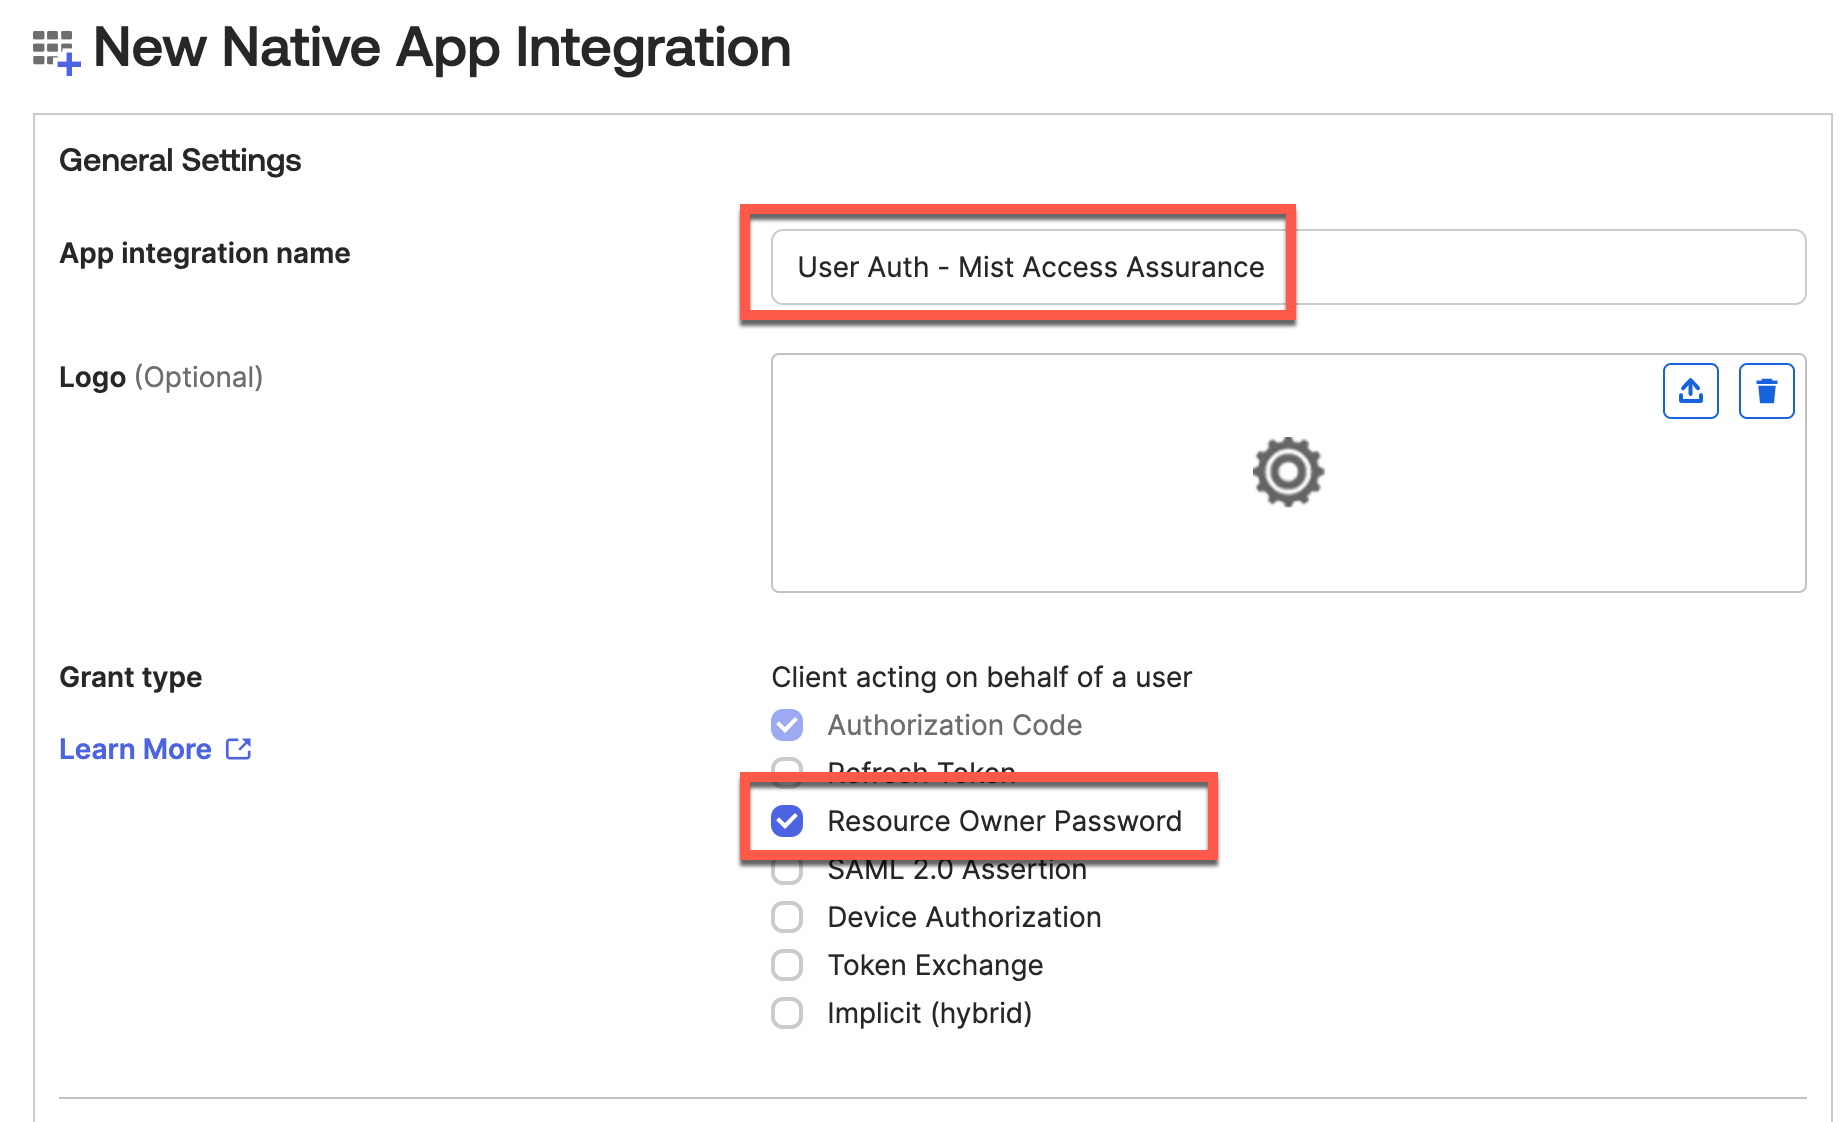
Name your application, select Resource Owner Password Grant Type:
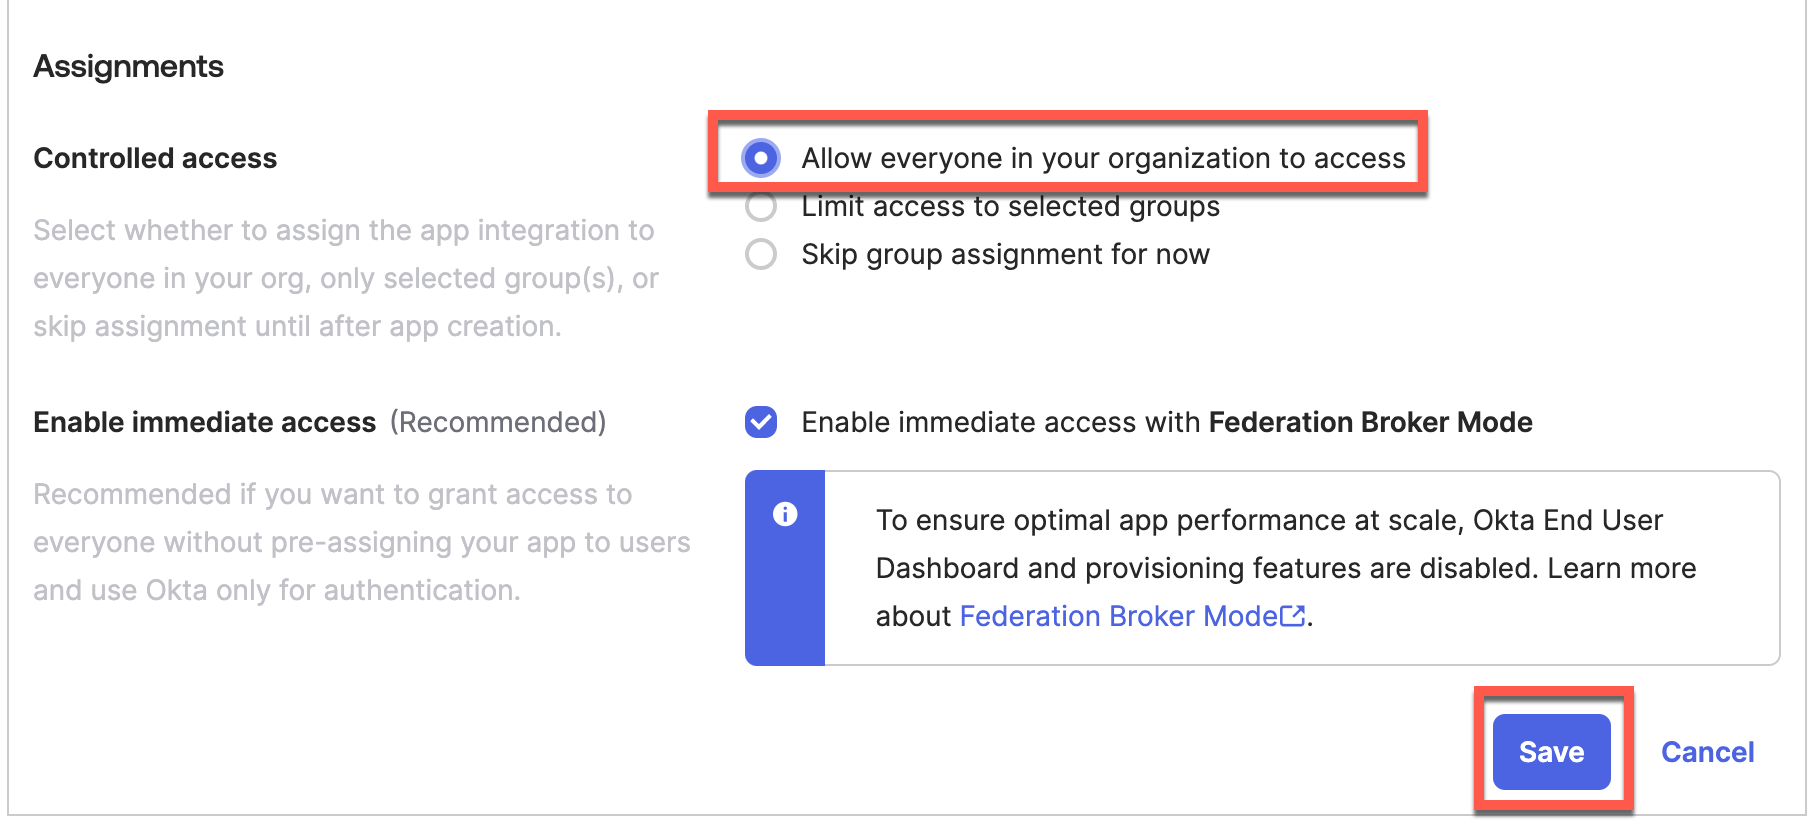
Select which users will allow to authenticate via this app:
Step 3 – Generate Client ID and Client Secret:
Let’s generate Client Secret. Under General tab, click on Edit button.
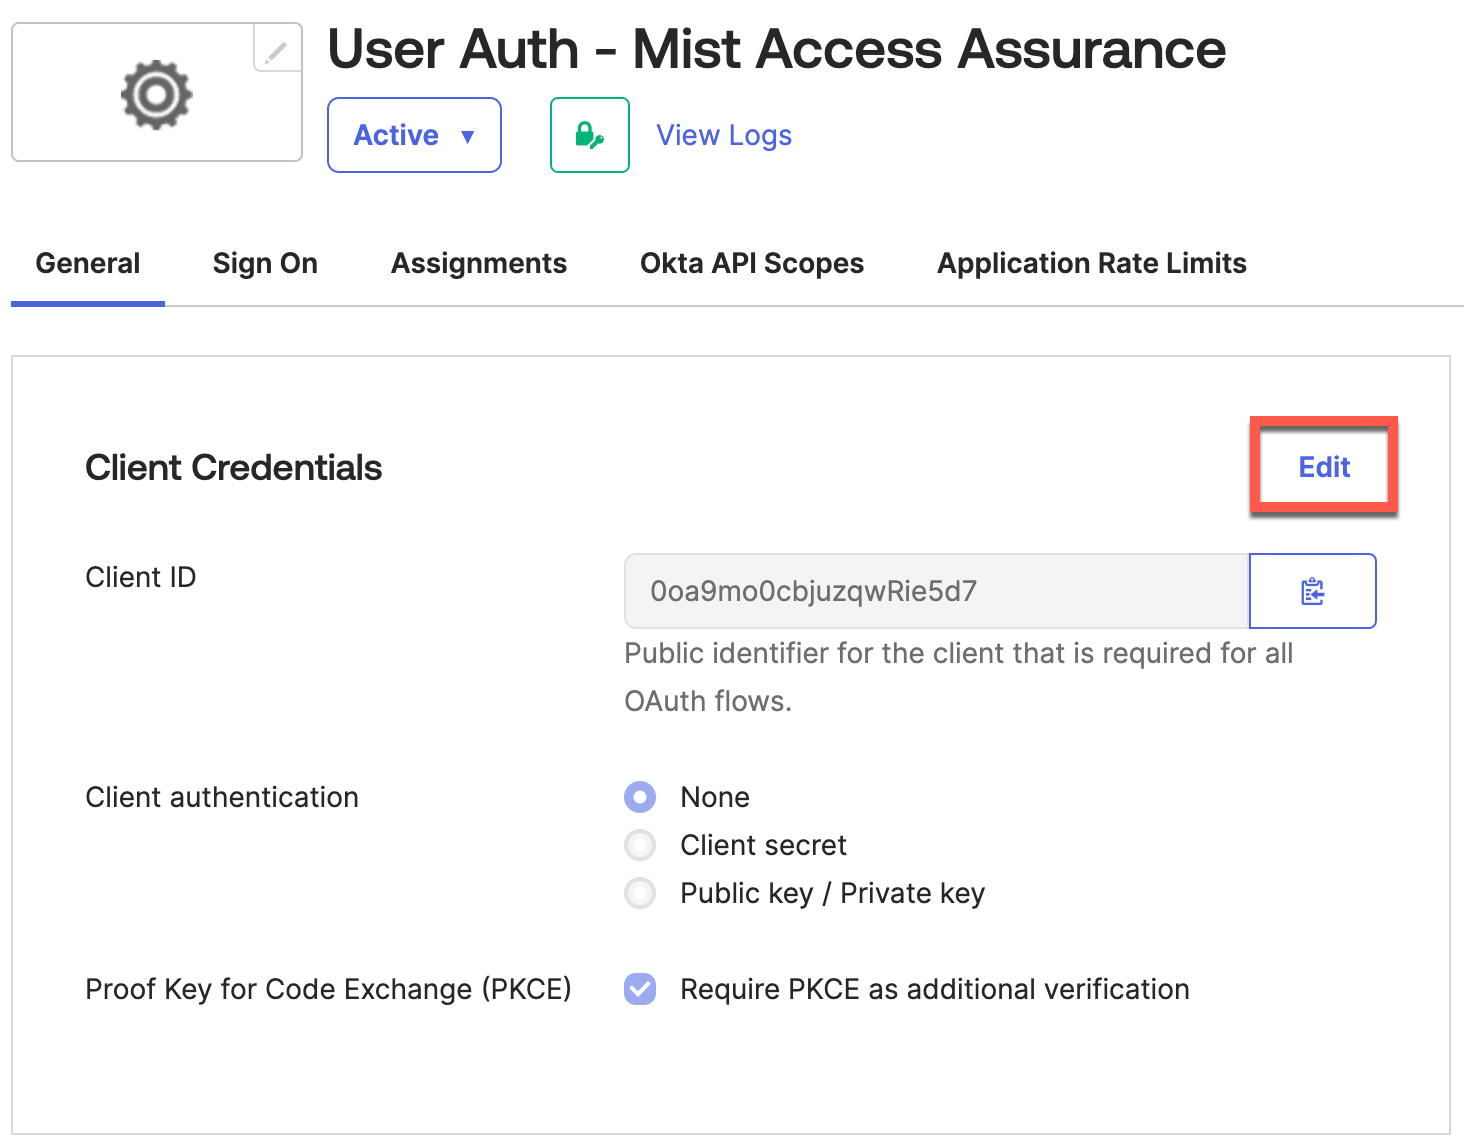
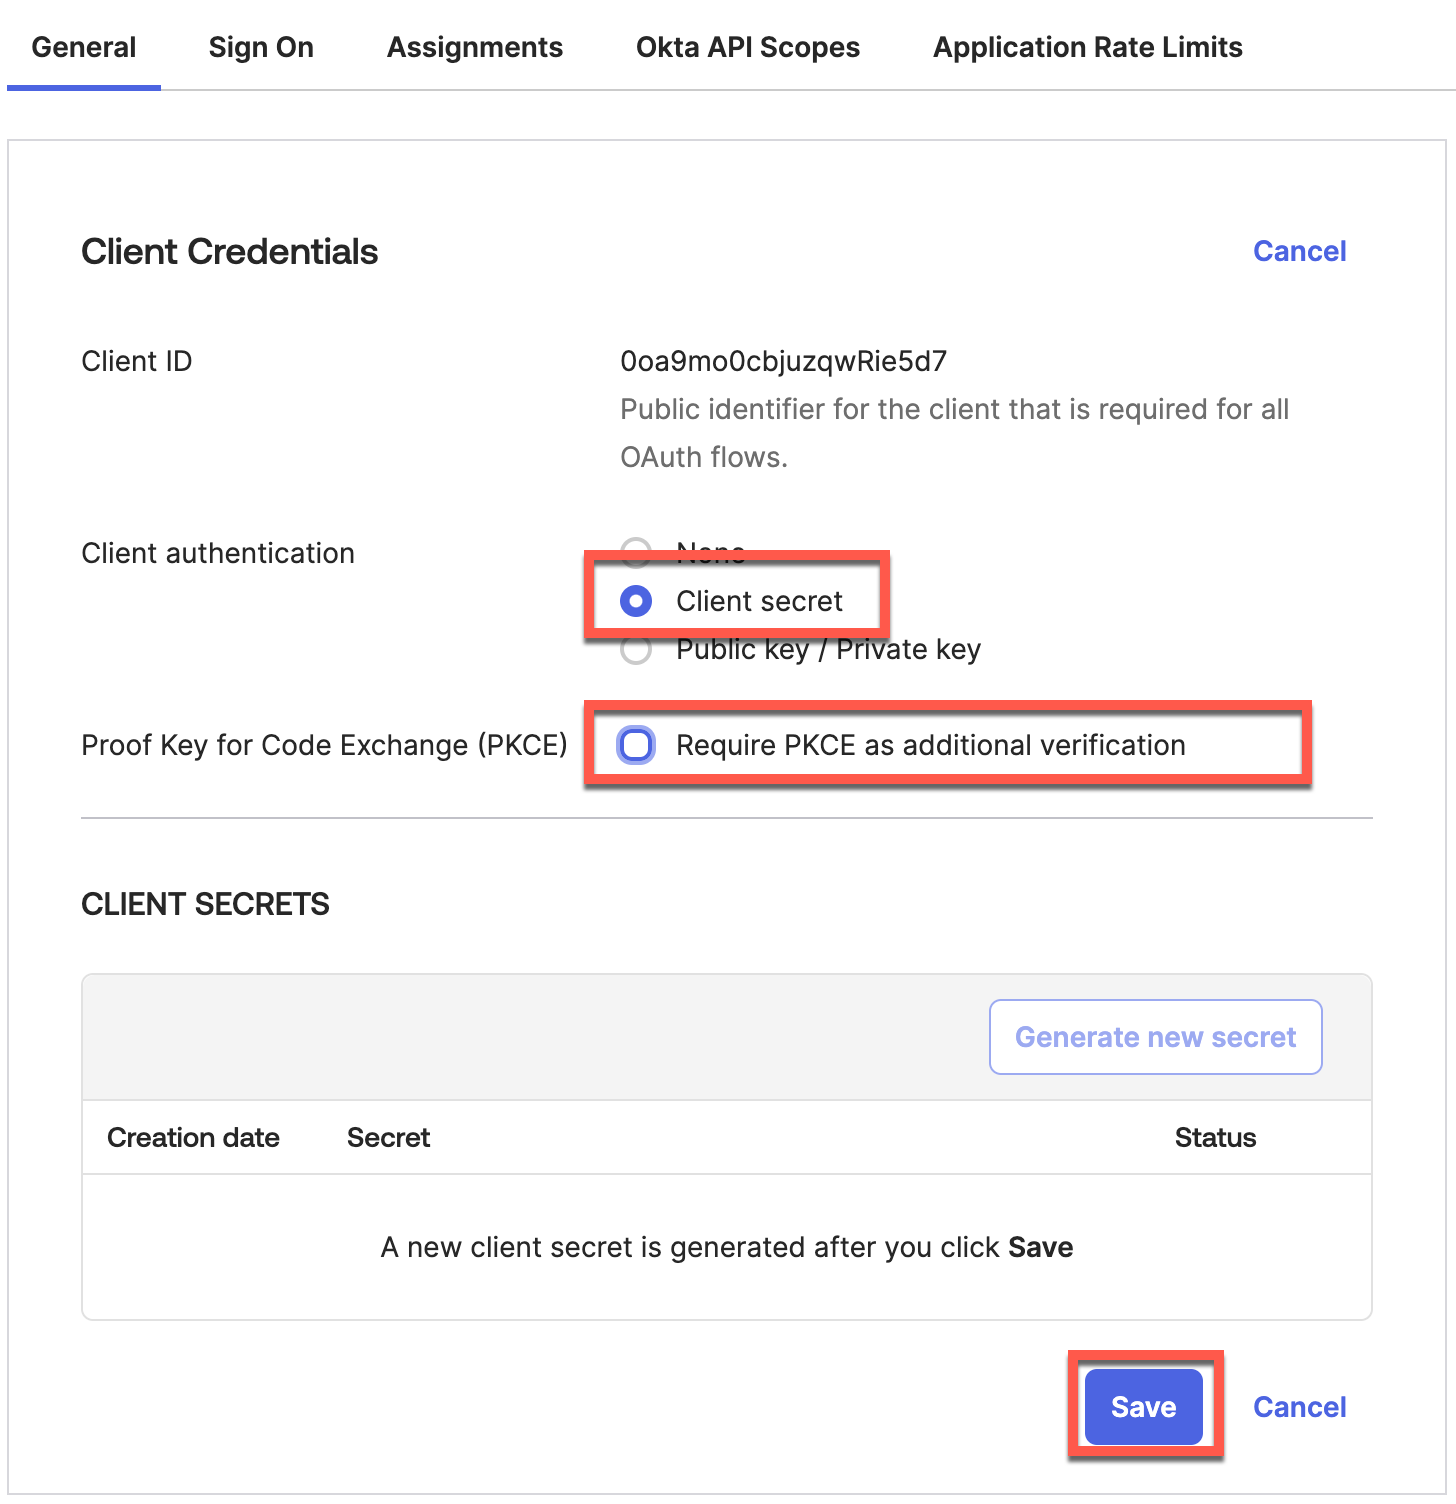
Set Client Authentication as Client Secret.
Copy generated Client ID and Client Secret:

Step 4 – Configure App API Scopes
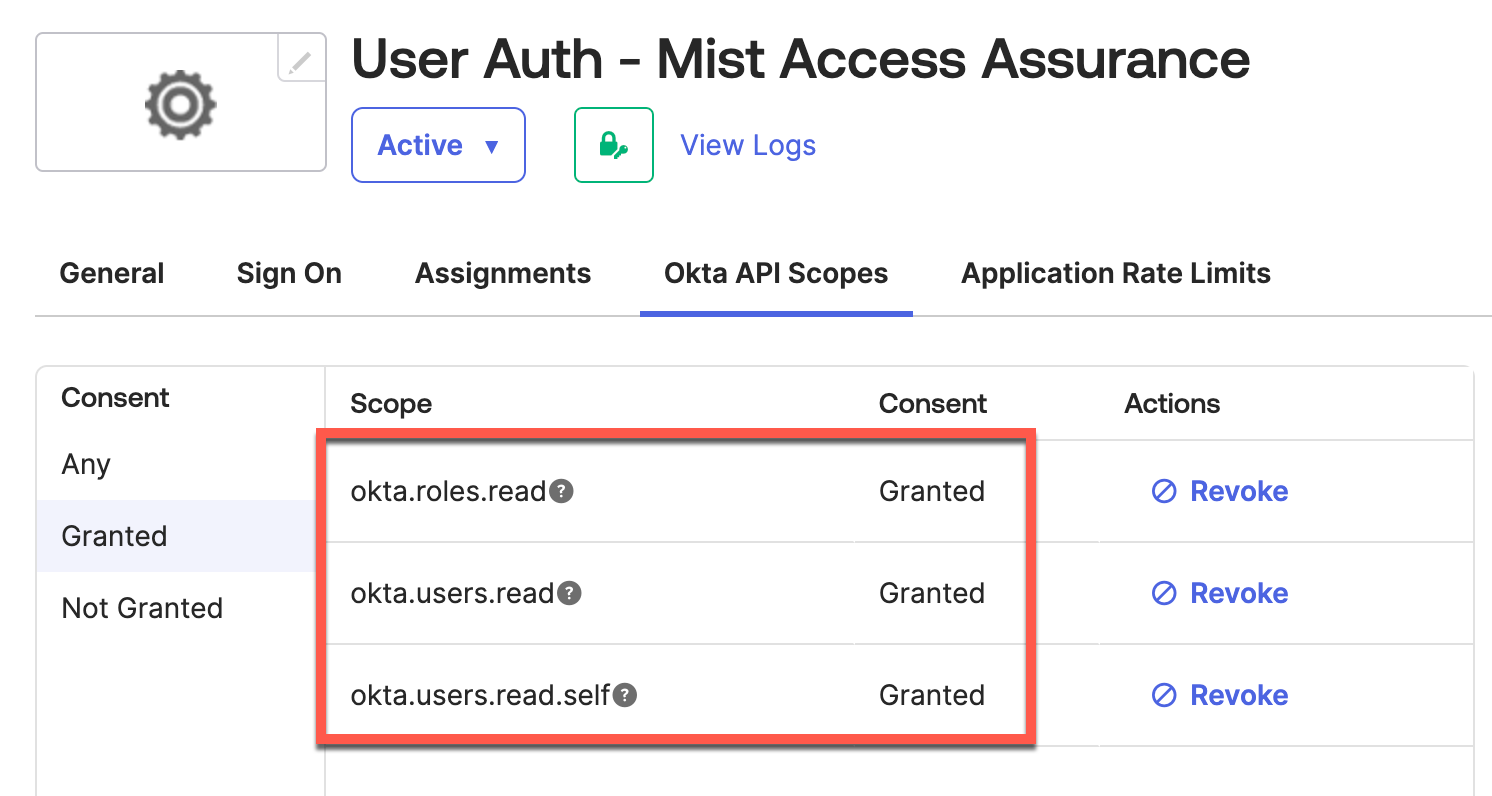
Go to Okta API Scopes to allow app following read permissions:
Section 2: OKTA Client Credential App Integration
Step 1 – Create App Integration
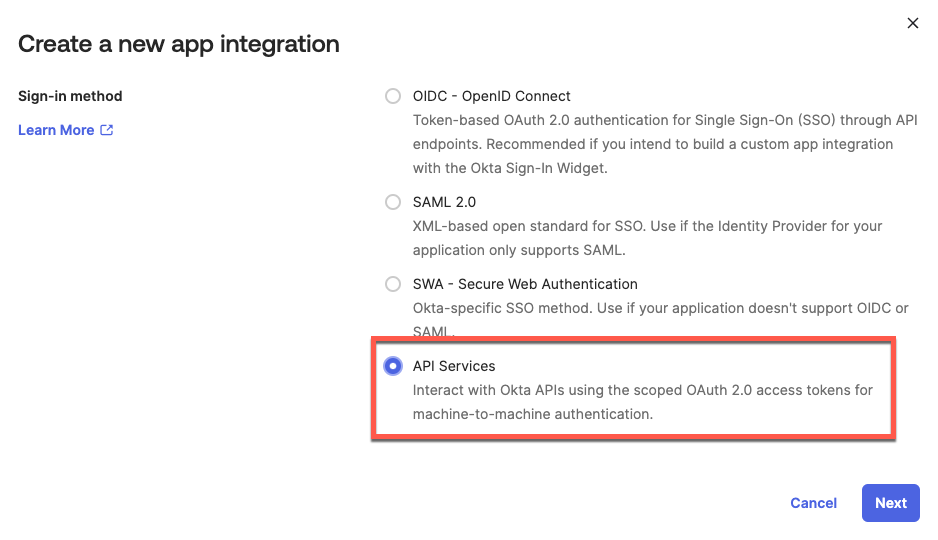
Navigate to Applications > Create New App Integration. Select API Services as sign-in method.
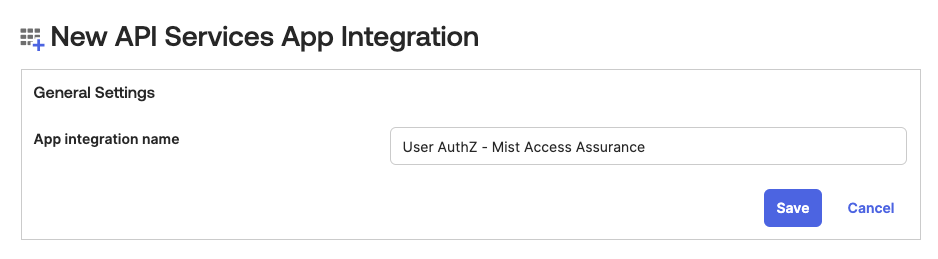
Name your application and click Save:
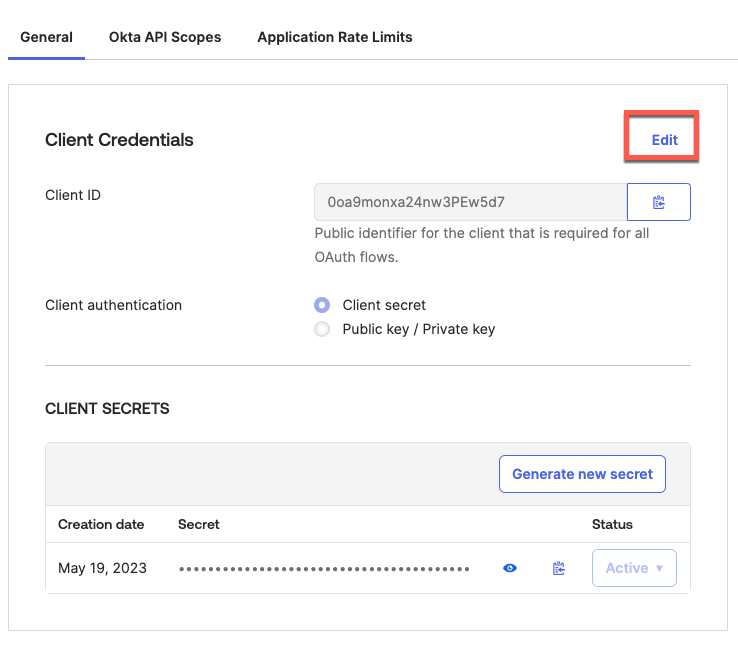
Step 2 – Generate Client ID and Private Key
On the next screen click on Edit to generate a private Key:
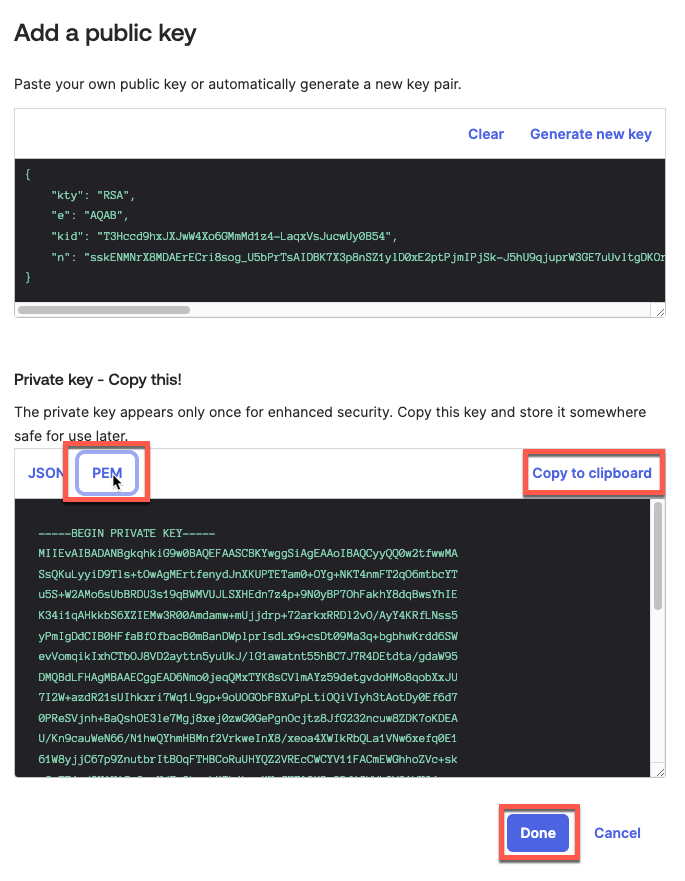
Set Client Authentication as Public key / Private key, then click on Add key:
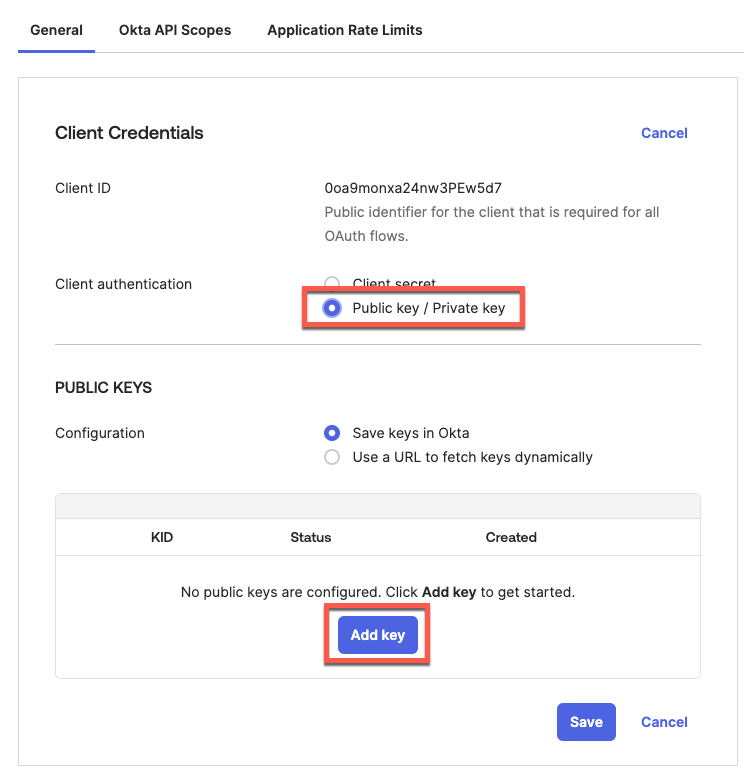
First select format as PEM, then Copy the result private key (save it in a safe place), then click Done.
On the next screen click Save:

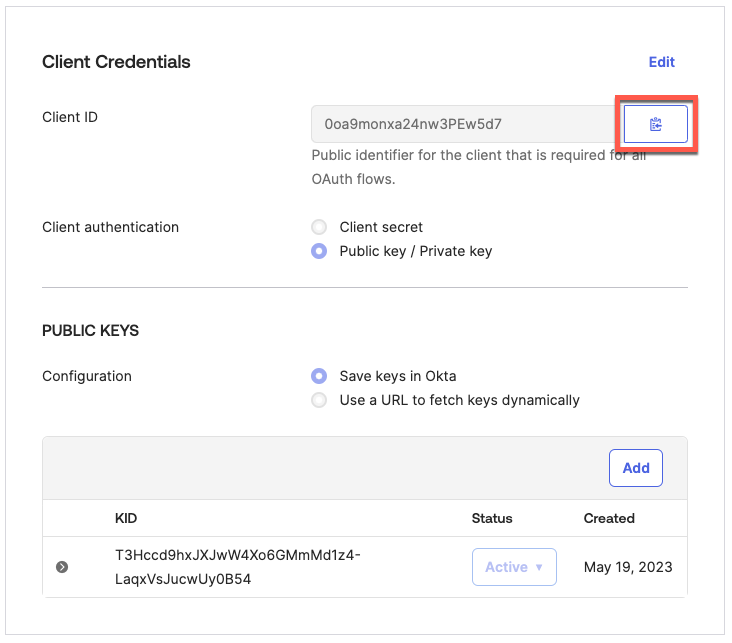
Do not forget to copy and save your Client ID:
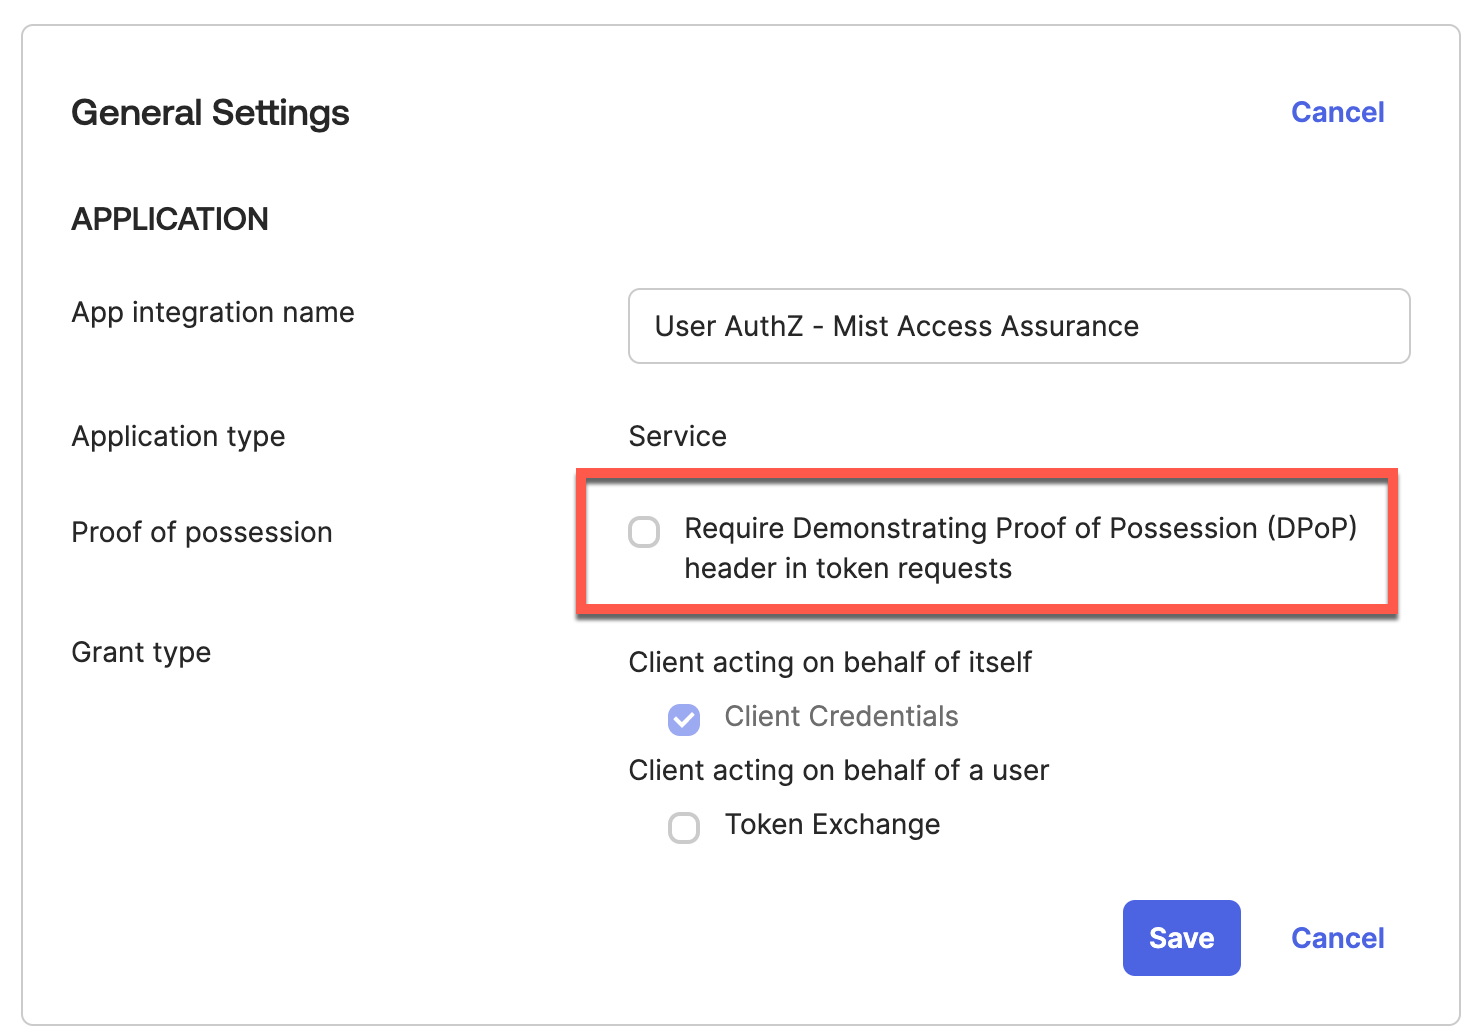
Scroll down until you see General Settings section, click Edit and uncheck “Require Demonstrating Proof of Possession (DPoP) header in token requests”:
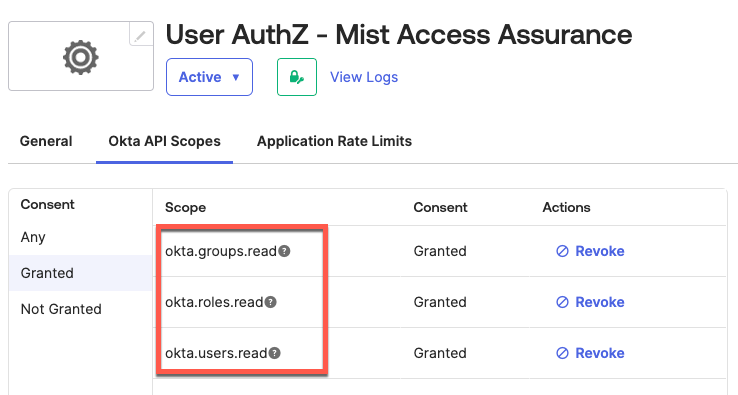
Step 3 – Configure App API Scopes
Go to Okta API Scopes tab and grant the following API permissions:
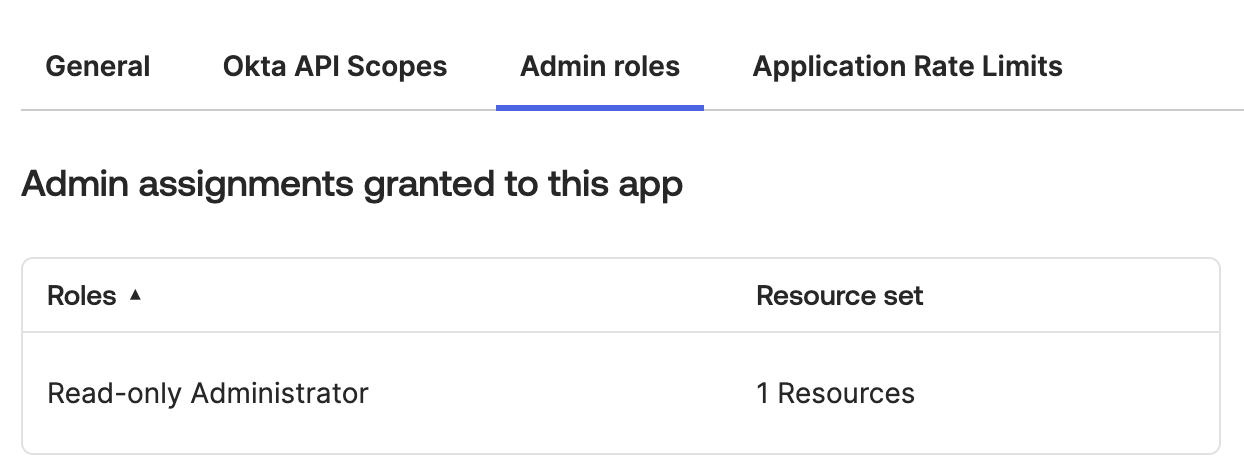
Step 4 – Assign Admin Role to App
Navigate to Admin roles tab and assign Read-only Administrator role, otherwise app will not be able to read any data via API:
Mist Dashboard
First get your Okta tenant ID into the new IDP under Mist Dashboard.
Step 1 – Add Identity Provider
In Mist dashboard navigate to Organization > Access > Identity Providers > Add
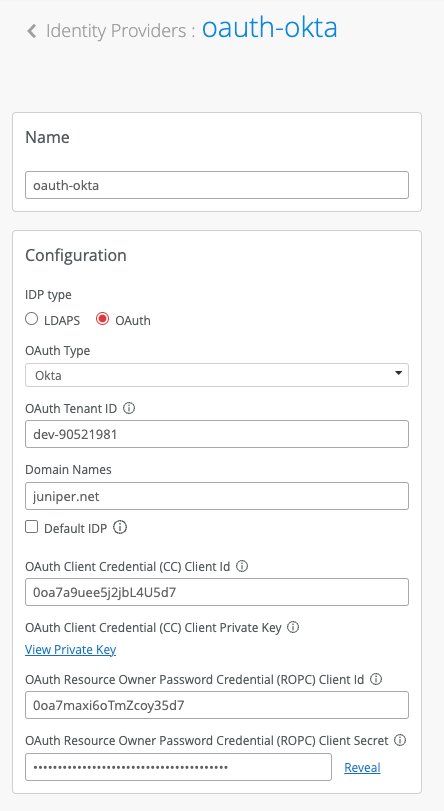
Configure IDP as follows:
IDP Type: OAuth
OAuth Type: Okta
OAuth Tenant ID: Okta Tenant ID (take a look at the very beginning of this guide)
Domain Names: Your Okta users domain name(s), e.g. company.com
OAuth CC Client ID: Client ID you copied in Section 2 / Step 2
OAuth CC Private Key: Private key you copied in Section 2 / Step 2
OAuth ROPC Client ID: Client ID from Section 1 / Step 3 of this guide
OAuth ROPC Client Secret: Secret from Section 1 / Step 3 of this guide
Validation
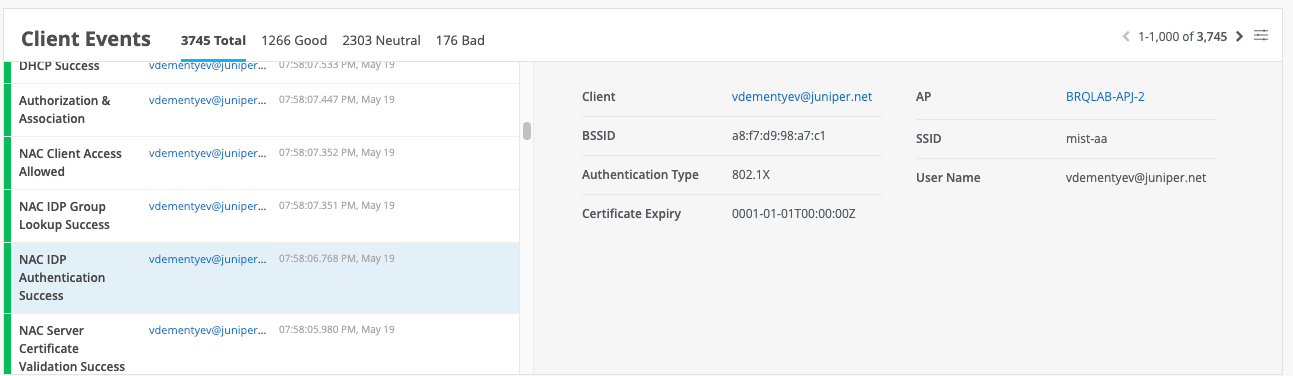
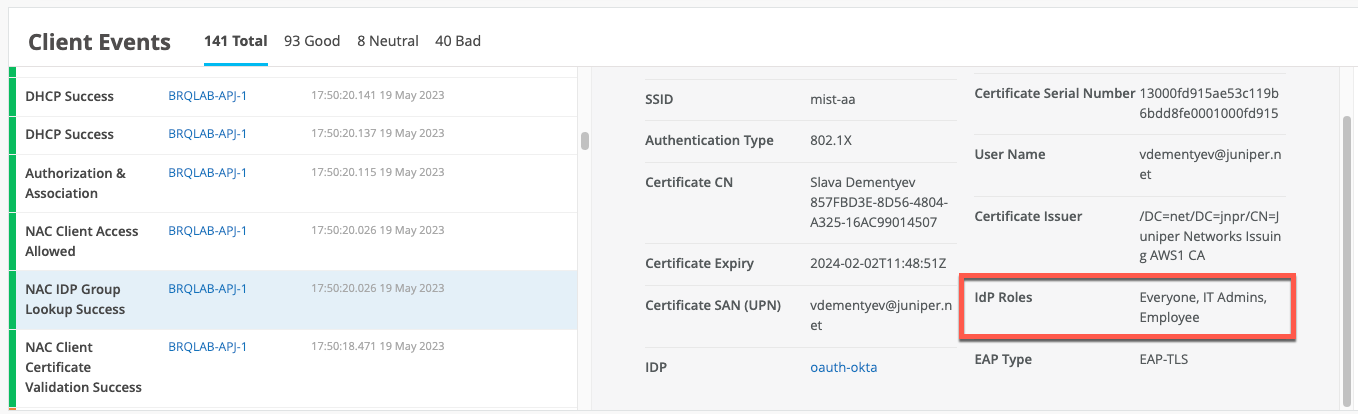
In case of a successful EAP-TLS client authentication with a subsequent IDP lookup against Okta, you should see a NAC Group Lookup Success event with IDP Roles fetched from Okta:
In case of a successful EAP-TTLS authentication, you would also see a successful NAC IDP Authentication Success event indicating that user credentials have been verified by Okta: