Marvis
Conversational Interface
Please note that this feature requires a valid SUB-VNA license
We are excited to announce the next generation of our Marvis Virtual Network Assistant with advanced AI capabilities to better understand and answer questions about your network health. Our new Marvis Conversational Interface (CI) can answer network related questions in an easily accessible chat window that can be found anywhere within the Mist portal. This reduces the dependency on dashboards and the need to learn a new system.
Currently we are in the first phase of this rollout – the following queries are supported today:
- Troubleshoot a wireless client
- Troubleshoot an access point (AP)
- Troubleshoot a Juniper switch
- Troubleshoot a site
- Org wide device search
- Quick & easy access to Mist documentation
Use the Conversational Interface by asking Marvis questions in a natural language format. We are constantly putting in effort to improve the functionality and supported phrases to give you the best possible experience and not have to memorize specific wording/phrases. Here are some examples of different ways you can ask your questions:
- how is <client>
- tshoot client <client>
- troubleshoot <client_mac>
- <client> not working
- unhappy users
- unhappy users at <site>
- how is <partial name of switch>
- <AP mac>
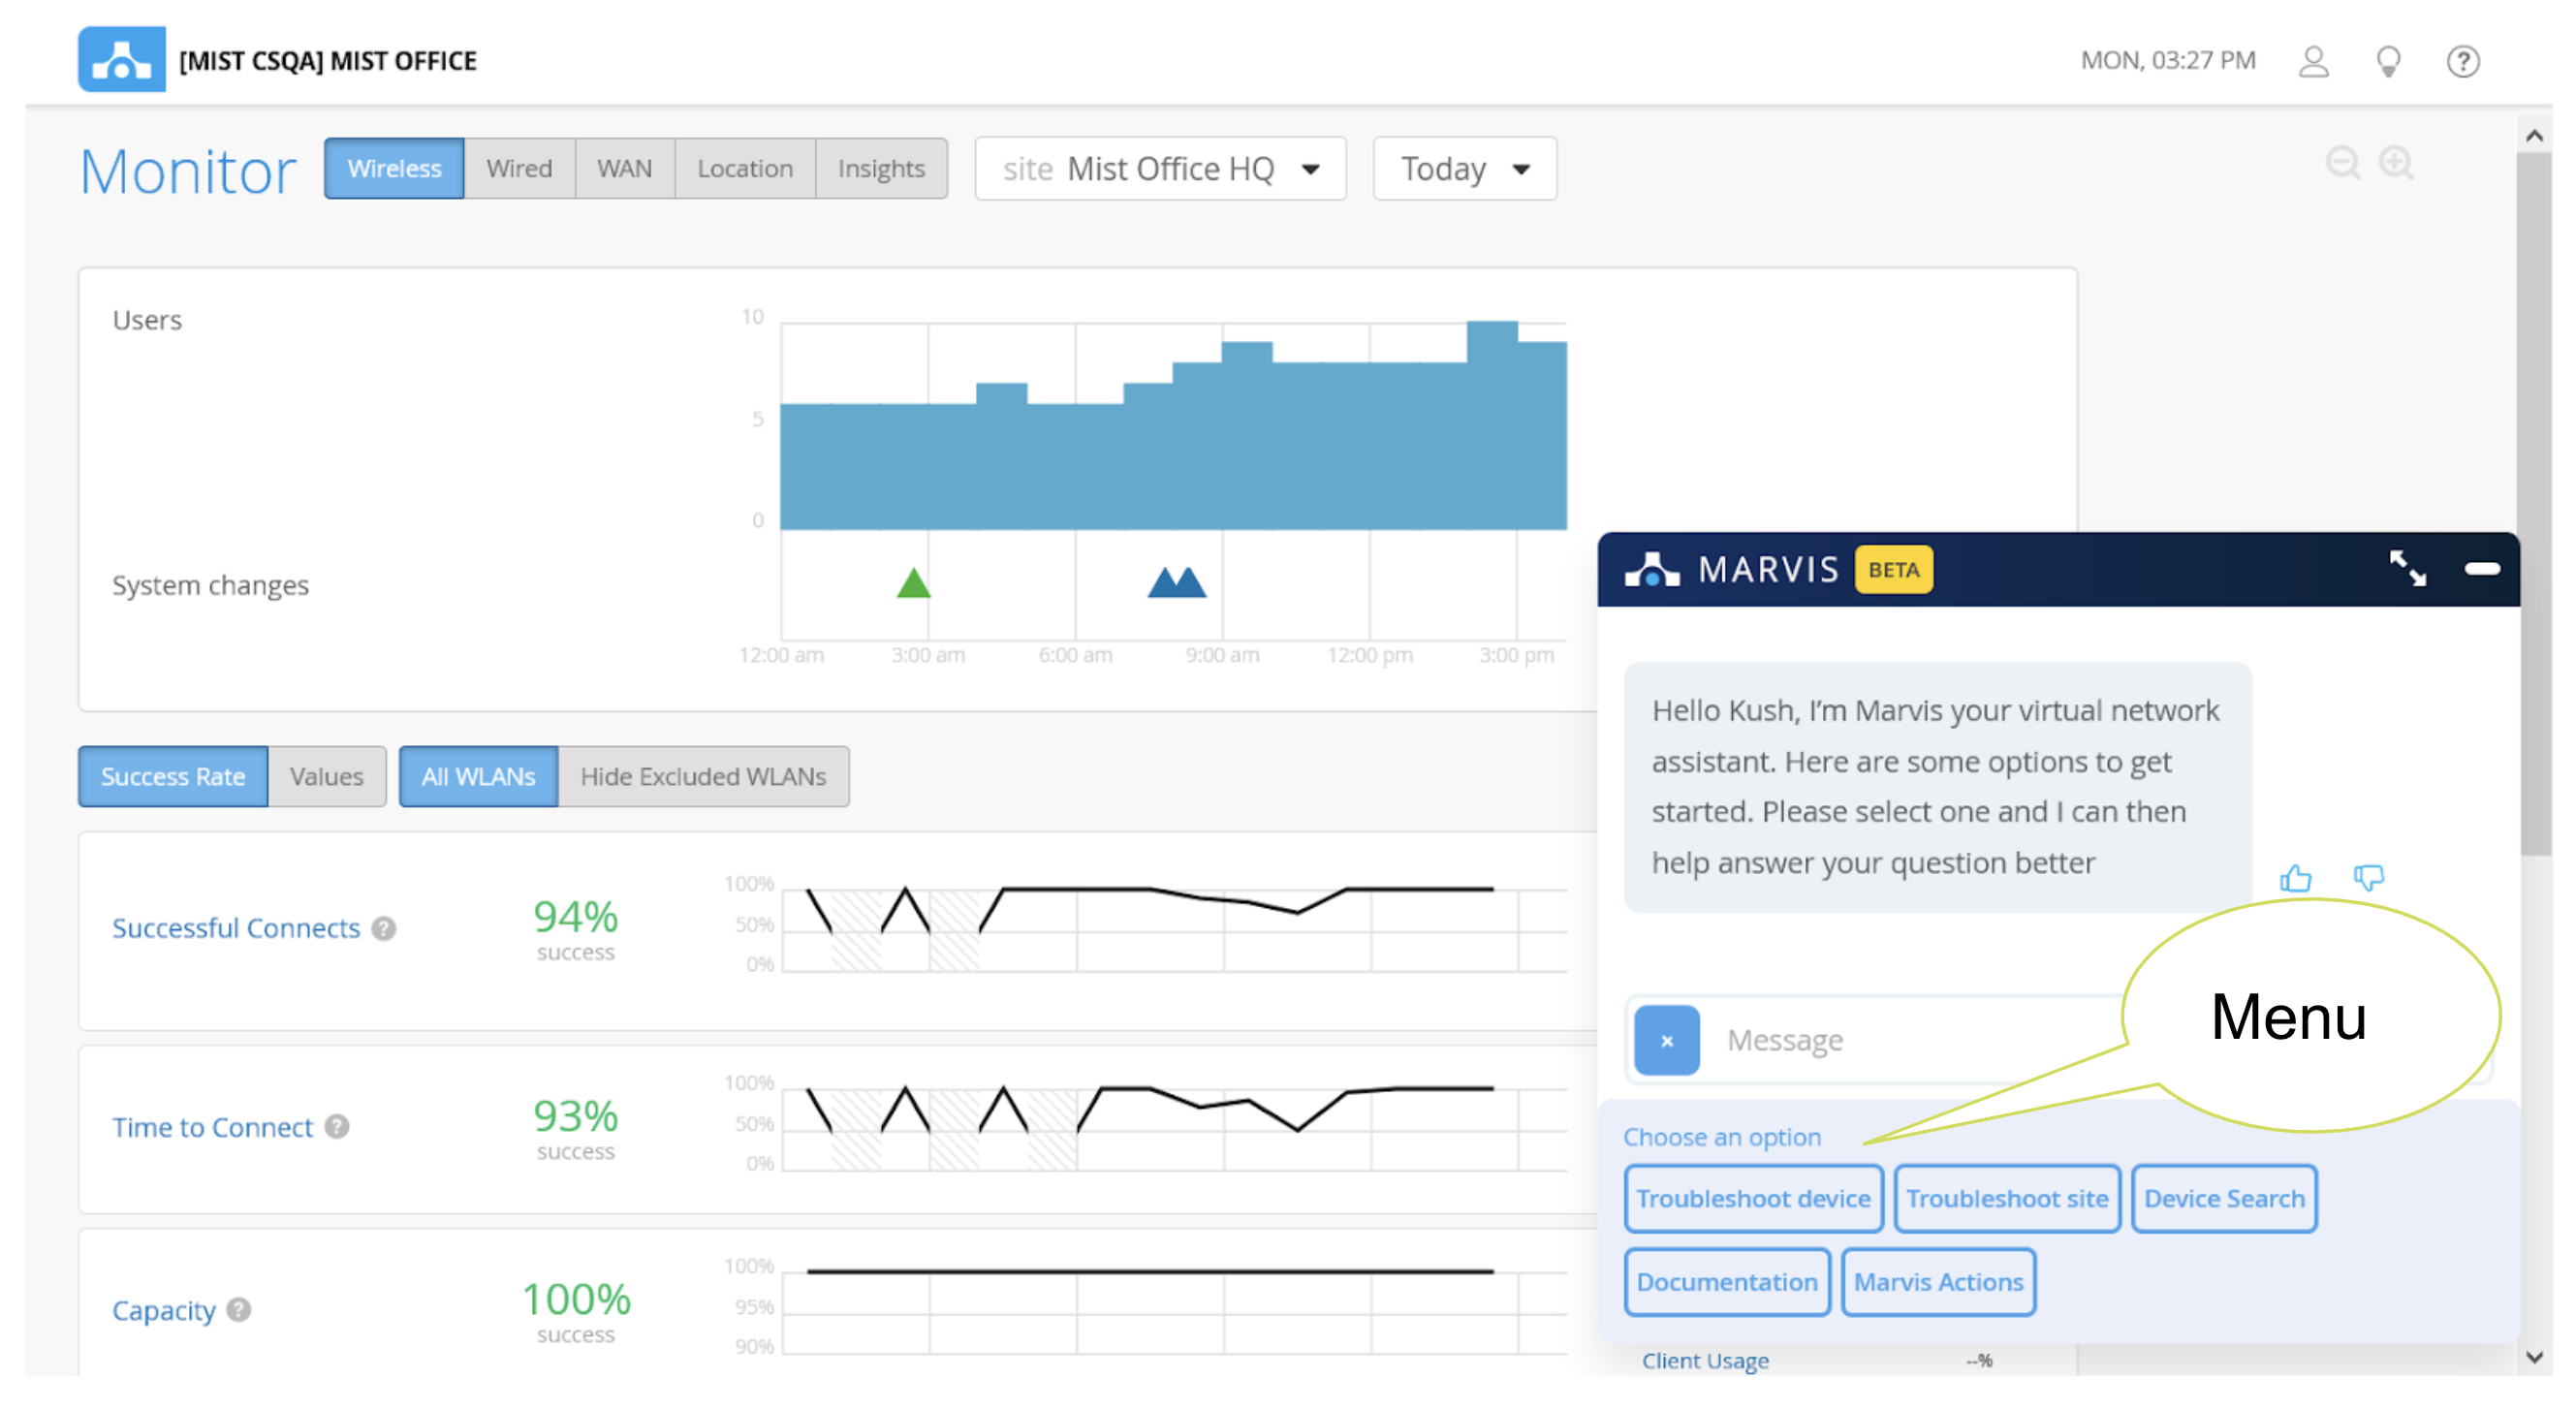
Find the Conversational Interface in the bottom right corner of any page in the Mist dashboard. Upon opening the CI by clicking on the Marvis button, you may choose an option to get started.
Marvis can help you narrow down your troubleshooting to a user or set of users.
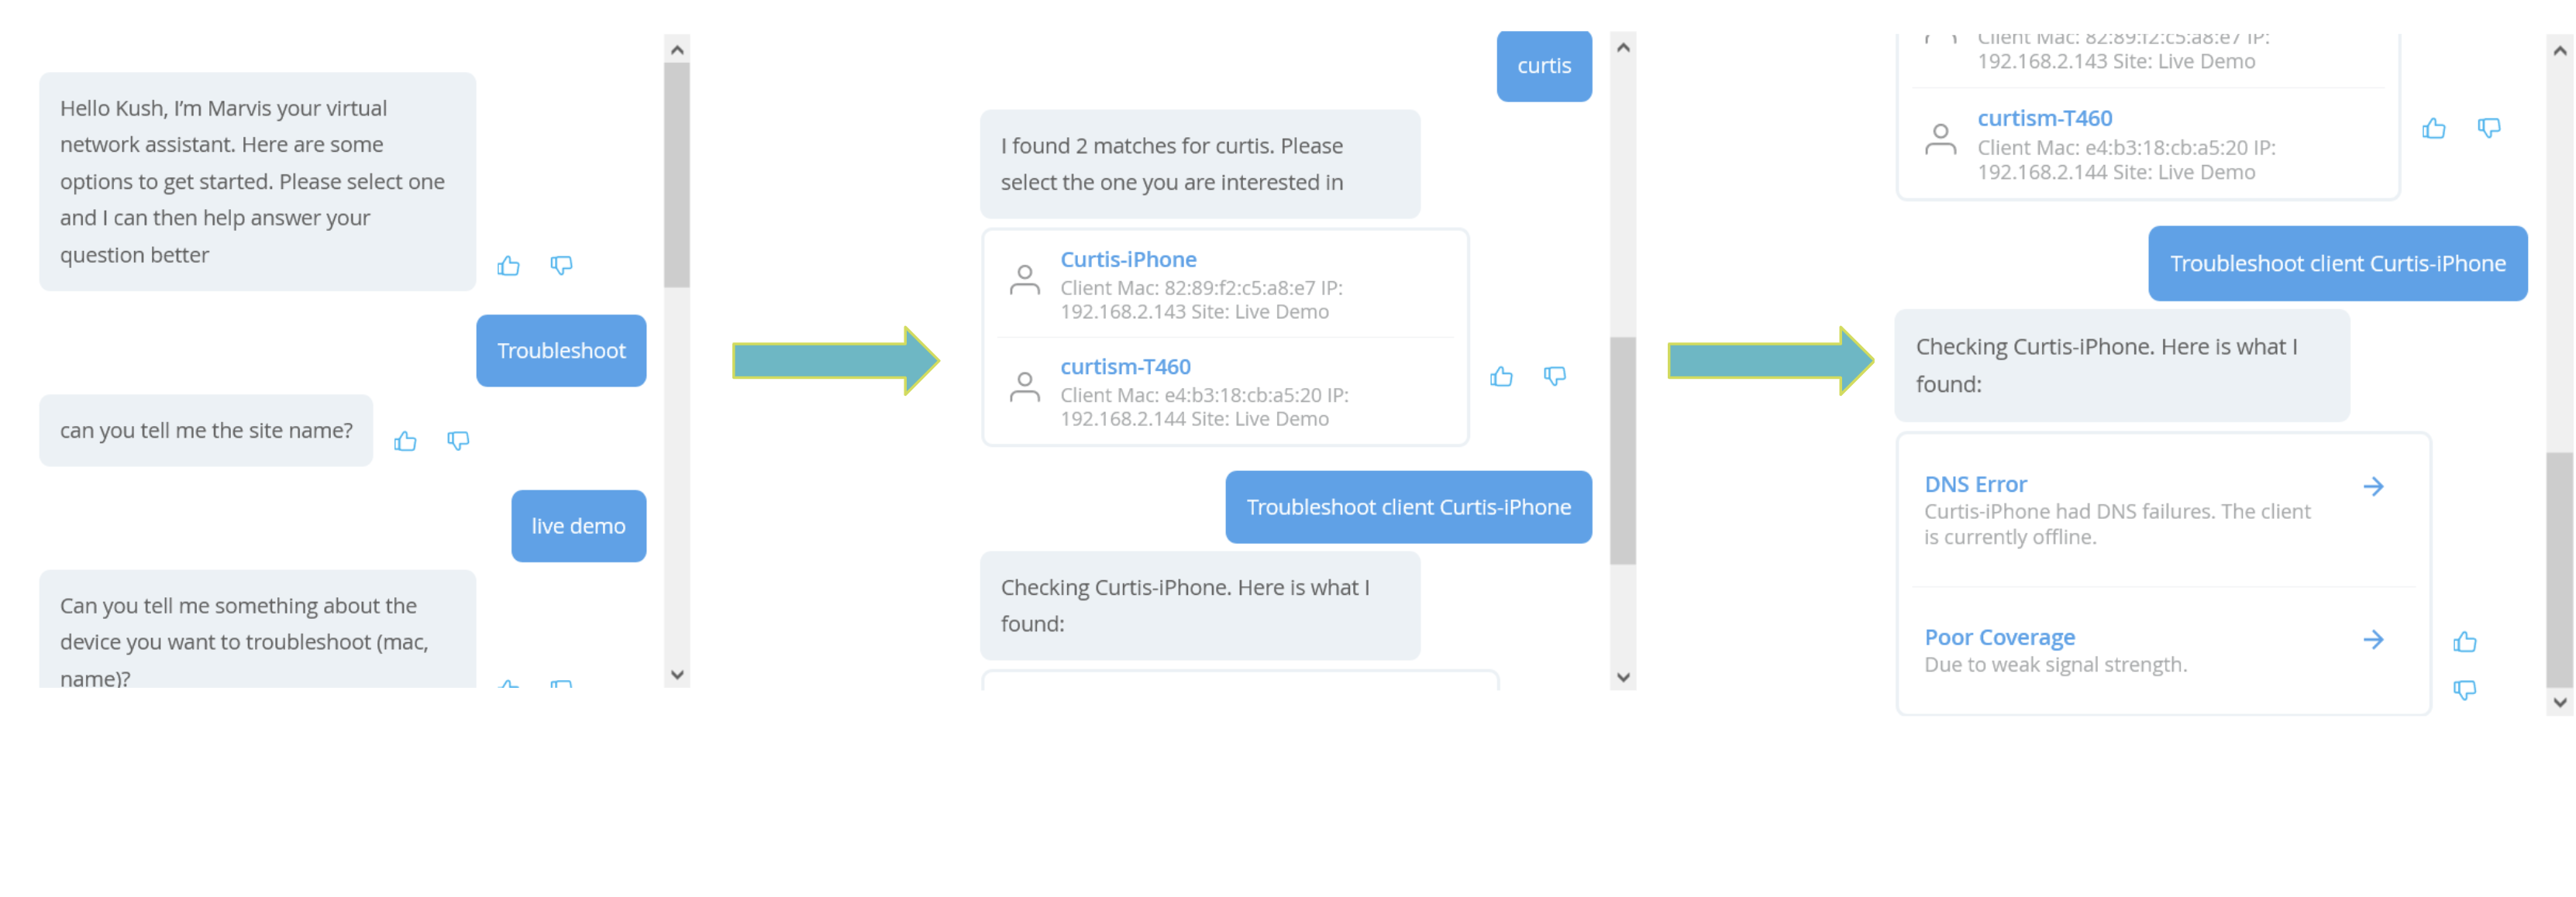
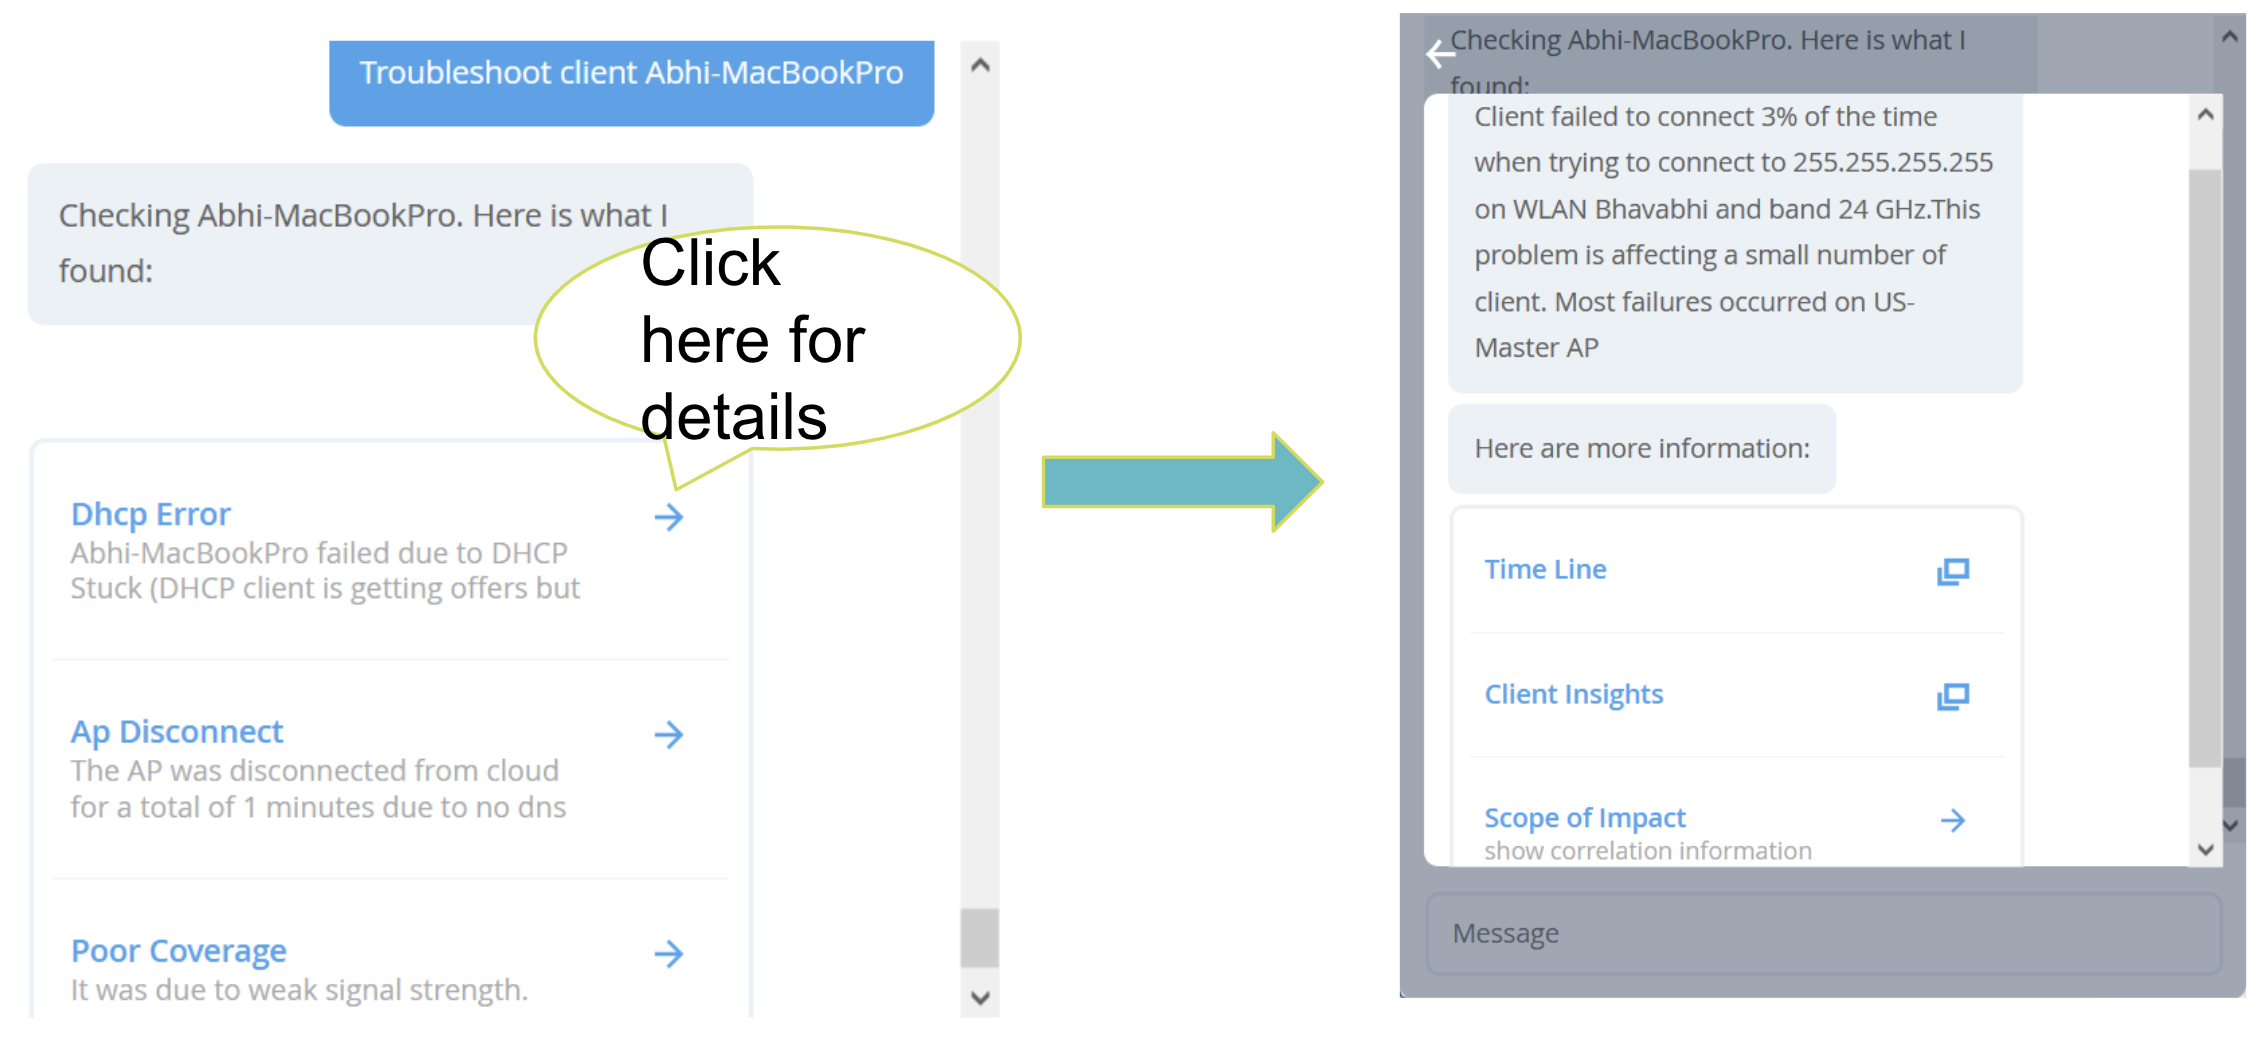
Here is an example of troubleshooting client issues through the Conversational Interface. Marvis will help identify the root cause and failure reason of your client:
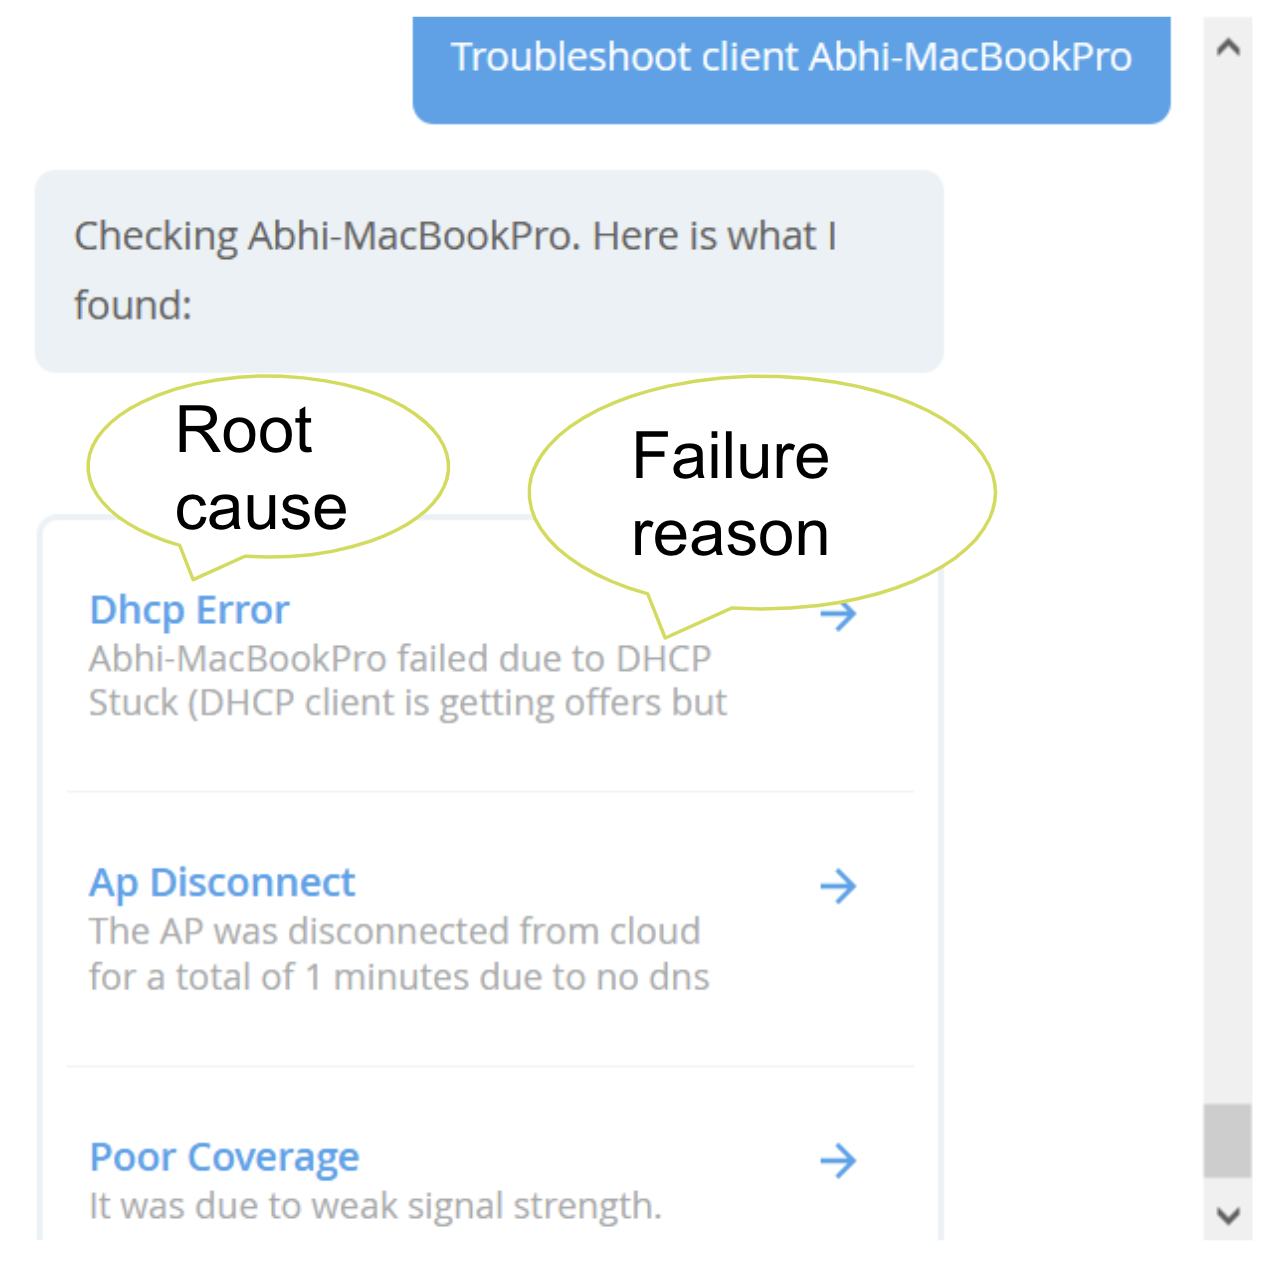
Dig deeper for each root cause by revealing more details.
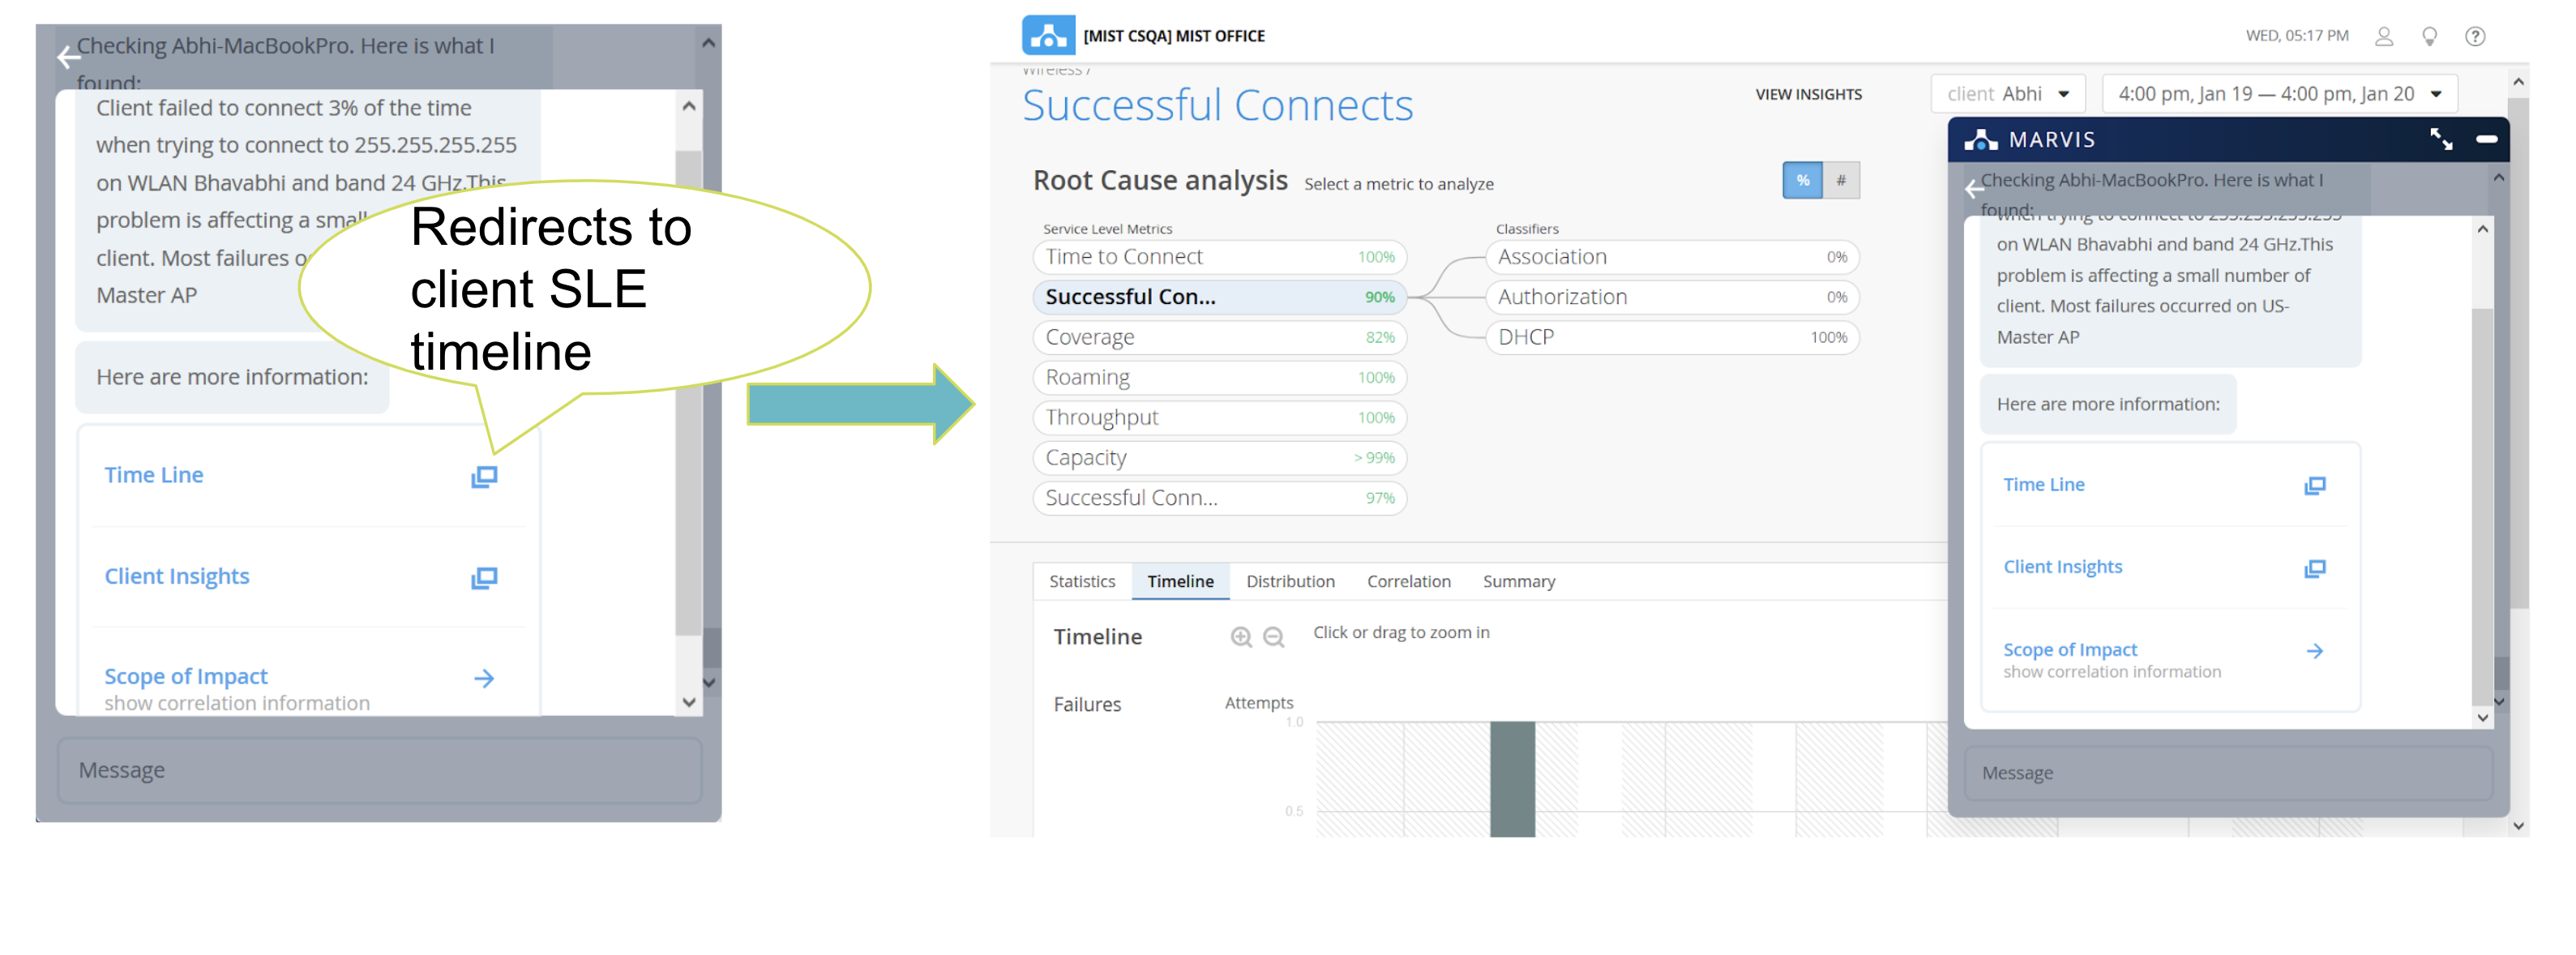
Marvis can redirect you to different parts of the system to provide further evidence of where the issue lies
To read more about the Conversational Interface and see other examples and FAQs, please visit this section in our documentation portal: https://www.mist.com/documentation/category/conversational-interface/
Wired Assurance
Switch and Gateway Locations on Map
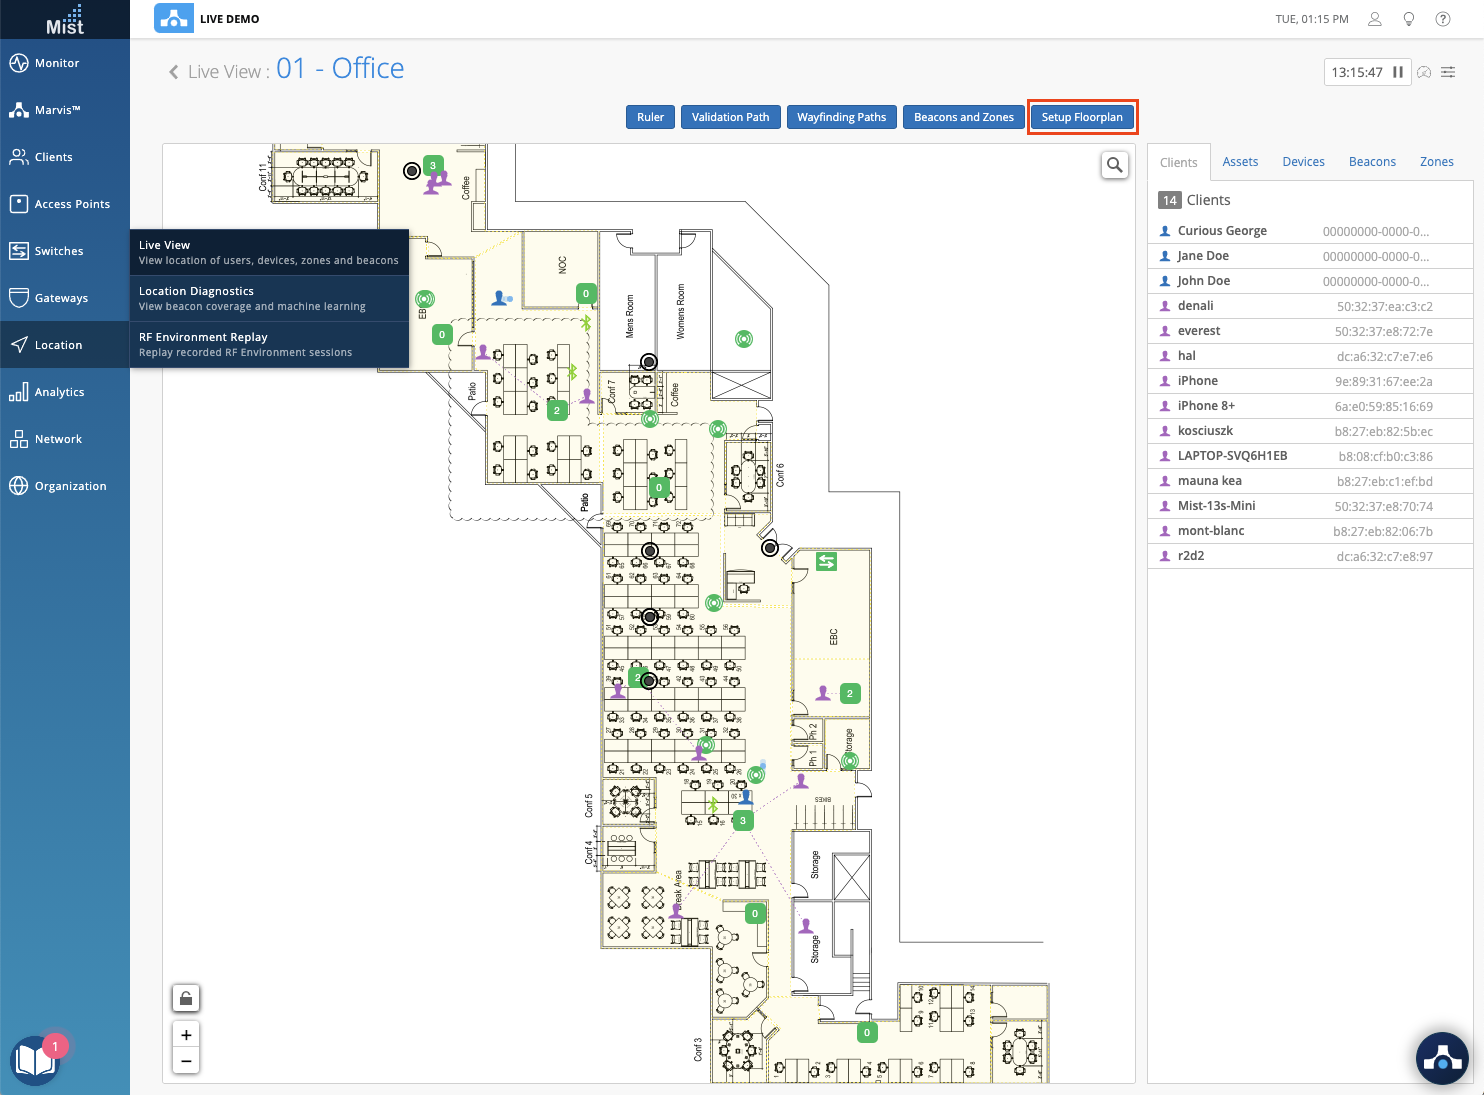
We now support placing Switches and Gateways onto your floorplan in the Location Live View page! With these additions, you will be able to see all of your different devices on the floorplan and conveniently be able to locate the physical location of each if needed.
To place your switches and gateways on your floorplan, navigate to Location > Live View and select the Setup Floorplan button. Here, you may drag and drop APs, Switches, and Gateways from the list onto your map.
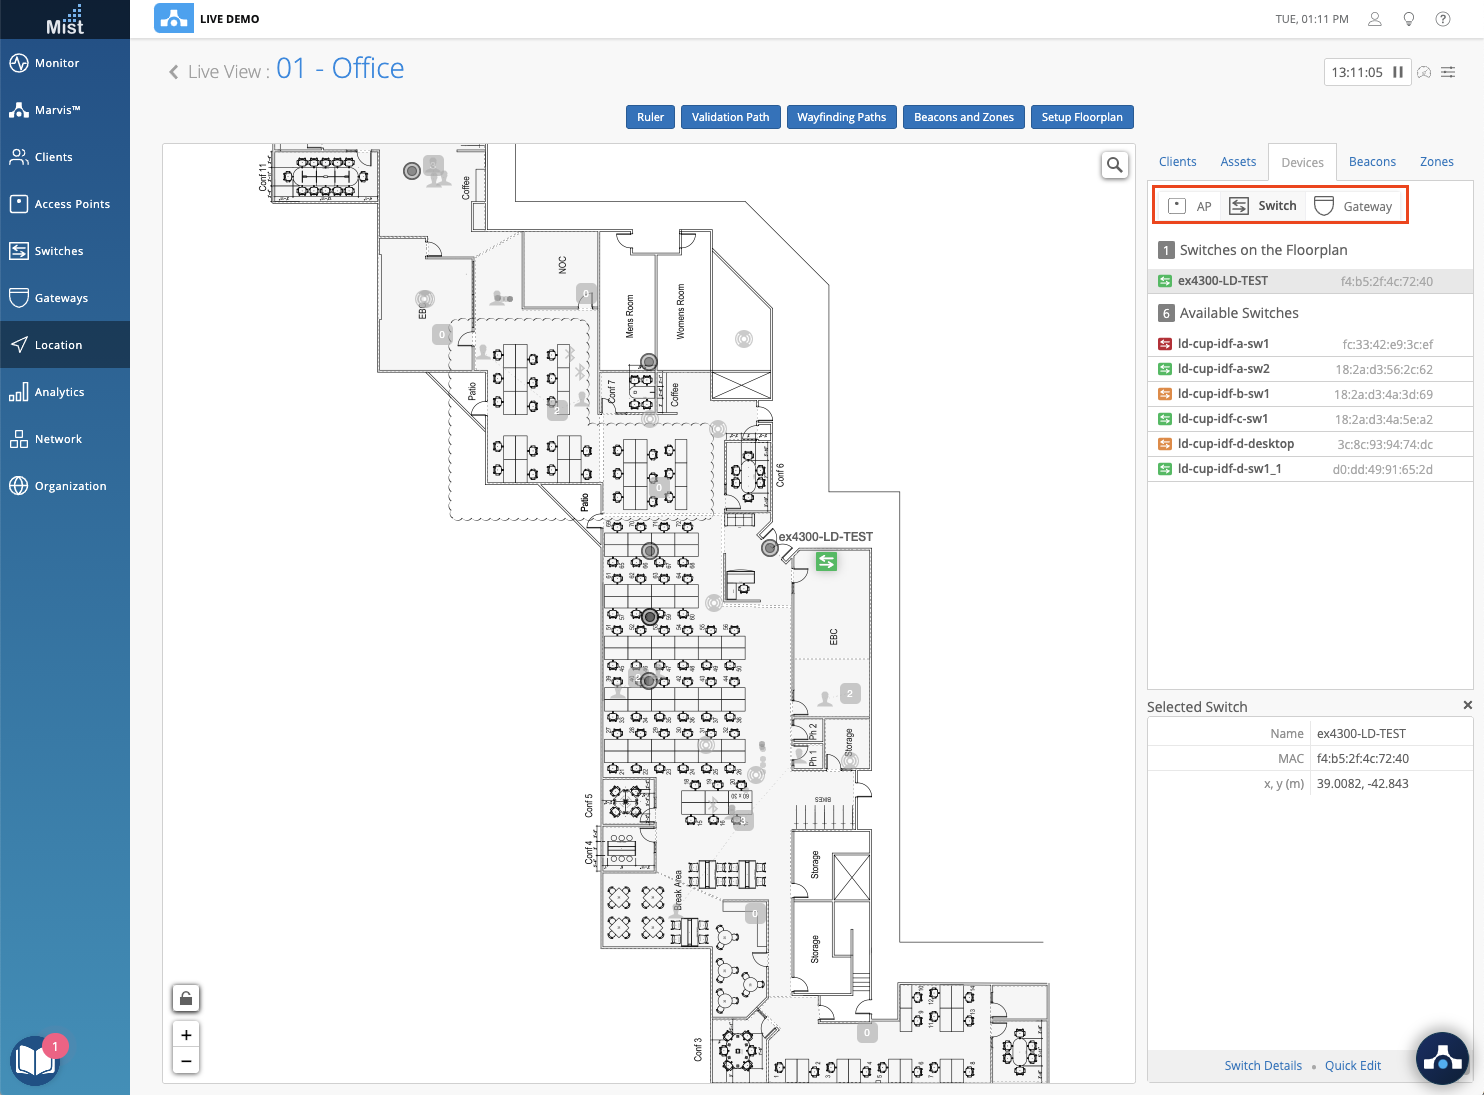
On your map view, select the Devices tab to see the full list of APs, Switches, and Gateways. Select a desired device to highlight it on the map and display detailed information. Here we have selected a Switch from the device list, and can see that this switch resides in the server room adjacent to the EBC on our map.
Port List Table for Switches
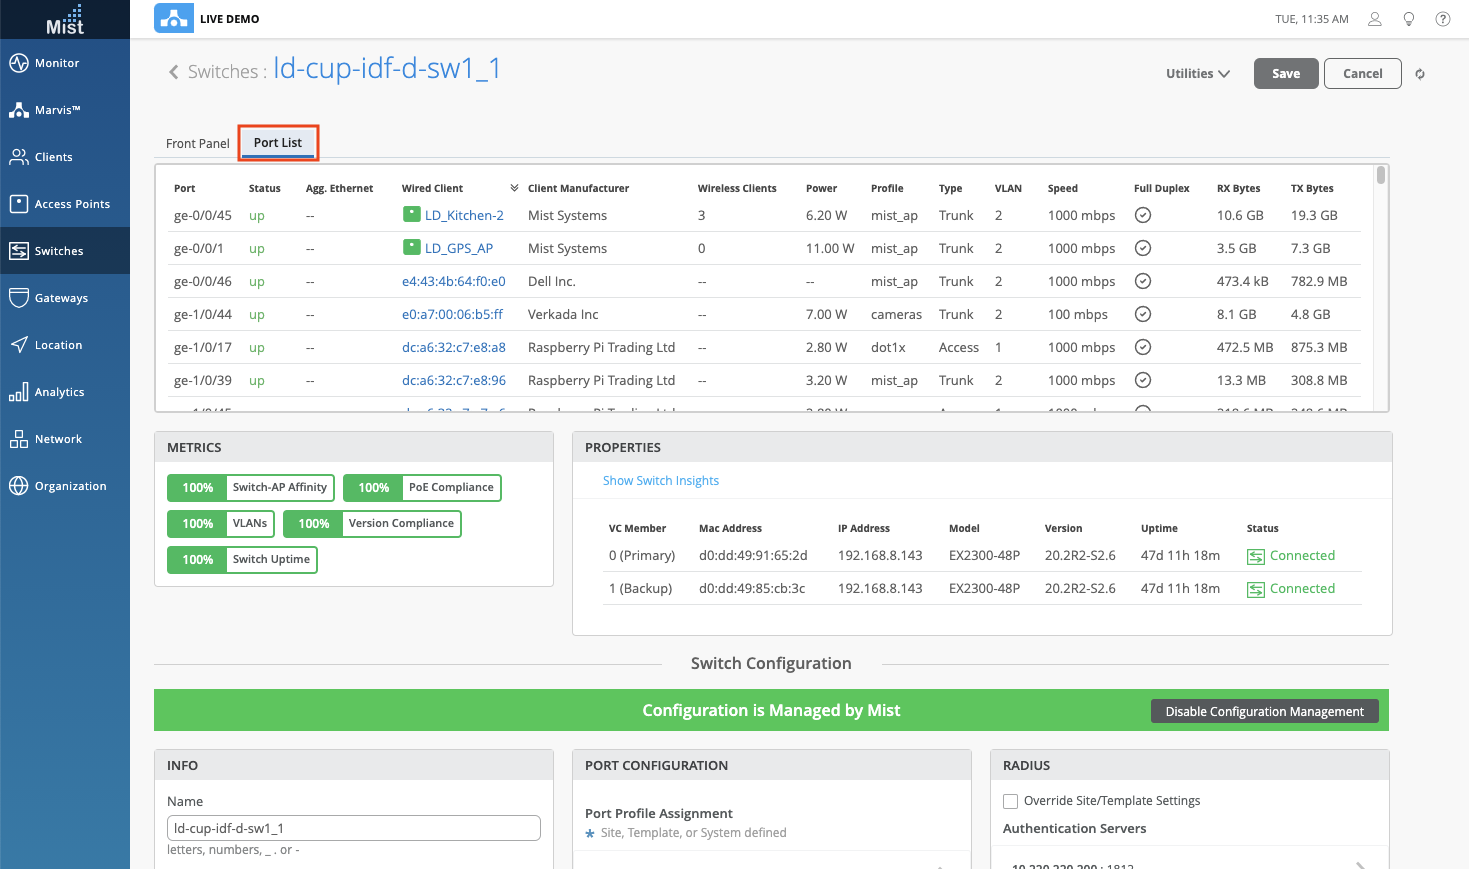
To give you more viewing options in the Switch Details page, we are now including a List View of the ports in addition to the existing Front Panel view. This Port List table contains all the relevant details in a column format. You can sort by each column to quickly order and display all of your ports in a neat list. To toggle between the Front Panel view and Port List view, simply select the desired tab at the top of the Switch details section.
Switch Template
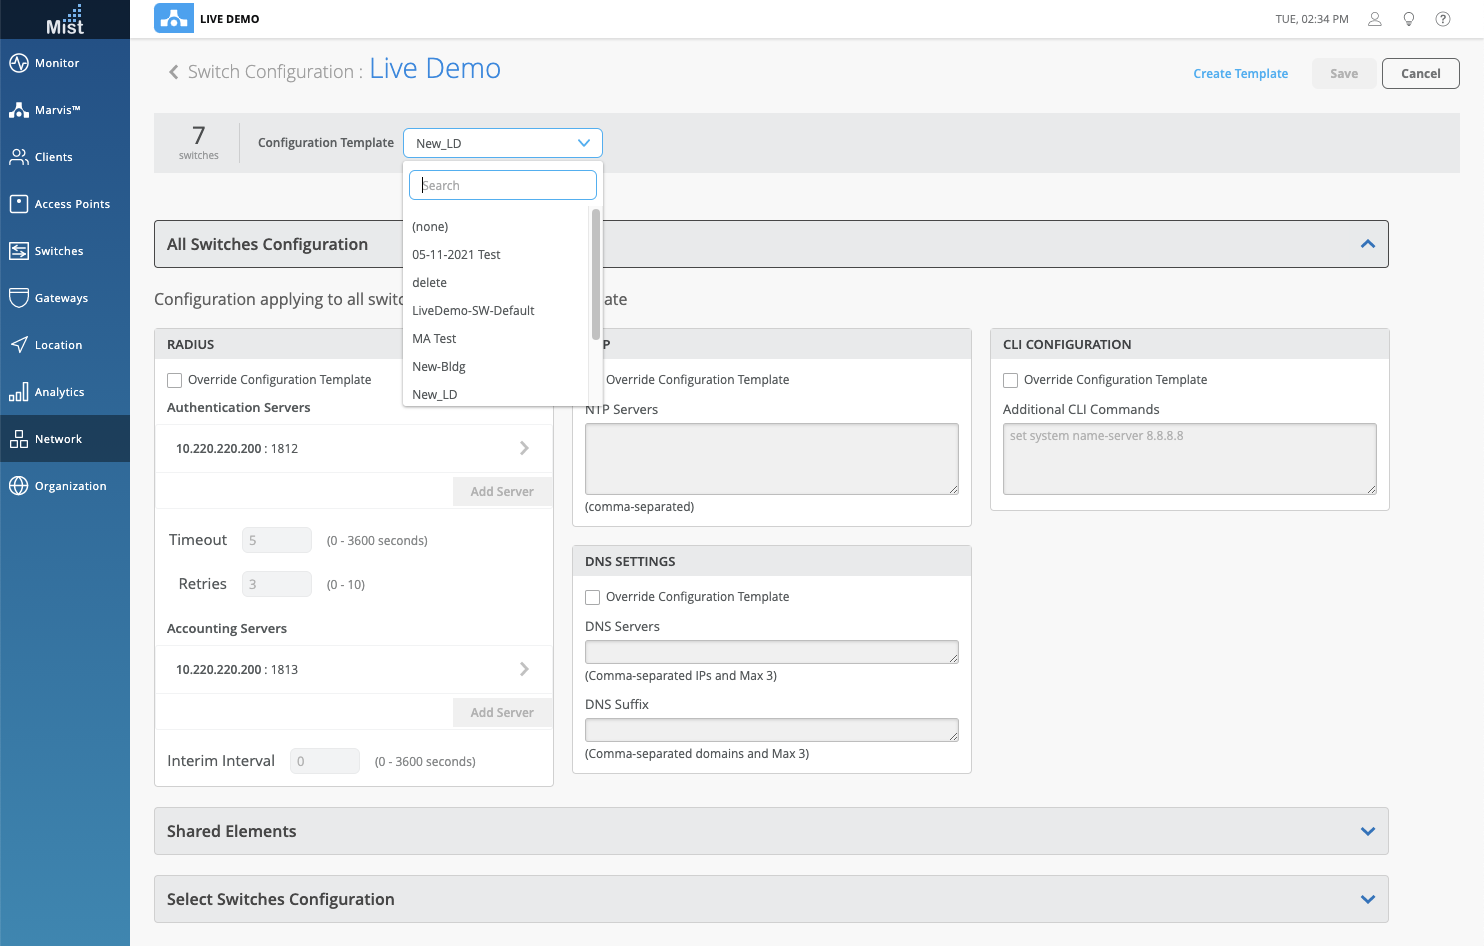
Use Switch Templates to help with configuring all of your switches in a manageable way, especially if you have multiple sites with a large number of switches to look after. There are already a few existing ways to create a switch template, and this week we are adding to that by allowing you to create templates directly from the Switch Details page. From the Utilities dropdown menu, select Create Template. This will copy all of the existing switch configurations to a new template, which may then be used to apply to other switches.

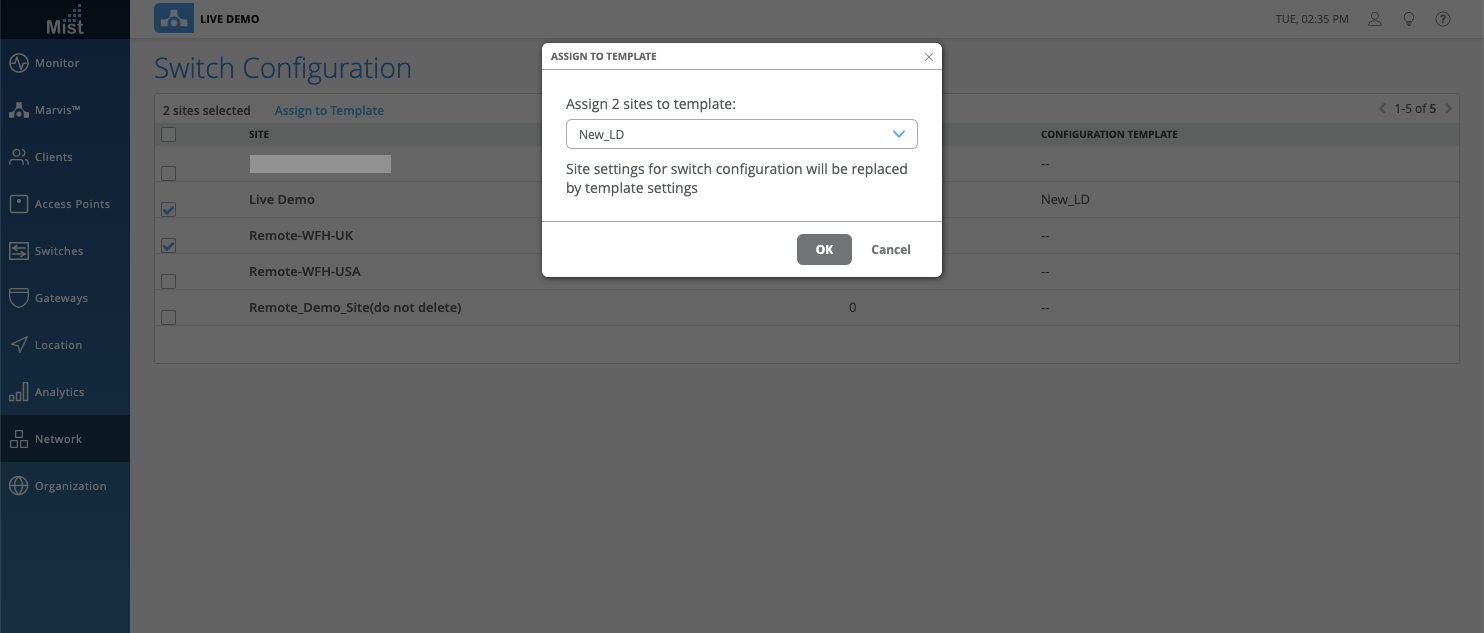
To apply your Switch Configuration Template to a site, go to your Switch Configuration page (Network > Switch Configuration) and select your desired site. Click into the site and at the top you may select a Configuration Template from the dropdown list. You may also select multiple sites from the list and apply a single template to them.
Switch BPDU Errors
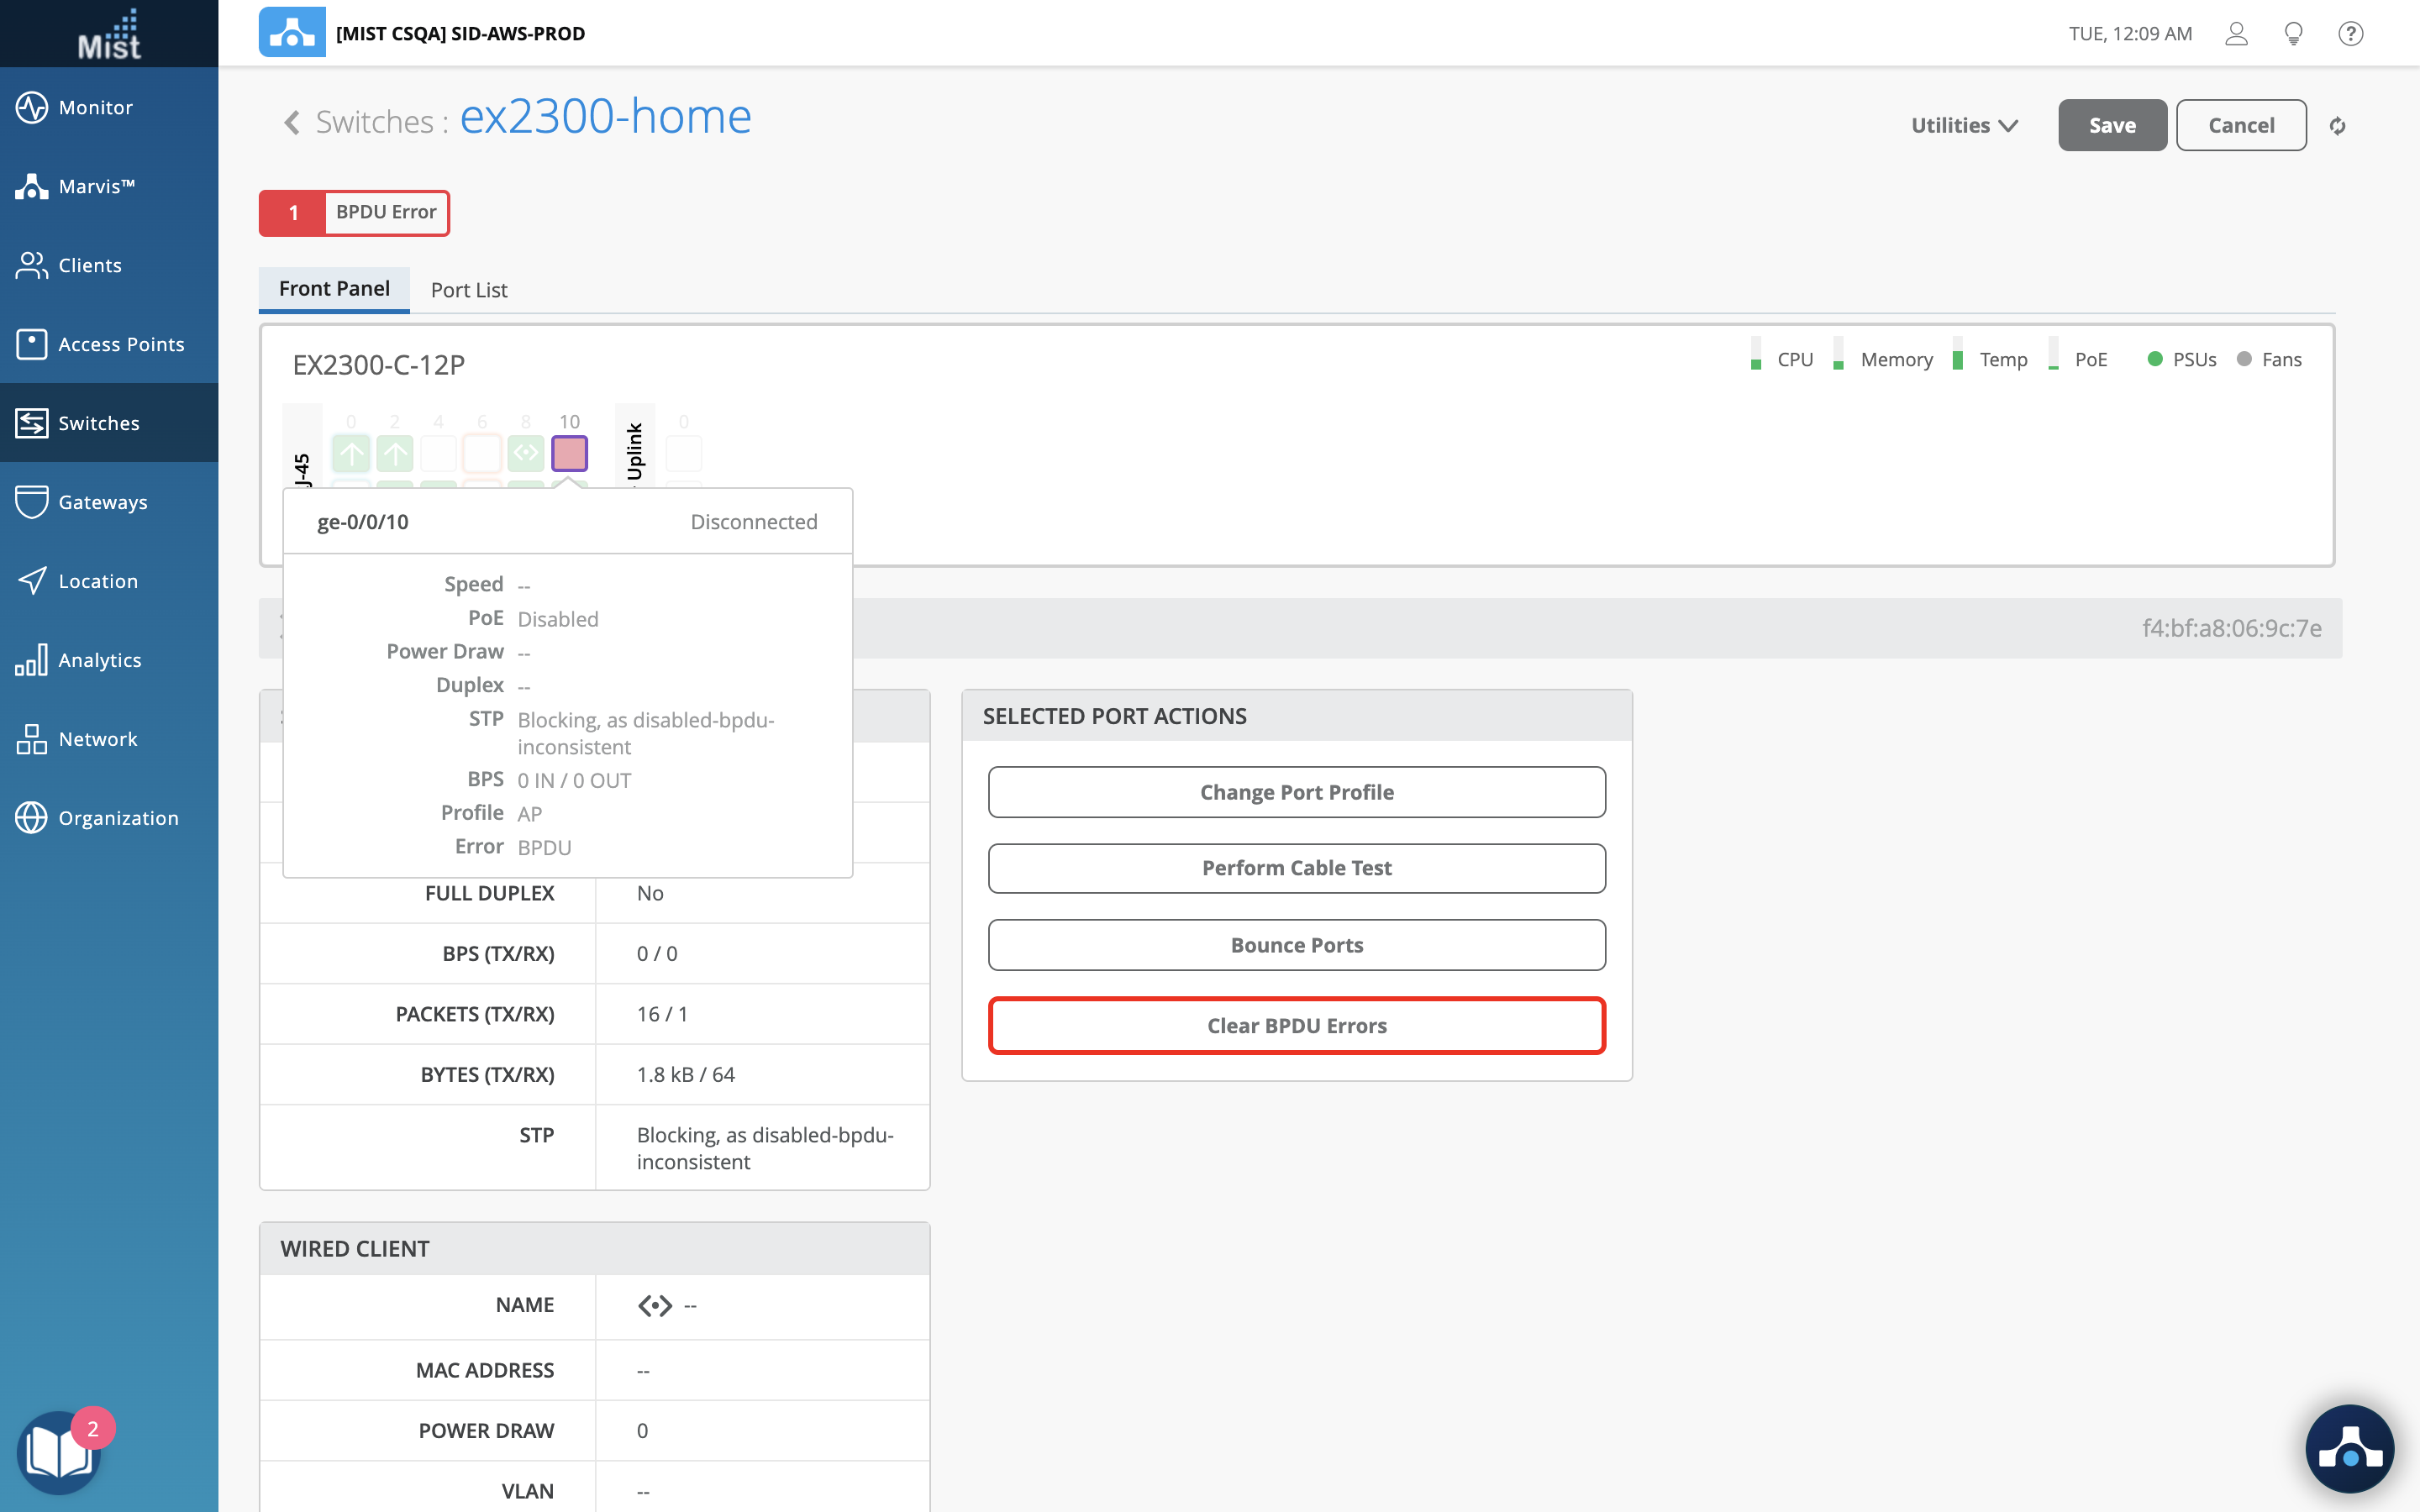
Starting this week you now have the ability to see which ports on your switch are in a BPDU error state and clear the state directly from the Mist UI Dashboard. When a BPDU is received on a port with BPDU guard enabled, the switch will disable the port. You can see the ports experiencing these error states on the Switch front panel view, which will be highlighted in red. Just select the port with the BPDU error and click on Clear BPDU Errors from the Selected Port Actions section. This will re-enable the switch ports which were disabled due to the BPDU error, and allow traffic to resume.
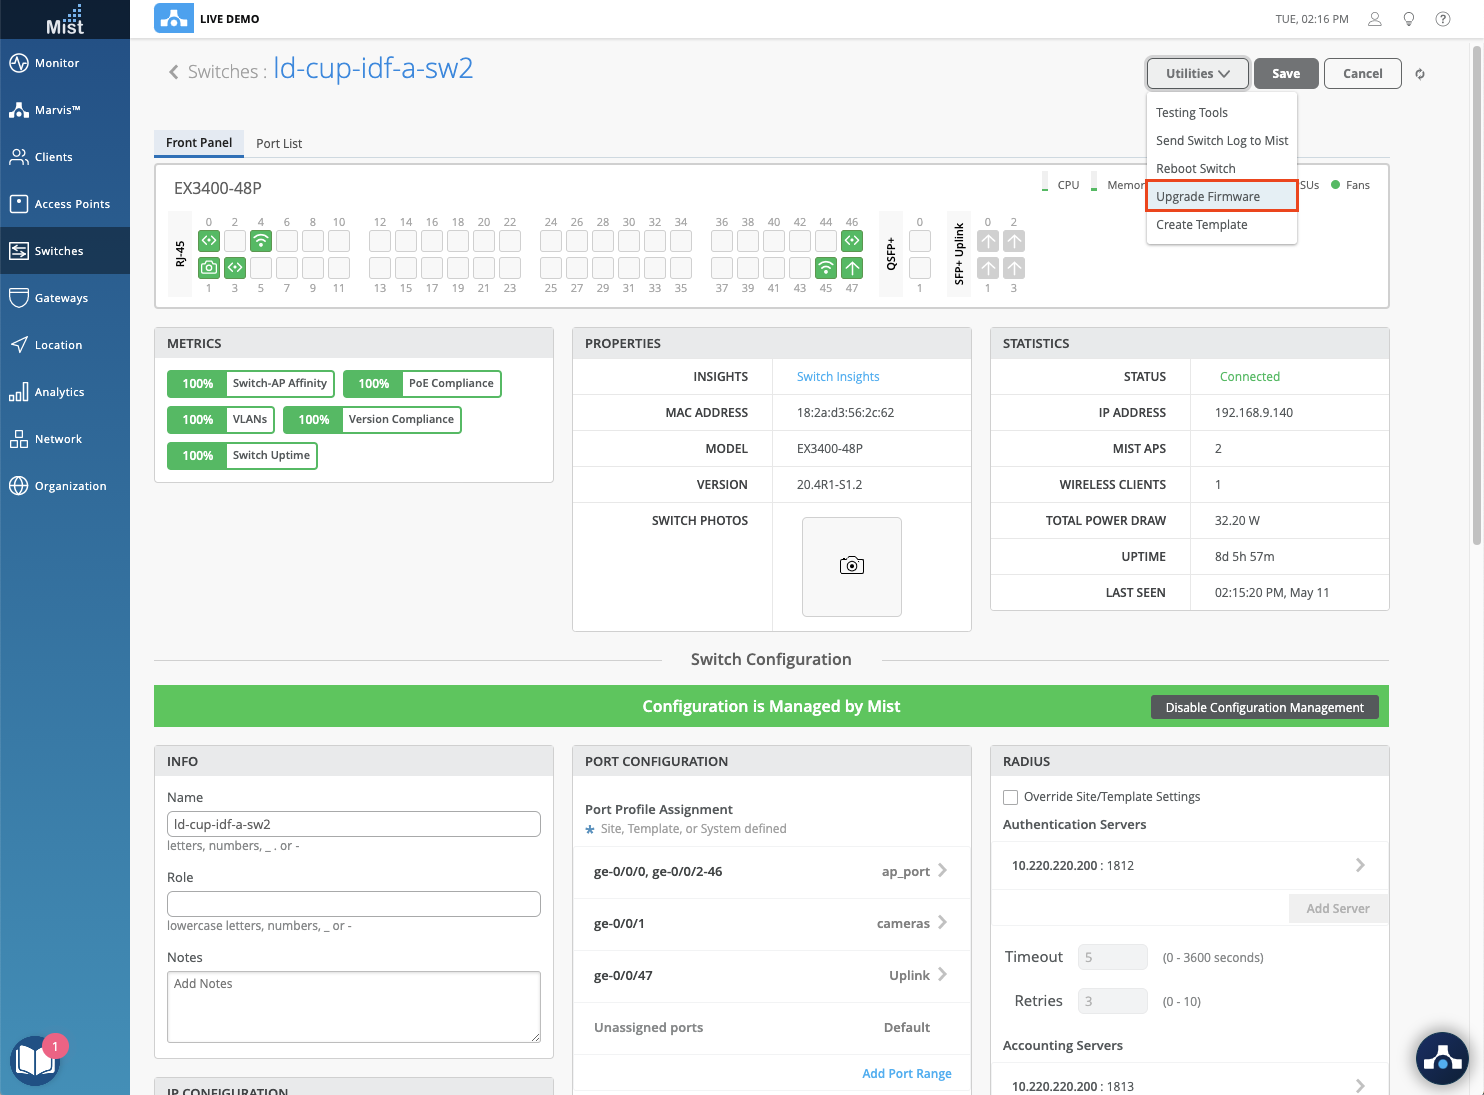
Upgrade Firmware from Details Window
Recently we announced that you can upgrade your switches directly from the list view of the Switch page by selecting your devices and upgrading from the Utilities dropdown menu. Now, you can also upgrade the firmware directly from the Switch Details Page in the Utilities dropdown.