Network Programmability
Dual 5 GHz Radio Support
This week we are excited to announce Dual 5 GHz radios for supported AP models (AP43, AP63). This feature allows the 2.4 GHz radio on the AP to be converted to 5 GHz to provide additional coverage and additional capacity in the 5 GHz band. When APs are configured to operate in the 5 GHz dual band mode, the dedicated 5 GHz radio will broadcast on the lower channels (below channel 100), while the dual band radio will broadcast on the upper channels (channel 100 and above) for RF separation.
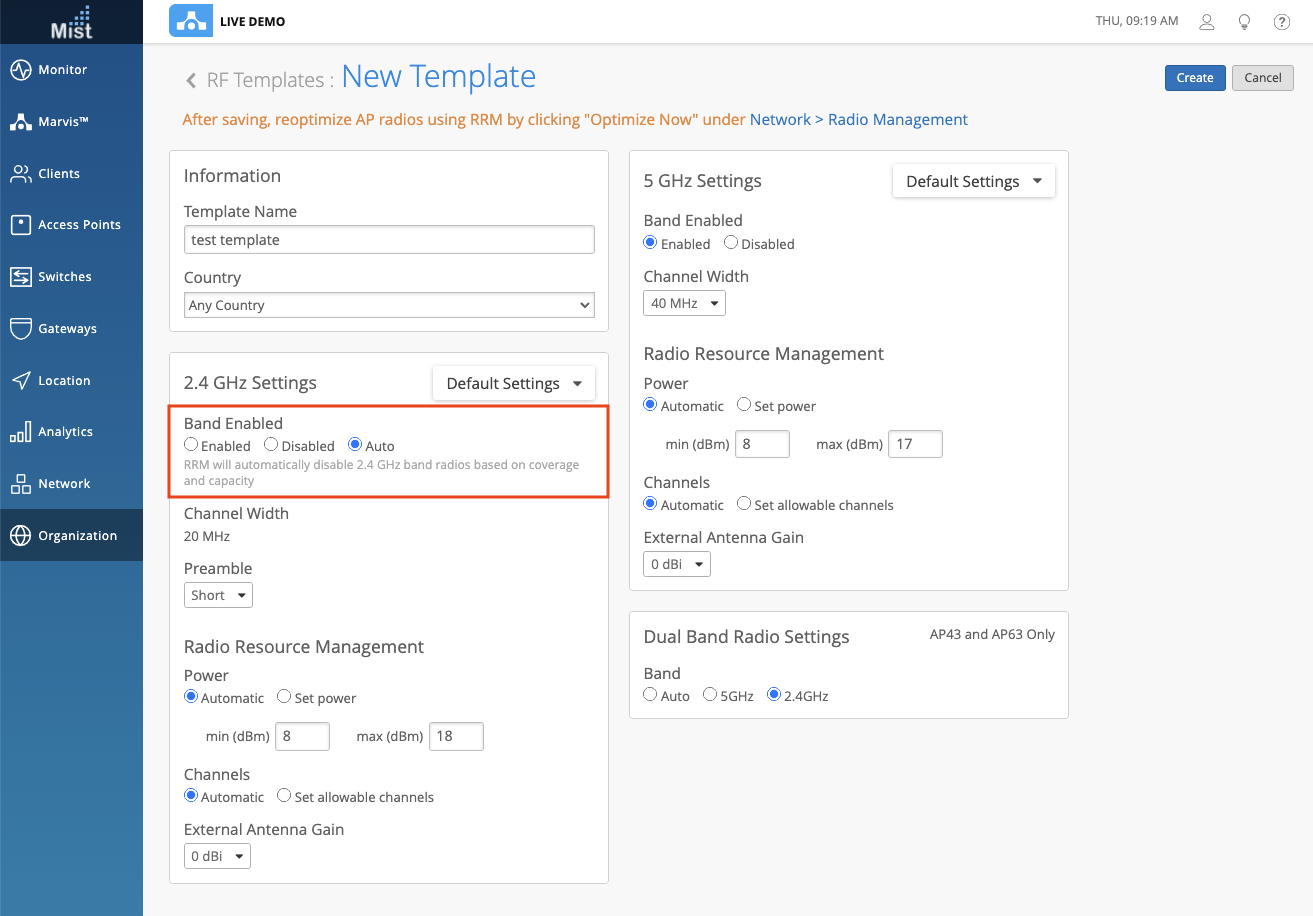
Dual 5 GHz can be configured on the AP details page, RF templates, and Device Profiles. On these pages, you can find the Dual Band Radio Settings section. Here, there are 3 options available: 2.4GHz, 5GHz, and Auto.
- 2.4 GHz: This is the default setting. Here, the AP has one radio on 2.4 GHz and one on 5 GHz.
- 5 GHz: Here, the AP will use both radios to operate on the 5 GHz band.
- Auto: RRM determines if APs are placed close enough such that some APs can cumulatively provide enough coverage for the entire area in the 2.4GHz band. In these scenarios, the 2.4GHz band is cancelled on the remaining APs and the dual band radio moves to operate on the 5GHz band. This function is called Auto Conversion.
Auto Conversion and Cancellation
APs without Dual band support can also be set to Auto, but the 2.4 GHz radio cannot be converted – only cancelled when not needed. This is referred to as Auto Cancellation. When non Dual band APs are set to Auto, RRM determines if APs are placed close enough such that some APs can cumulatively provide enough coverage for the entire area in the 2.4 GHz band. The remaining APs will then cancel their 2.4GHz band.
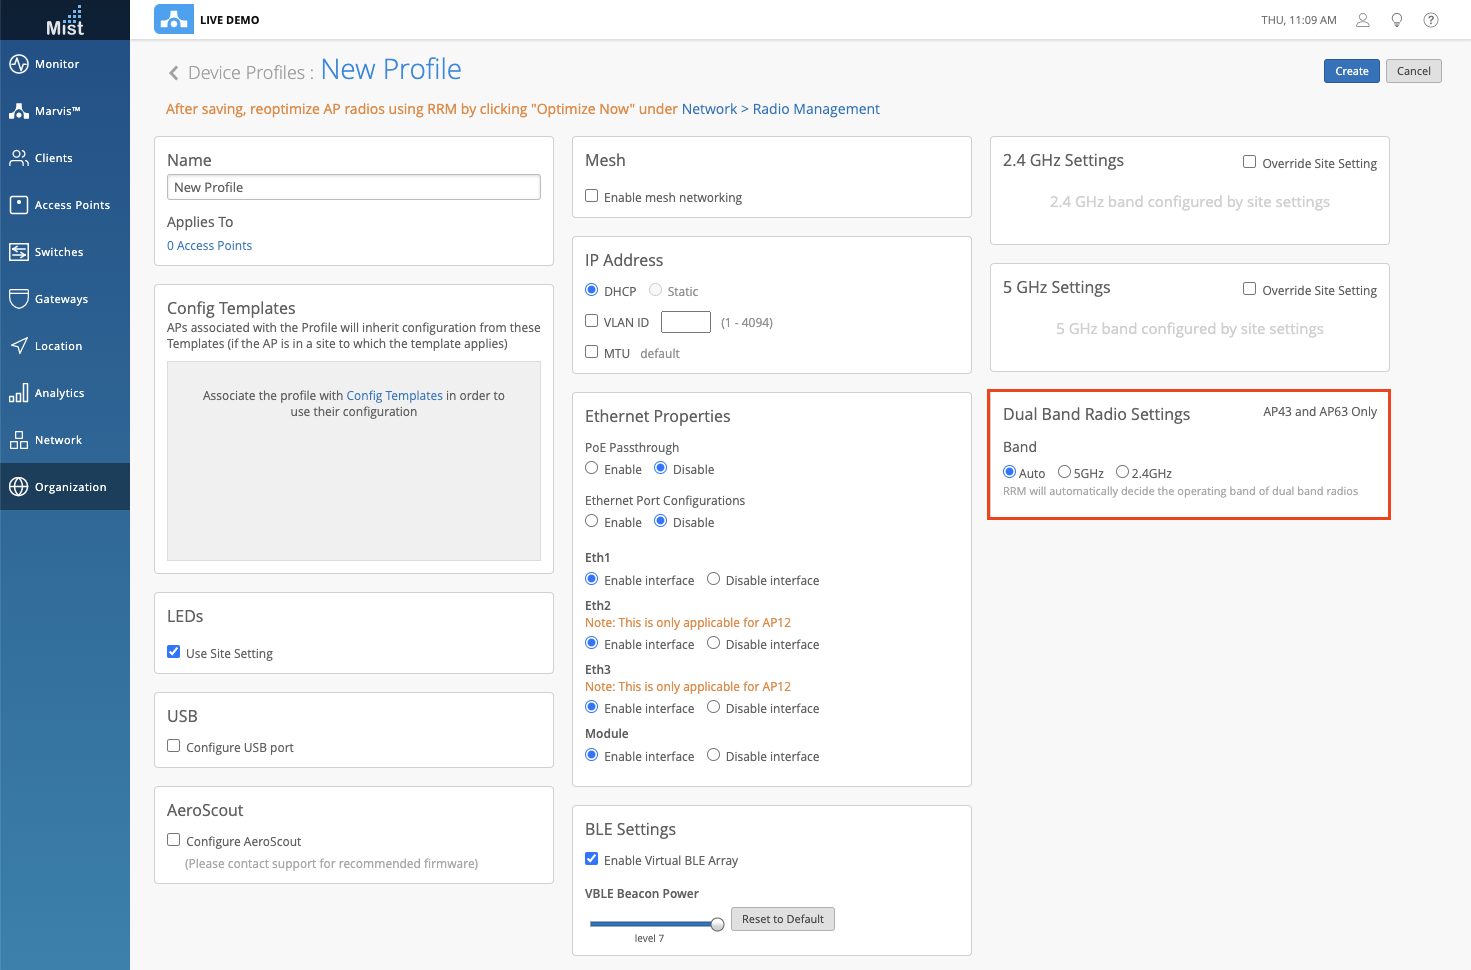
In the RF Templates and Device Profiles pages, enabling Auto in the Dual Band Radio Config box will enable Auto Conversion for the Dual Band AP models, and Auto Cancellation for the rest of the APs.
RF Template:
Device Profile:
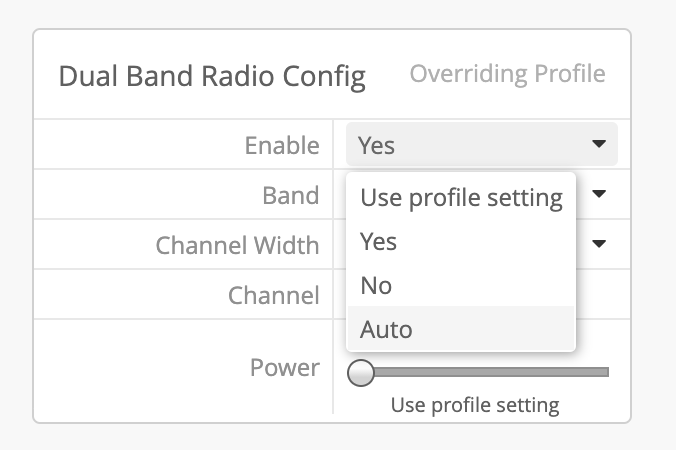
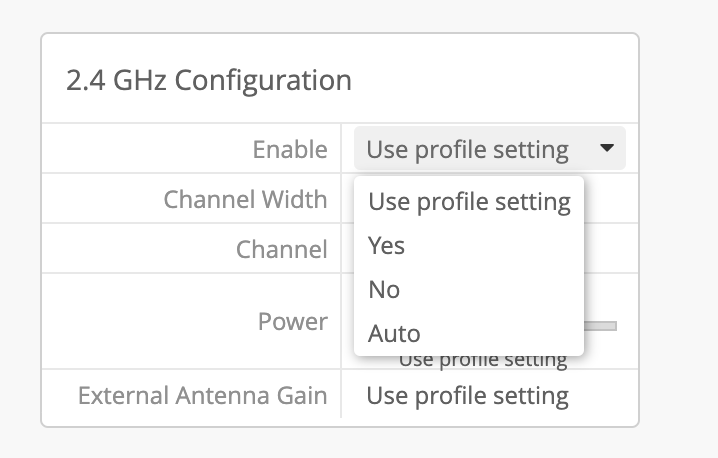
From the AP Config page, you may enable Auto Conversion for Dual Band APs in the Dual Band Radio Config section. For Non Dual Band APs, you may enable Auto Cancellation in the 2.4 GHz Config section (In the dropdown menu you may select Auto).
Dual Band AP:
Non Dual Band AP:
Marvis
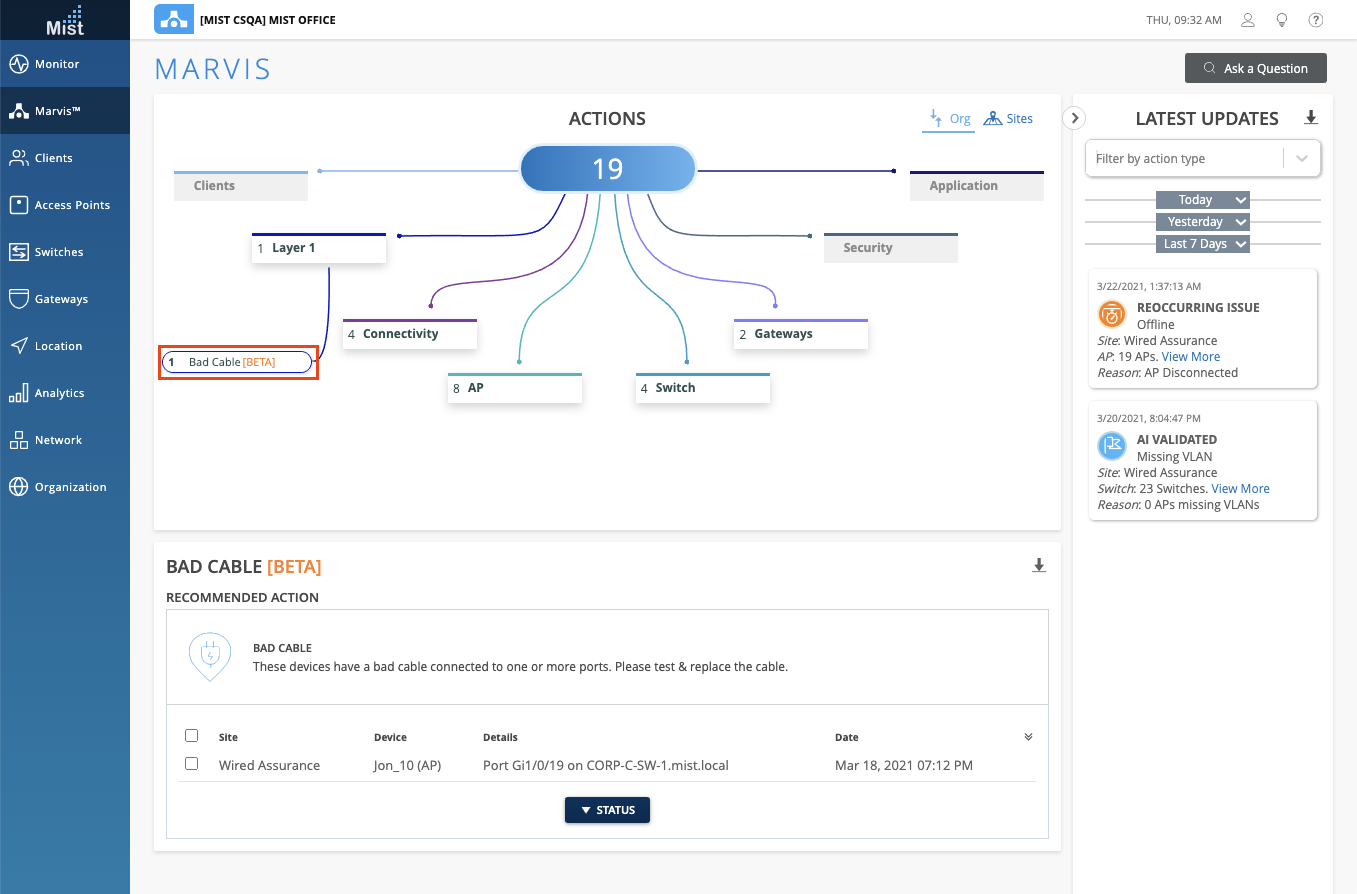
Actions – AP Bad Cable [BETA]
This week we are expanding on our Marvis Action Dashboard with the introduction of a new section – Layer 1. In this section we cover Bad Cable cases detected on the AP side to give us a more complete coverage for Ethernet errors across your network. With this new addition, we now have visibility into Gateway, Switch, and now AP bad cables. Please keep in mind that this is still considered a Beta feature and there may be some bug fixes needed. We are working on ironing out any issues for a more complete release of this in the near future.
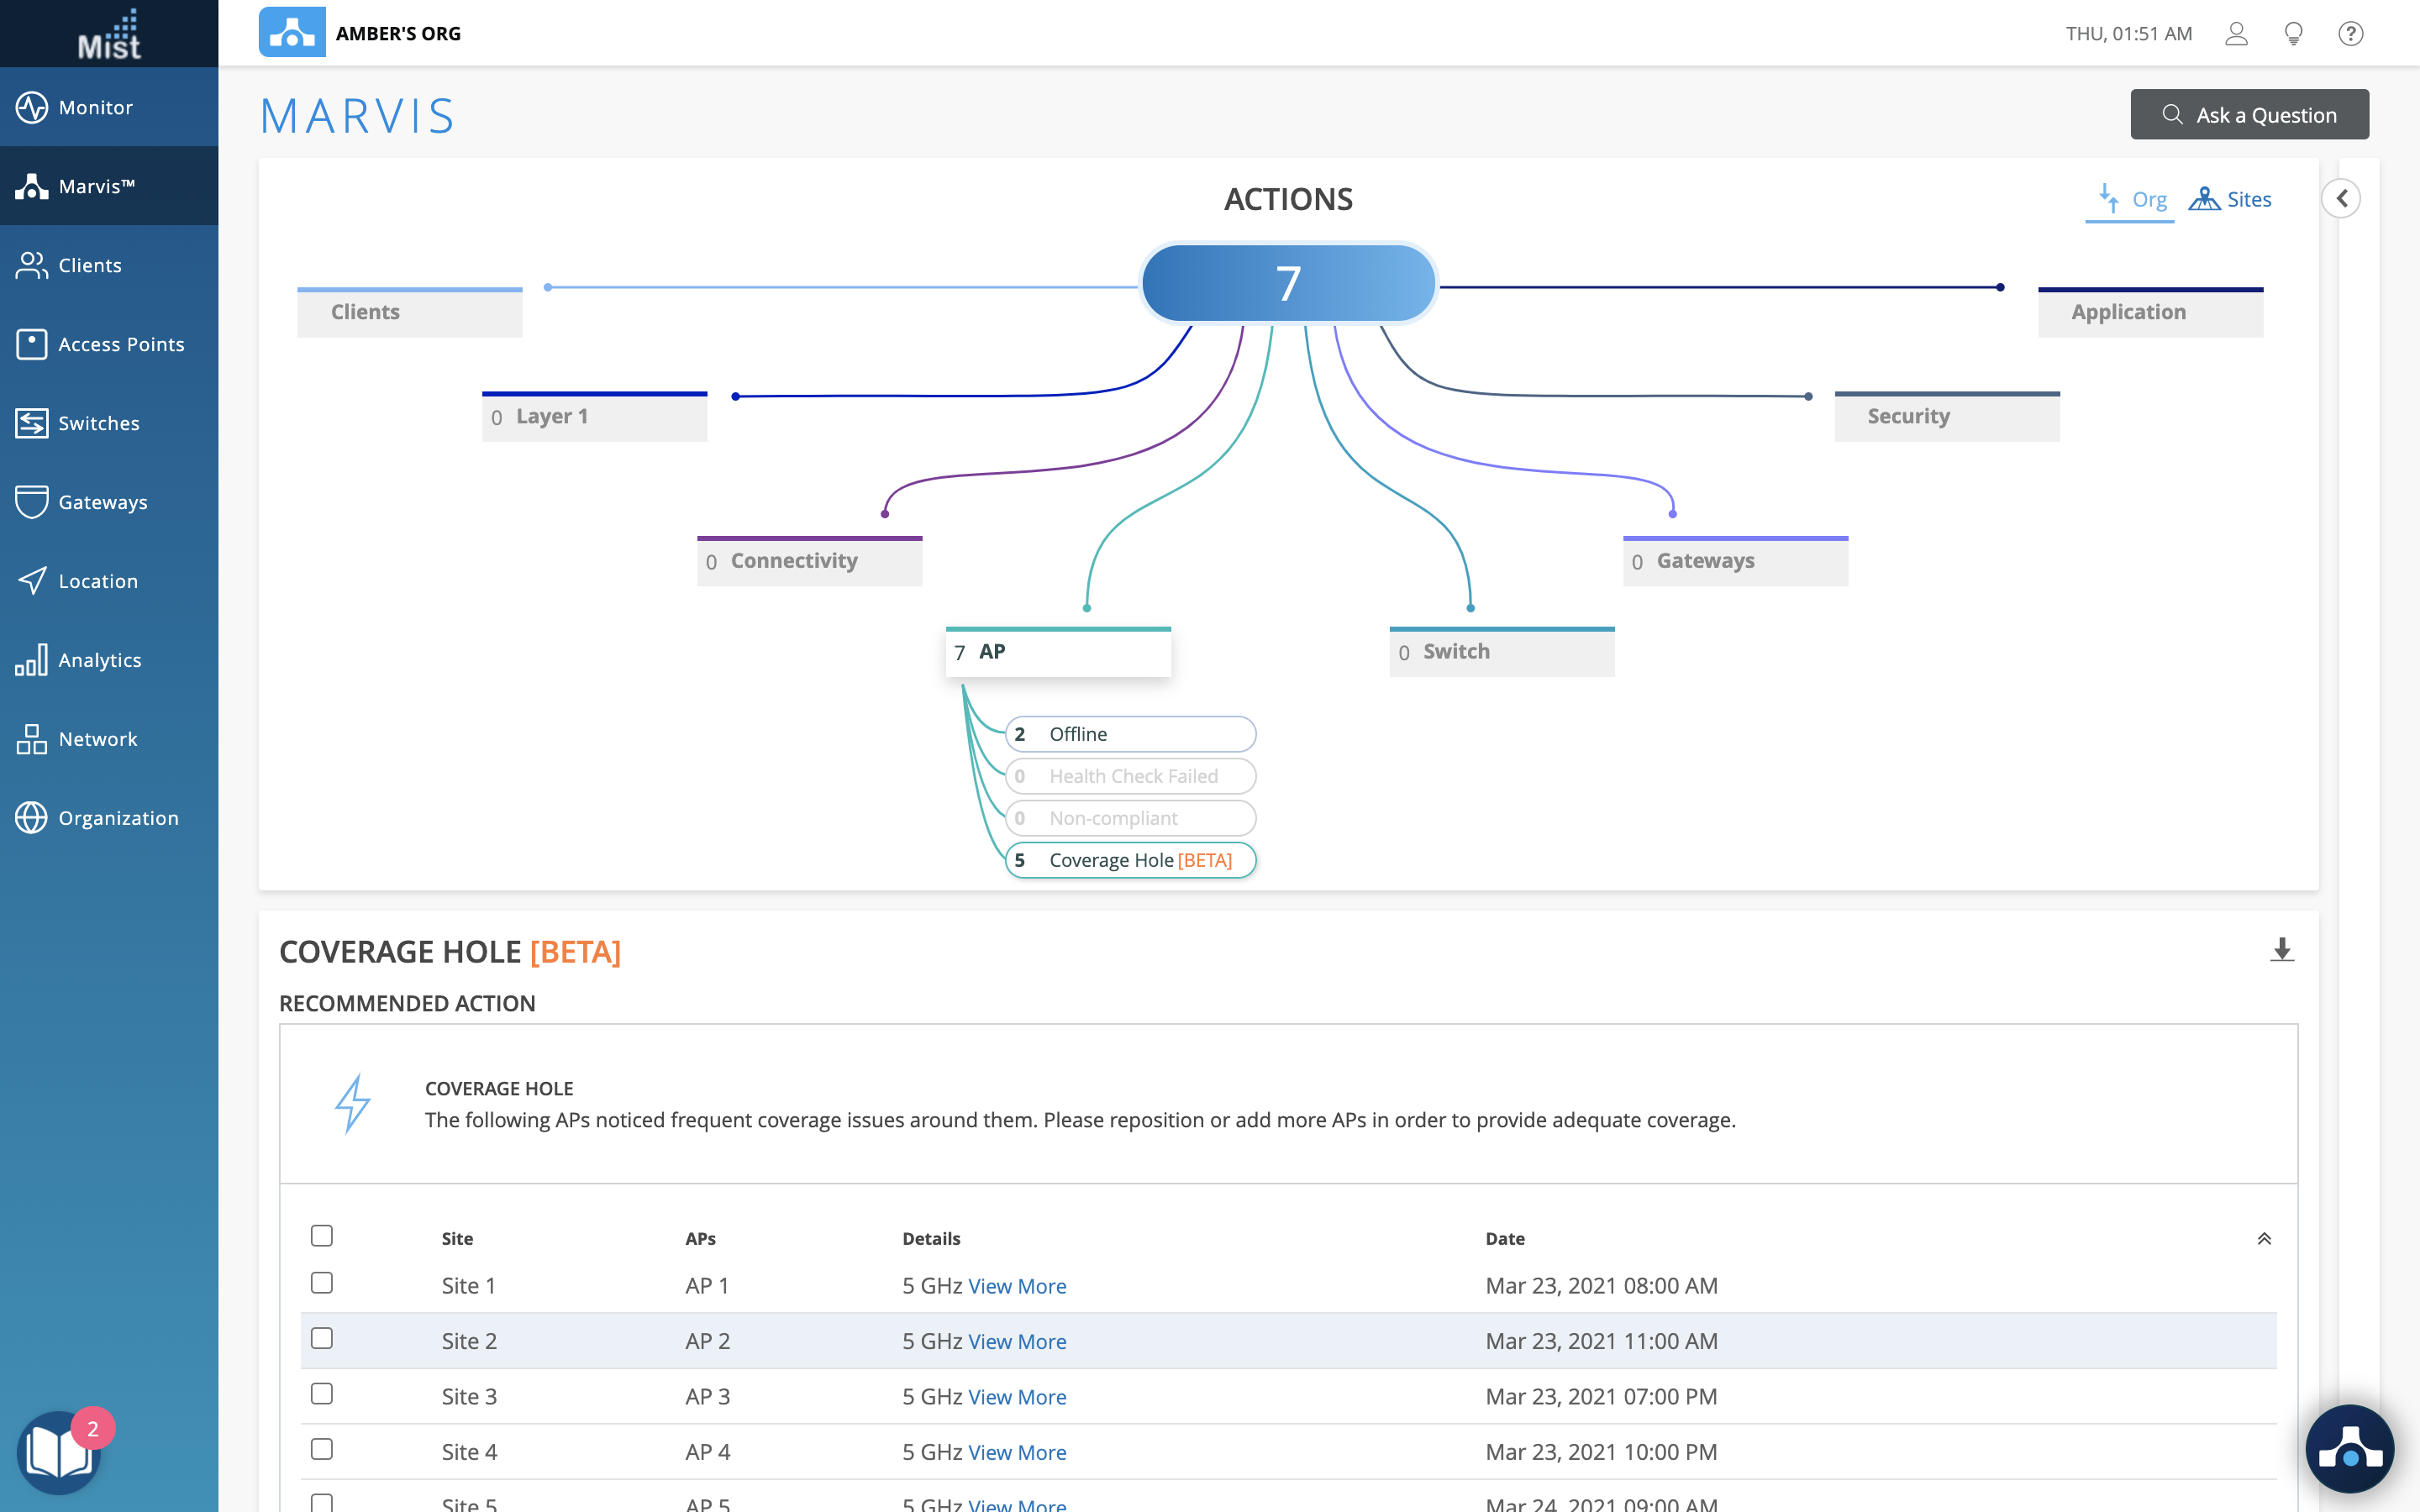
Actions – Coverage Hole [BETA]
We are also introducing a new Coverage Hole Marvis Action as a part of the AP section. This new Action will detect any coverage issues on your site and provide a floorplan visual of the APs on your map experiencing these issues. Use this visual to find the low coverage spaces identified on your site and make the necessary improvements. Make sure you have a Floorplan set up in Location Live View in order to take advantage of the Coverage hole visibility. Please keep in mind that this is still considered a Beta feature and there may be some bug fixes needed. We are working on ironing out any issues for a more complete release of this in the near future.
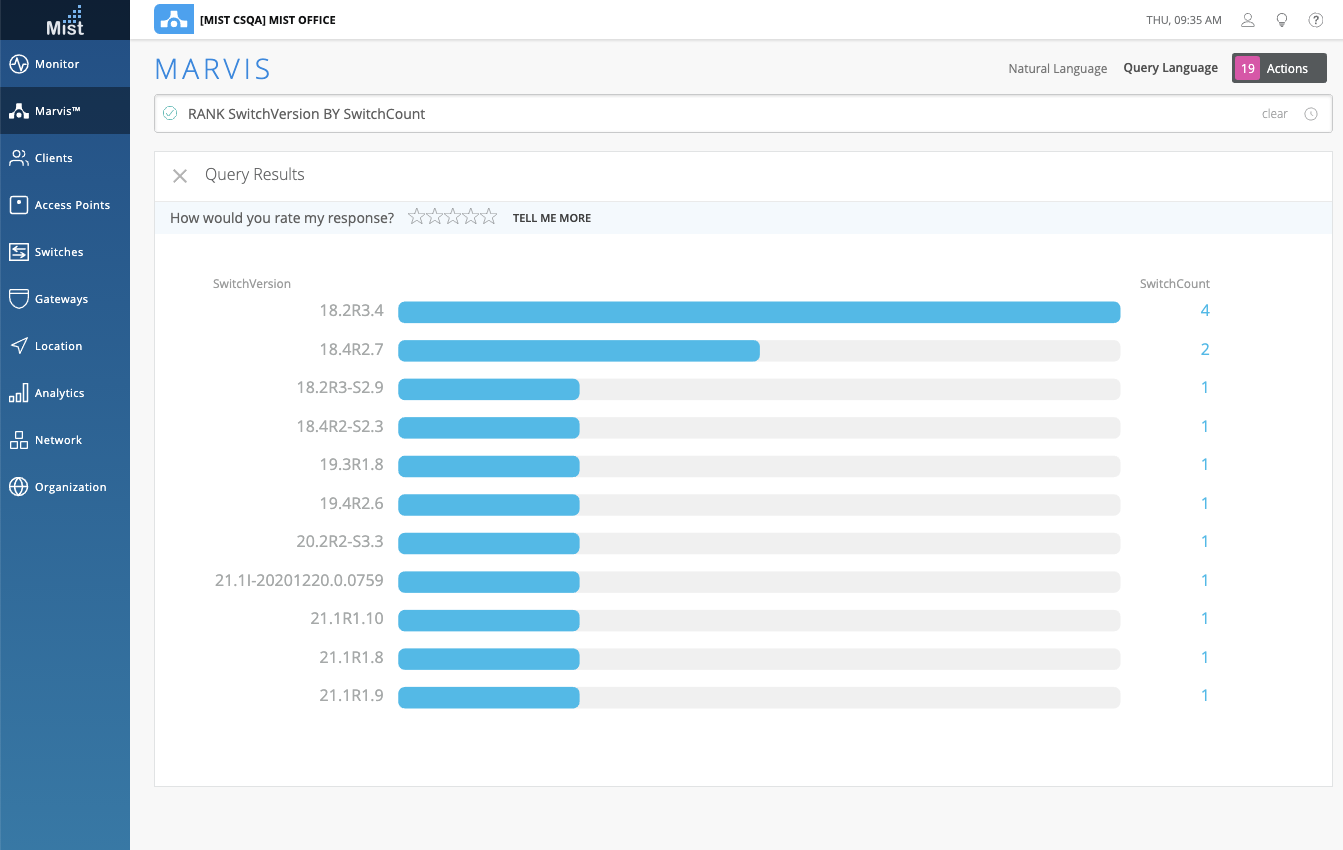
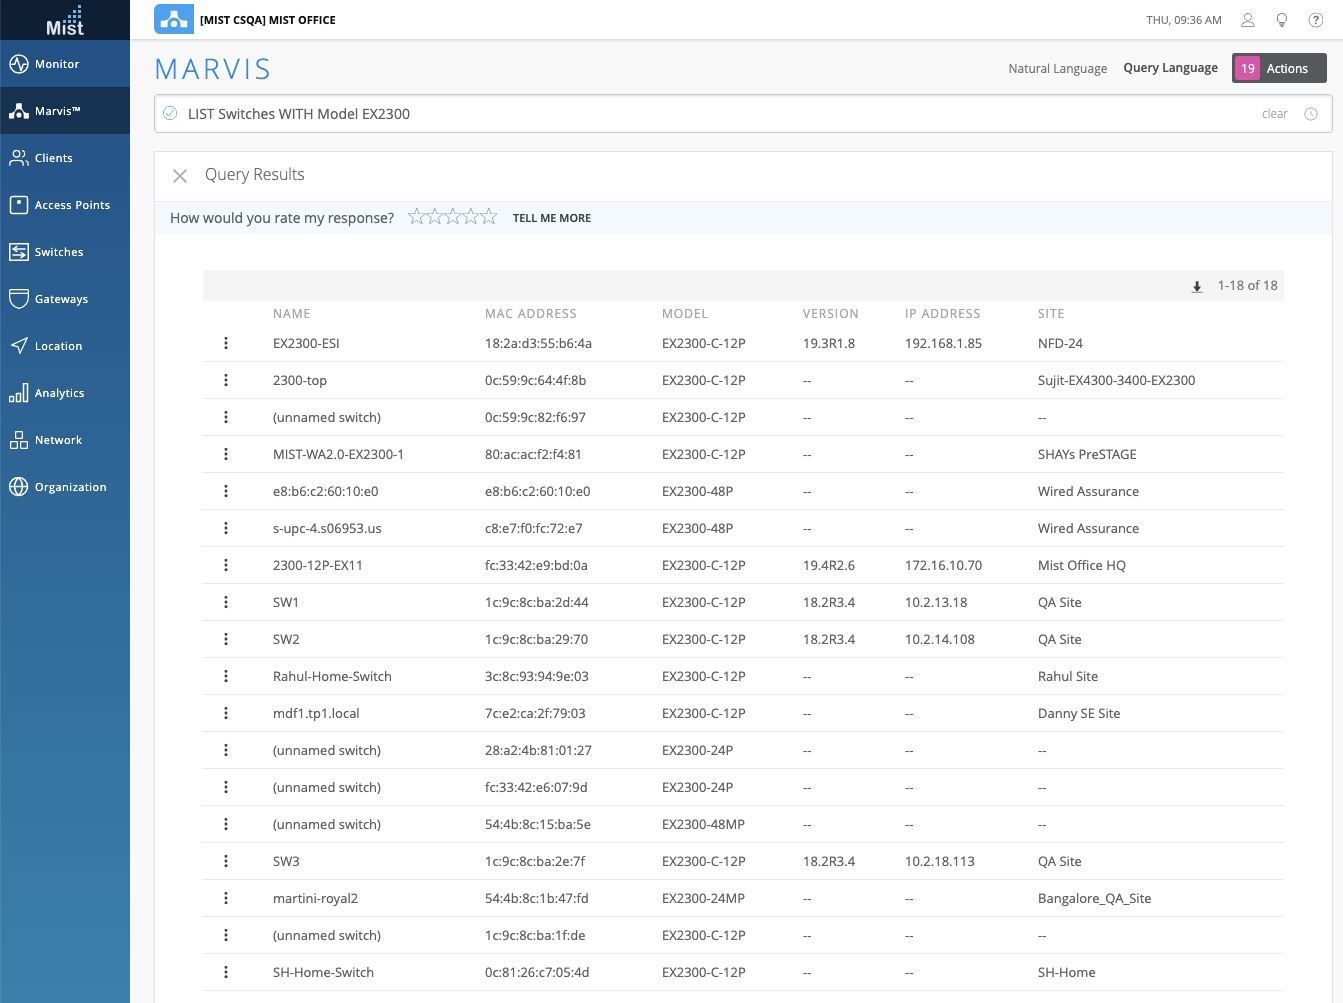
Marvis Search – More Queries for Switch
With the inclusion of Wired Assurance and Switches in our dashboard, we are also making improvements on the capabilities of our Marvis Search. This week we have some new additions to the Marvis Query Language search, including:
COUNT/LIST APs by: Model, Version, IP, MAC Address, and Site
COUNT/LIST Switches by: Model, Version, IP, MAC Address, and Site
RANK: AP Version, Switches, Switch Event Types, Switch Version
LIST Switch Events
Customer Engagement
Marvis Clients Page (please reach out to support@mist.com if you would like to try this capability)
Marvis client is a software agent in the form of an App, SDK, headless service that is installed on end user devices in order to view the network from the client’s perspective. Currently Marvis Client is only available on the Android platform. Please visit this section in our documentation to learn more about installing and using the SDK on your Android device: https://www.mist.com/documentation/category/marvis-android-client/
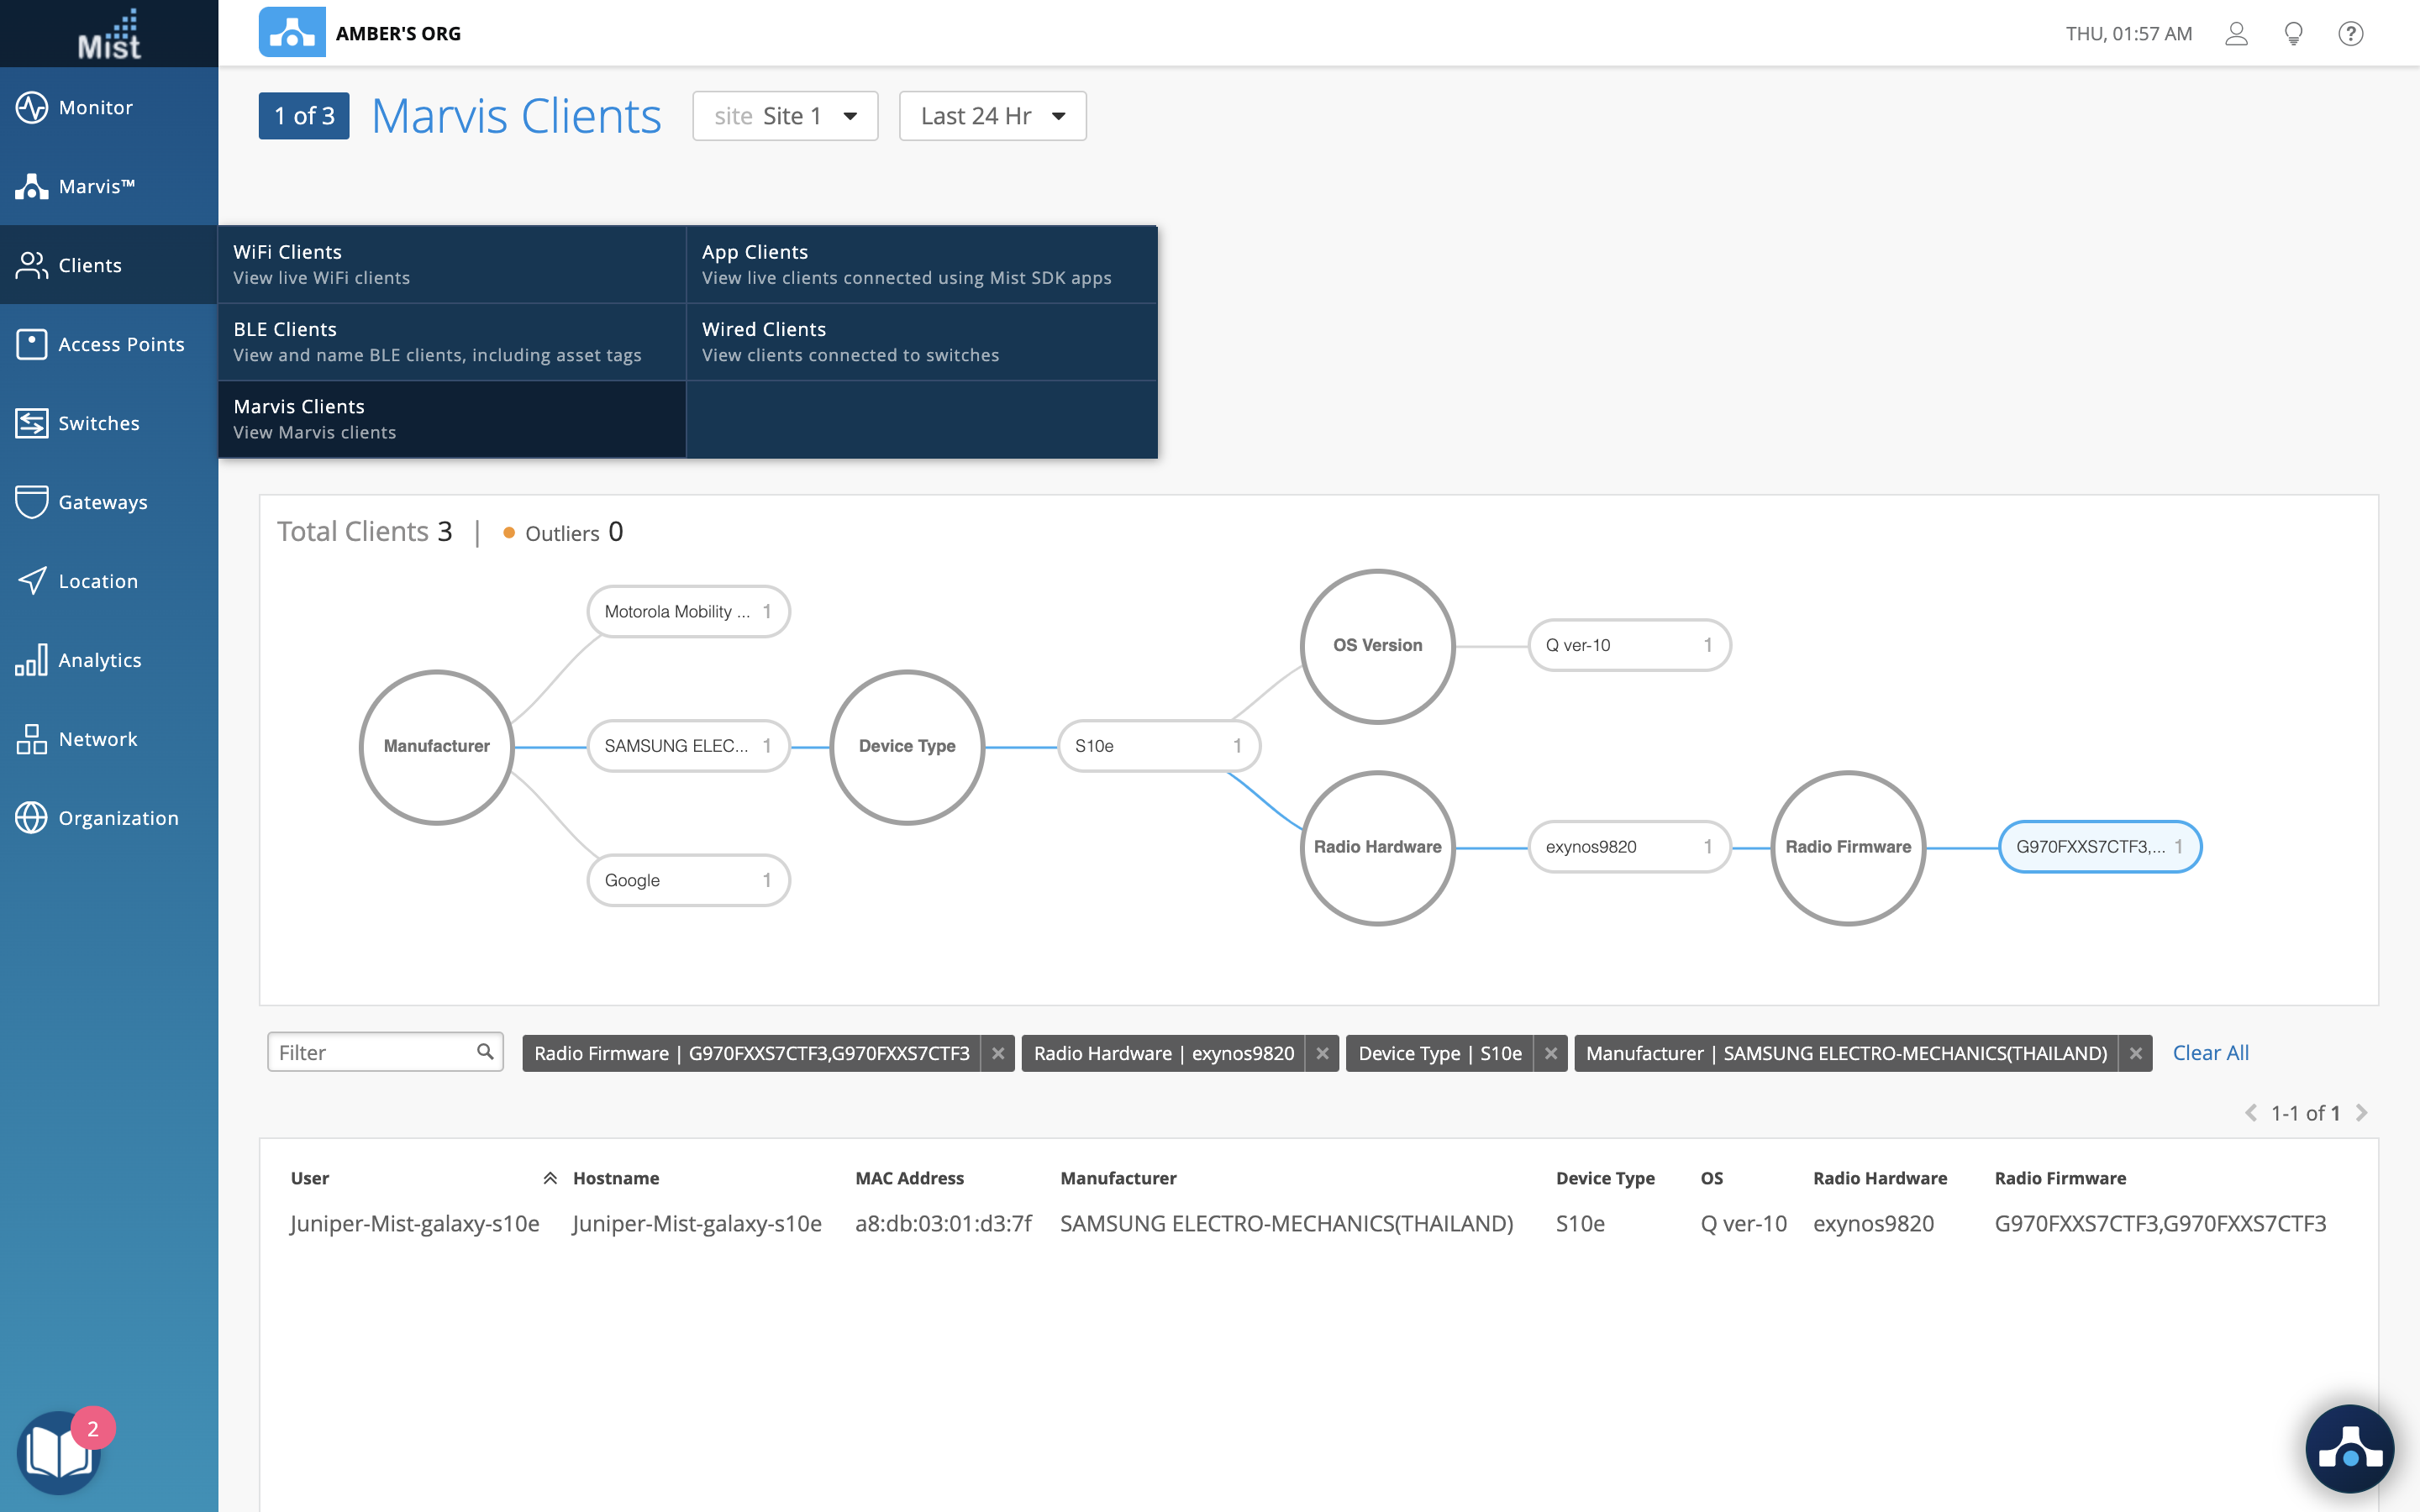
Now we have a convenient way to view all connected Marvis SDK clients directly on the Mist UI Dashboard in the new Marvis Clients page (Clients > Marvis Clients). Here, you may view a graphical representation of your Marvis Clients and their detailed information including Manufacturer, Device Type, OS Version, and Radio Hardware/Firmware. You may select either the Tree or List view to display your Marvis Clients.
Engagement Analytics – Zone Scope
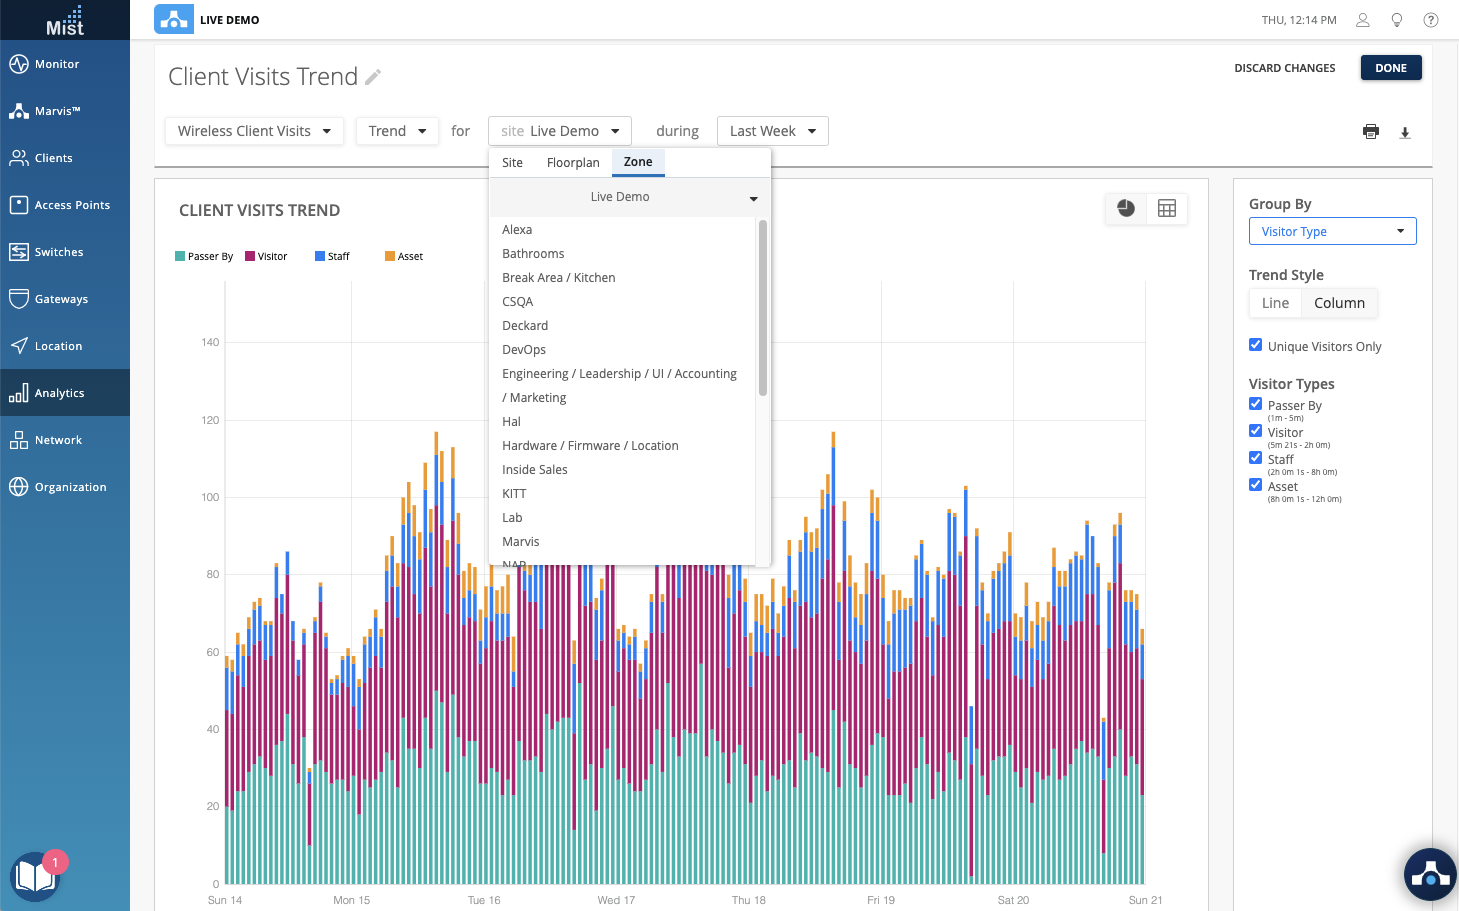
Use the Engagement Analytics page to monitor detailed views of client activity and usage rate across all your sites in a customized layout. The Engagement Analytics page focuses on client data like dwell time, visit trends, and wait time. Now we have added a Zone scope as an option when customizing individual cells allowing you to only look at data in selected zones. Use this to help keep track of specific zone areas in your site for a more detailed site monitoring ability.
Find out more about Engagement Analytics here: https://www.mist.com/documentation/network-and-engagement-analytics/
Wired Assurance
Switch Upgrade
We are excited to bring you the next improvement in our Wired Assurance vision. You now have the ability to upgrade the firmware of your supported Juniper switches directly from our UI Dashboard! You can find the upgrade button in your Switches Page in the upper right corner. Just select the switches you wish to upgrade using the check boxes and click on Upgrade Switches. In the modal, select your firmware version to upgrade to in the dropdown menu. You may select Reboot switch after image copy – By checking this box, the switch will automatically reboot after the image copy procedure is completed, so that switch will boot up with the new image.
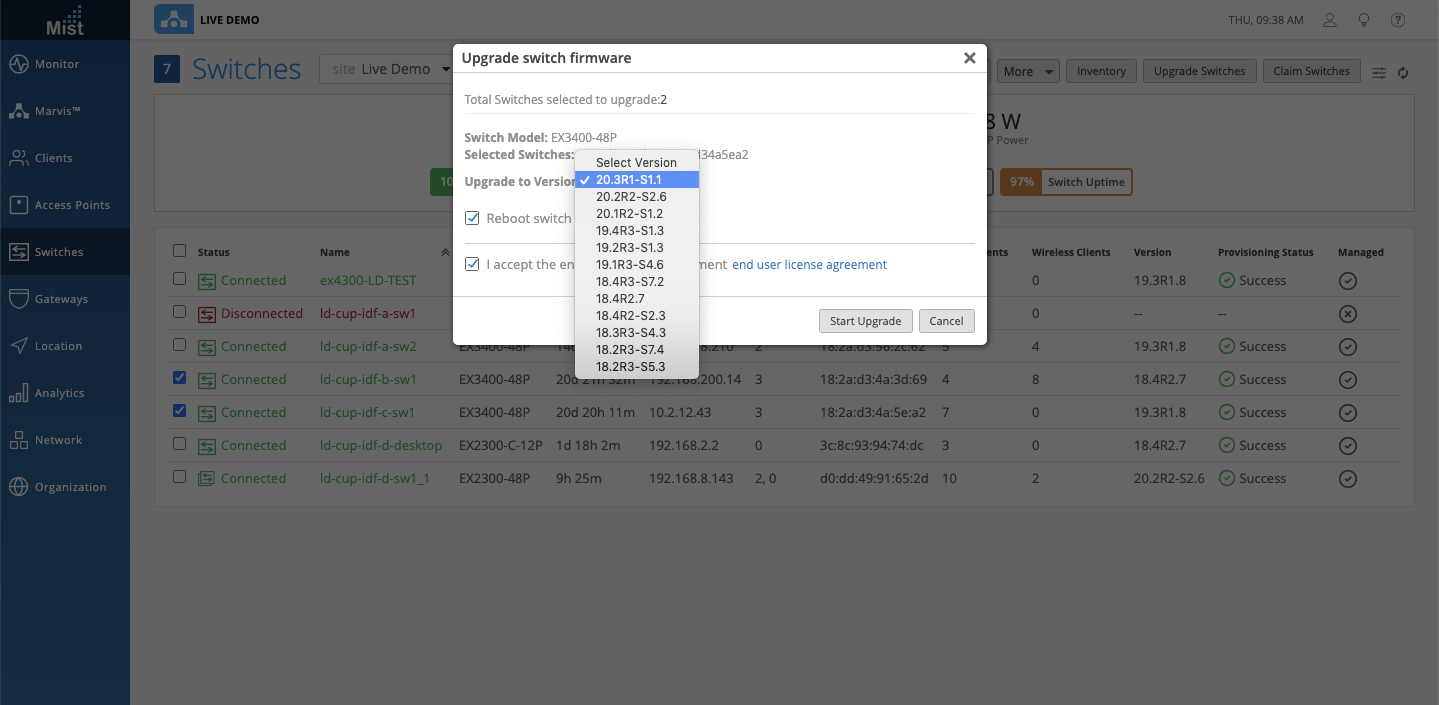
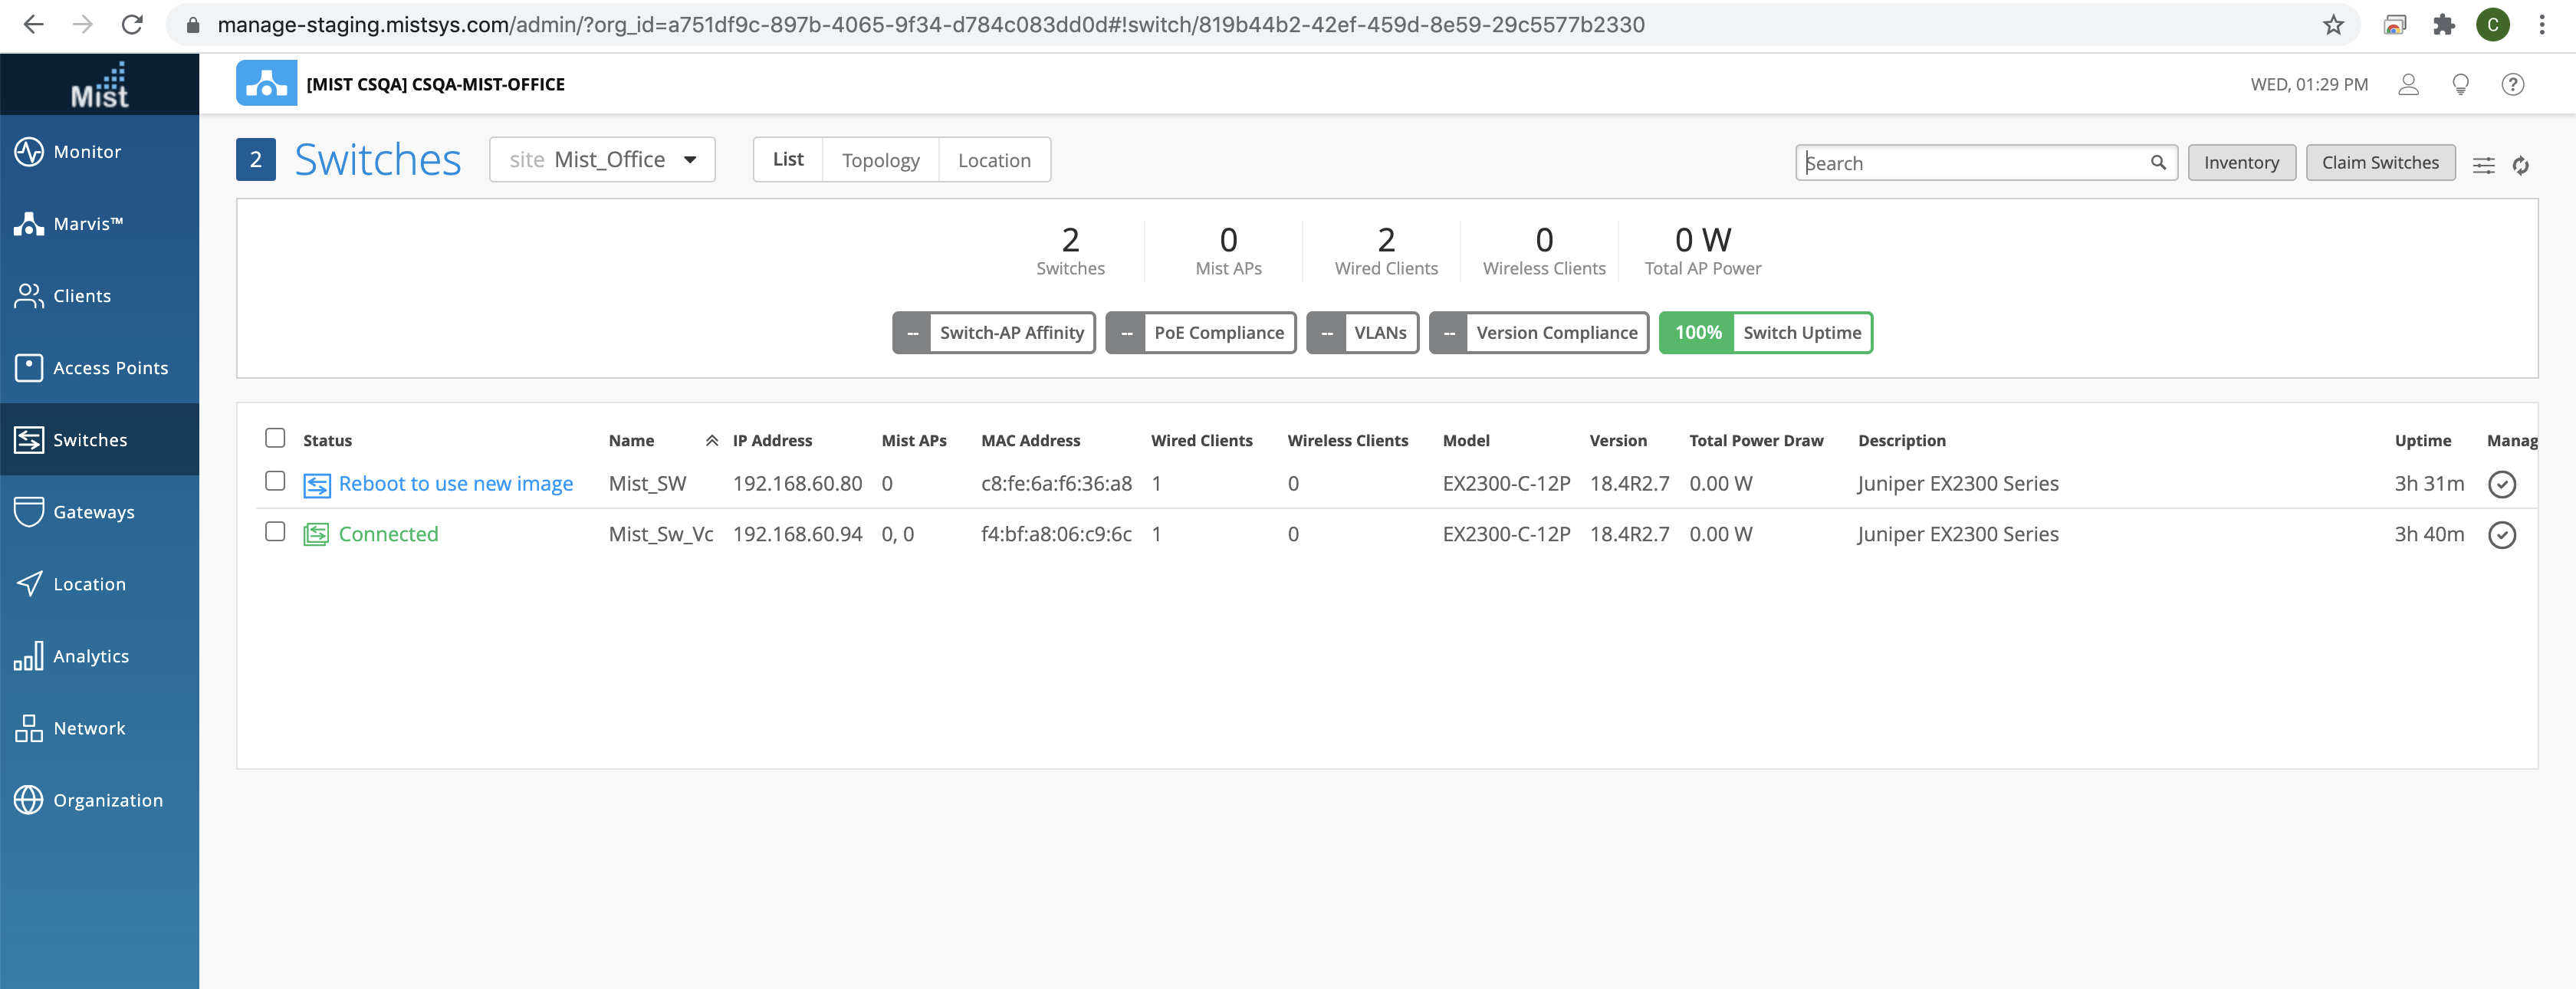
If you leave this option unchecked, once the Switch image version uploading is done the UI will show Reboot to use new image as the Switch status. Reboot the switch to upgrade to the desired image.
Also, do make sure to accept the End-user license agreement in order to be able to access the firmware images and proceed with the upgrade.
Feature Deprecation
Extended Deadline for Location Analytics and Reports
We previously notified you of the Feature Deprecation for Location Analytics and Reports. While this feature is still getting deprecated, we are extending the deadline to give you more time to navigate the change. Now, availability for the Location Analytics and Reports dashboards have been extended to 4/7 in the UI. API-only access to the data has also been extended to 6/30. Please continue to migrate over to Engagement & Network Analytics under the “Analytics” tab to create custom reports.