Create a Topology with High-Avail Spoke and Hub SRX Routers
With this Lab the Topology changes and reuses the 5 SRX’s in a different manner. Instead of 3 Spokes and 2 Hubs on each side we have devices forming a HA-Cluster. So, this scenario has one standalone and one HA-Clustered Spoke and an HA-Clustered Hub on the other side.
The supported SRX HA-Clustering for WAN Edge requires local Layer2 adjacencies regardless of if it is a Spoke or a Hub.
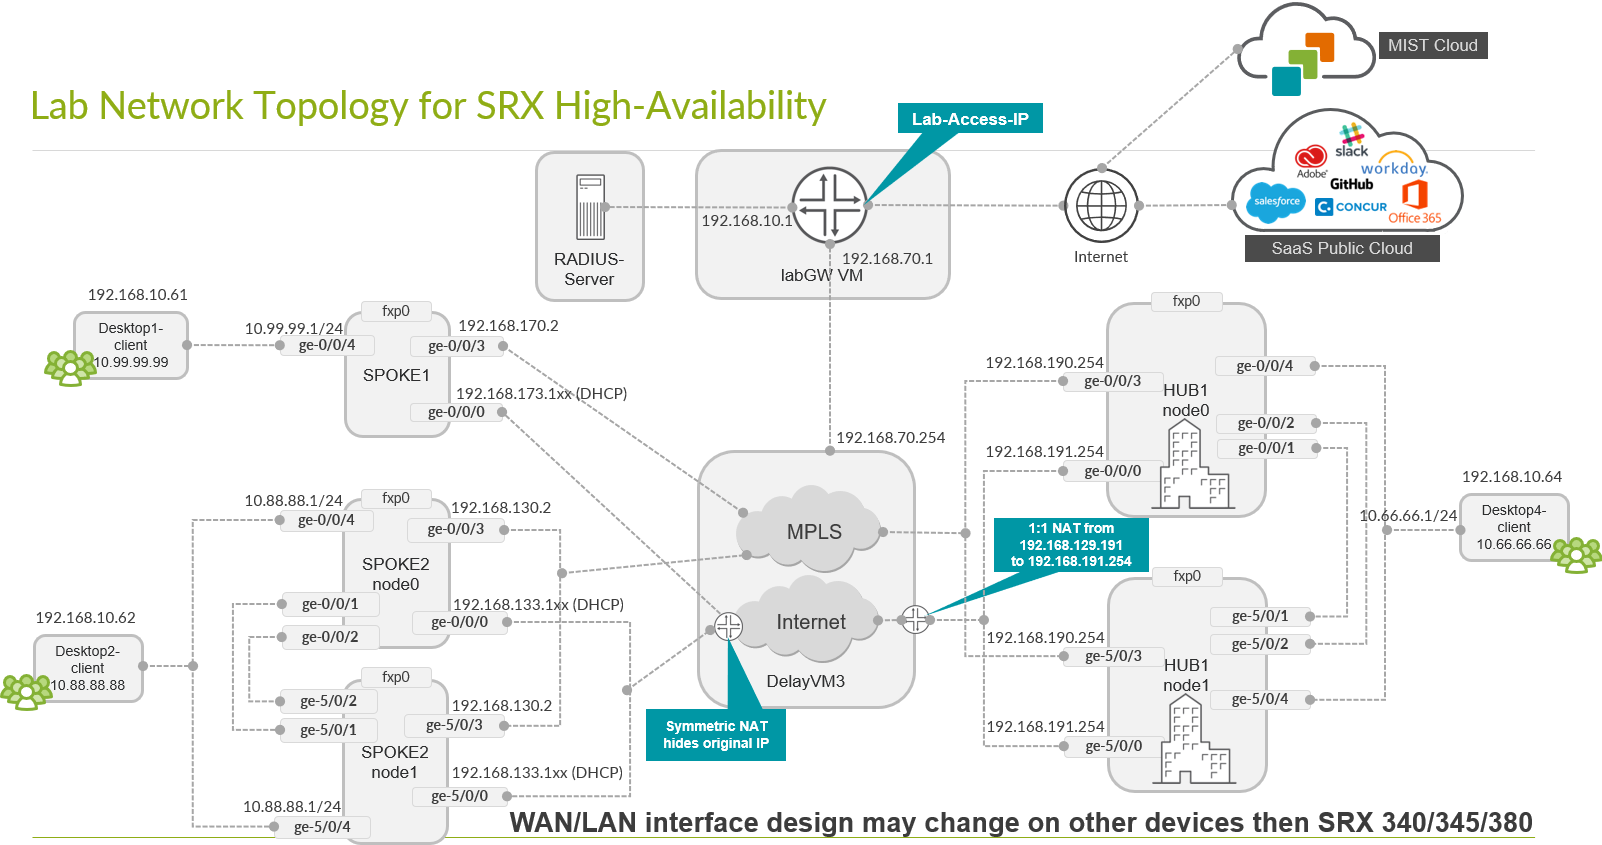
The resulting Topology will look like the below Picture
First one must make yourself aware of building a Cluster with SRX:
- Requires a dedicated HA-Control interface that is defined by the Device type. This interface is connected usually via a patch cable between the two devices. You can NOT change the Port and depend on the Device type.
- Requires a dedicated Fabric-Data interface. This interface is connected usually via a patchable between the two devices. While our public Documentation may state that you can select the Port used yourself this is NOT possible with WAN Edge. The Fabric is usually the one next to the Control Port and there is no API/GUI to influence that.
- Like for a Virtual Chassis the Ports on the secondary node are renumbered after the cluster has been built.
- Building the Cluster always involves the two nodes to reboot after initial commands issues to build the cluster.
We suggest to review the following two articles about ports used and the re-numbering process.
https://supportportal.juniper.net/s/article/SRX-Chassis-Cluster-Ports-Details-for-SRX-Series
WAN-EDGE automatically chose the Fabric interface next to the HA Control Interface. So be aware this is also a fixed assignment. For documentation use the link. Note that using the link below is only possible if you are logged in to https://manage.mist.com .
The Link to use is: https://api.mist.com/api/v1/docs/Site#ha-cluster
Only the WAN1, WAN0 and LAN1 are changeable in the List below if they do not conflict with others which are not changeable.
With all this information together and knowing that ZTP (needs DHCP-Lease on that Port) is also not done from all Ports of the device initially we have created the following Table for the Primary Node0 and our Labs.
Primary Node0 Interface Table
Device MGMT
(fxp0) HA Control Fabric Data WAN0
ZTP-IF WAN1 LAN1 LAN2
optional
vSRX-N0 Mgmt em0 ge-0/0/0 ge-0/0/1 ge-0/0/3 ge-0/0/4 ge-0/0/5
SRX300-N0 ge-0/0/0 ge-0/0/1 ge-0/0/2 ge-0/0/7 ge-0/0/3 ge-0/0/4 ge-0/0/5
SRX320-N0 ge-0/0/0 ge-0/0/1 ge-0/0/2 ge-0/0/7 ge-0/0/3 ge-0/0/4 ge-0/0/5
SRX340-N0 Mgmt ge-0/0/1 ge-0/0/2 ge-0/0/0 ge-0/0/3 ge-0/0/4 ge-0/0/5
SRX345-N0 Mgmt ge-0/0/1 ge-0/0/2 ge-0/0/0 ge-0/0/3 ge-0/0/4 ge-0/0/5
SRX380-N0 Mgmt ge-0/0/1 ge-0/0/2 ge-0/0/0 ge-0/0/3 ge-0/0/4 ge-0/0/5
SRX550-N0 Mgmt ge-0/0/1 ge-0/0/2 ge-0/0/0 ge-0/0/3 ge-0/0/4 ge-0/0/5
SRX1500-N0 Mgmt ha_control ge-0/0/1 ge-0/0/0 ge-0/0/3 ge-0/0/4 ge-0/0/5
SRX4100-N0 Mgmt ha_control ha_data xe-0/0/0 xe-0/0/3 xe-0/0/4 xe-0/0/5
SRX4200-N0 Mgmt ha_control ha_data xe-0/0/0 xe-0/0/3 xe-0/0/4 xe-0/0/5
SRX4600-N0 Mgmt ha_control ha_data xe-1/0/0 xe-1/0/3 xe-1/0/4 xe-1/0/5
Additionally, on the Second node1 after the reboot to build the cluster has happened the local interface names change. You have to use those when you configure the second WAN/LAN interface in the Mist GUI.
Secondary Node1 Interface Table RENUMBERING
Device MGMT
(fxp0) HA Control Fabric Data WAN0
ZTP-IF WAN1 LAN1 LAN2
optional
vSRX-N1 Mgmt em0 ge-7/0/0 ge-7/0/1 ge-7/0/3 ge-7/0/4 ge-7/0/5
SRX300-N1 ge-1/0/0 ge-1/0/1 ge-1/0/2 ge-1/0/7 ge-1/0/3 ge-1/0/4 ge-1/0/5
SRX320-N1 ge-3/0/0 ge-3/0/1 ge-3/0/2 ge-3/0/7 ge-3/0/3 ge-3/0/4 ge-3/0/5
SRX340-N1 Mgmt ge-5/0/1 ge-5/0/2 ge-5/0/0 ge-5/0/3 ge-5/0/4 ge-5/0/5
SRX345-N1 Mgmt ge-5/0/1 ge-5/0/2 ge-5/0/0 ge-5/0/3 ge-5/0/4 ge-5/0/5
SRX380-N1 Mgmt ge-5/0/1 ge-5/0/2 ge-5/0/0 ge-5/0/3 ge-5/0/4 ge-5/0/5
SRX550-N1 Mgmt ge-9/0/1 ge-9/0/2 ge-9/0/0 ge-9/0/3 ge-9/0/4 ge-9/0/5
SRX1500-N1 Mgmt ha_control ge-7/0/1 ge-7/0/0 ge-7/0/3 ge-7/0/4 ge-7/0/5
SRX4100-N1 Mgmt ha_control ha_data xe-7/0/0 xe-7/0/3 xe-7/0/4 xe-7/0/5
SRX4200-N1 Mgmt ha_control ha_data xe-7/0/0 xe-7/0/3 xe-7/0/4 xe-7/0/5
SRX4600-N1 Mgmt ha_control ha_data xe-8/0/0 xe-8/0/3 xe-8/0/4 xe-8/0/5
With this knowledge you can now start your Lab.
Clone Hub-Profile and Spokes-Template
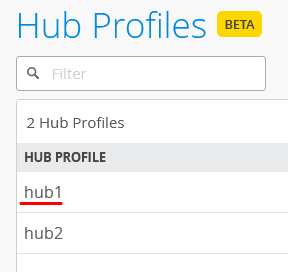
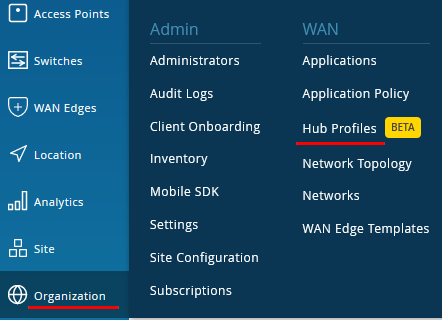
Go to Organization -> Hub Profiles

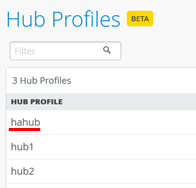
We create the new Hub-Profile by cloning the existing one and then modifying the clone. Hence click on the existing Profile “hub1”
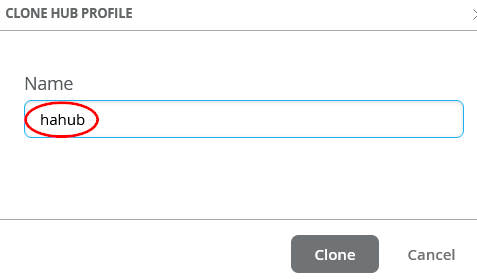
Then click on “Clone”

And name the new Profile “hahub”
BEST PRACTICE: Always refresh your Browser after you cloned something. This will make sure all objects are REALLY refreshed!

The new Profile now needs to be modified. For the WAN-Interfaces you will see that we have added a redundant interface according to the secondary Node Interface naming for SRX340 to 380 above. You might need to change that for your own deployments if you have other devices.
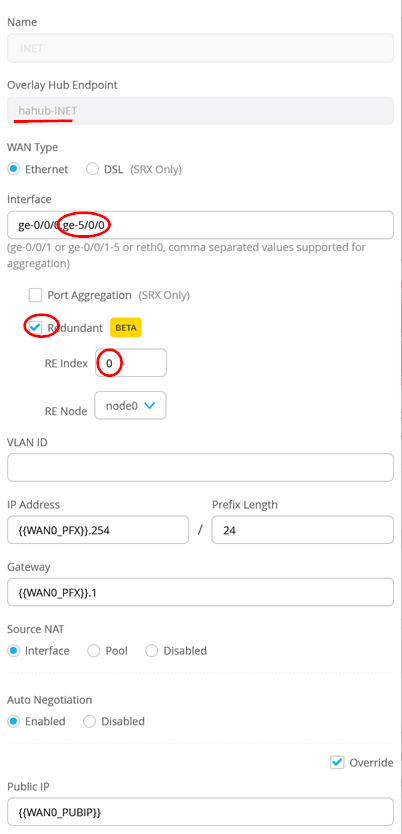
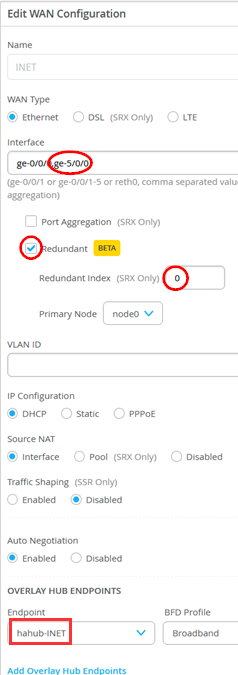
Here is how a redundant Interface would look like. The Overlay Hub Endpoint also changes with the new Profile name. For the Interface named “INET” the configuration would now be:
- Interfaces change to the added=ge-0/0/0,ge-5/0/0
- Redundant=Enabled
- RE Index=0 As a convention we usually use the last octet as index.
- IP Address, Prefix, Gateway and Public IP do not change.
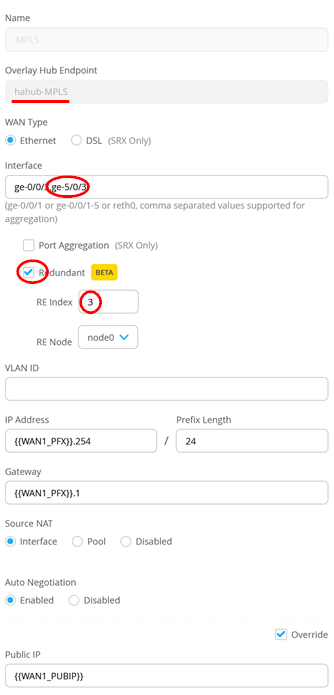
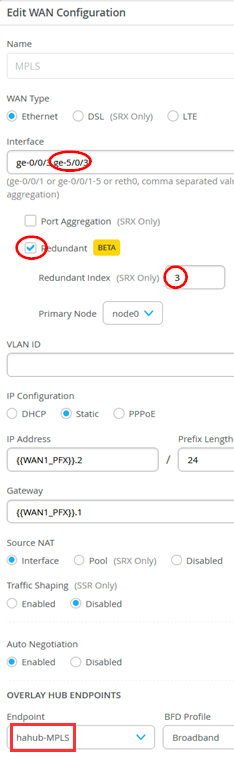
Same for the second WAN-Interface called “MPLS”
- Interfaces change to the added=ge-0/0/3,ge-5/0/3
- Redundant=Enabled
- RE Index=3 As a convention we usually use the last octet as index.
- IP Address, Prefix, Gateway and Public IP do not change.
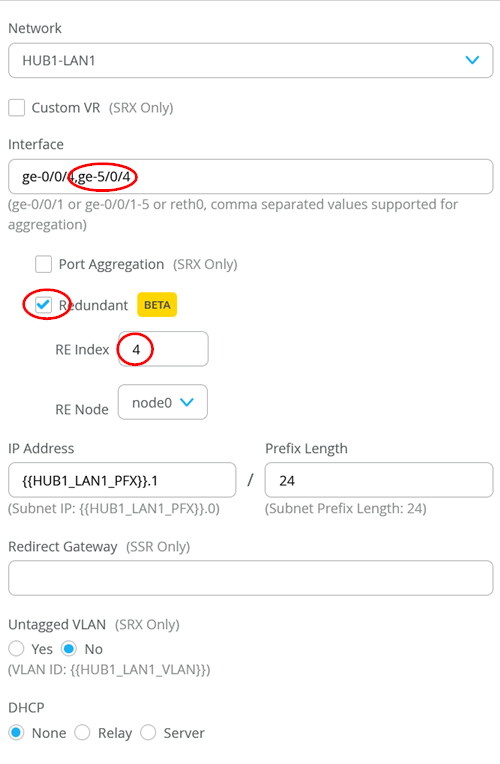
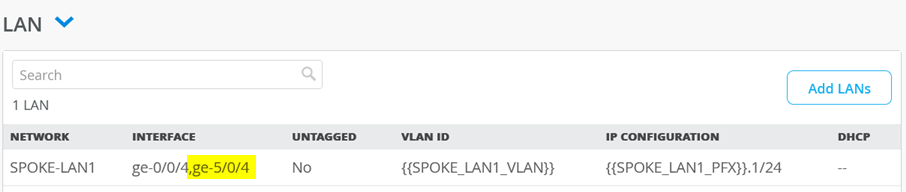
The LAN-Interface is also defined as redundant interface for cluster support.
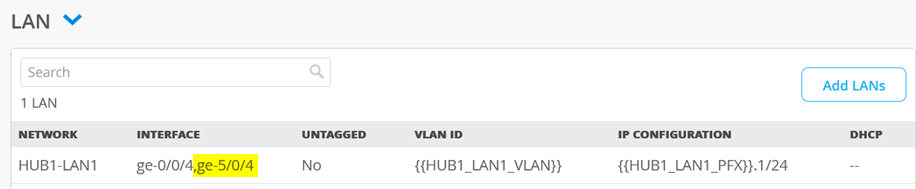
You see it follows a similar pattern for the LAN-Interface as for the WAN-Interface.
- Interfaces change to the added=ge-0/0/4,ge-5/0/4
- Redundant=Enabled
- RE Index=4 As a convention we usually use the last octet as index.
- IP Address and Prefix do not change.
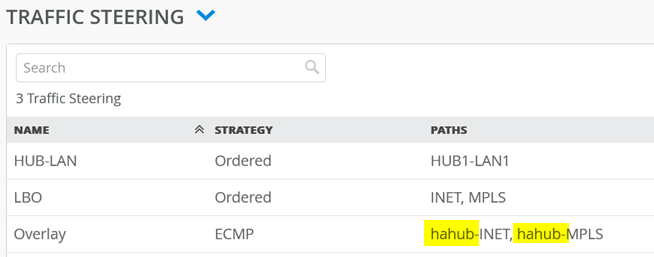
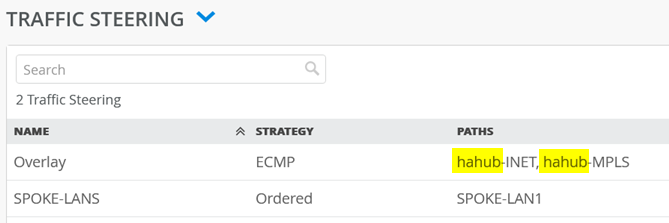
The Traffic steering rules change a bit for the new endpoint names.
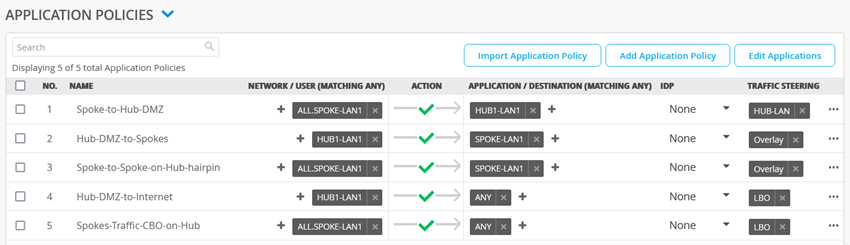
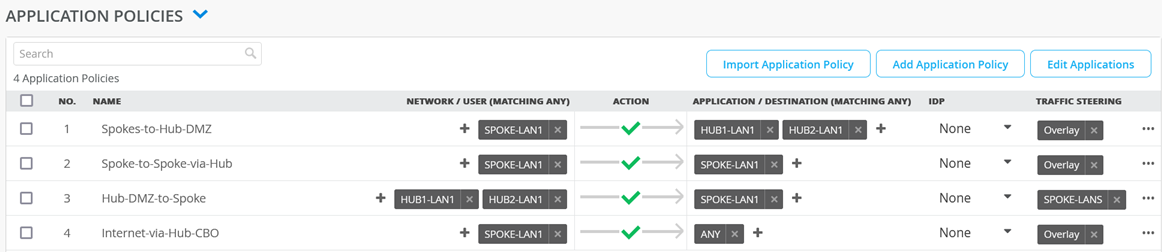
The Application Policies did not change at all.
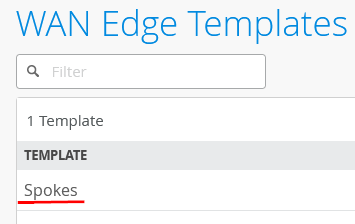
Go to Organization -> WAN Edge Templates.

We create the new Spoke-Template by cloning the existing one and then modifying the clone. Hence click on the existing Profile “Spokes”
Then click on “Clone”
And name the new Profile “haspoke”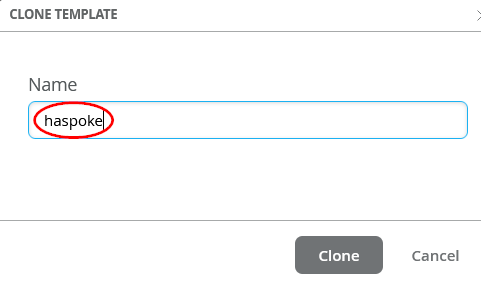
BEST PRACTICE: Always refresh your Browser after you cloned something. This will make sure all objects are REALLY refreshed!
Please review the created Template. For the WAN-Interfaces you will see that we have added a redundant interface according to the secondary Node Interface naming for SRX340 to 380 above. You might need to change that for your own labs if you have other devices. They also have the Overlay Hub endpoints changed to the hahub.

Here are the changes on the first WAN Interface:
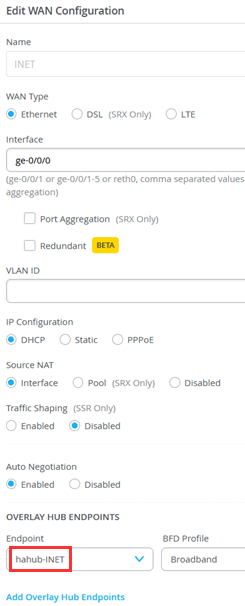
For the Interface named “INET” the configuration would now be:
- Interfaces change to the added=ge-0/0/0,ge-5/0/0
- Redundant=Enabled
- RE Index=0 As a convention we usually use the last octet as index.
- IP Configuration does not change.
- Overlay Hub EndPoints must be changed to a single (redundant)
- Endpoint=hahub-INET
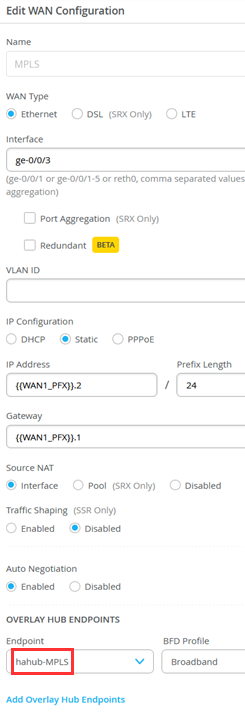
Here are the changes on the second WAN Interface:
- Interfaces change to the added=ge-0/0/3,ge-5/0/3
- Redundant=Enabled
- RE Index=3 As a convention we usually use the last octet as index.
- IP Configuration does not change.
- Overlay Hub EndPoints must be changed to a single (redundant)
- Endpoint=hahub-MPLS
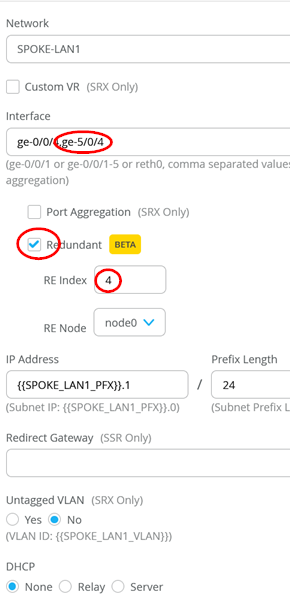
The LAN-Interface is also defined as redundant interface for cluster support.
- Interfaces change to the added=ge-0/0/4,ge-5/0/4
- Redundant=Enabled
- RE Index=4 As a convention we usually use the last octet as index.
- IP Address and Prefix do not change.
You see it follows a similar pattern for the LAN-Interface as for the WAN-Interface.
Next Step is to modify the Traffic Steering Profile named “Overlay” to use only the two new Hub Endpoints.
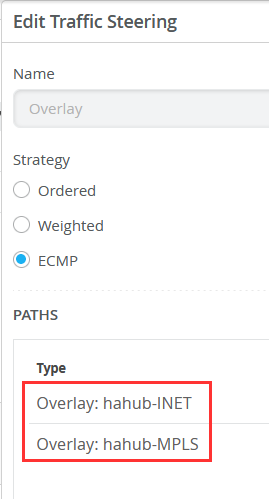
The Traffic steering rules now point to the hahub endpoints.
The Application Policies are the same as before.
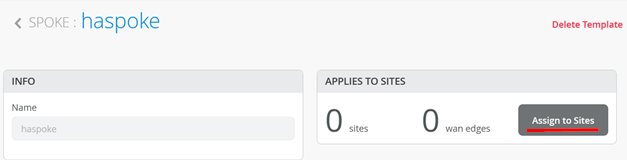
Now click on the “Assign to Sites”-Button
Check that you are using the “haspoke” Template and select the site “spoke2-site” before you hit “Apply”.
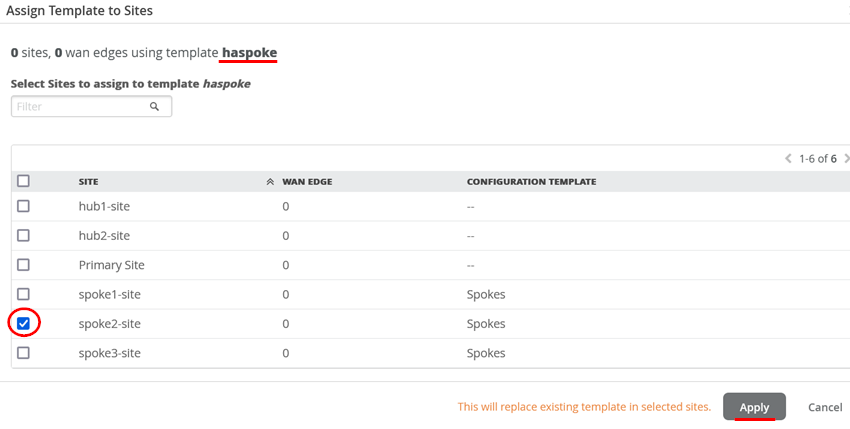
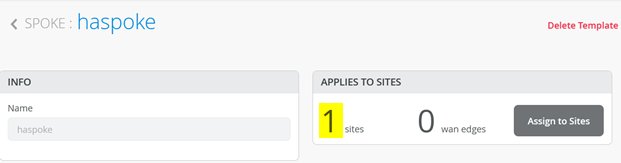
Check that your Template has now at least 1 Site assigned.
Go to Organization -> WAN Edge Templates.
We create the new Spoke-Template by cloning the existing one and then modifying the clone. Hence click on the existing Profile “Spokes”
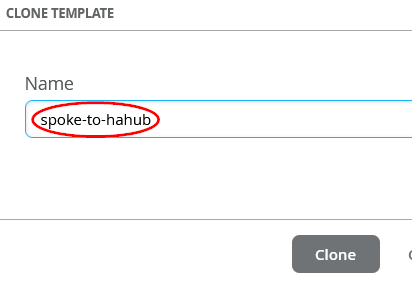
Then click on “Clone”
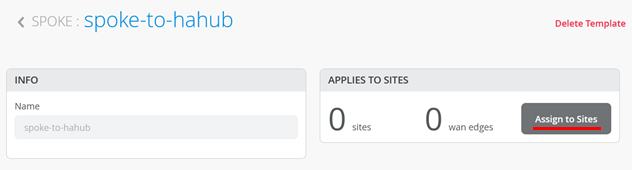
And name the new Profile “spoke-to-hahub”
BEST PRACTICE: Always refresh your Browser after you cloned something. This will make sure all objects are REALLY refreshed!
There are not many differences between this and the former template. The only Point that changes are the Hub Endpoints for the WAN-Interfaces.
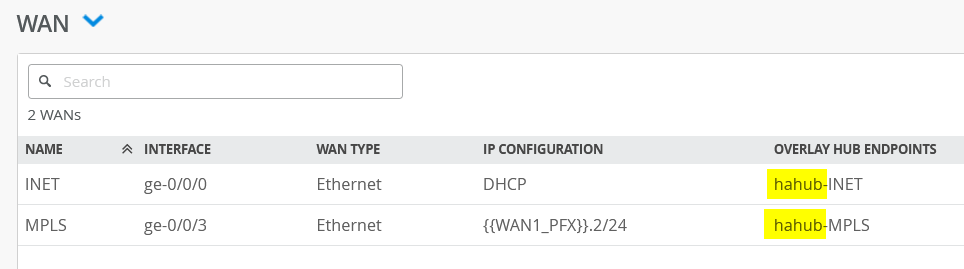
For the Interface named “INET” the configuration would now be:
- Overlay Hub EndPoints must be changed to a single (redundant)
- Endpoint=hahub-INET
For the Interface named “MPLS” the configuration would now be:
- Overlay Hub EndPoints must be changed to a single (redundant)
- Endpoint=hahub-MPLS
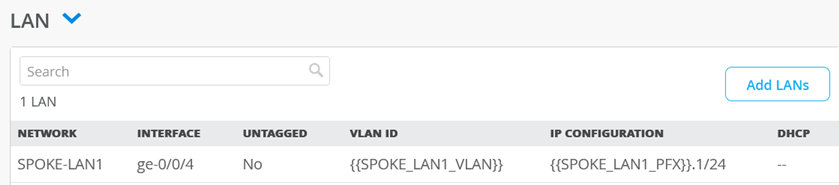
The LAN-Interfaces did not change and are not redundant on this type of Spoke.
Next Step is to modify the Traffic Steering Profile named “Overlay” to use only the two new Hub Endpoints.
The Traffic steering rules now point to the hahub endpoints.
The Application Policies are the same as before.
Now click on the “Assign to Sites”-Button
CCCC
Check that you are using the “spoke-to-hahub” Template and select the site “spoke1-site” before you hit “Apply”.
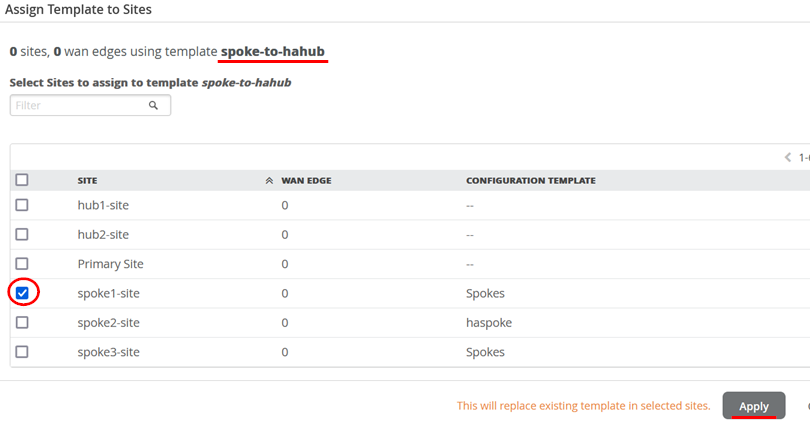
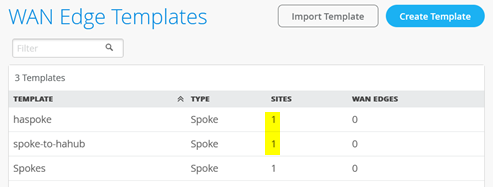
Check that your Template has now at least 1 Site assigned.
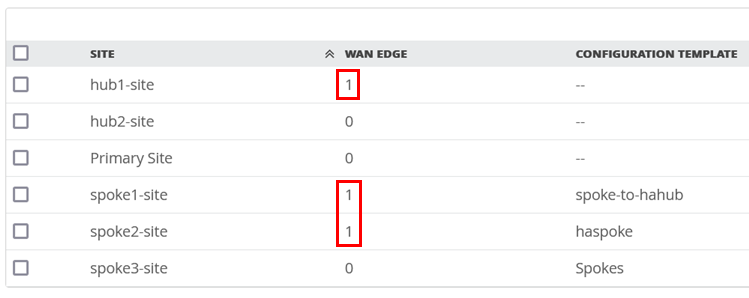
Your WAN-Ede Template overview should now look like the below. Please check.
Onboard your Devices
All HA-Cluster devices will start in standalone mode and the Mist Cloud will transition them into the Cluster mode. There is no special preparation one needs to do. Just take care that the Interfaces are correct cabled.
Now it’s time to use the Claim or Adopt Method to onboard the devices and see them in the organization inventory. We have already shared this information in chapter 2 above as it is a Day-0 task. On-board your devices please and then continue here.
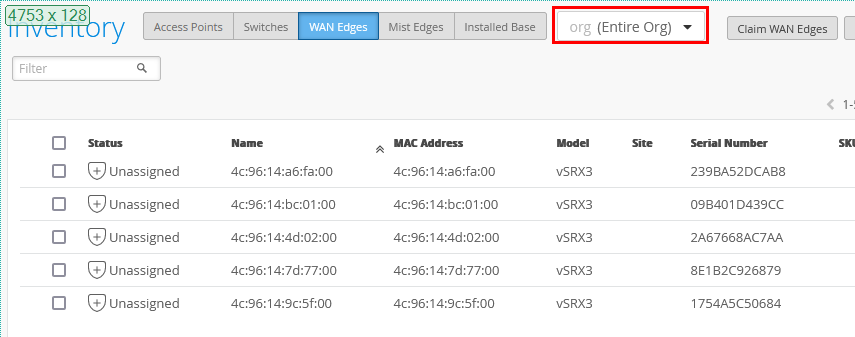
Go to Organization -> Inventory

Make sure the Inventory-View is set to “(Entire Org)” as below and hit the refresh-Button on your Browser until you hopefully see all your devices.
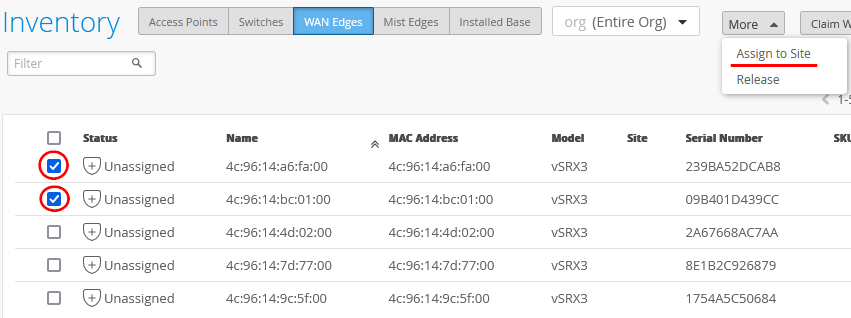
Select the two devices that will belong to the Hub-Cluster same time and execute “Assign to Site”.
Select “hub1-site” and enable “Create Cluster” before you “Assign to Site”.
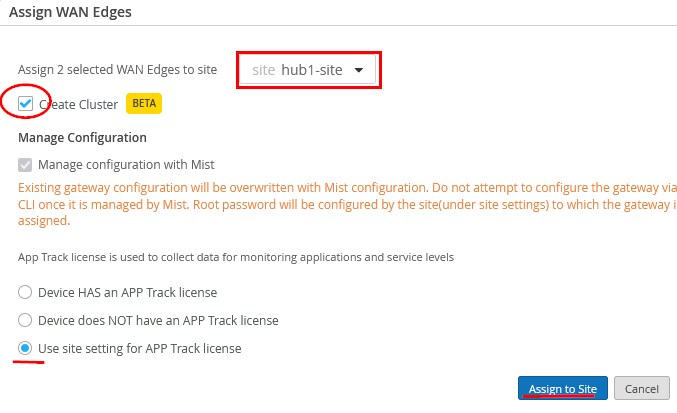
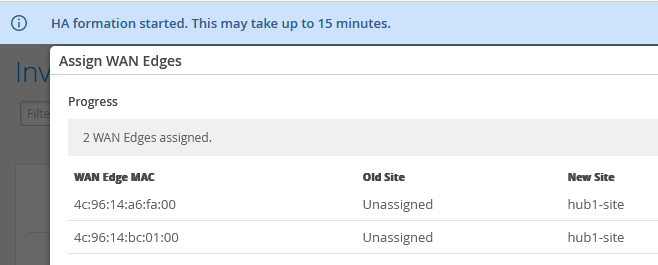
A dialogue about that operation will be displayed.
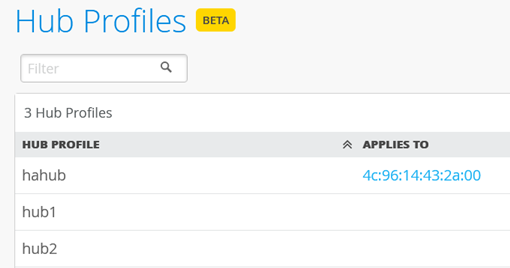
Go to Organization -> Hub Profiles
Select “hahub”-Profile
Under “Applies to” select “hub1-site” and the name that appears then.
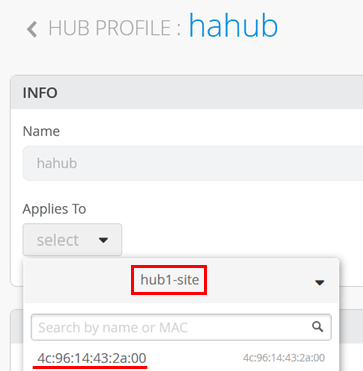
Make sure under “Applies to” a WAN-Edge is selected and then press “Save” to apply your changes.

You should now see the following overview.
Pause here and wait ~10minutes for vSRX and ~20minutes for SRX3xx until hahub is up and running! Remember to build the Cluster they have to reboot that’s why it takes longer than for a standalone device.
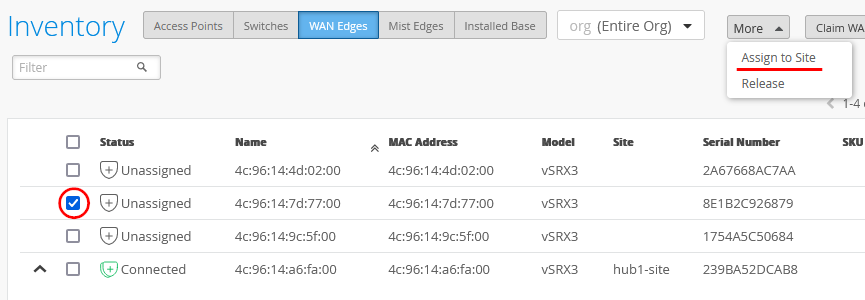
Go again to Organization -> Inventory
Select the standalone device and “Assign to Site”
Select “spoke1-site” and do not manage the configuration directly before you “Assign to Site”.
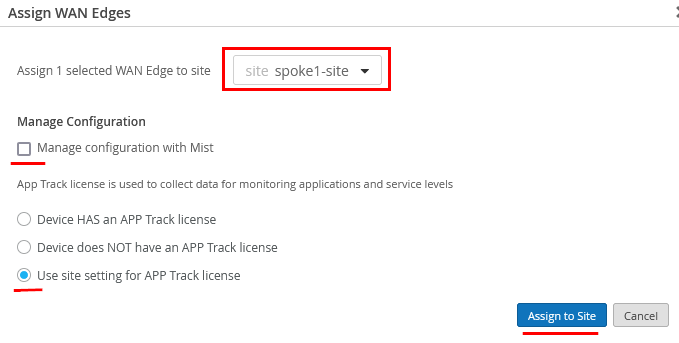
A dialogue about that operation will be displayed.
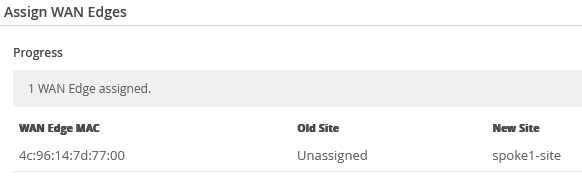
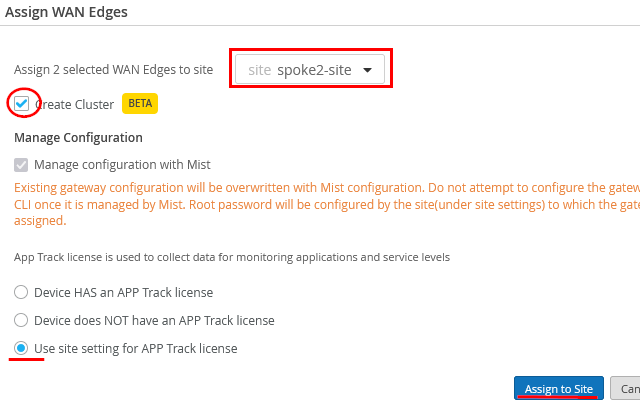
Select the two remaining devices and execute “Assign to Site”.

Select “spoke2-site” and enable “Create Cluster” before you “Assign to Site”.
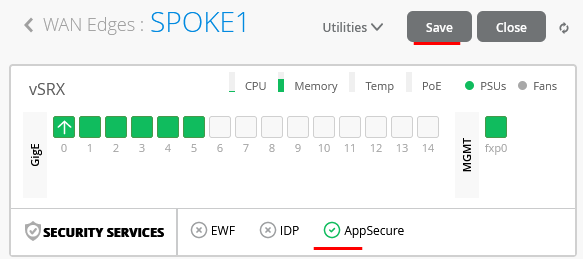
Go to WAN-Edges where site=”spoke1-site”
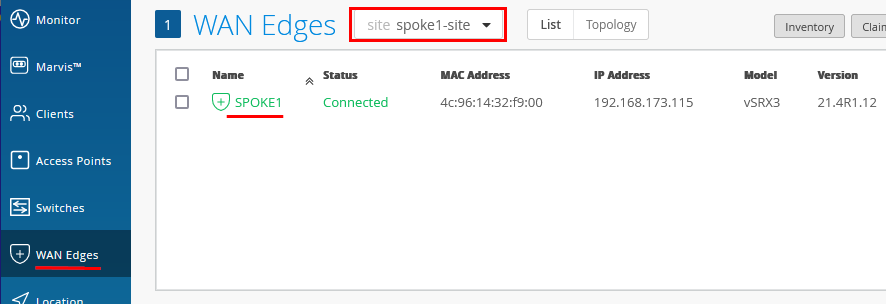
Verify or set the device name and “Enable Configuration Management”
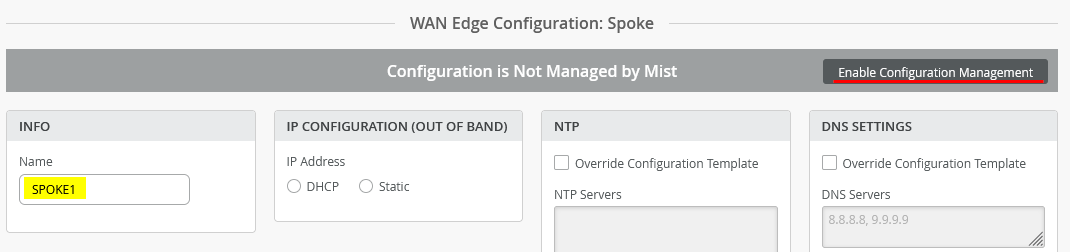
Save your changes
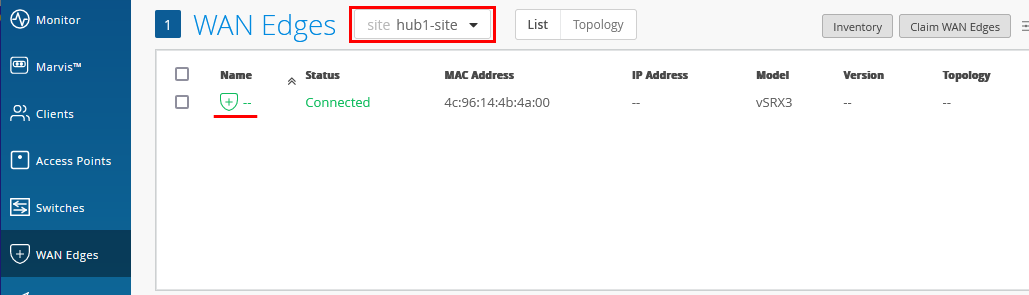
Go to WAN-Edges where site=”hub1-site”
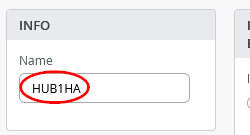
You may want to change the name for a better display into “HUB1HA”
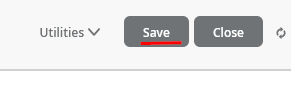
Save your changes to apply them.
After long enough waiting the Cluster should change from a standalone to a cluster devise. This may take some extra Time but should be done after 30minutes starting the cluster build process.

Same change should happen on our redundant spoke.

If you review the Spoke Template assignments you should also see this now. Note that a cluster is still counted as one device.
In the device inventory you should see similar to the below arrangements.
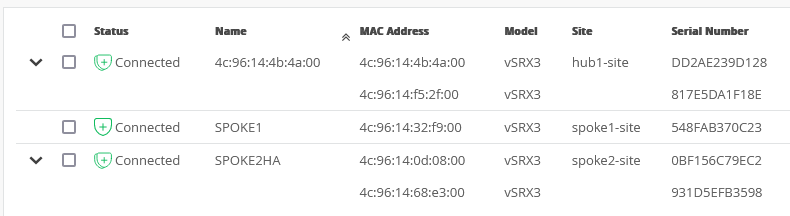
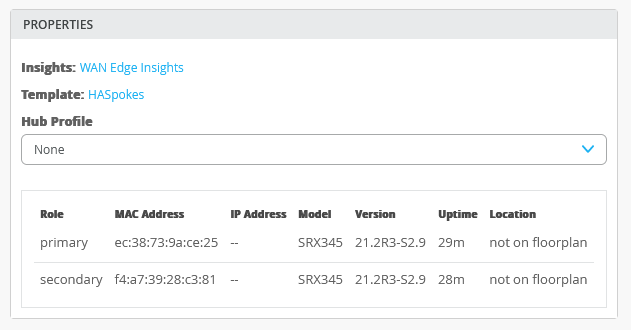
When you review, for example, the clustered Spoke you will see the notion of primary and secondary device. Here from an SRX345 cluster.
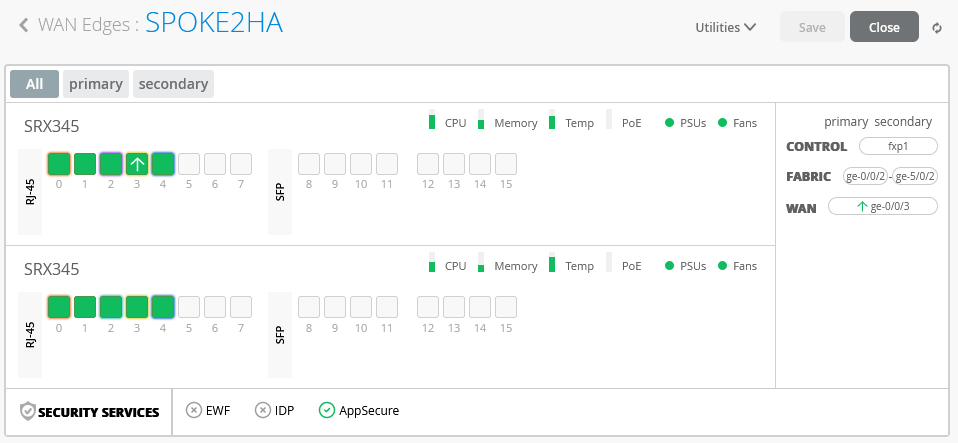
You see the two devices in the “Properties” pane.