This document shows the steps for configuring OKTA SSO for admin Access to Mist Dashboard.
The same steps can be used for MSP accounts as well.
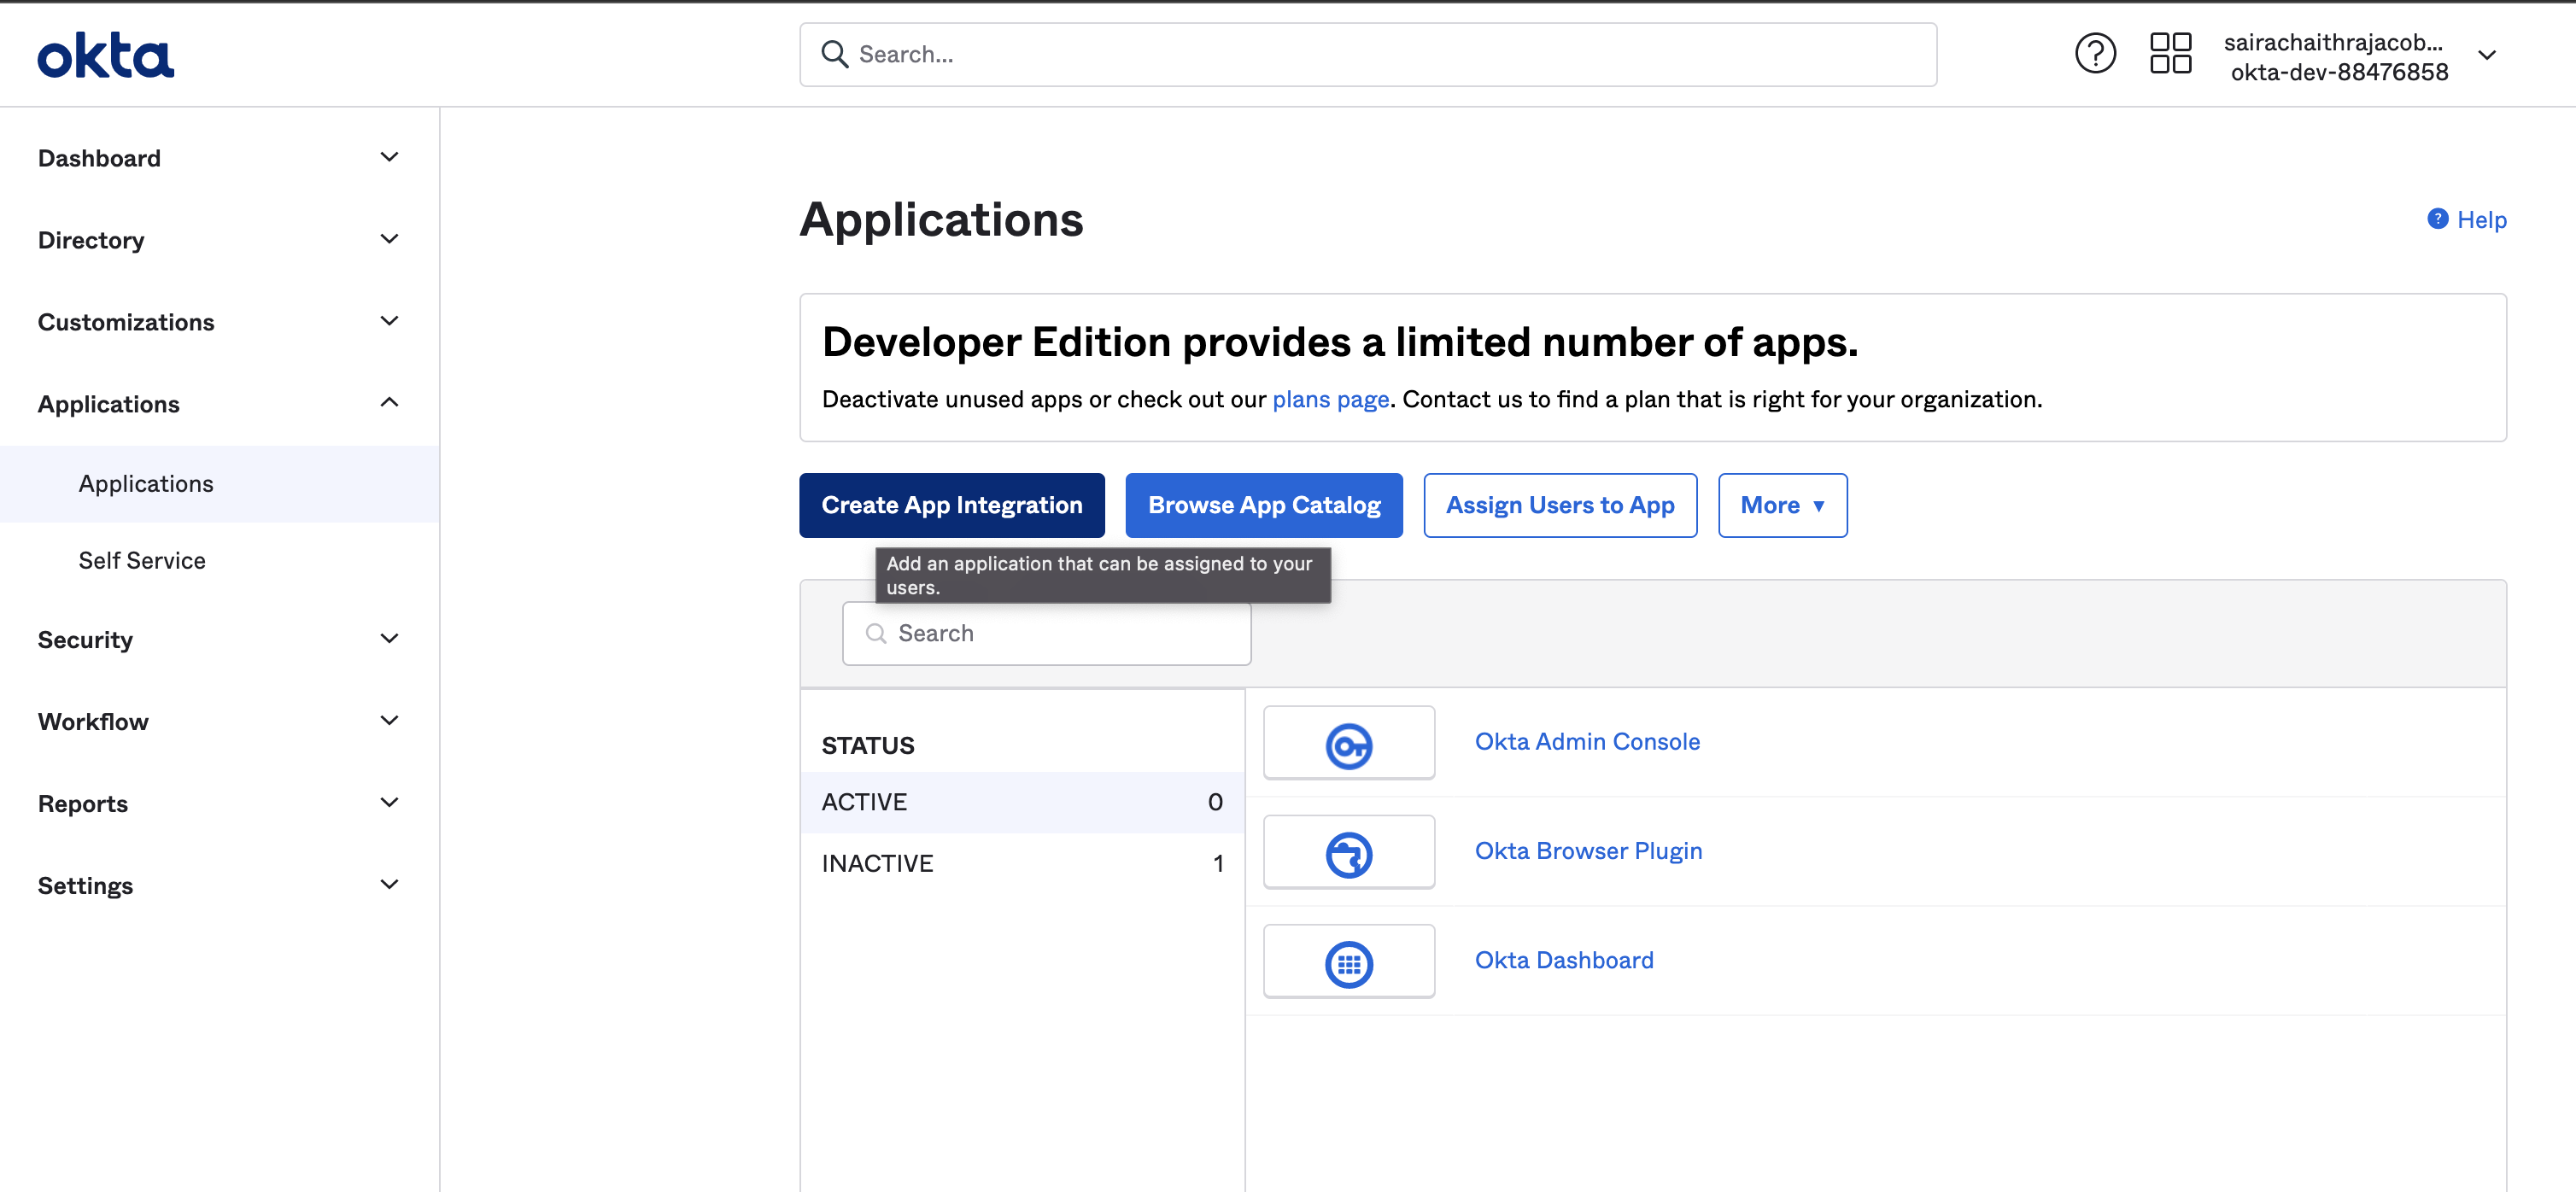
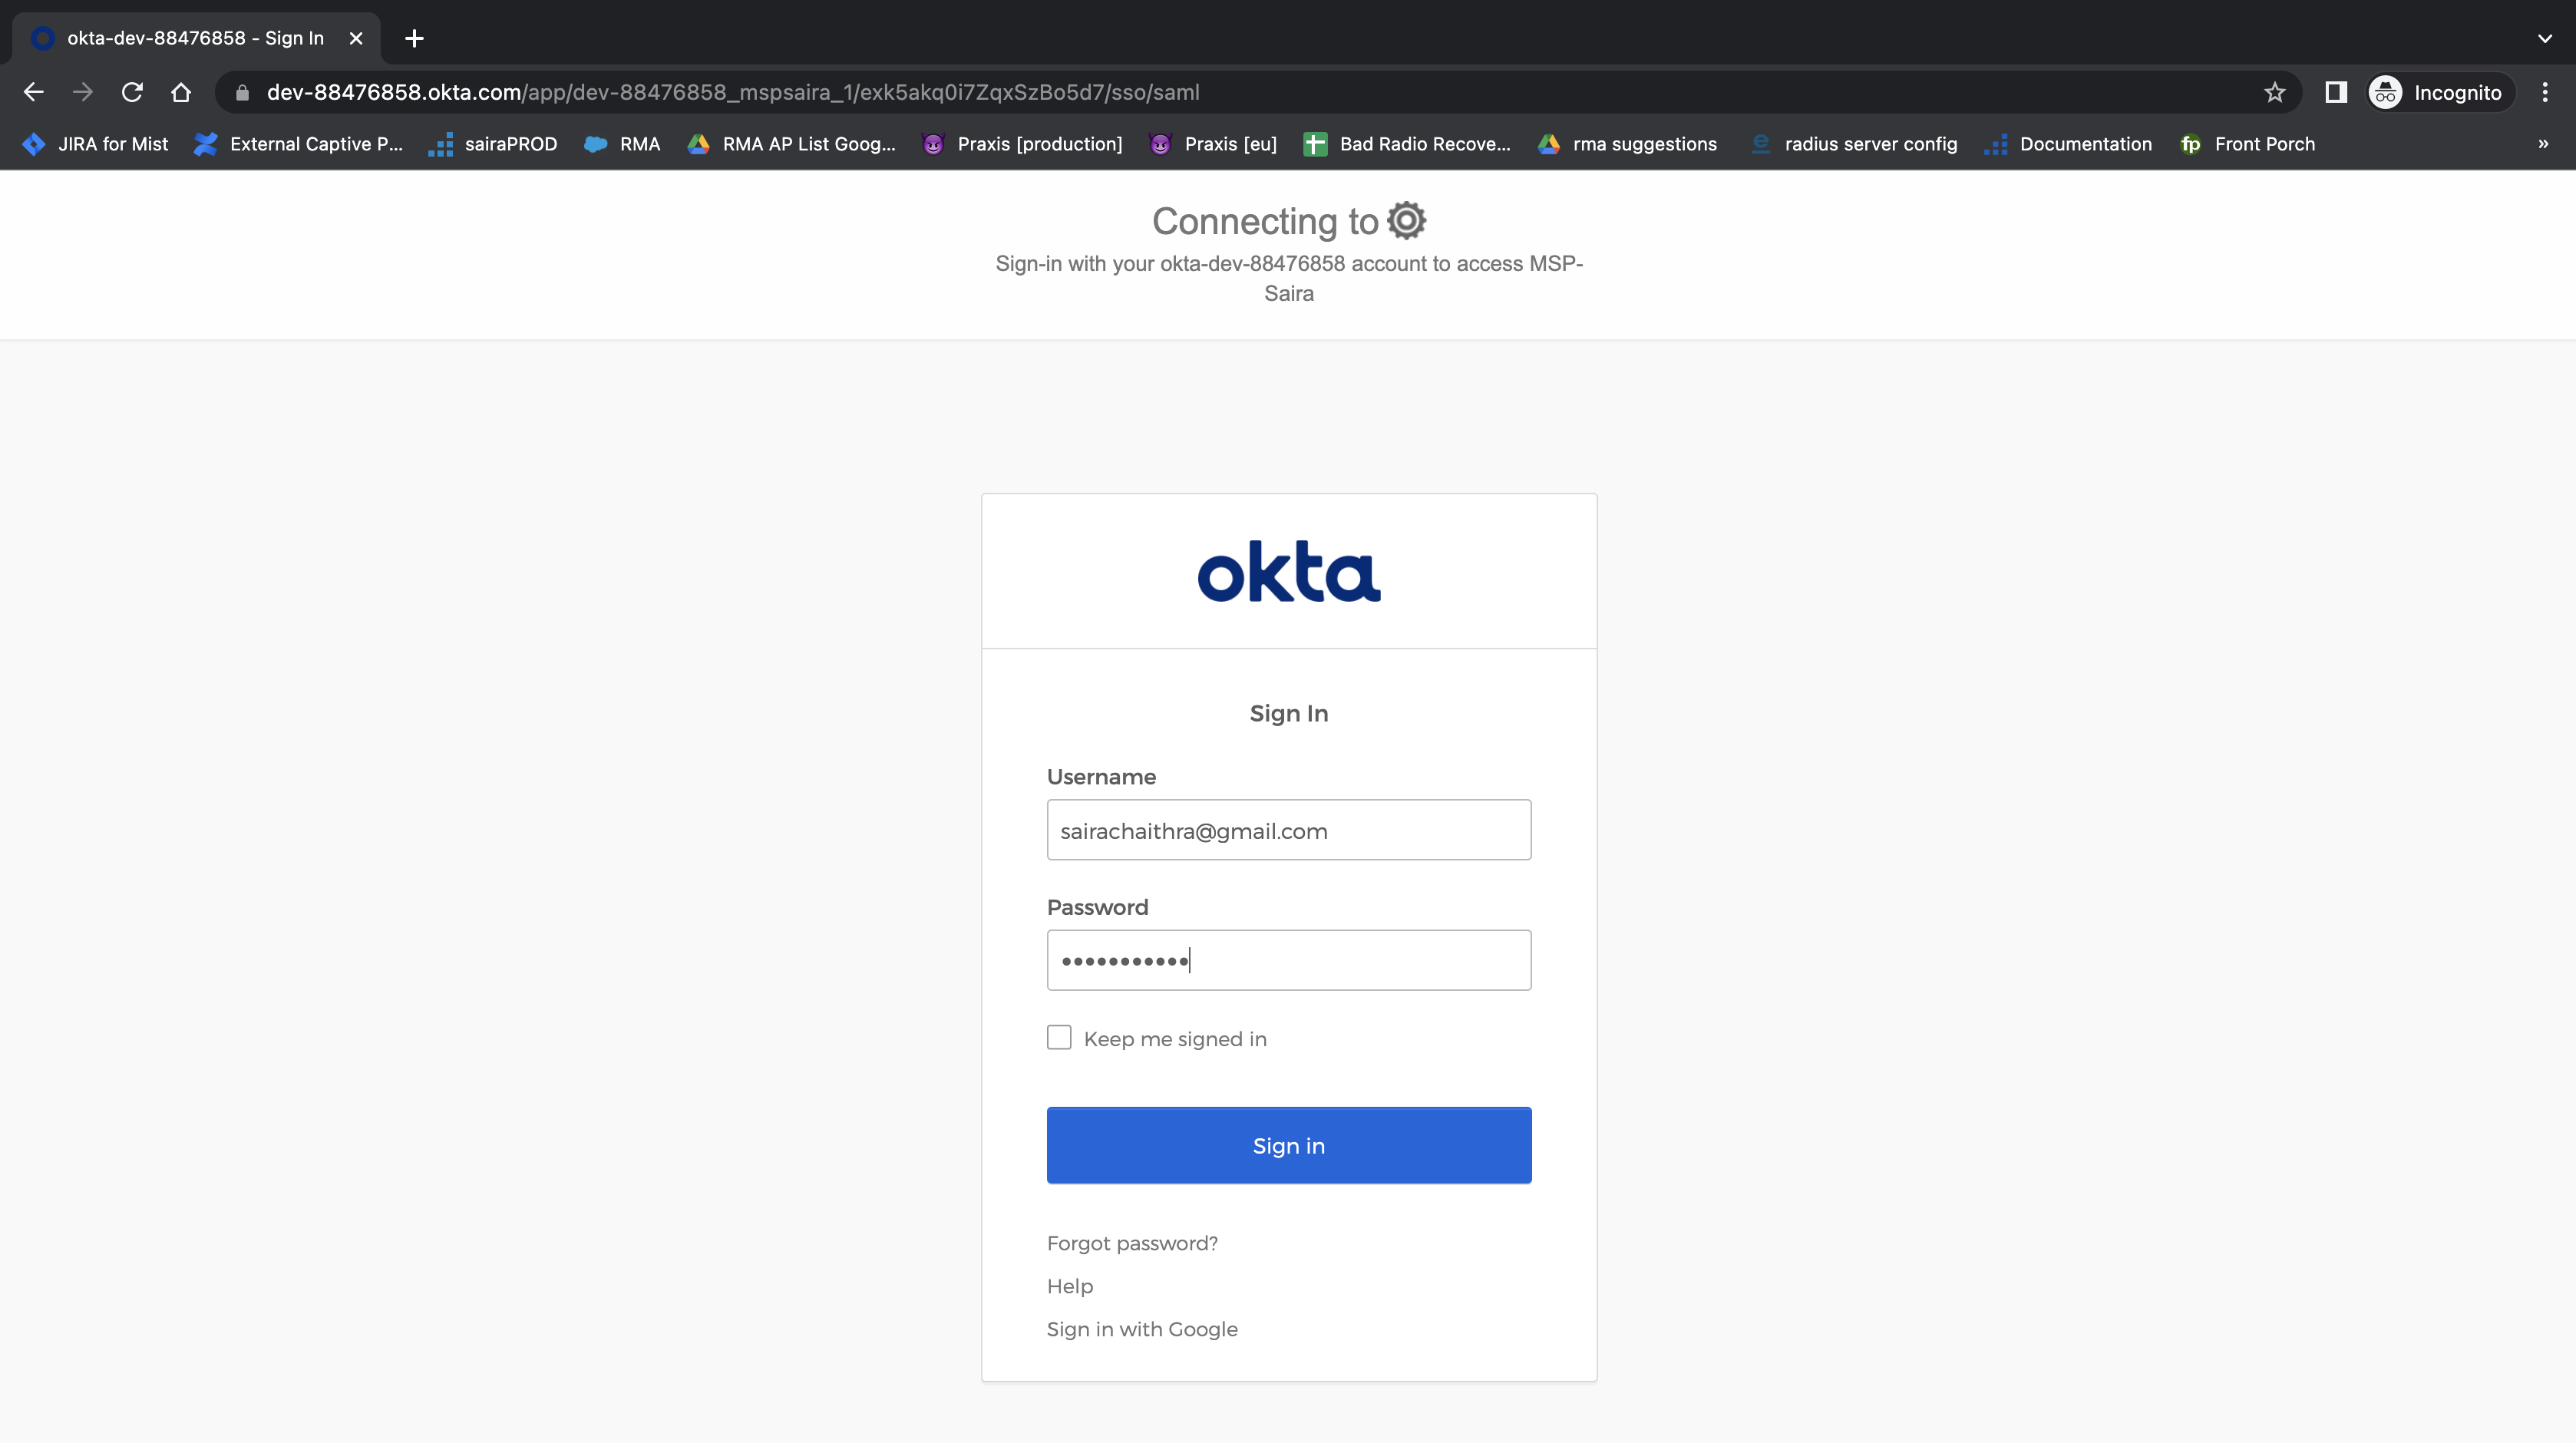
Log in to Okta:
The first step is to create an Application
For this navigate to applications → create app integration.
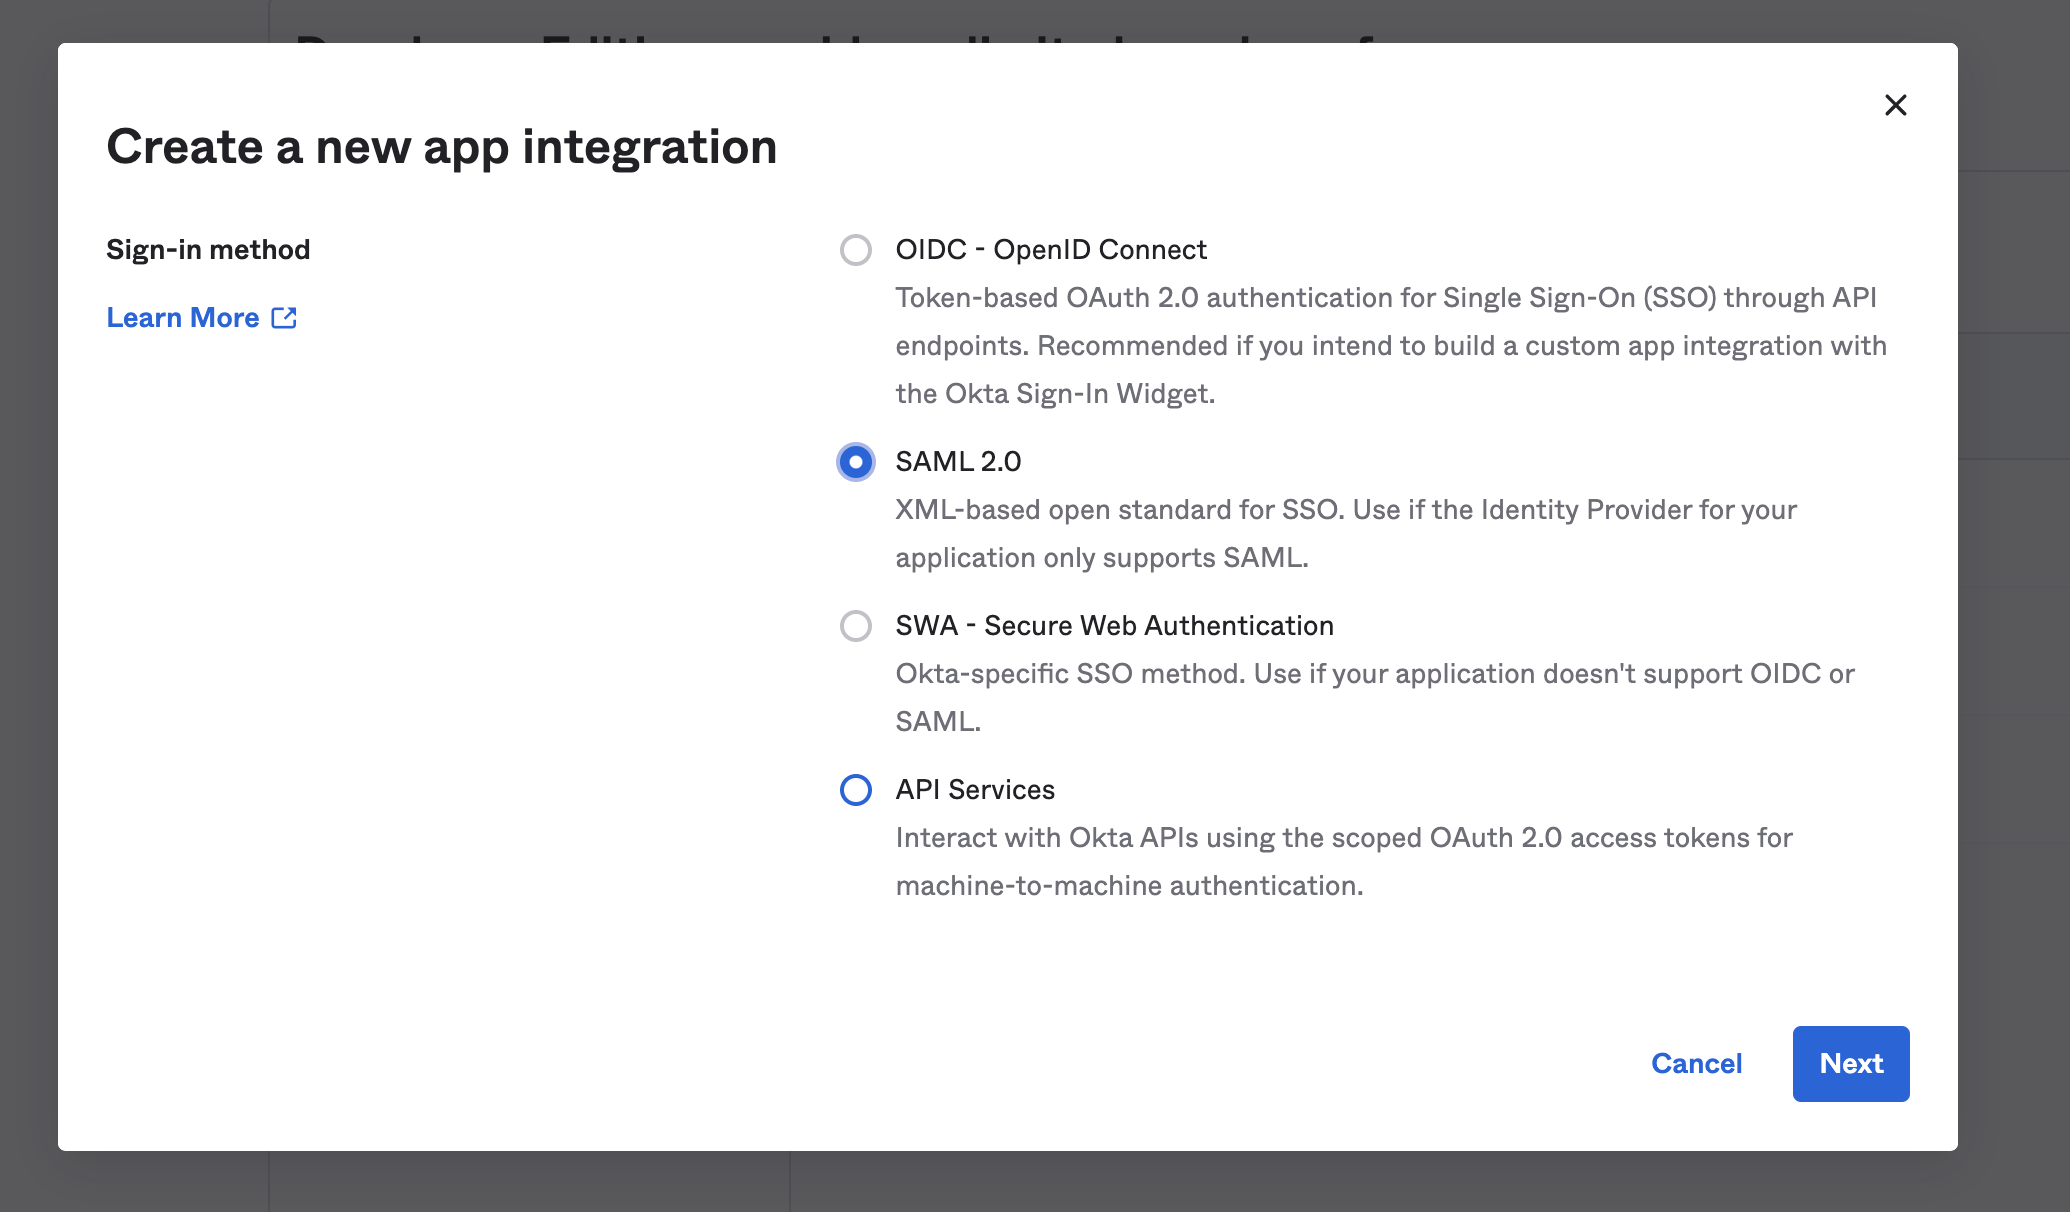
Select SAML2.0
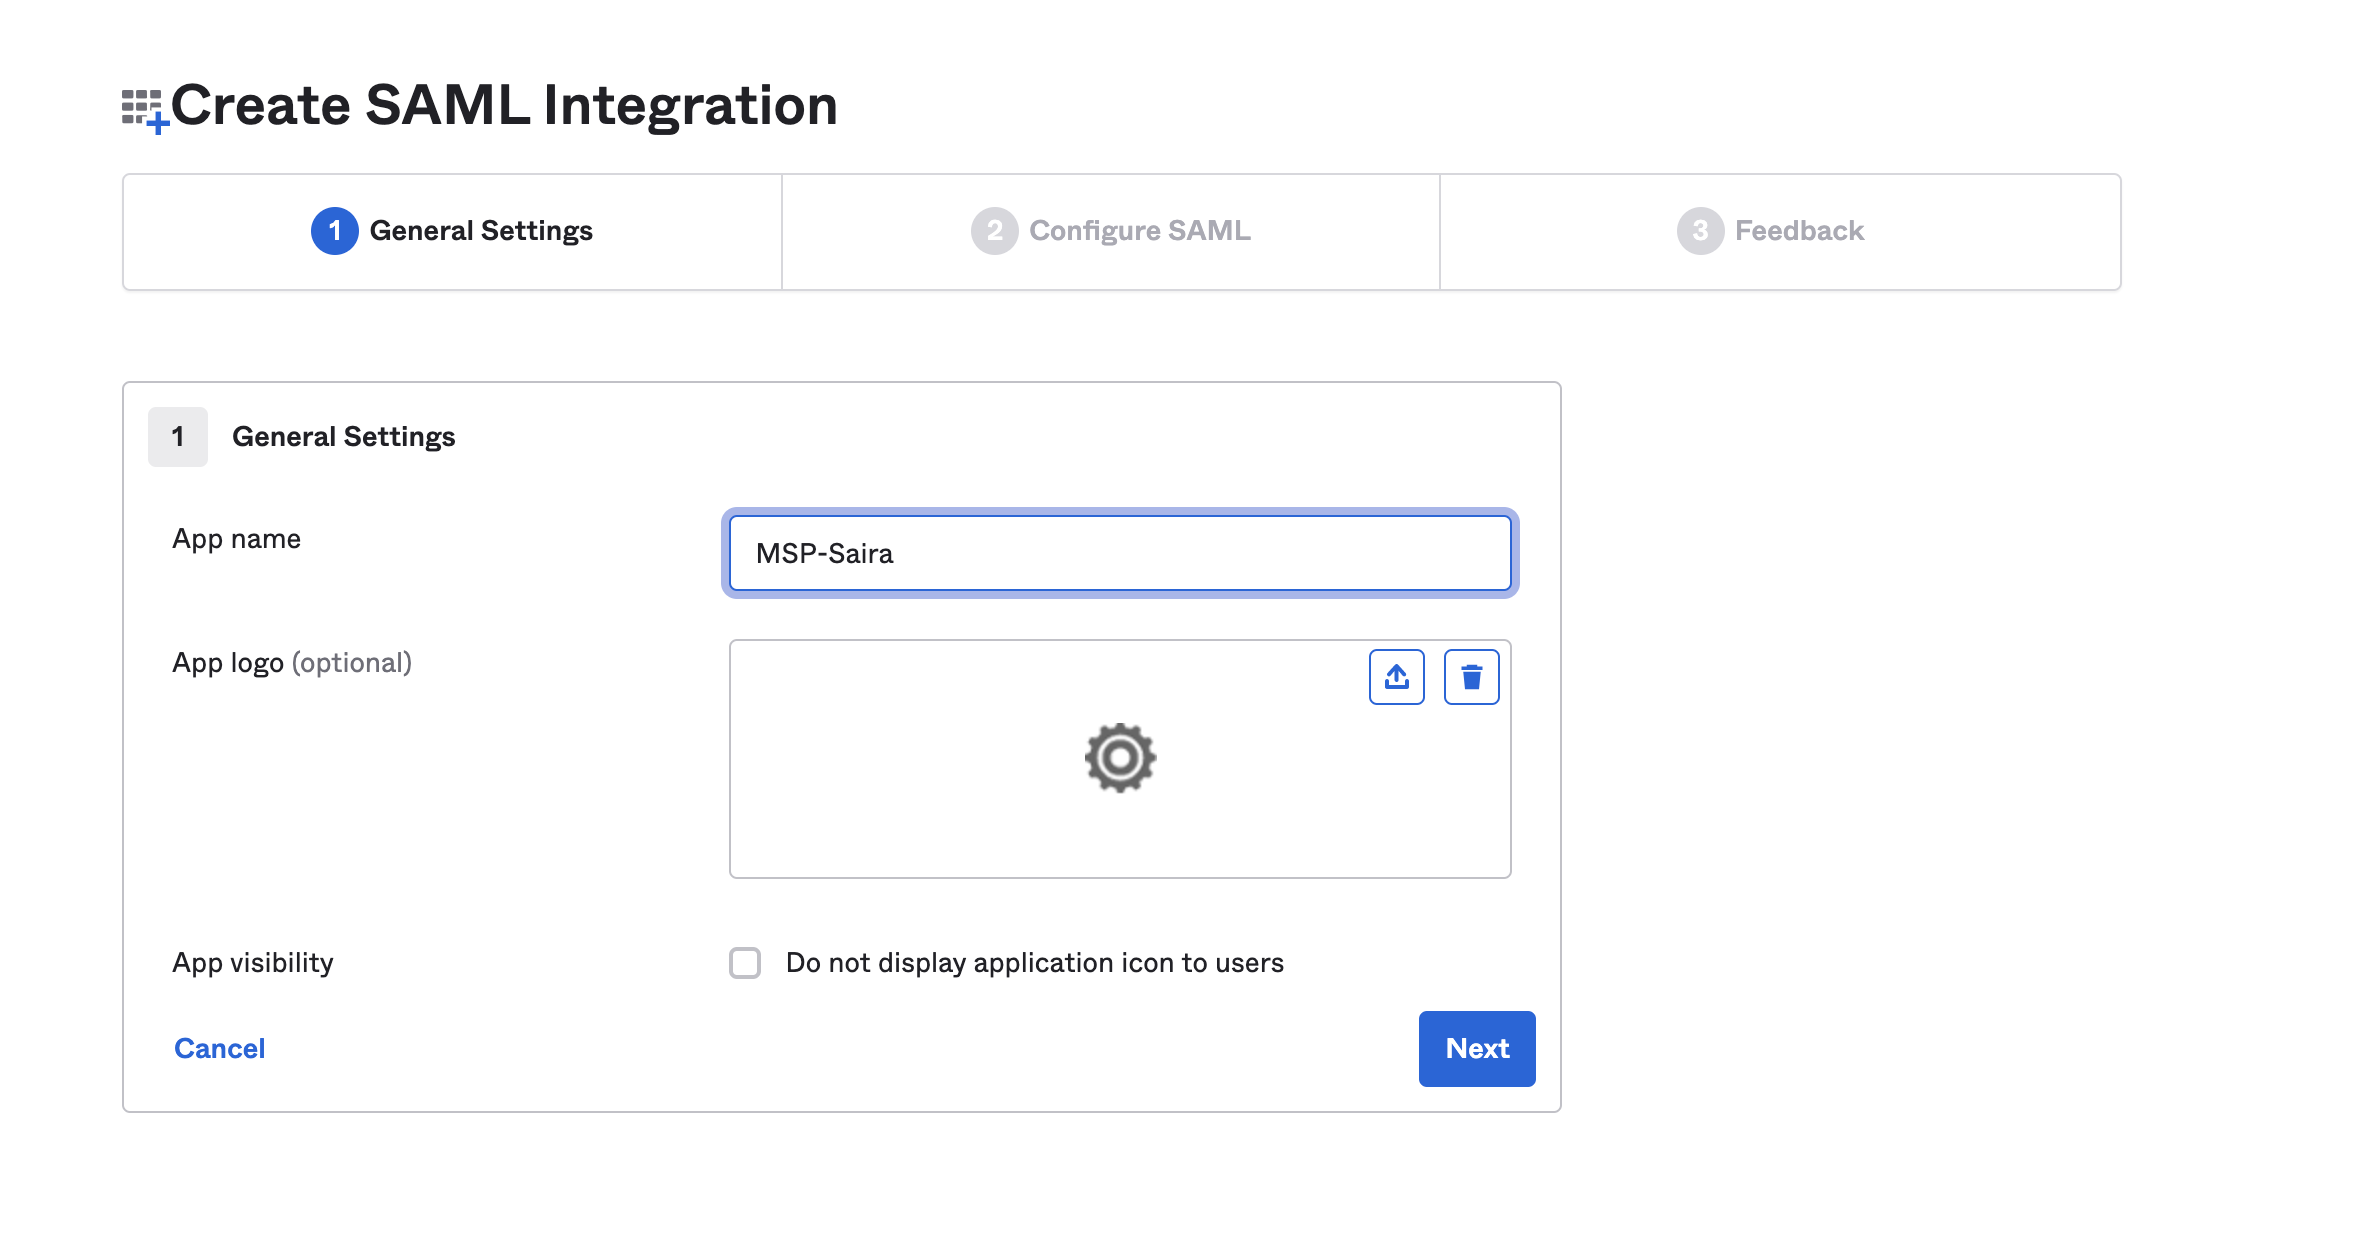
Select the name of the Application that you would want to create.
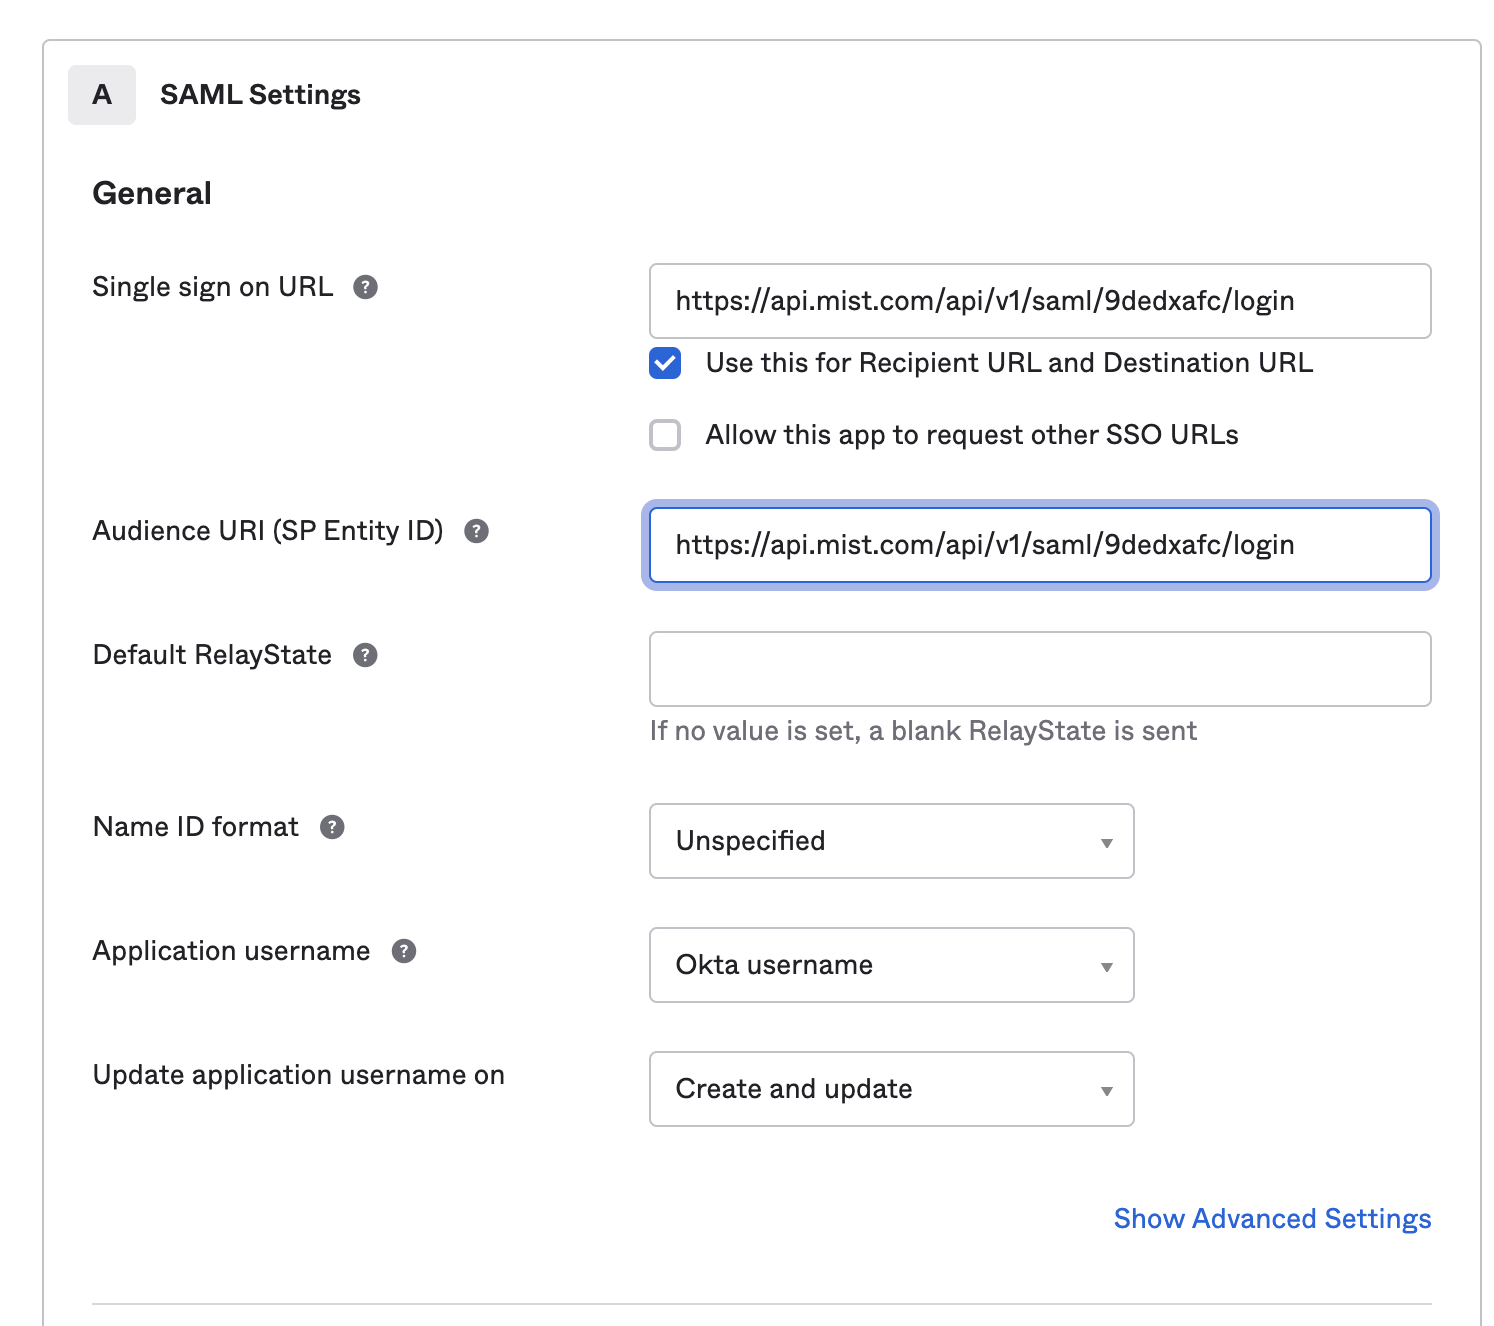
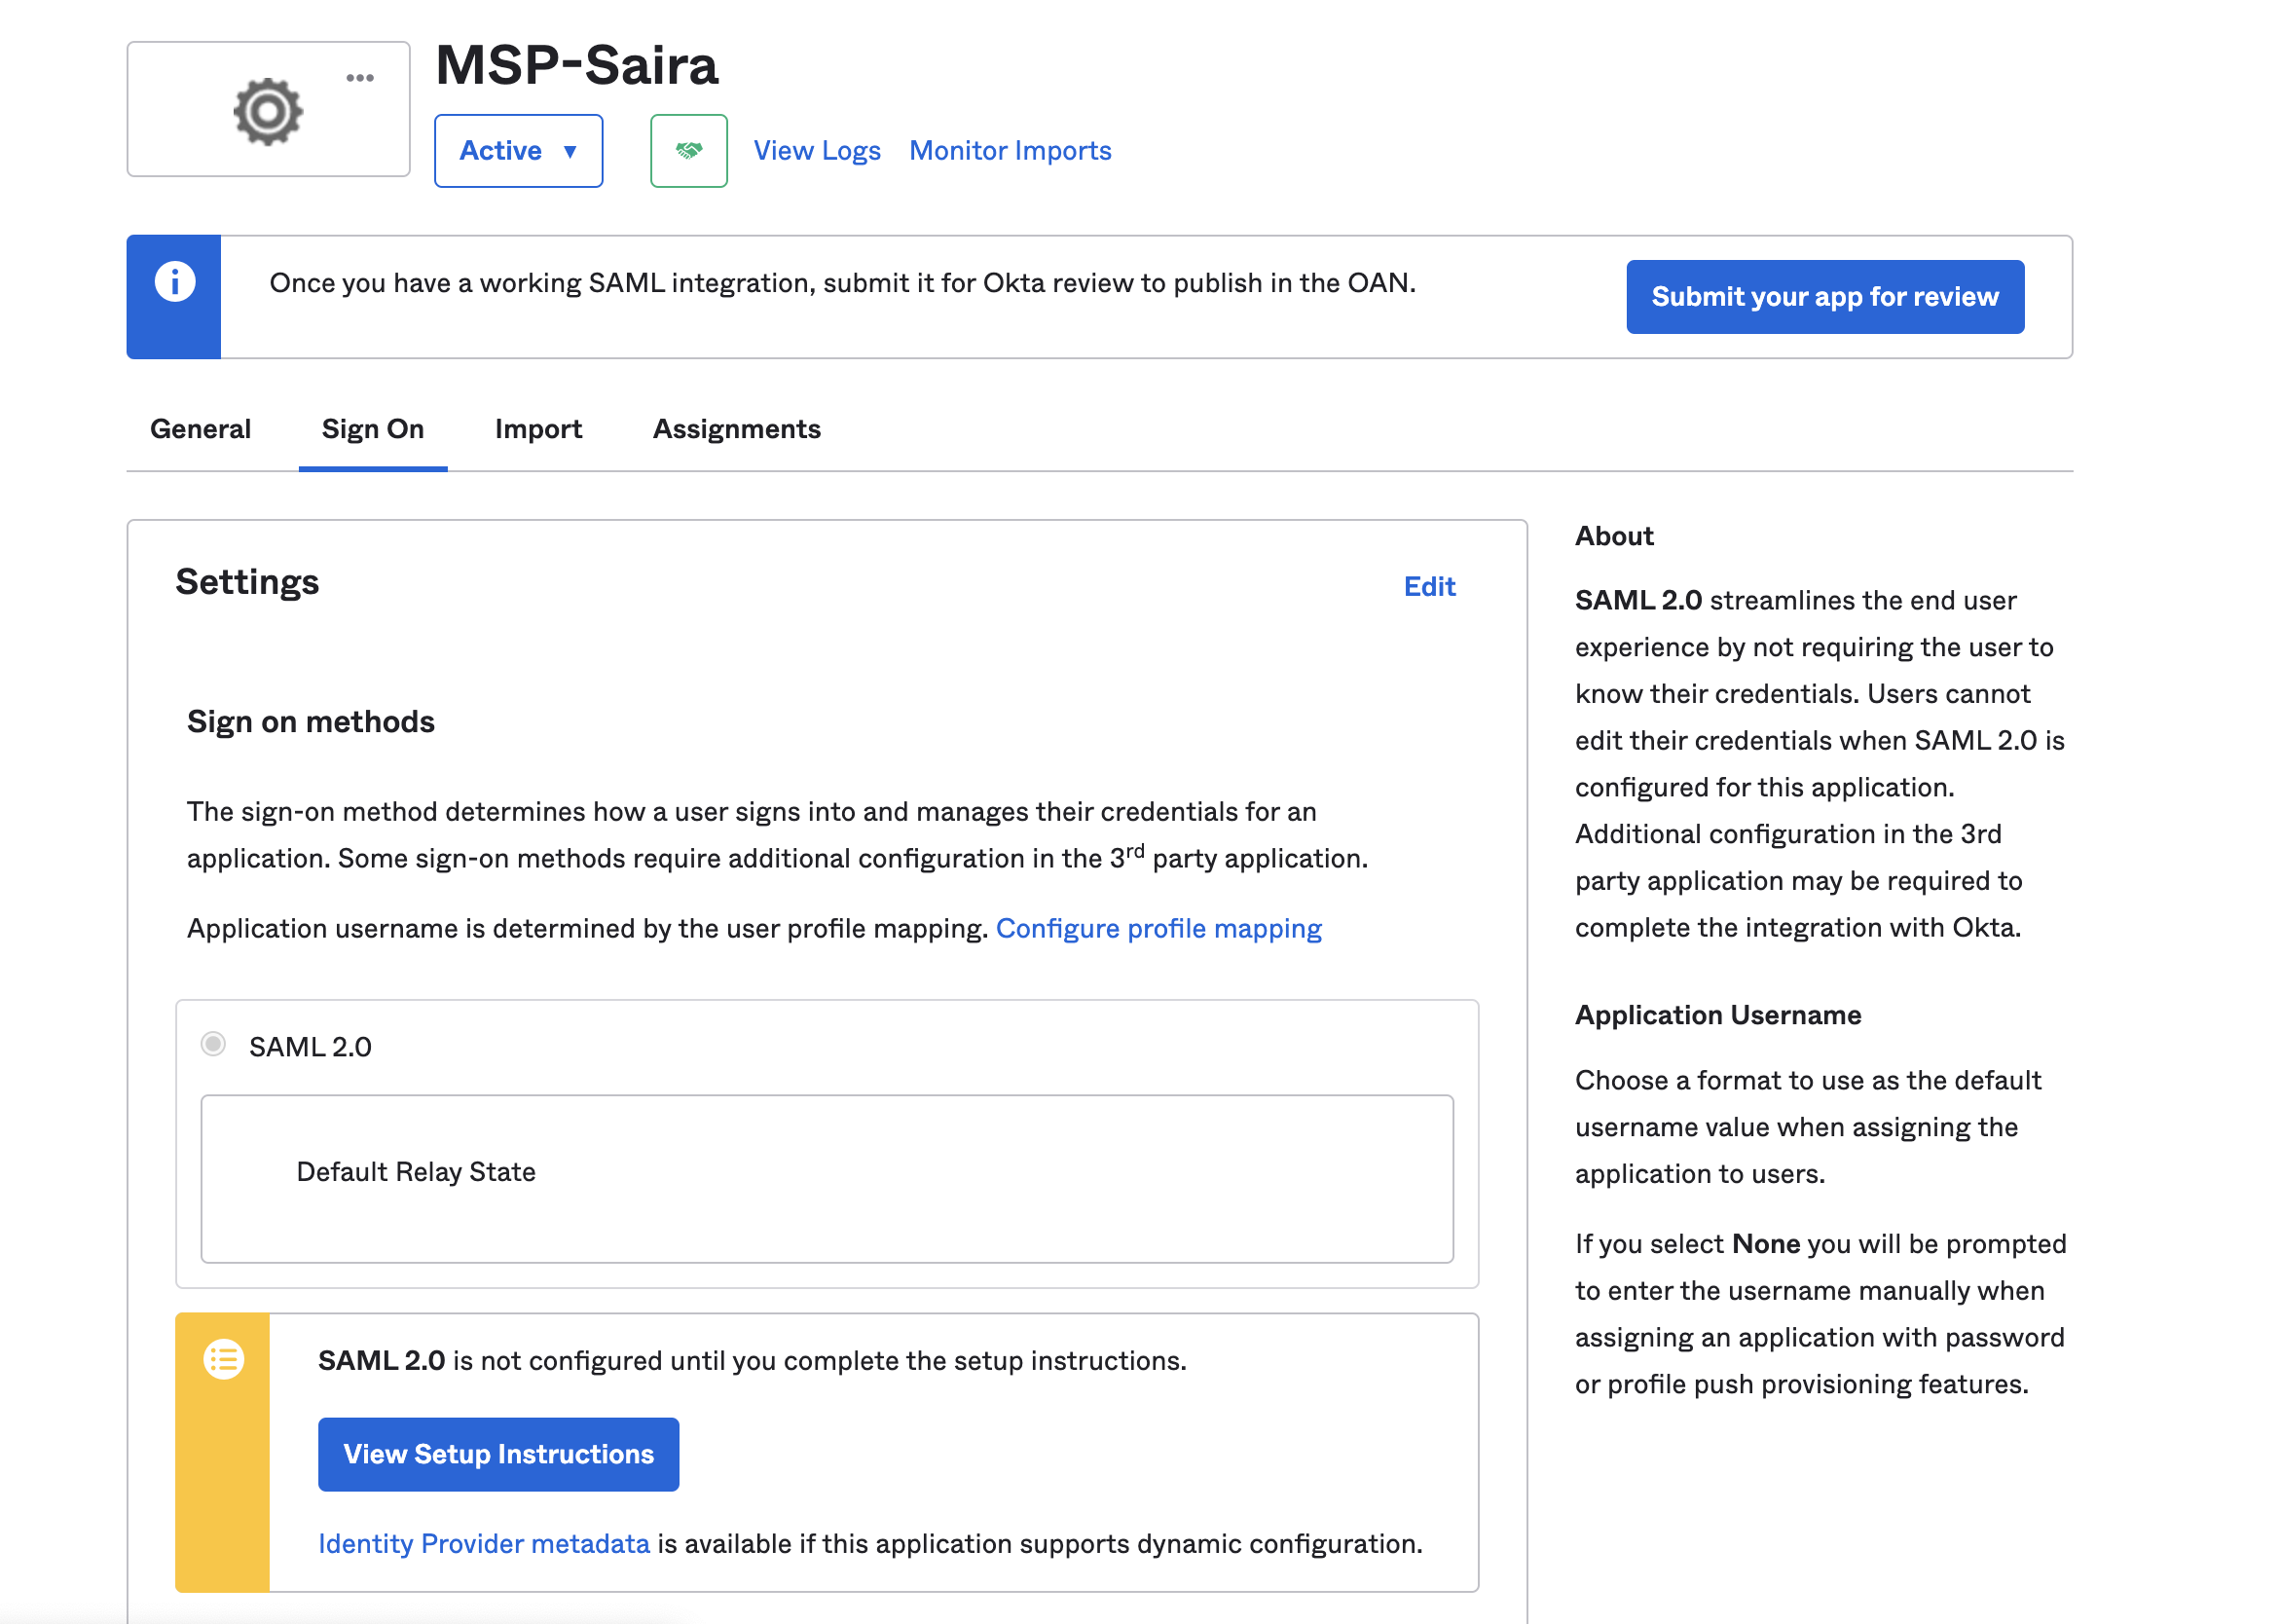
Now we need to get the ACS URL of the Identity provider configuration from the mist dashboard,
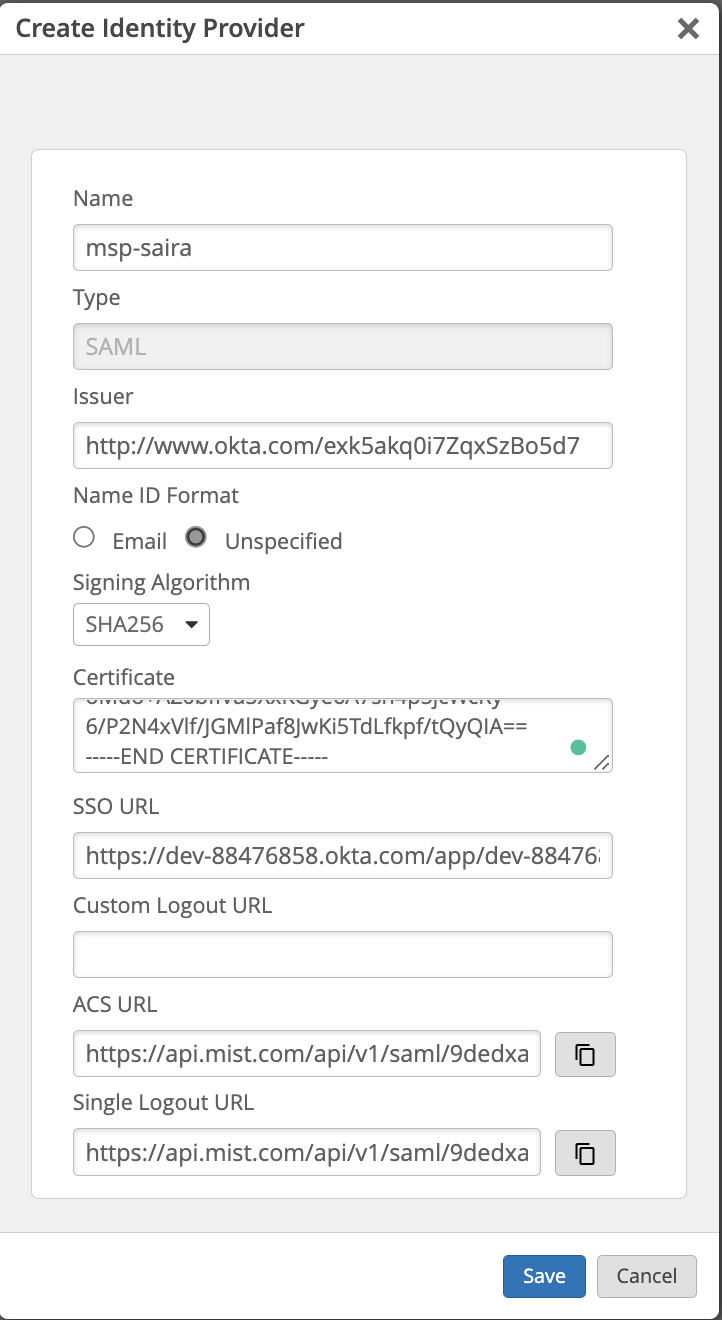
Navigate to mist portal → organization → settings → Create Identity provider.
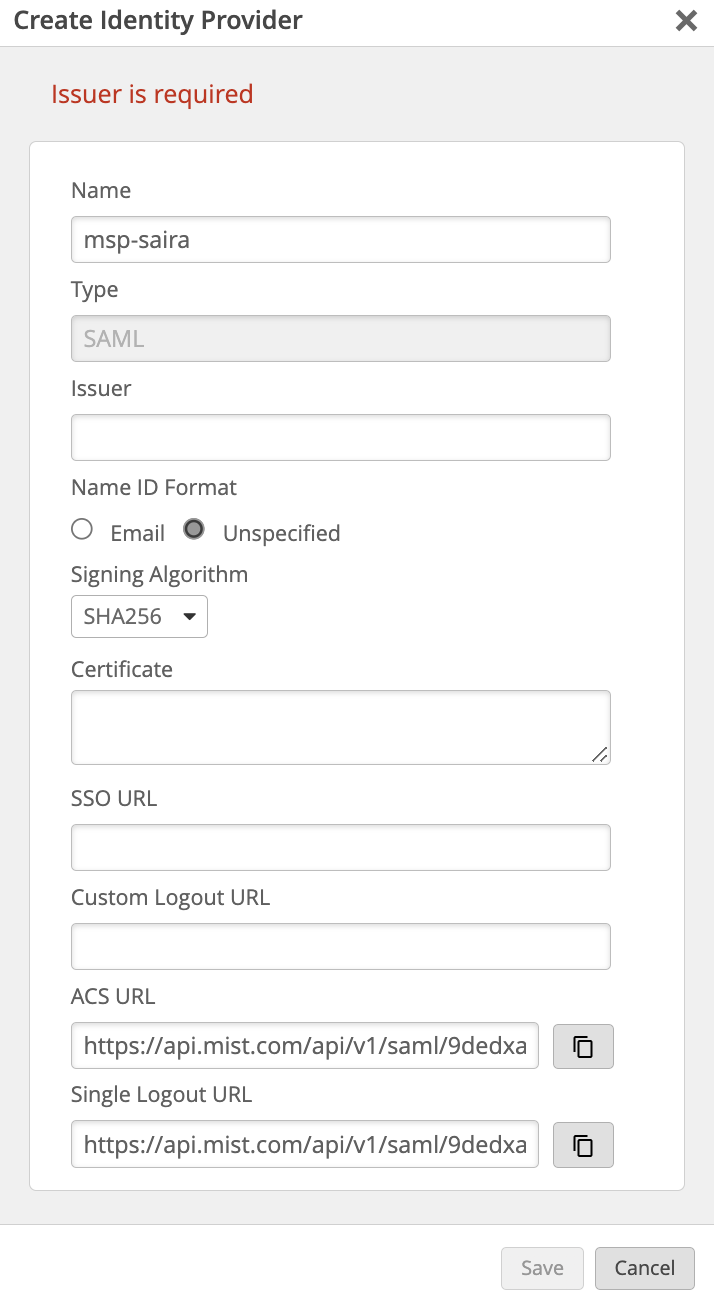
Copy the ACS URL from the Mist management page and paste it on the Single sign on URL and the same for SP entity ID
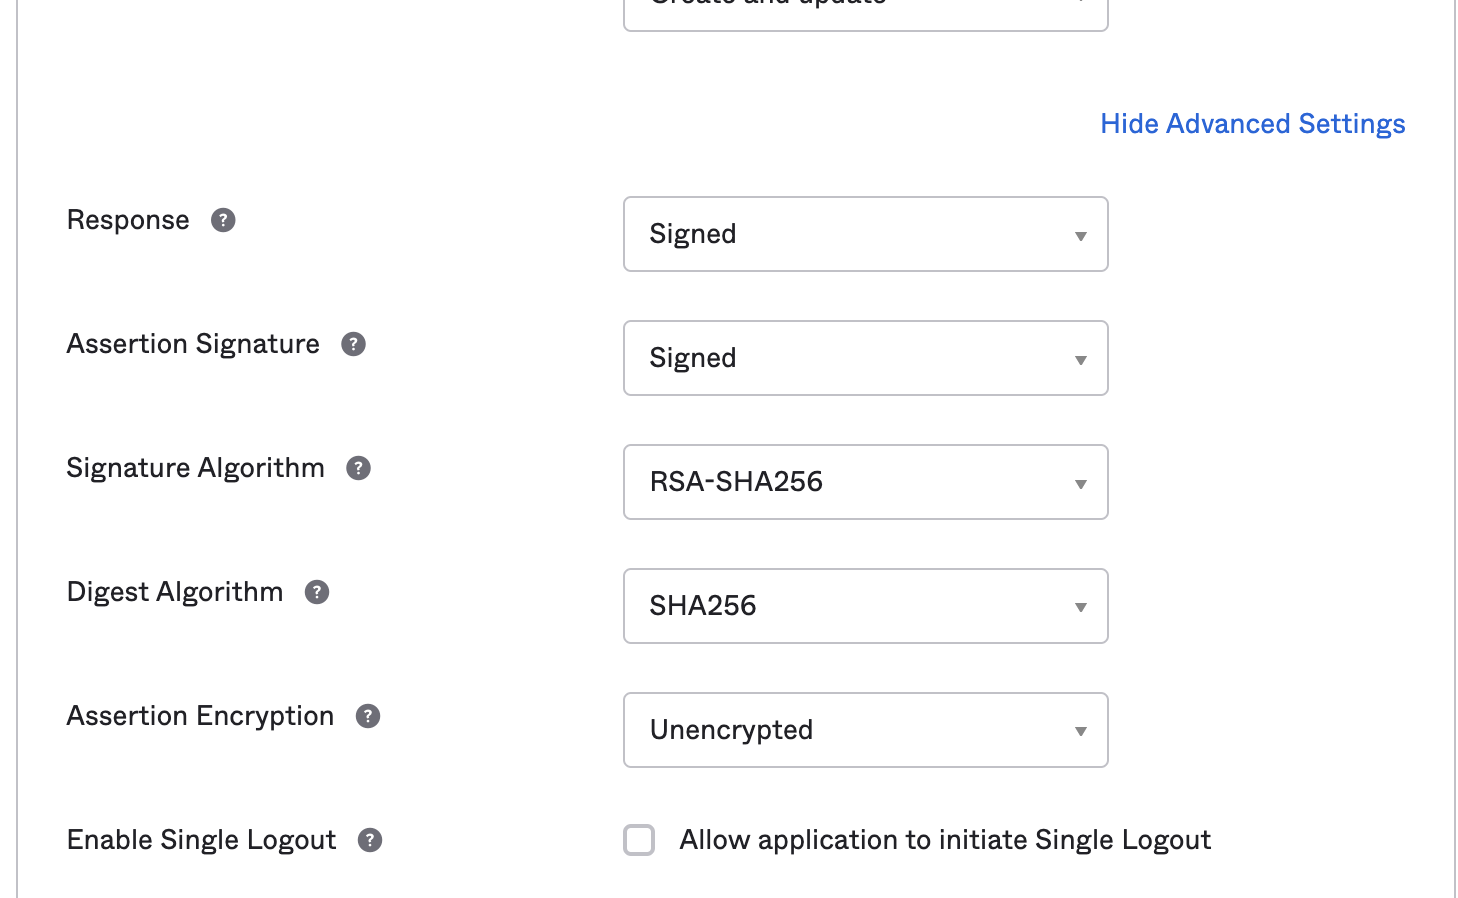
navigate to “show advance settings” and Select the signature Algorithm as RSA-SHA-256
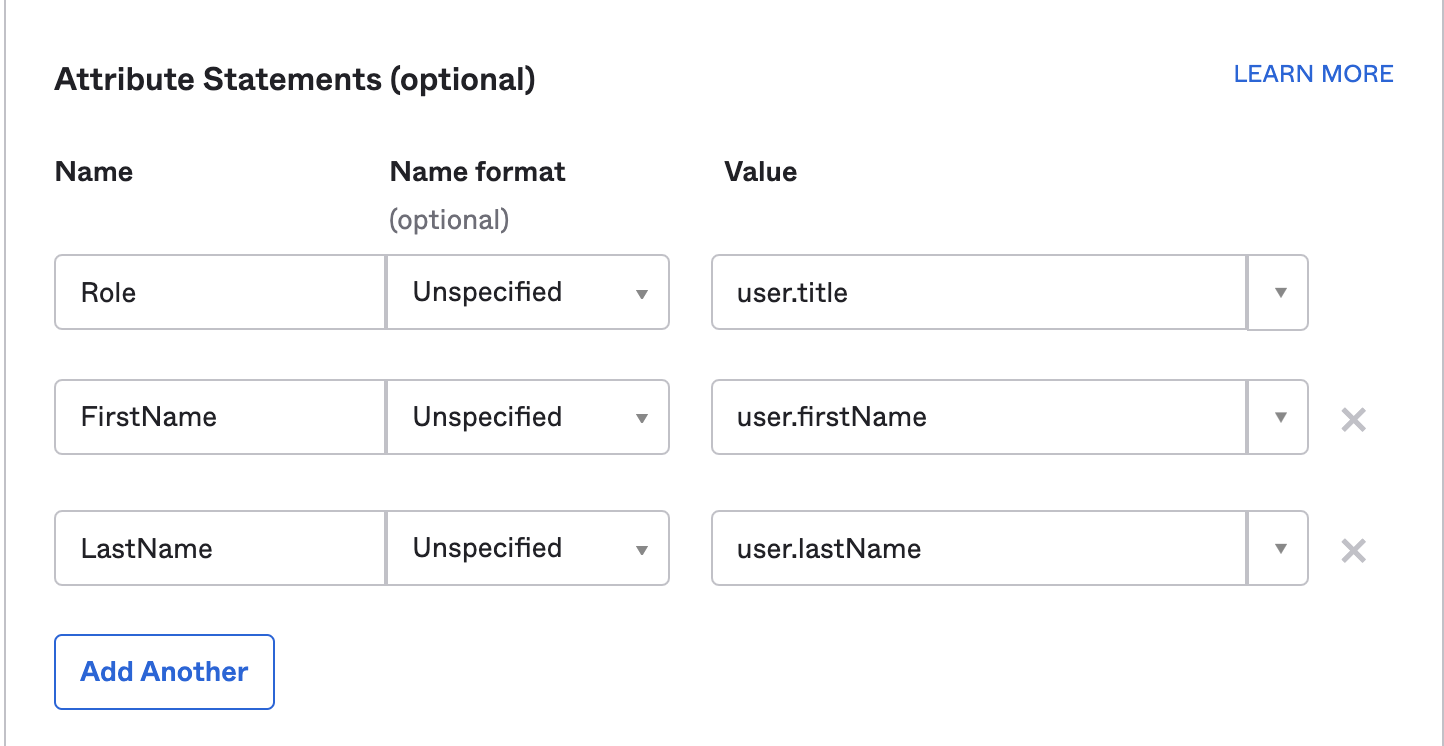
Next step is to specify the attribute statements that are sent back for the user information.
user.title is the Role that we select for the user. This attribute should return the role name we configure on the mist portal for the Identity provider
user.firstName Returns the first name of the user
user.lastName Returns the last name of the user.
Note: Attributes are case sensitive and make sure you add Role not role <it would throw an error: detail”: “Role attribute missing”>
Once you finish creating the Application select the View set up instruction to configure the Identity Provider on the Mist.
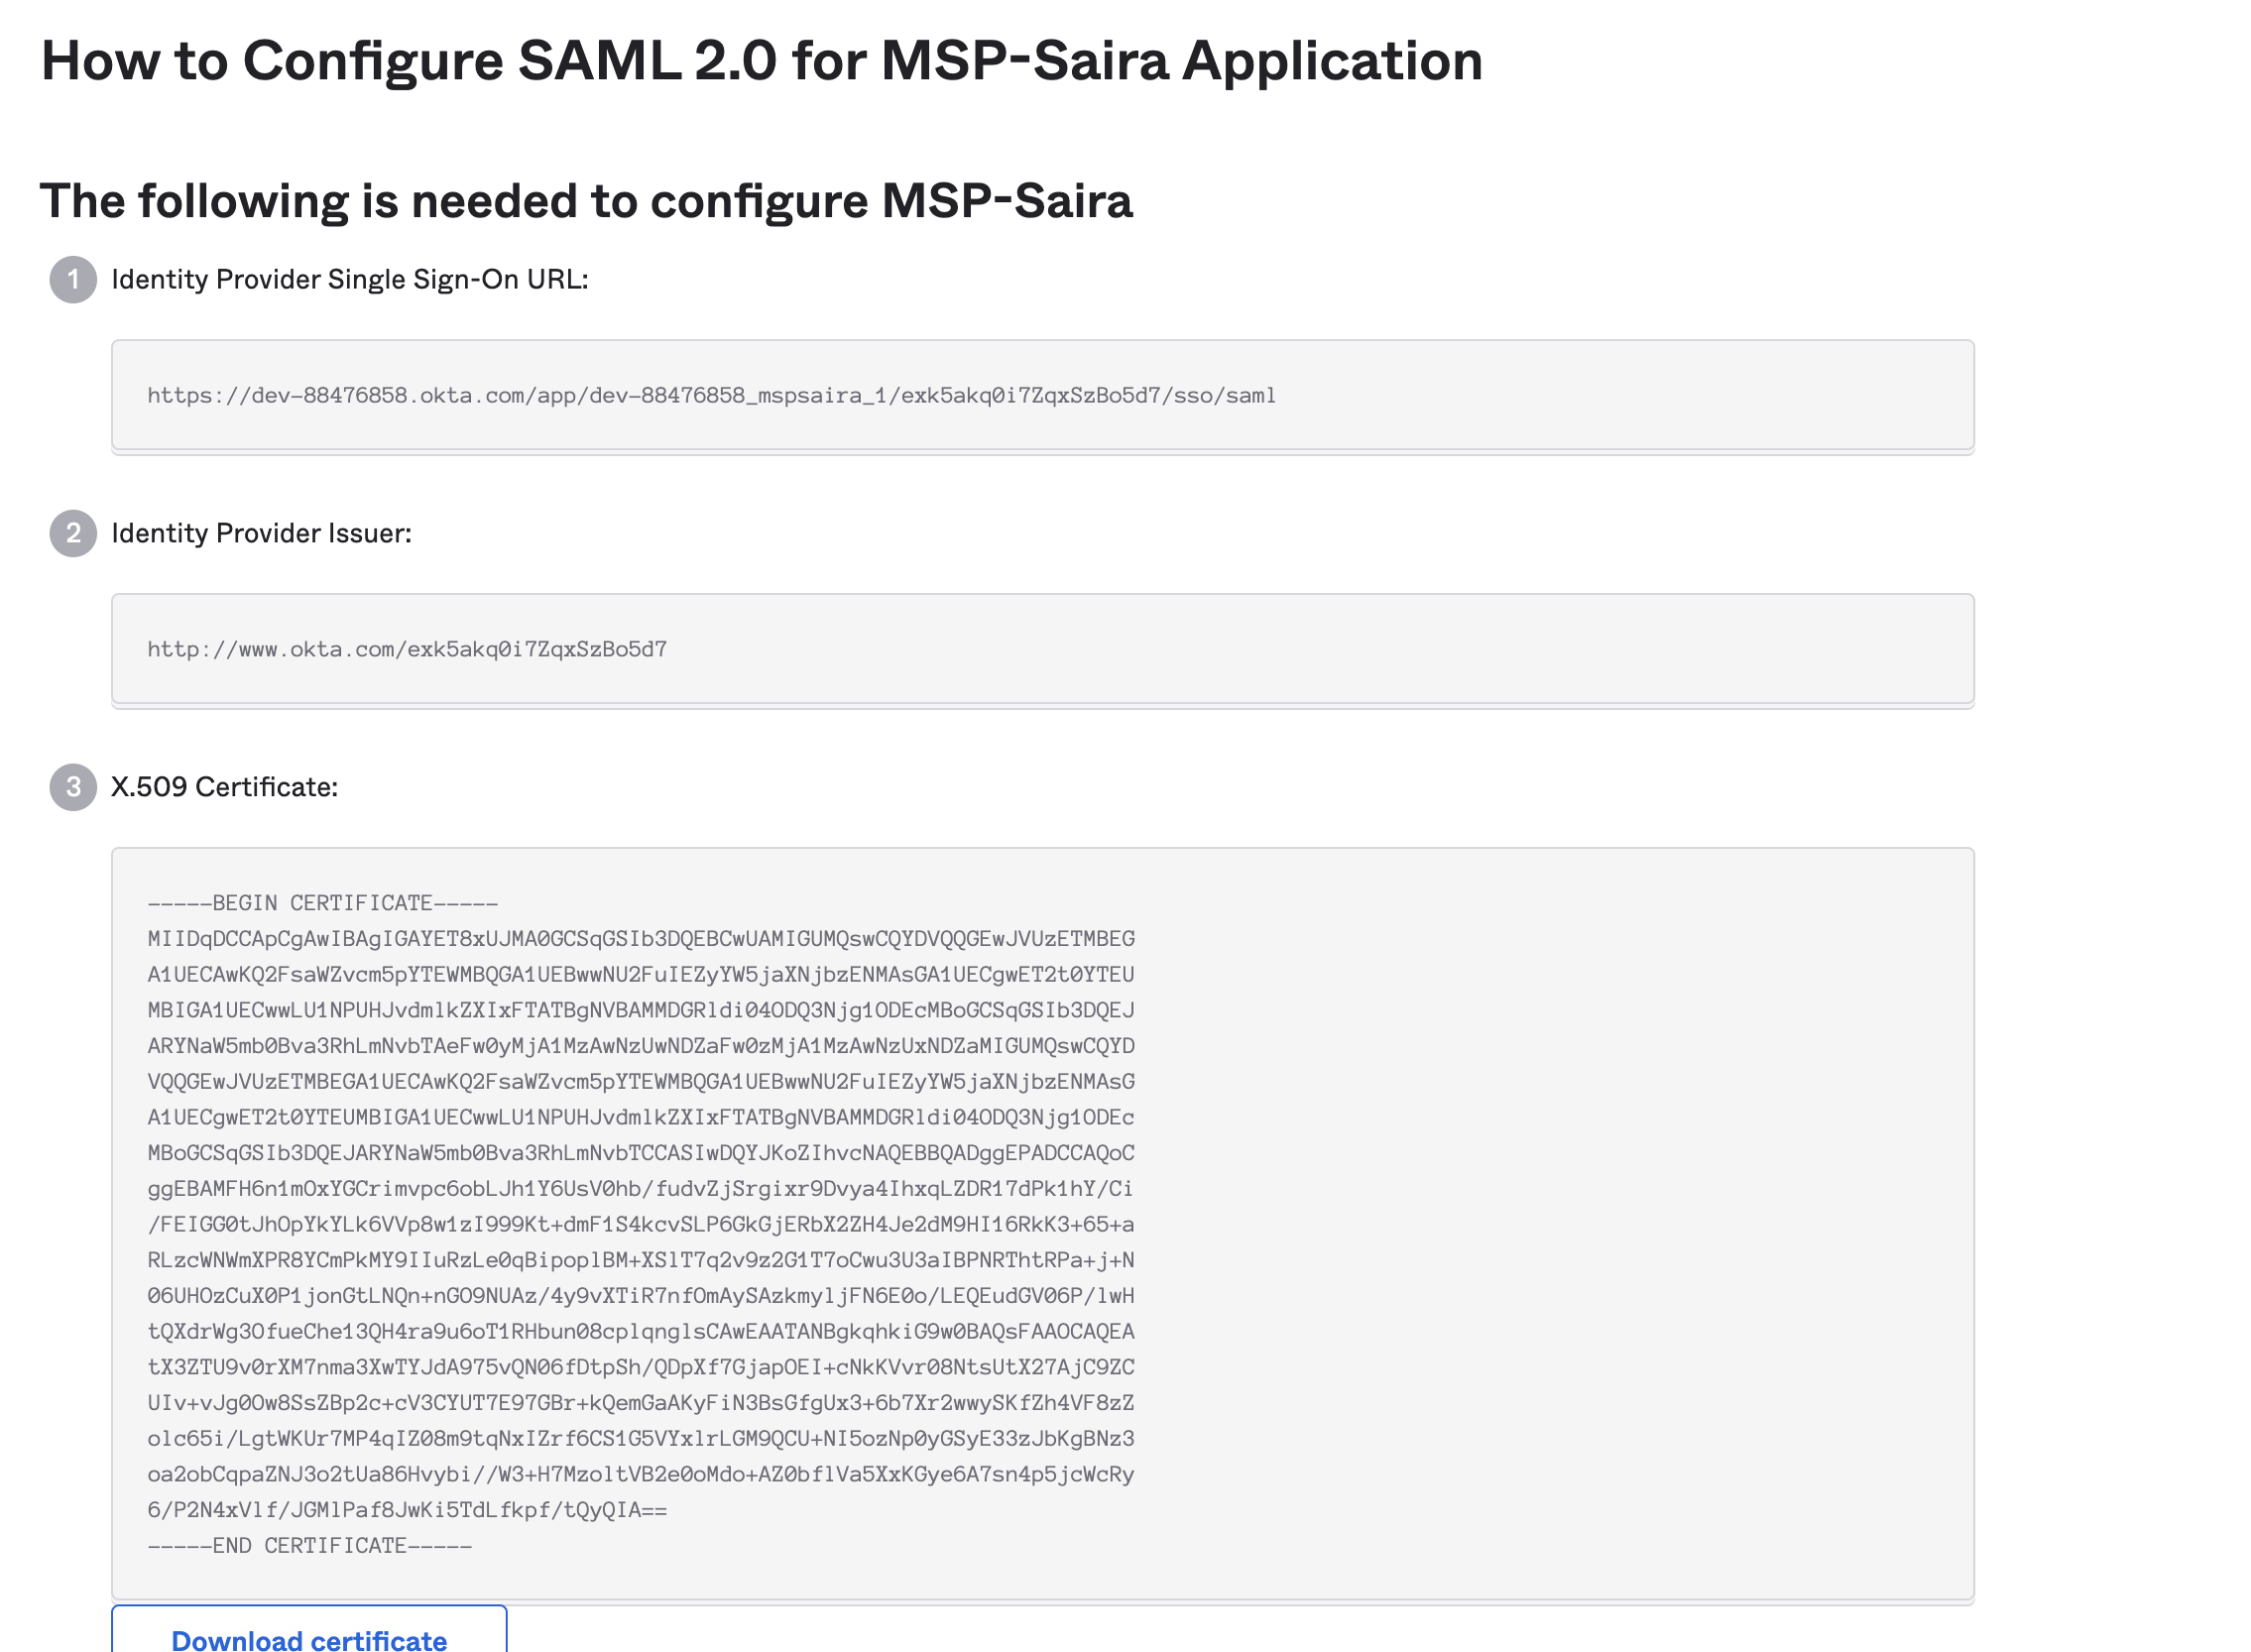
The next step is to complete the Identity provider configuration on the mist dashboard using the above information from the application we have created
Navigate back to Organization -> Settings to complete the Identity Provider setup.
Copy paste the value correctly on the Mist configuration for the Identity Provider
Issuer = Identity Provider Issuer
Certificate = X.509 Certificate
SSO URL = Identity Provider Single Sign-On URL
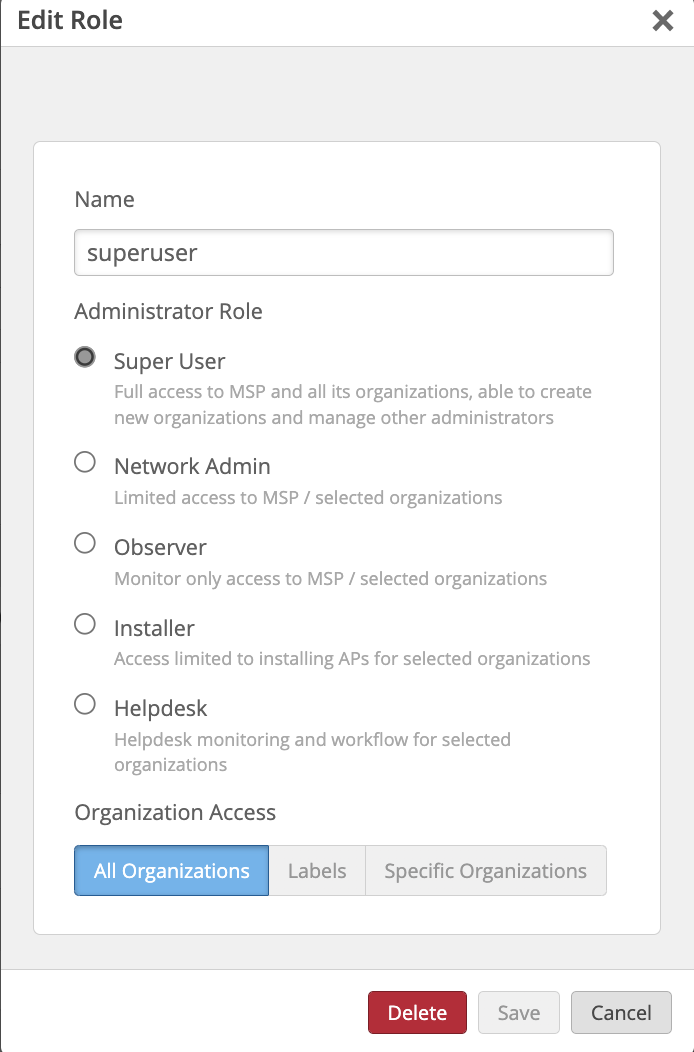
Now We need to create a Role for the user on Mist dashboard.
This will indicate what Administrator Role the user will receive.
When the user authenticates against Okta the user.title attribute will be fetched and returned. Based on the value returned we will assign the role to the user.
For the below example role, user.title will return the value “superuser” and will be assigned the Super User role.
Our Next step is to create the User on OKTA.
Navigate to Directory -> people create user.
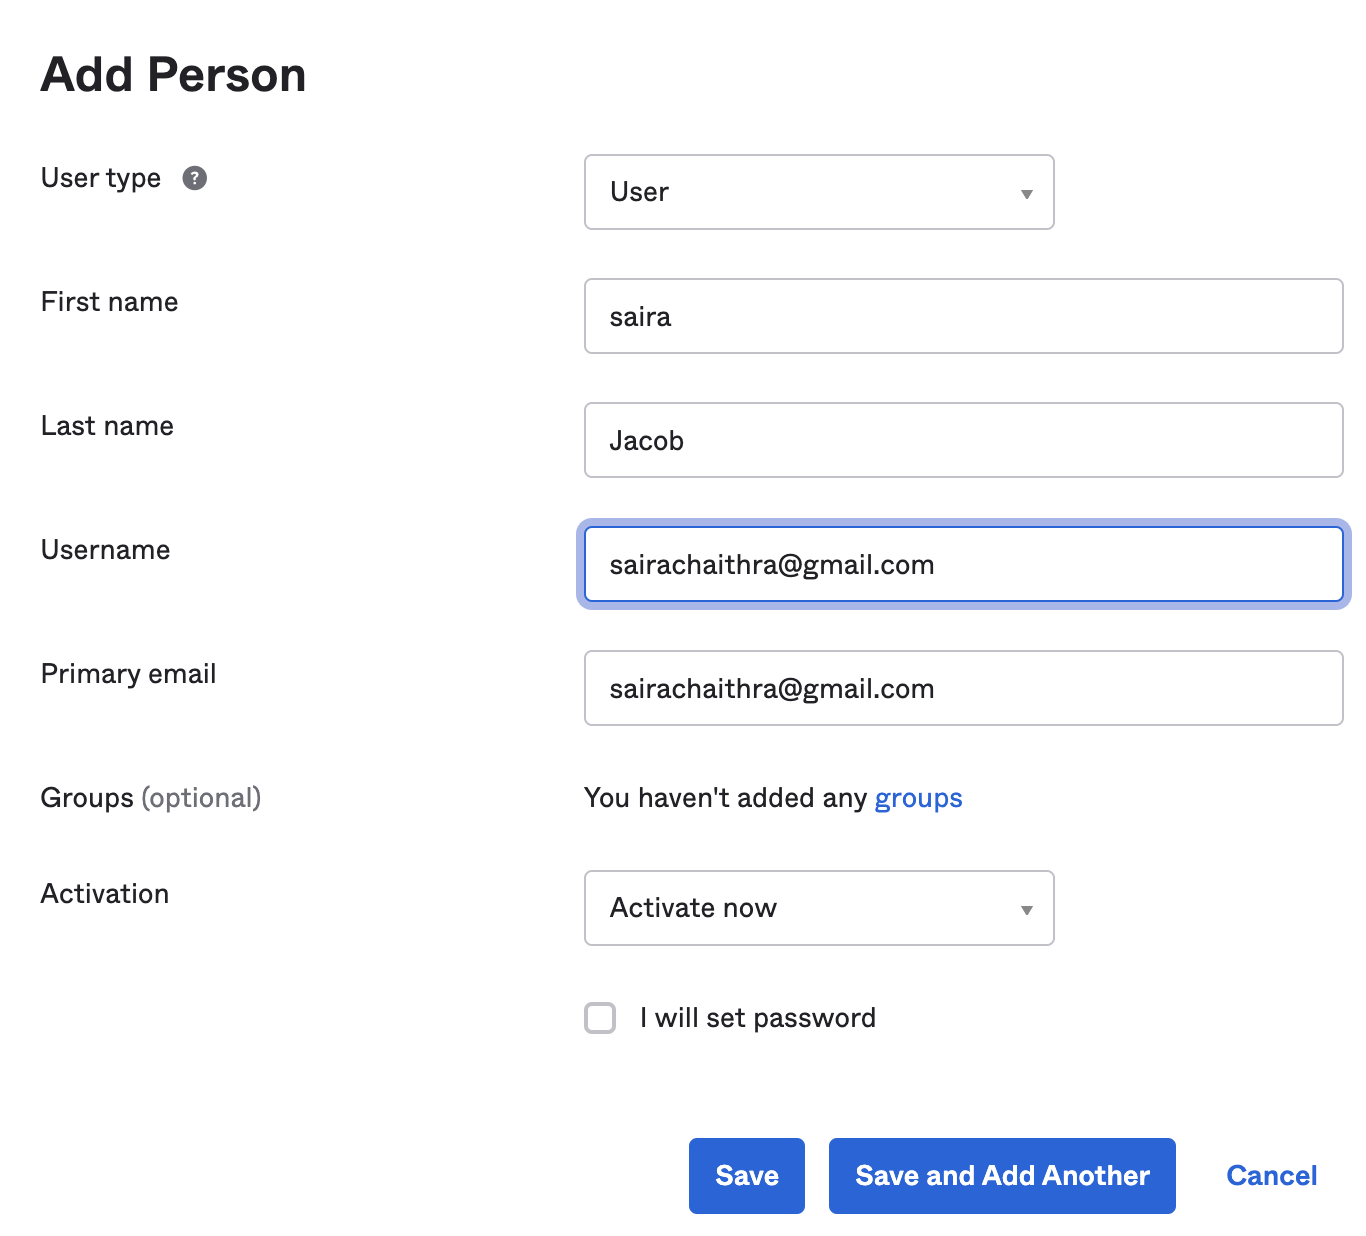
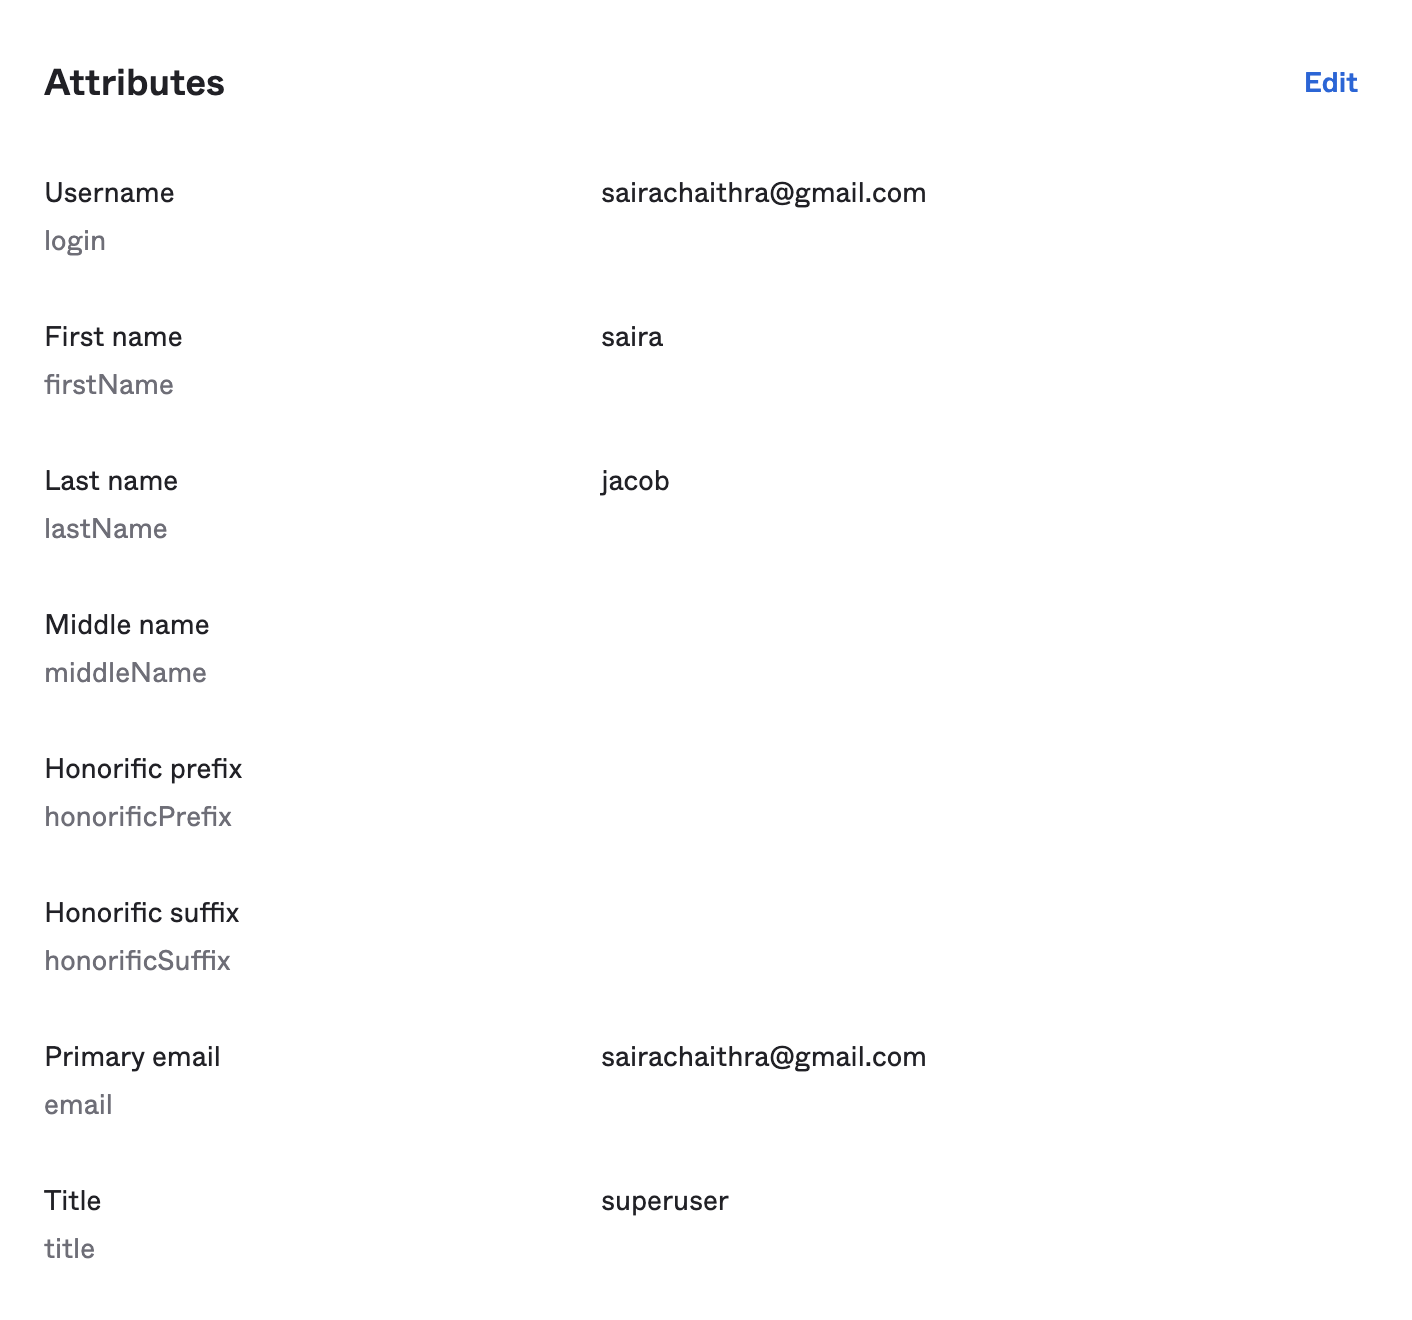
Once the user is created select the profile of the user and fill in the information such as the title
NOTE: The title should be the role name that is configured on the Portal page. In this example, the value will be “superuser”
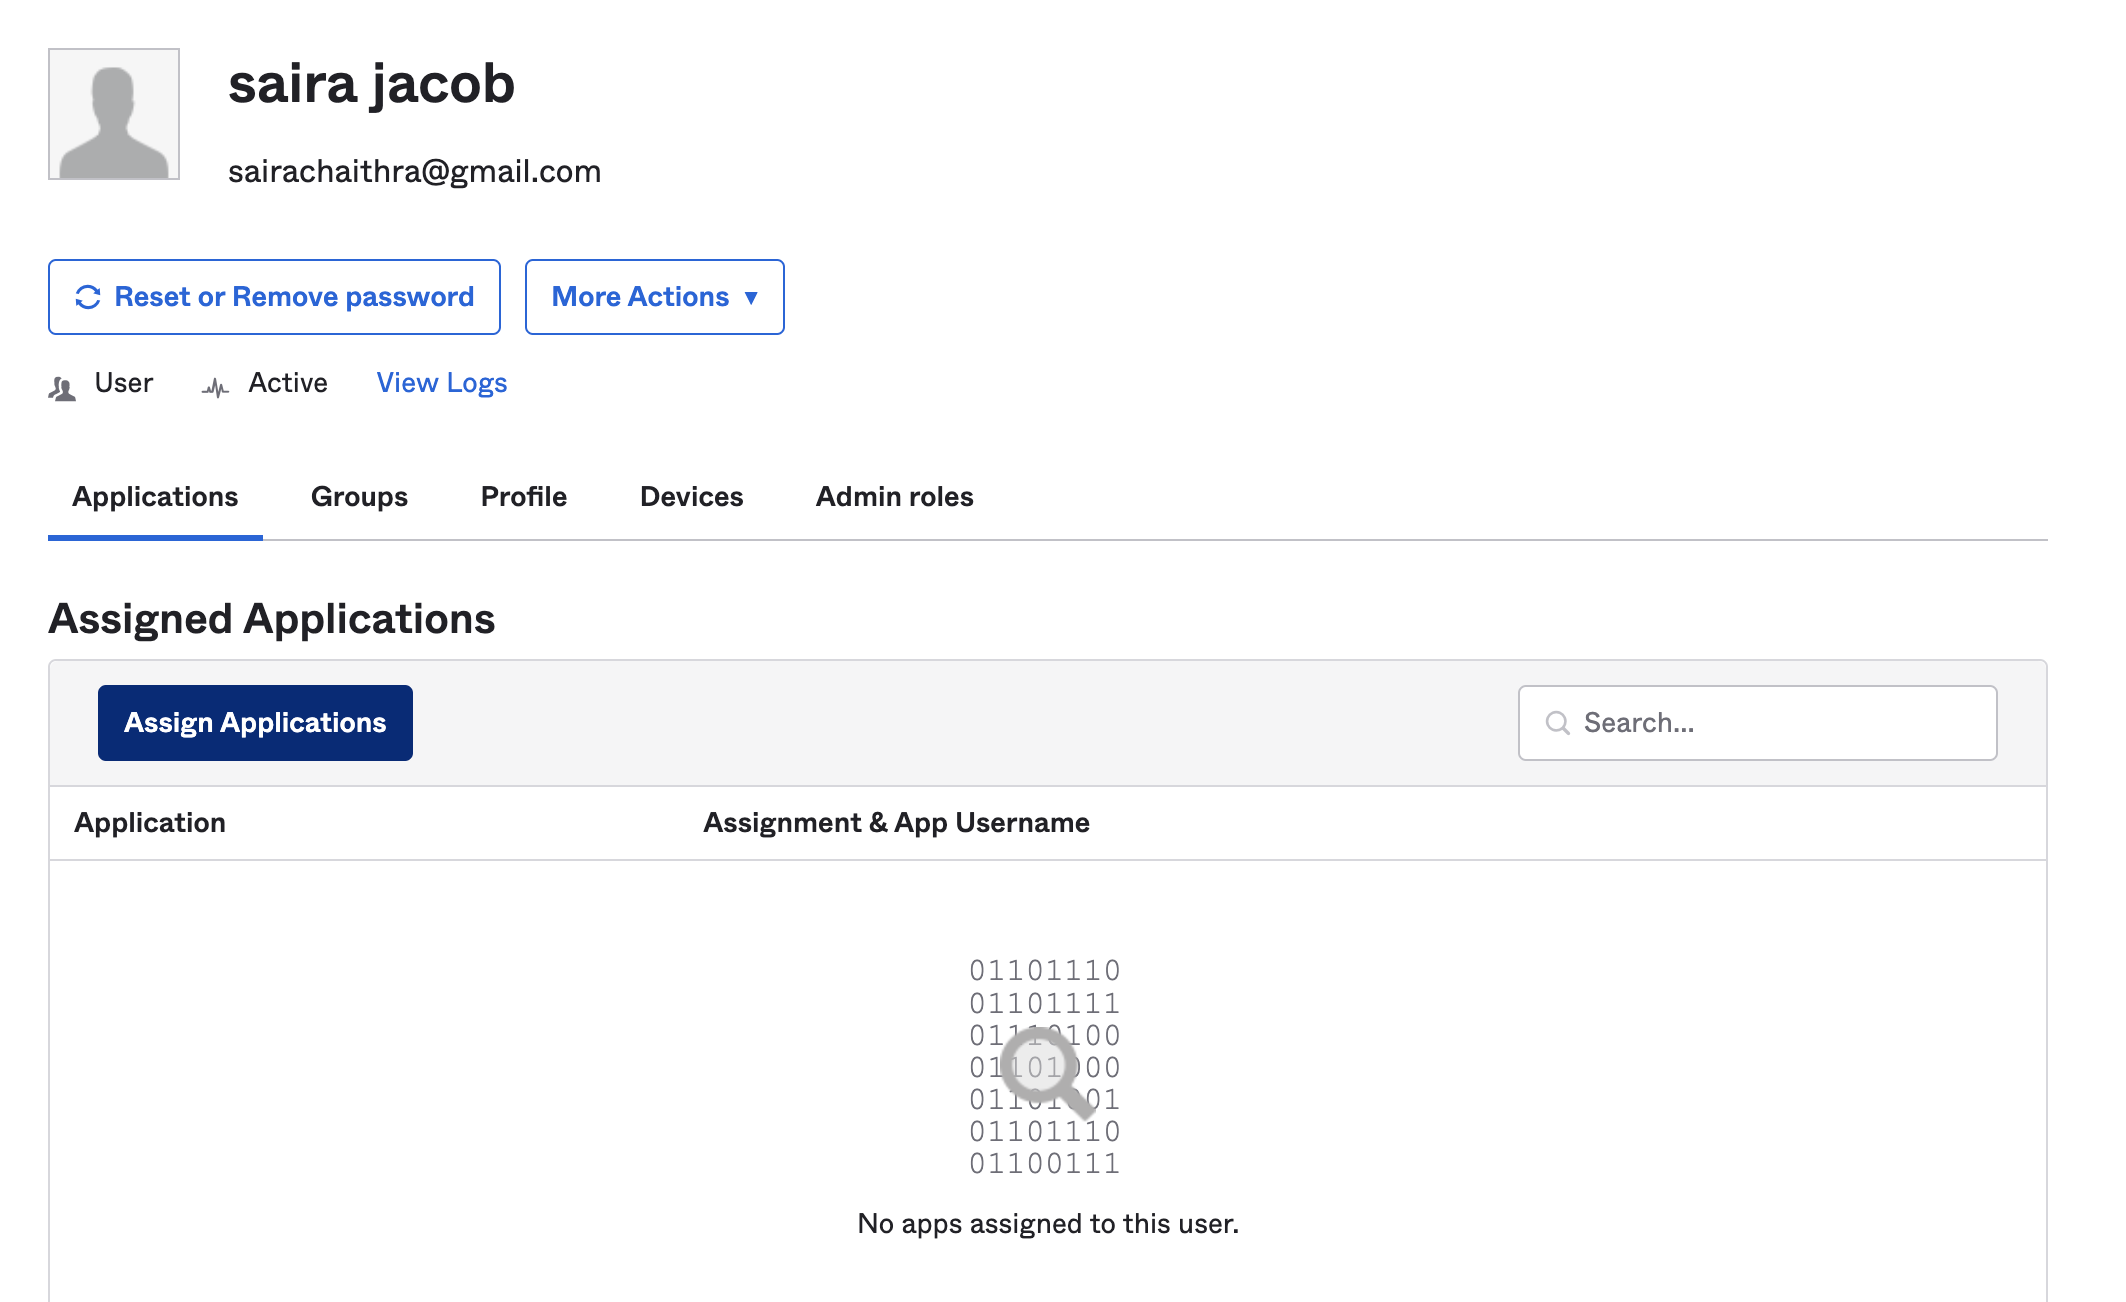
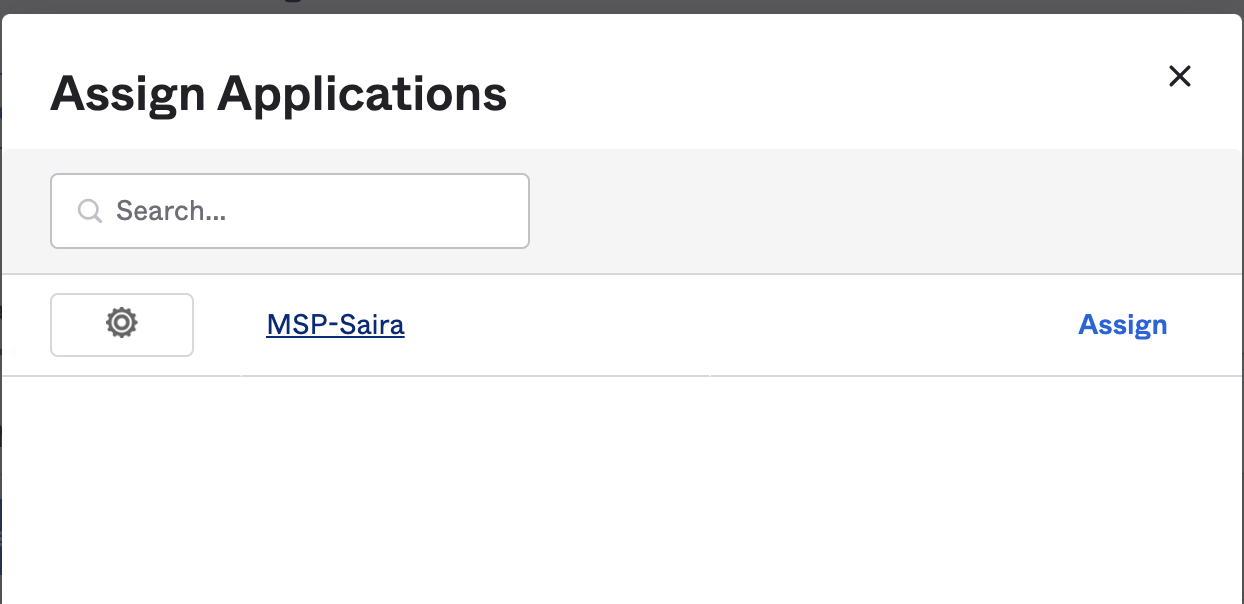
Our next step is to assign the application to the user.
Please note:
The first time an email address is used for SSO login, it must use IDP initiated login, which means the user must log in through the IDP into Mist. For this case, we can use the SSO URL for the initial SSO Login
Once the successful initial Login is done through IDP, the user-email ID is moved to an SSO user after which whenever the user logs in to the mist dashboard  Mist Systems The user will be redirected to the OKTA portal page for authentication.
Troubleshooting:
Q: How to login with SSO in the MIST portal.
Ans: Use SSO URL to login with the SSO account. Try with this SSO URL as configured in your portal.
Q: How do I find the issuer URL?
Ans: The Issuer URL comes from your ADFS setup. You can find it in the ADFS metadata.
Q: Getting error: {
“detail”: “Role attribute missing”
}
Ans: The error means the Role attribute is not being sent in your SAML Assertion from ADFS to Mist OR Attributes are case sensitive and make sure you add Role not role
Q: Getting error:
{
“detail”: “email already taken”
}
Ans: You can get around this by one of the following methods:
(a) Delete your local administrator account. Do note that every Organization needs at least one local administrator.
(b) Use a different email address for your SSO account and local account. You can update your local account’s Email Address to a different alias here: Mist Systems Administration
In addition, Revoking access from an Organization is not the same as deleting the account. Revoking access would remove the user’s access to your organization, but it would not delete their local account.
You can delete an account by the following:
(1) Log in to your user account.
(2) Launch an Organization.
(3) In the upper-right corner of your Admin Web GUI, click the user icon/avatar. This will open a dropdown.
(4) Select the “My Account” option from the dropdown.
(5) On the “My Account” page, click the “Utilities” button. This will open a dropdown.
(6) Select the “Delete Account” option from the dropdown, and confirm the account deletion.
Q: Getting error:
{
“detail”: “sso admin cannot create api tokens”
}
Ans: As the error shows, SSO Administrators cannot create API Tokens as their permissions are generated on the fly (at time of assertion). We would suggest setting up a local administrator account, to be used as a “service account”, for any API automation purposes.
Q: Do MIST support SAML 2.0 to login to the Mist portal?
Ans: Yes. We do support SAML 2.0
Q: Where we can see recent sso errors.
Ans: Below API can be used to check recent SSO errors:
/api/v1/orgs/:org_id/ssos/:sso_id/failures
Q: Getting error: Domain domain_name not found
Ans: 1) The domain name you are using is not correct, that you can check in https://api.mist.com/api/v1/orgs/{org_id}/ssos/{some_id}/metadata
-
Check ACS URL is correctly configured, which you see in the “add identity provider” in Organization → settings page
Q : Error : The response has to be signed
{
“detail”: “the response has to be signed”
}
Ans : Check if full Message is signed, or only the Assertion? We expect the full Message to be signed and throw the error {“detail”: “the response has to be signed”} if not.
Q: SSO configuration not populating names when logging on. The user name is coming as “??”
Ans: Mist requires the “FirstName”, “LastName”, “Role”, and “Name ID” (as email) attributes sent in the SAML assertion. If “FirstName”, “LastName” are not sent in the attribute then upon first login, SSO account is created with the supplied Email, but FirstName and LastName is sent as “?”.
Q: Getting error:
{
“detail”: “idp_cert invalid”
}
Ans: You will need to check the certificate at your end. Check SSO IDP Certificate have the headers and footers.