This doc will walkthrough the configuration of the client onboarding workflows for PSK Portals. These portals allow users to self provision PSKs (BYOD portal) or in the future Guest PSK administration.
You will need to configure SAML authentication with your IdP so users are able to login to the PSK portal and manage their keys. This guide provide examples of configuring PSK Portals with Okta and Azure AD. The process is very similar to Mist Admin SSO and will work with a wide variety of IdPs, assuming they support SAML2.0
When you create the portal, a Mist URL will be generated for folks to access the portal. It is the intention you will create a CNAME in your DNS to create a more user friendly URL that is associated with your domain.
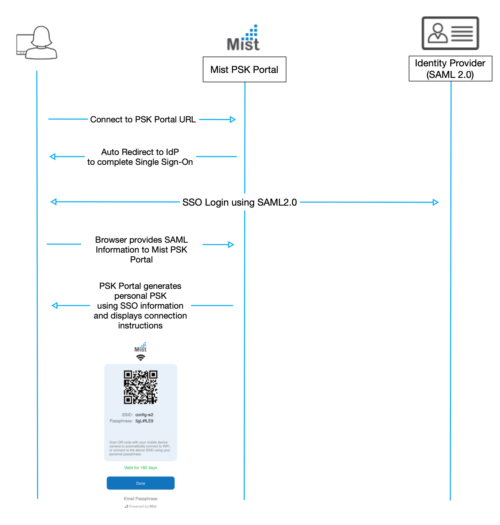
Here is an example of the “workflow” for the BYOD PSK Portal
Pre-Requisites:
- Client Onboarding requires an IoT Assurance subscription
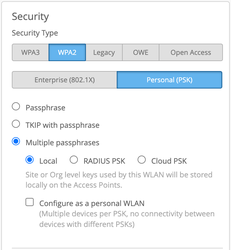
- At least one org-level WLAN needs to exist with Multi PSK enabled (either local or cloud PSK options are fine):
Initial Mist Dashboard Configuration
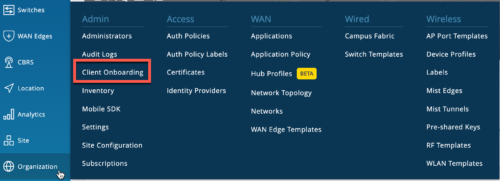
- Go to Organization > Client Onboarding
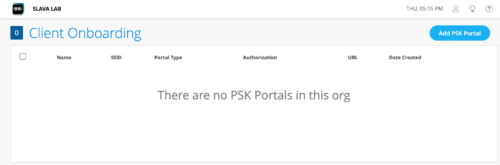
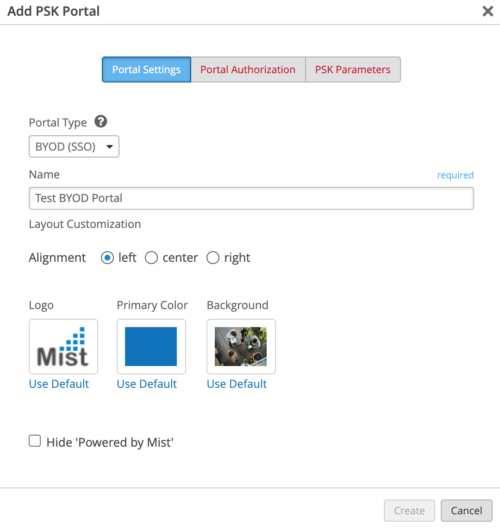
- Click on Add PSK Portal
- Configure PSK Portal Name and proceed to Authorization tab.
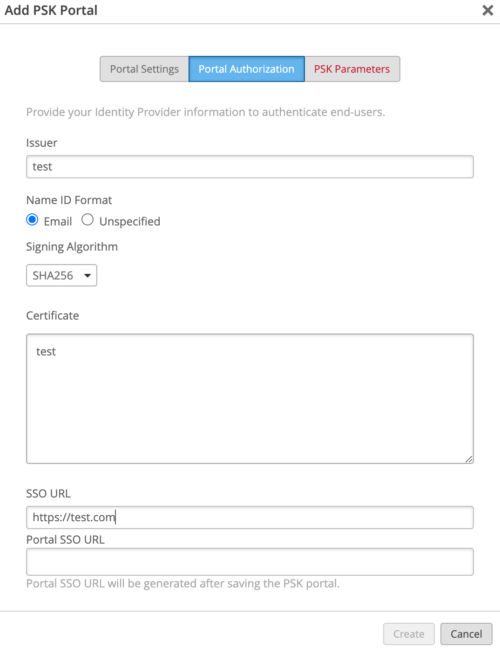
- While on Authorization tab, provide dummy values for now, we will come back to this tab later:
Continue to the PSK Parameters tab.
- Under PSK Parameters tab select SSID (assuming you have met the pre-requisites, only org-level MPSK enabled SSIDs will show up).
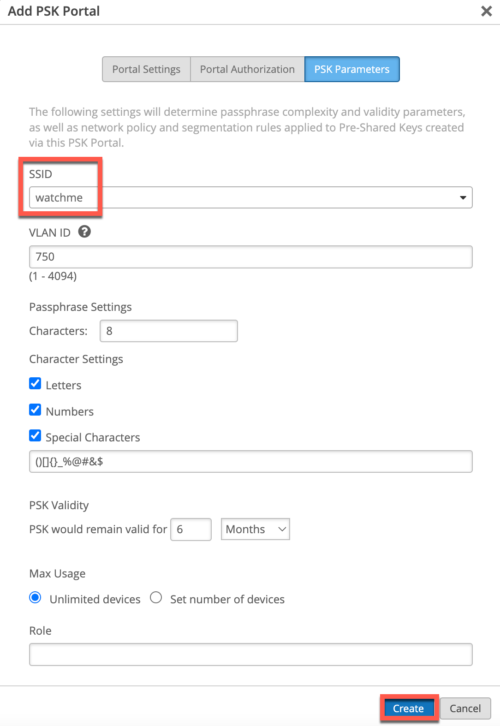
Optionally, configure VLAN (users onboarded via this portal would be assigned specified VLAN), Passphrase complexity settings, PSK Validity.
Hit Create.
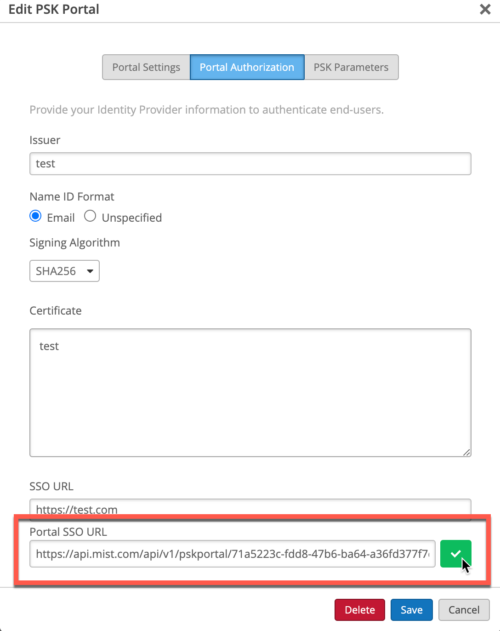
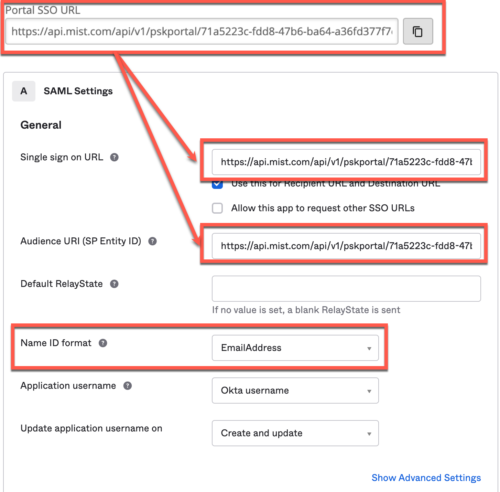
- After creating the PSK Portal, click on the PSK Portal to go into edit mode, and go to Authorization tab. Copy the Portal SSO URL and save it somewhere.
Configuring OKTA as SSO Provider:
- Login to your Okta developers tool. To get a free okta dev account, follow this link:
https://developer.okta.com/signup/
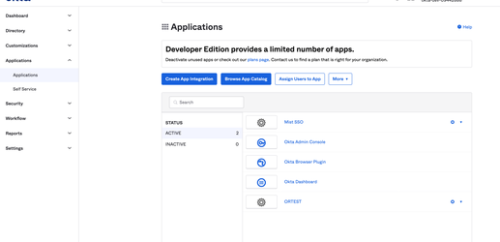
- Click Applications > Create App Integration
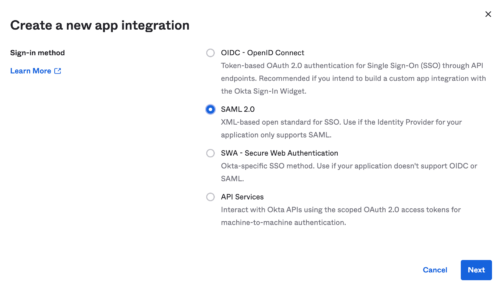
Select SAML 2.0 and click Next:
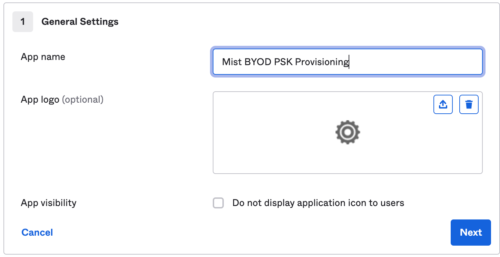
- Configure App name and click Next
- Paste Portal SSO URL into Single Sign on URL and SP Entity ID fields. Also, set Name-Id format as email address:
Click Next and then Finish.
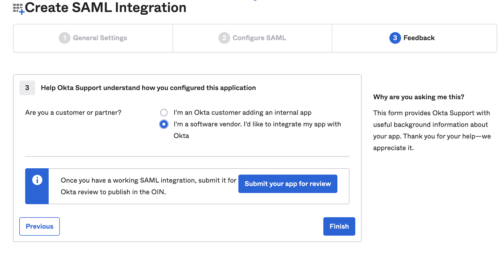
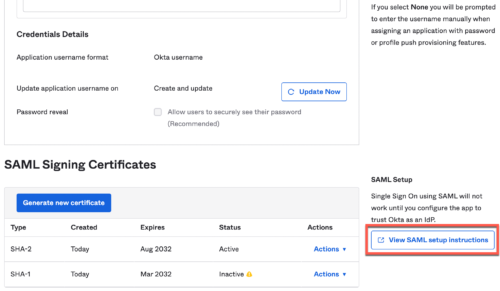
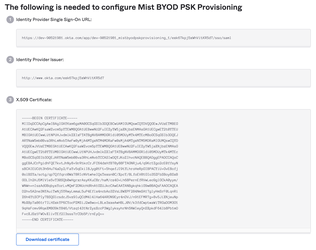
5. You will be redirected to a different screen with this app in edit mode. Scroll down to see a link to view SAML Setup Instructions:
Proceed to Complete Mist Dashboard Configuration section.
Configuring AZURE as SSO Provider
- Login to https://portal.azure.com/
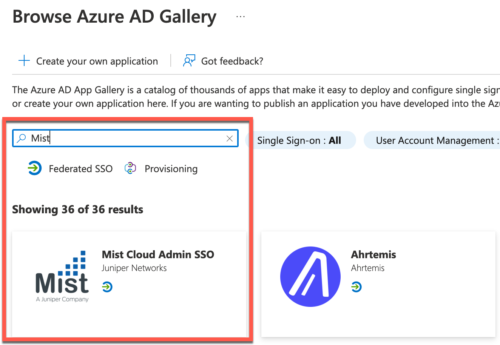
- Go to Home > Enterprise Applications Under Azure Services
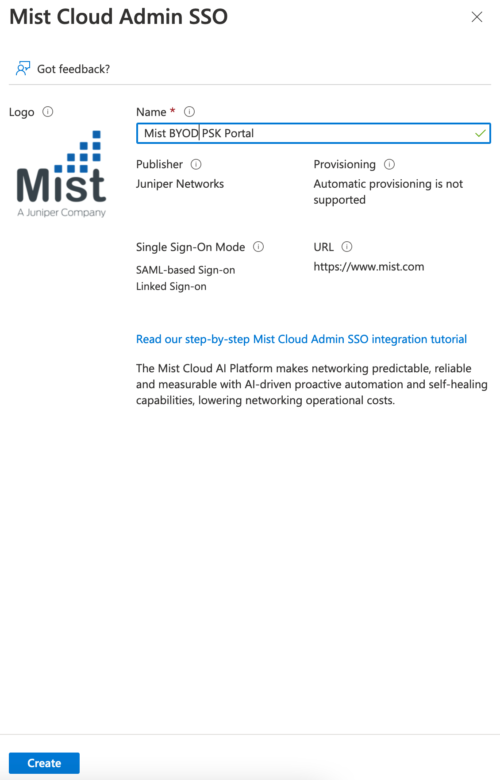
- In the Search field type Mist and Select Mist Admin SSO app
- Change App name if required. Click on Create
- Click on Create
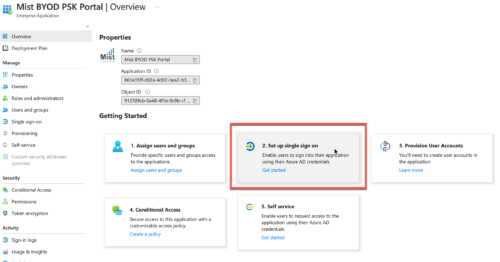
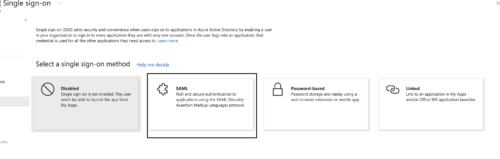
- Click on Set up single sign on > SAML
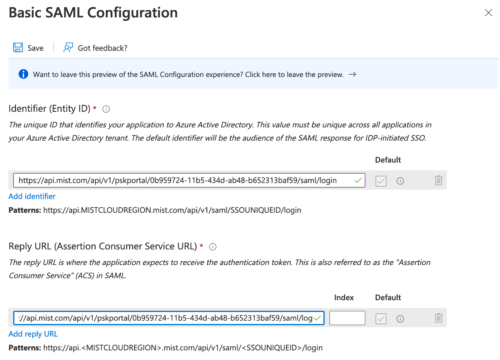
- Under Basic SAML Configuration
Identifier (Entity ID) and Reply URL (Assertion Consumer Service URL) should be equal to Portal SSO URL from the PSK Portal.
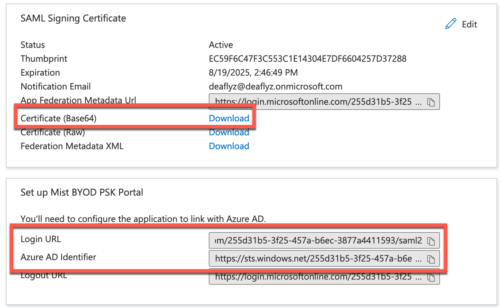
Now go back and click on Download Base 64 certificate, then copy Login URL and Azure AD Identifier:
Proceed to Complete Mist Dashboard Configuration section.
Complete Mist Dashboard Configuration:
Edit your PSK Portal and go to Authorization tab.
Paste the info from your SSO provider.
Okta scenario:
Issuer = Identity Provider Issuer
Paste the certficate
SSO URL = Identity Provider Single Sign on URL
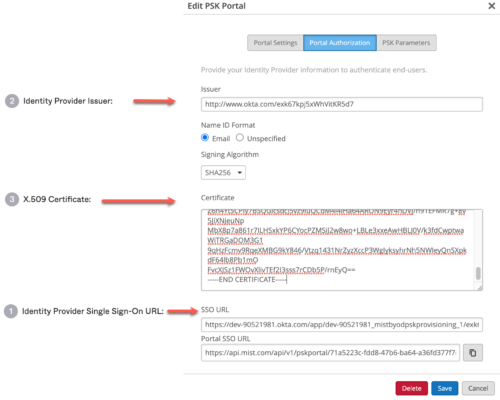
Now your configuration is complete. Proceed to Verification section.
Azure scenario:
Paste the Azure ID Identifier into Issuer field, paste payload of the downloaded Certificate (Base64) into Certificatefield on the PSK portal side, and finally paste Login URL from Azure to SSO URL field on the PSK portal.
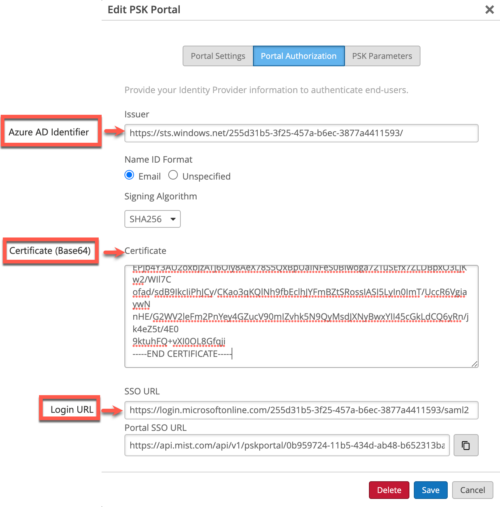
Proceed to Verification section.
Verification
There are two ways for the end-user to self-provision the PSK via the Portal.
- Use Mist provided PSK Portal URL, for example

- Use IDP initiated check-let or app flow.
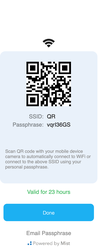
goto your PSKportal url
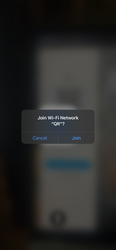
Scan the QR code with your standard camera app and you would be automatically connected to SSID on clicking Join
![]()