Register/login to the below URL
https://portal.azure.com/#home
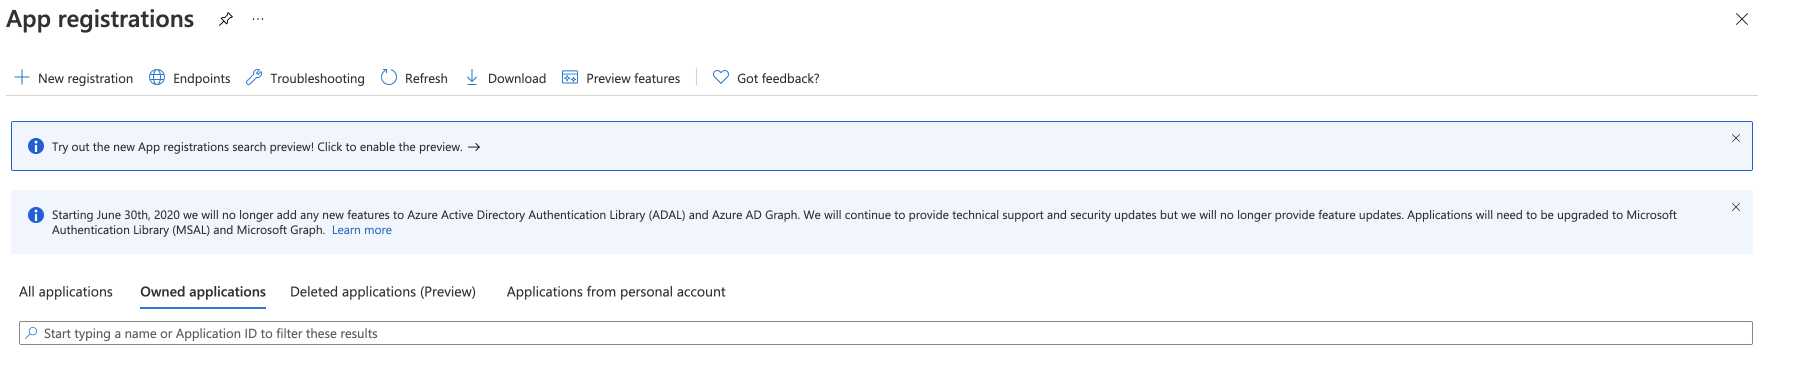
Click on App registrations. If you cannot find this, click on More Services and search for App registrations
Click on + New Registration
1. Add the name, you wish to add for the App
2. You can select any account type
3. Under Redirect Url select “Web” and the URL should be https://portal.mist.com/social_redirect
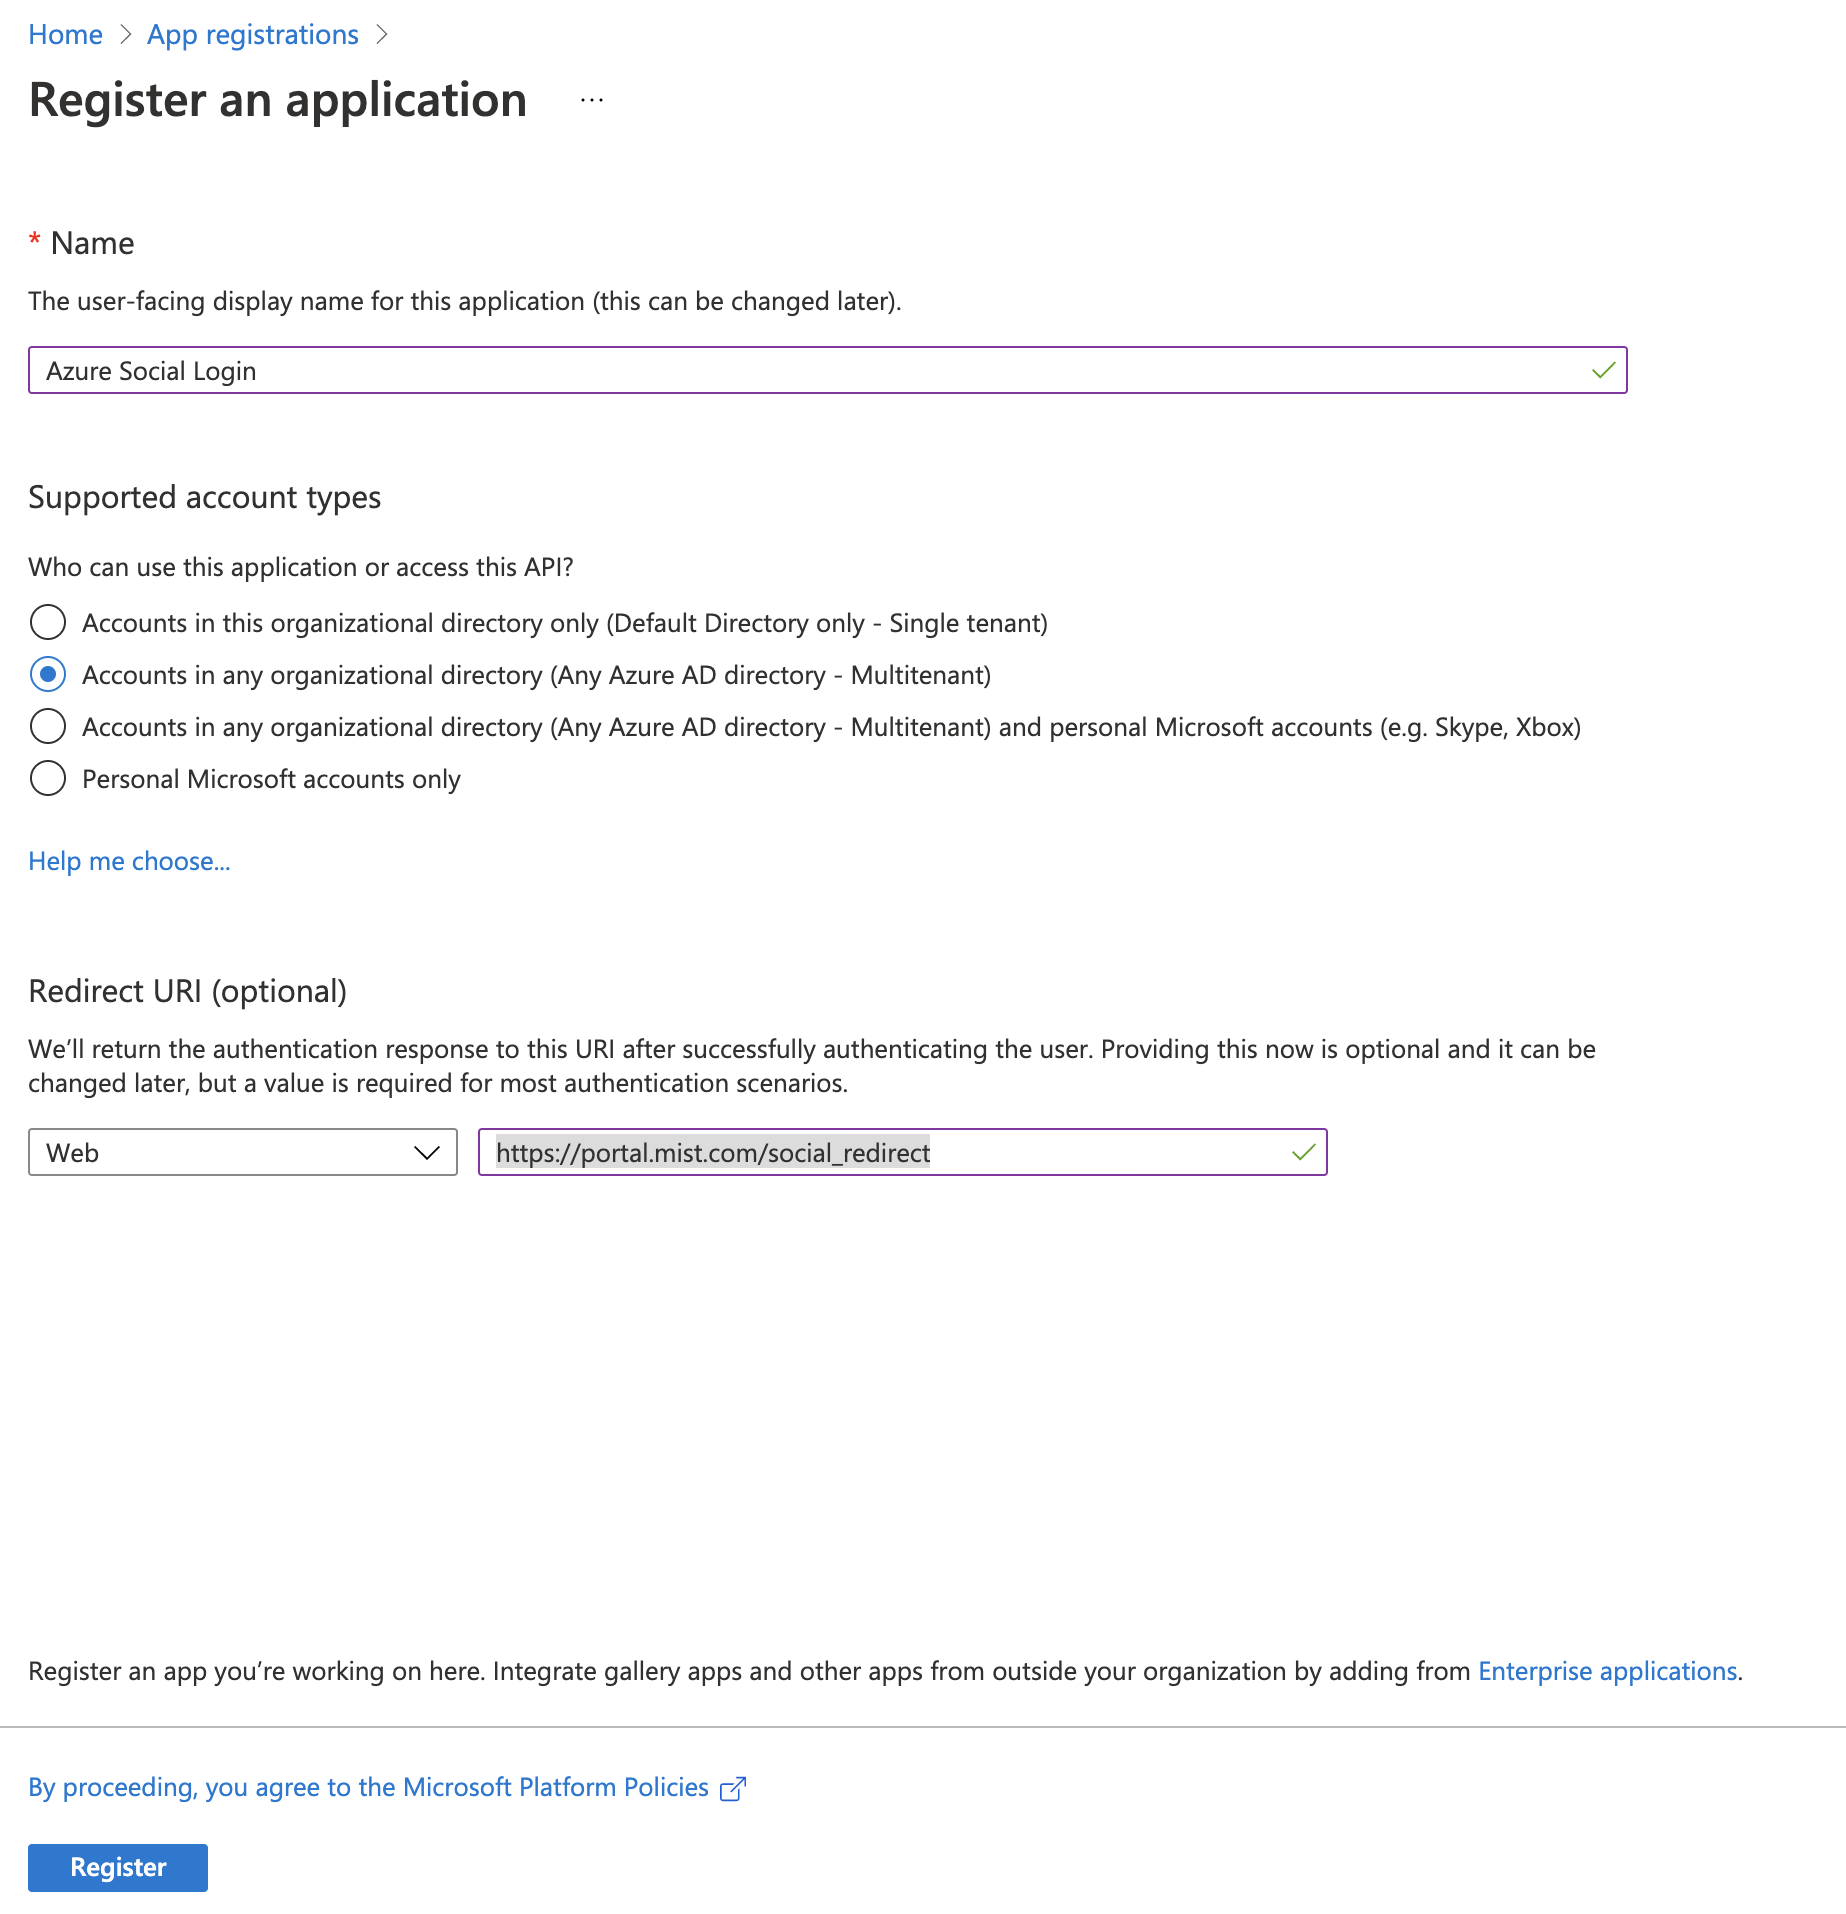
Click on Register
Once registration is done you will see this page:
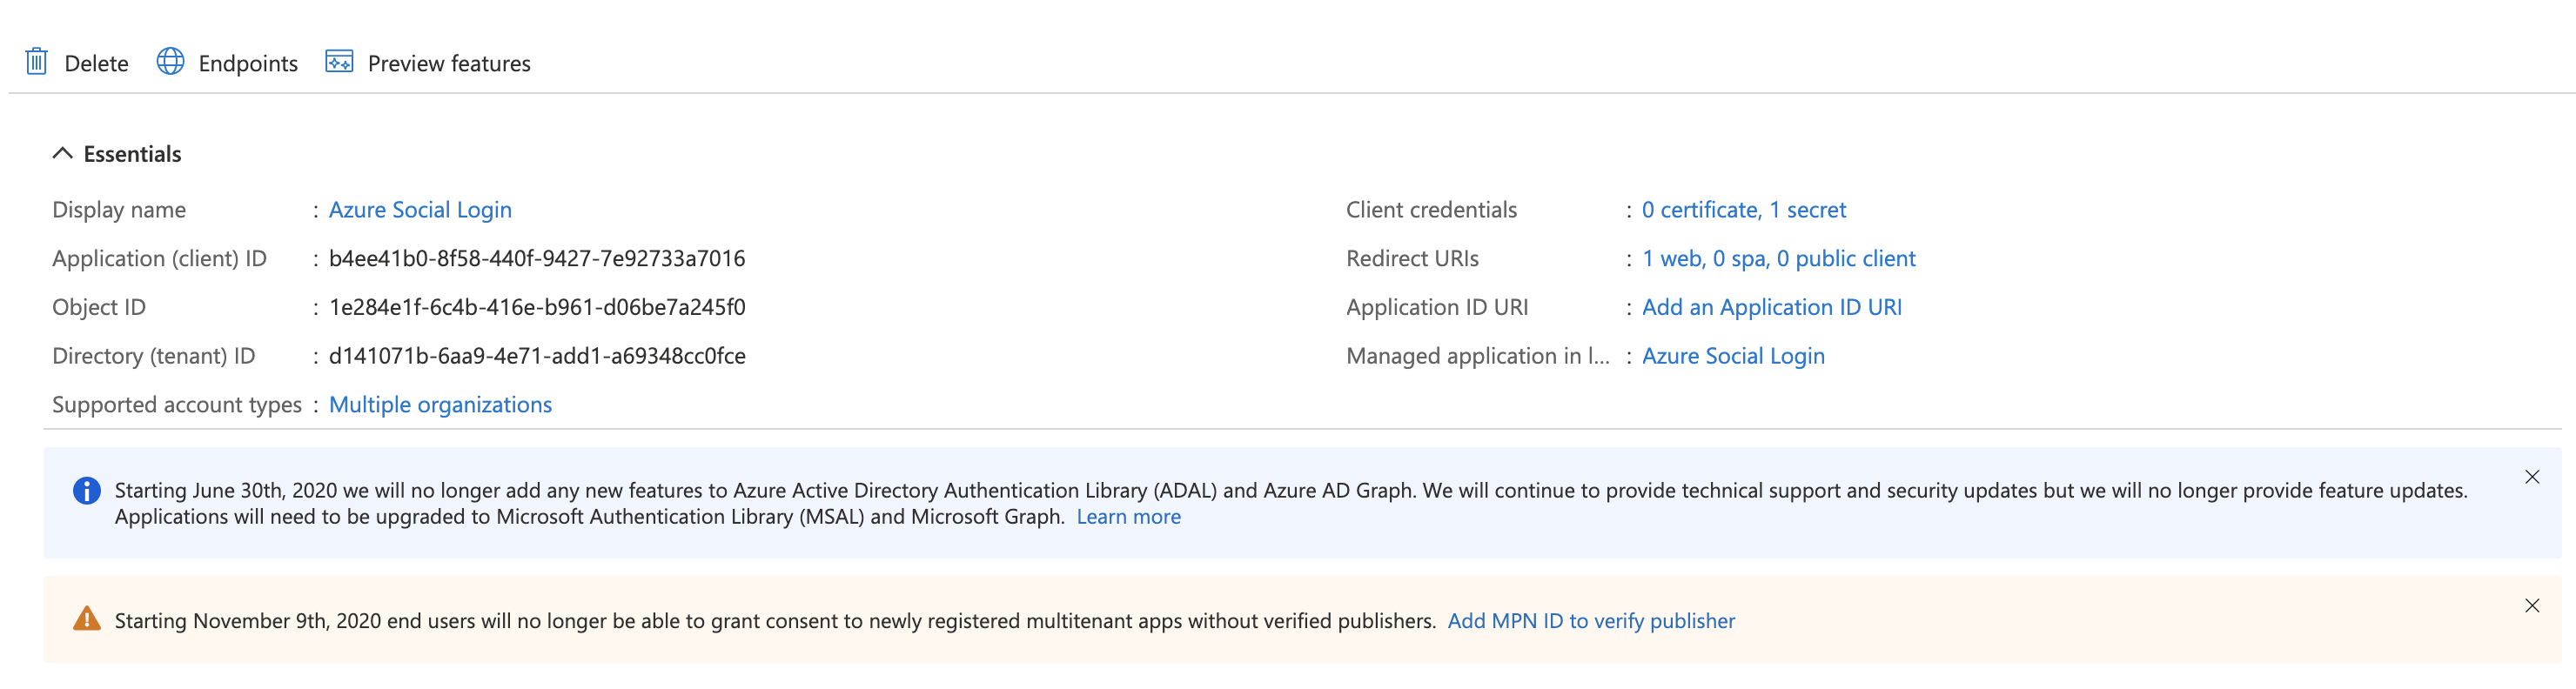
Example:
Application (client) ID: b4ee41b0-8f58-440f-9427-7e92733a7016
Directory (tenant) ID : d141071b-6aa9-4e71-add1-a69348cc0fce
You can copy the client ID and Tenant ID from here and enter these in the Guest Portal configuration page:
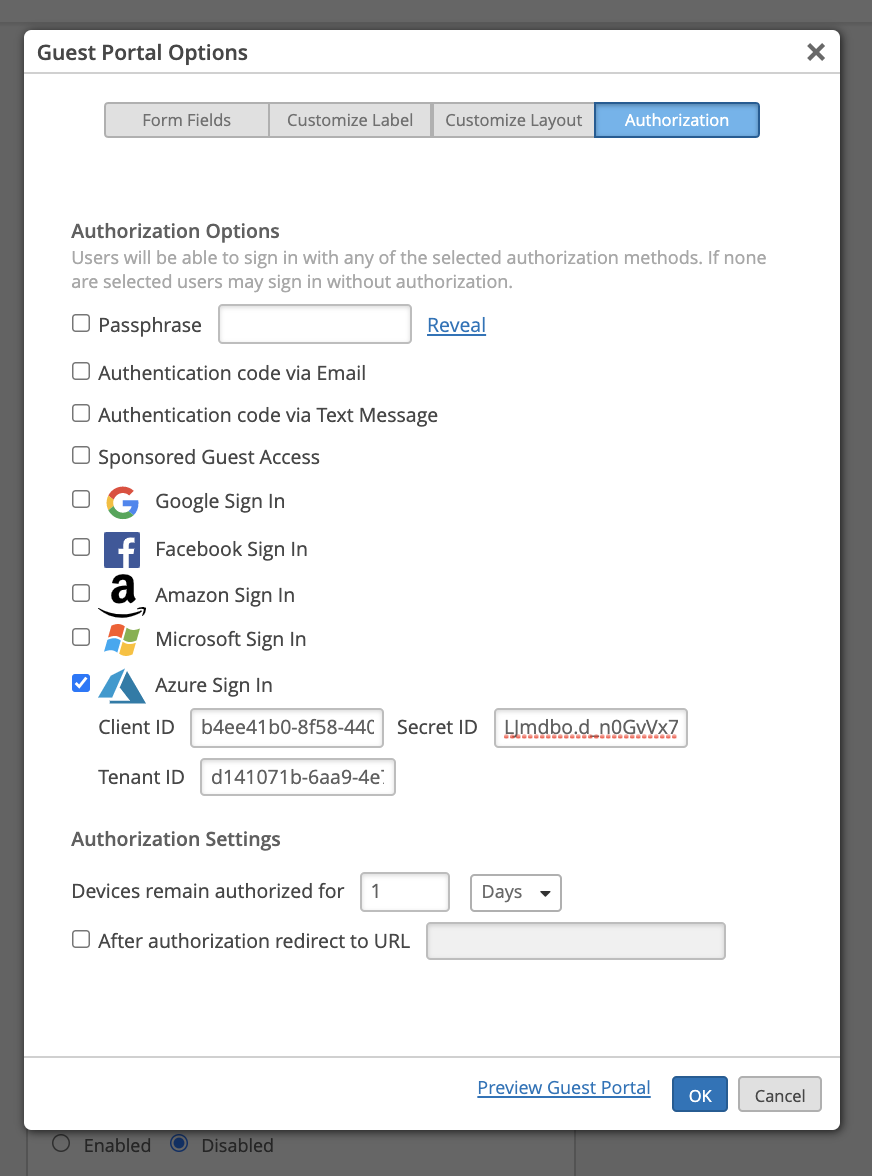
To generate the Secret ID, click on “Certificates & Secret” from the same page
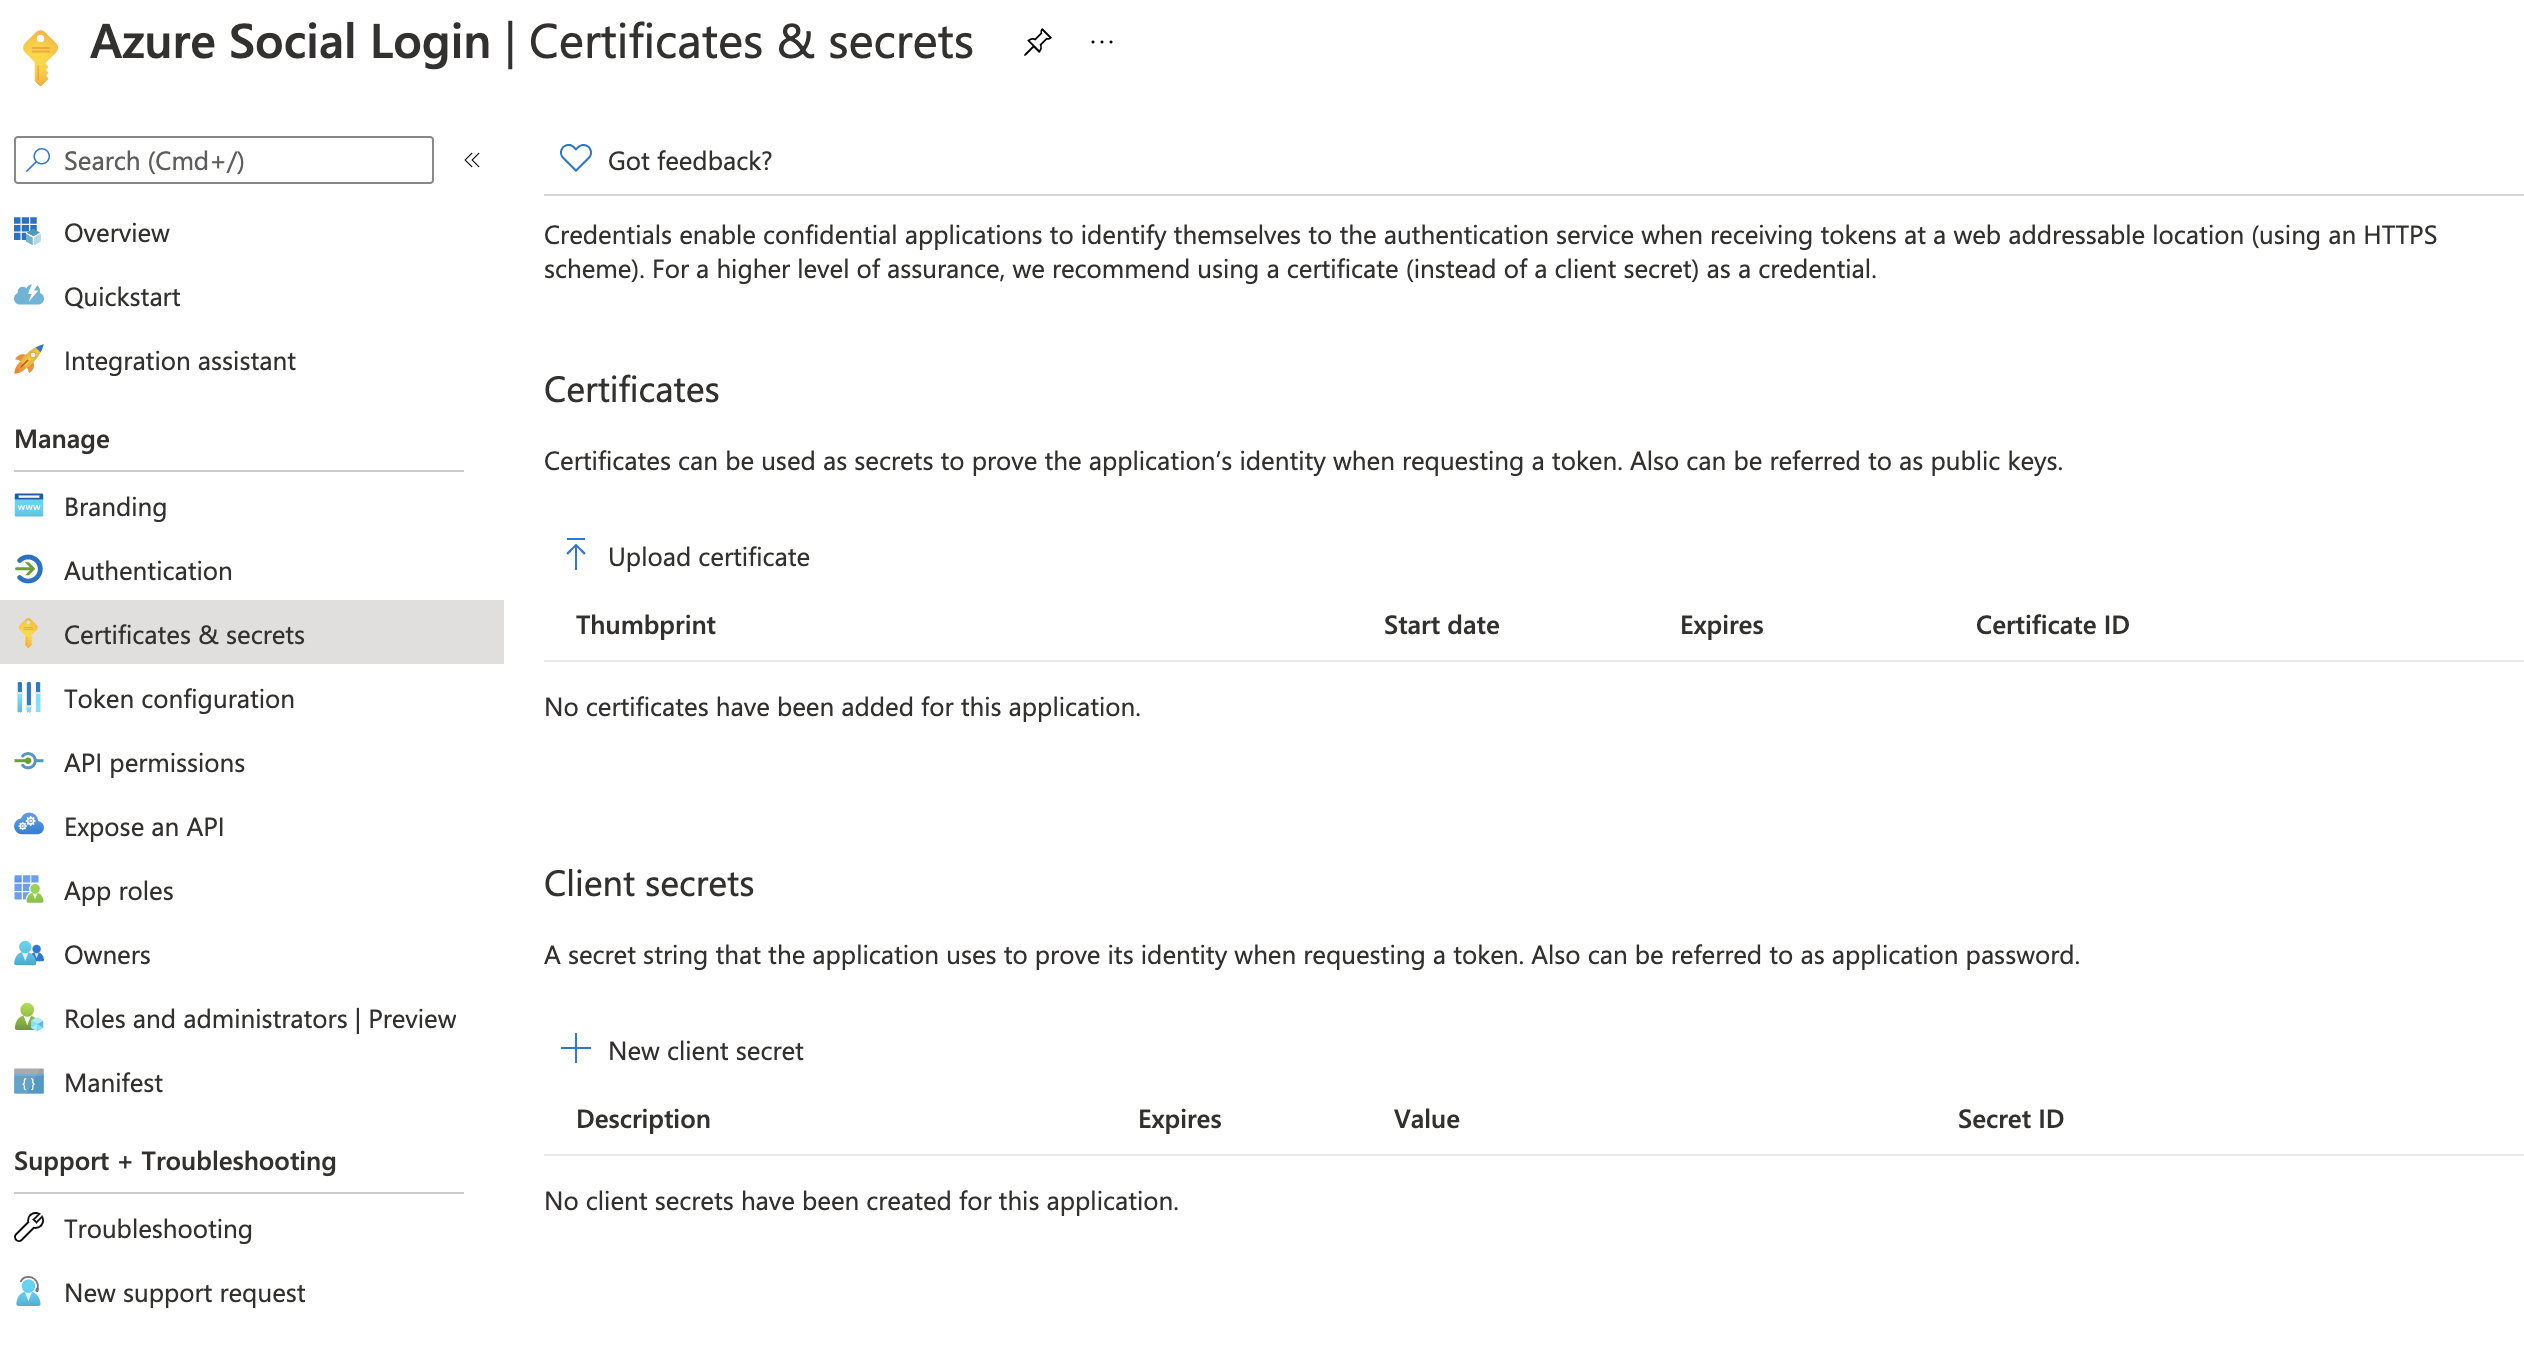
Now, click on + New Client Secret
You will see this pop up appear. Fill in the description and expiry time:
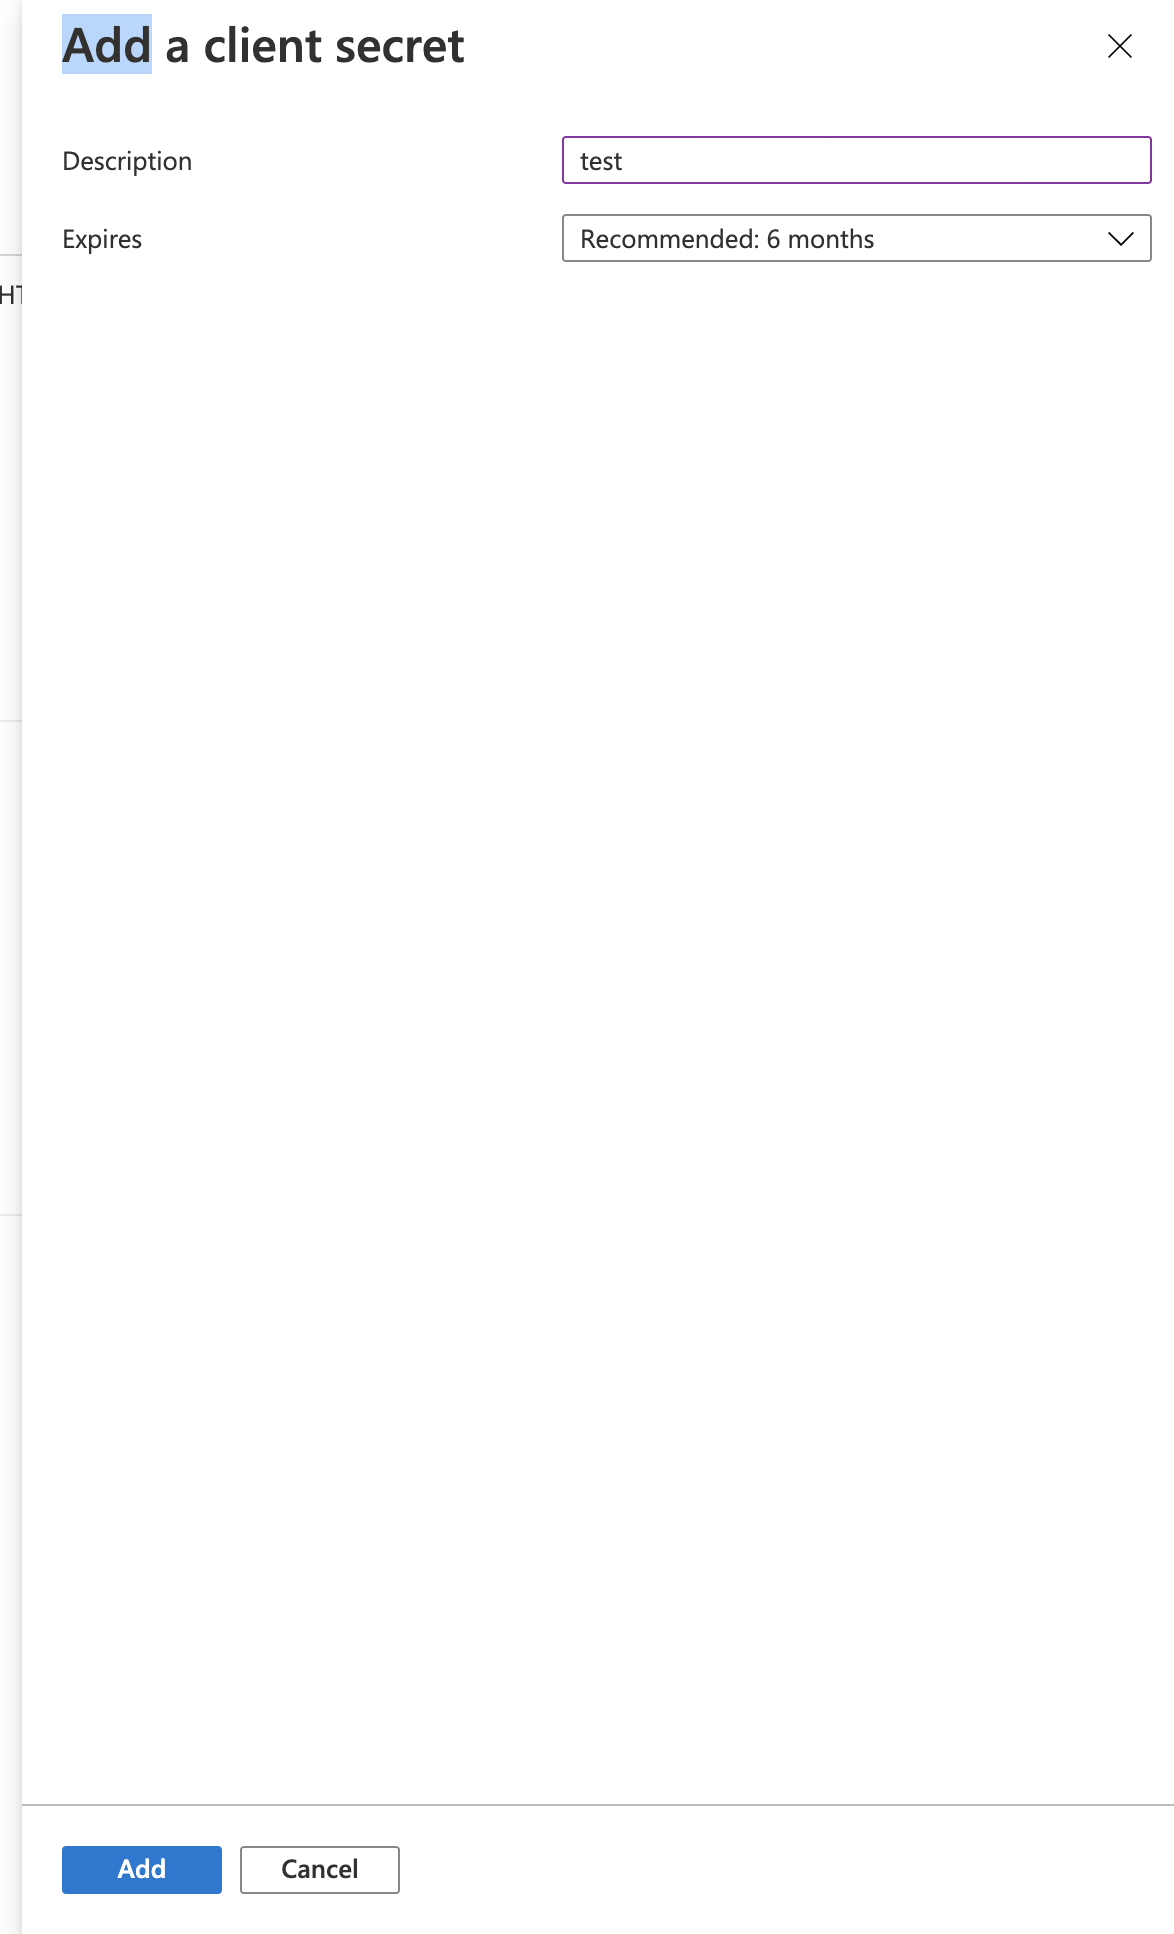
Click Add and a secret key will be generated.
Note: you need to copy the Value as a secret ID and paste it in the portal config, not the secret ID
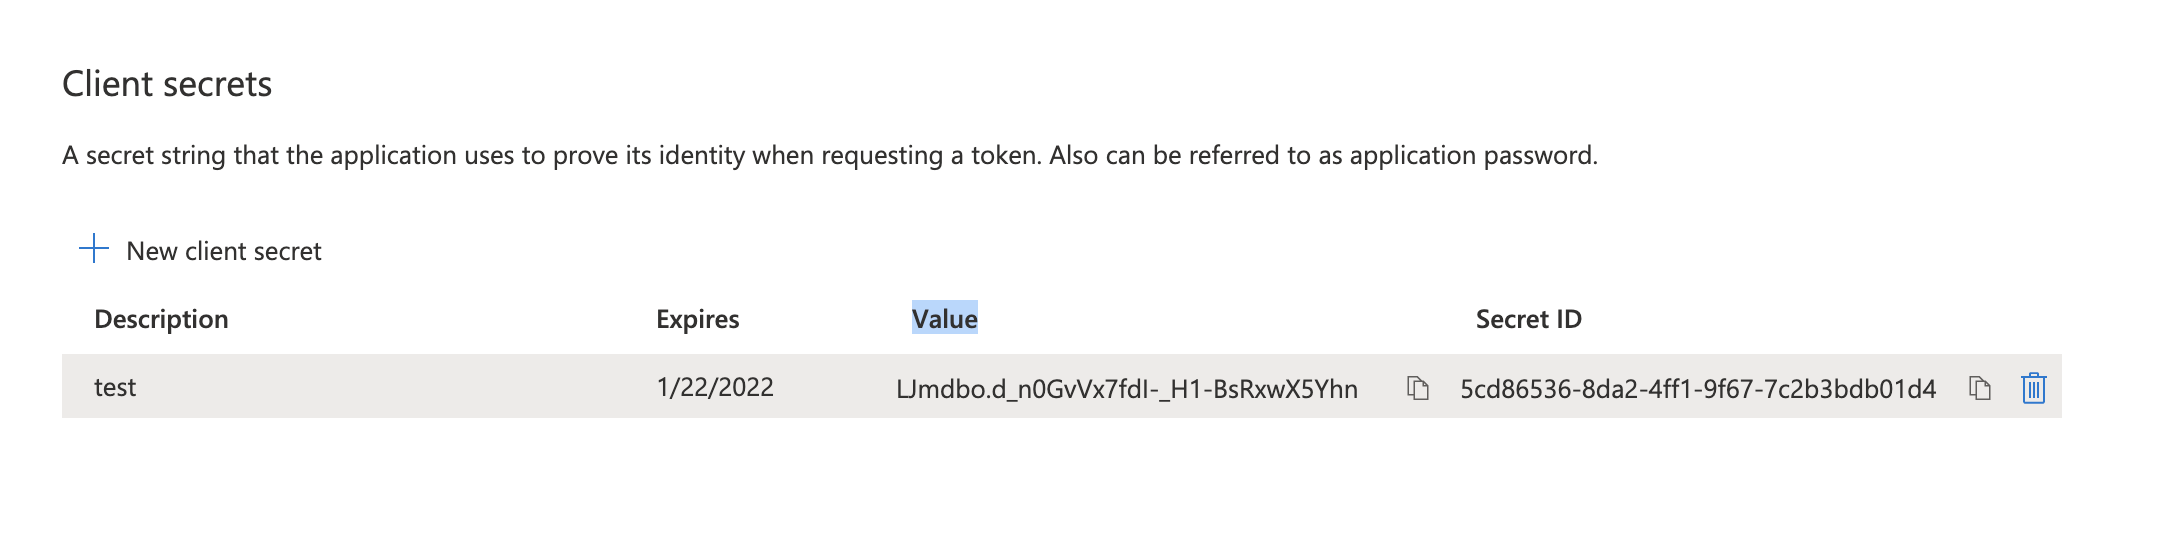
Secret ID : 7-aVI.Dz8vT-XX_nCl905wPml.2864syW_Now click on Branding
Add Home page URL as https://portal.mist.com
Terms of service URL as https://portal.mist.com/tos

From the Mist Guest Portal side config:
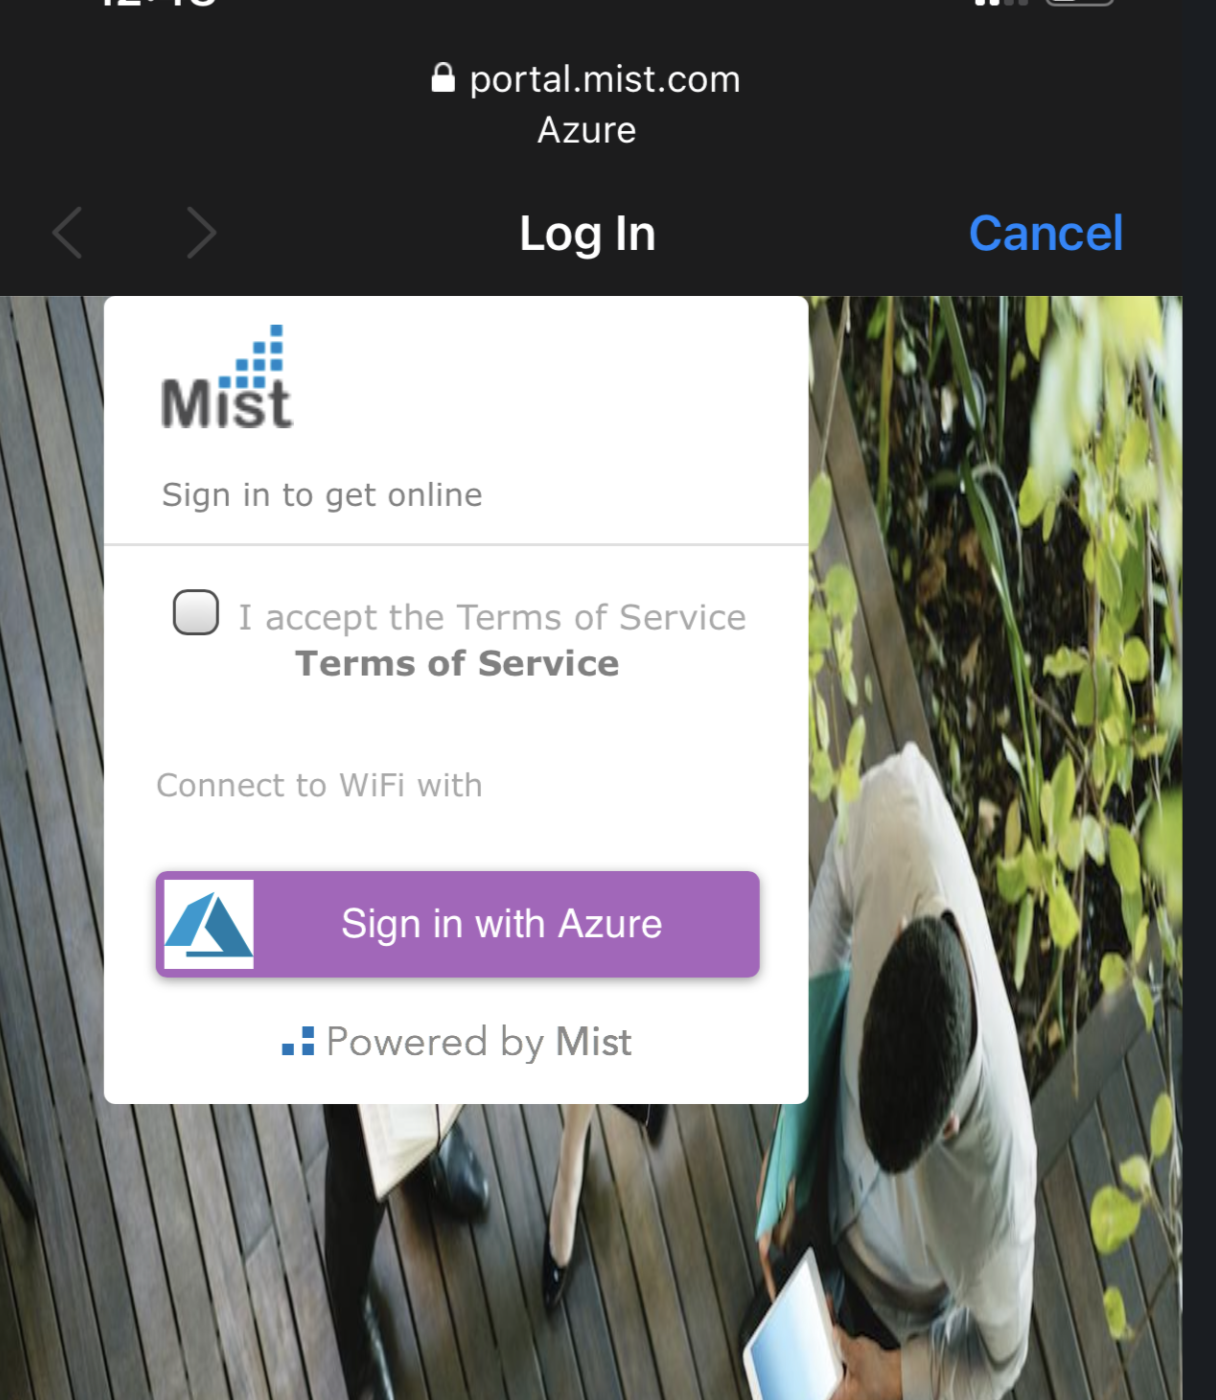
You will see this pop up when connecting to the guest portal. Accept the terms and conditions and select Sign in with Azure.

Once credentials are validated, please click on done
Troubleshooting
If a user is getting an error “client auth incorrectly configured, contact admin“ make sure value is copied in secret ID not secret ID
If you are seeing an error similar to this: User account “abc@mist.com” from identity provider doesn’t exist in the tenant “Microsoft services”
It means you need to add the user in your Azure AD. See below to learn how to do so.
Add a new guest user in Azure AD
1. Sign in to the Azure portal as an Azure AD administrator.
2. In the left pane, select Azure Active Directory.
3. Under Manage, select Users.

On the New user page, select Invite user and then add the guest user’s information.
-
Name. The first and last name of the guest user.
-
Email address (required). The email address of the guest user.
-
Personal message (optional) Include a personal welcome message to the guest user.
4. Select Invite to automatically send the invitation to the guest user. A notification appears in the upper right with the message Successfully invited user.
5. After you send the invitation, the user account will automatically be added to the directory as a guest.
Assign an app to the guest user
Add the Salesforce app to your test tenant and assign the test guest user to the app.
1. Sign in to the Azure portal as an Azure AD administrator.
2. In the left pane, select Enterprise applications.
3. Select application.
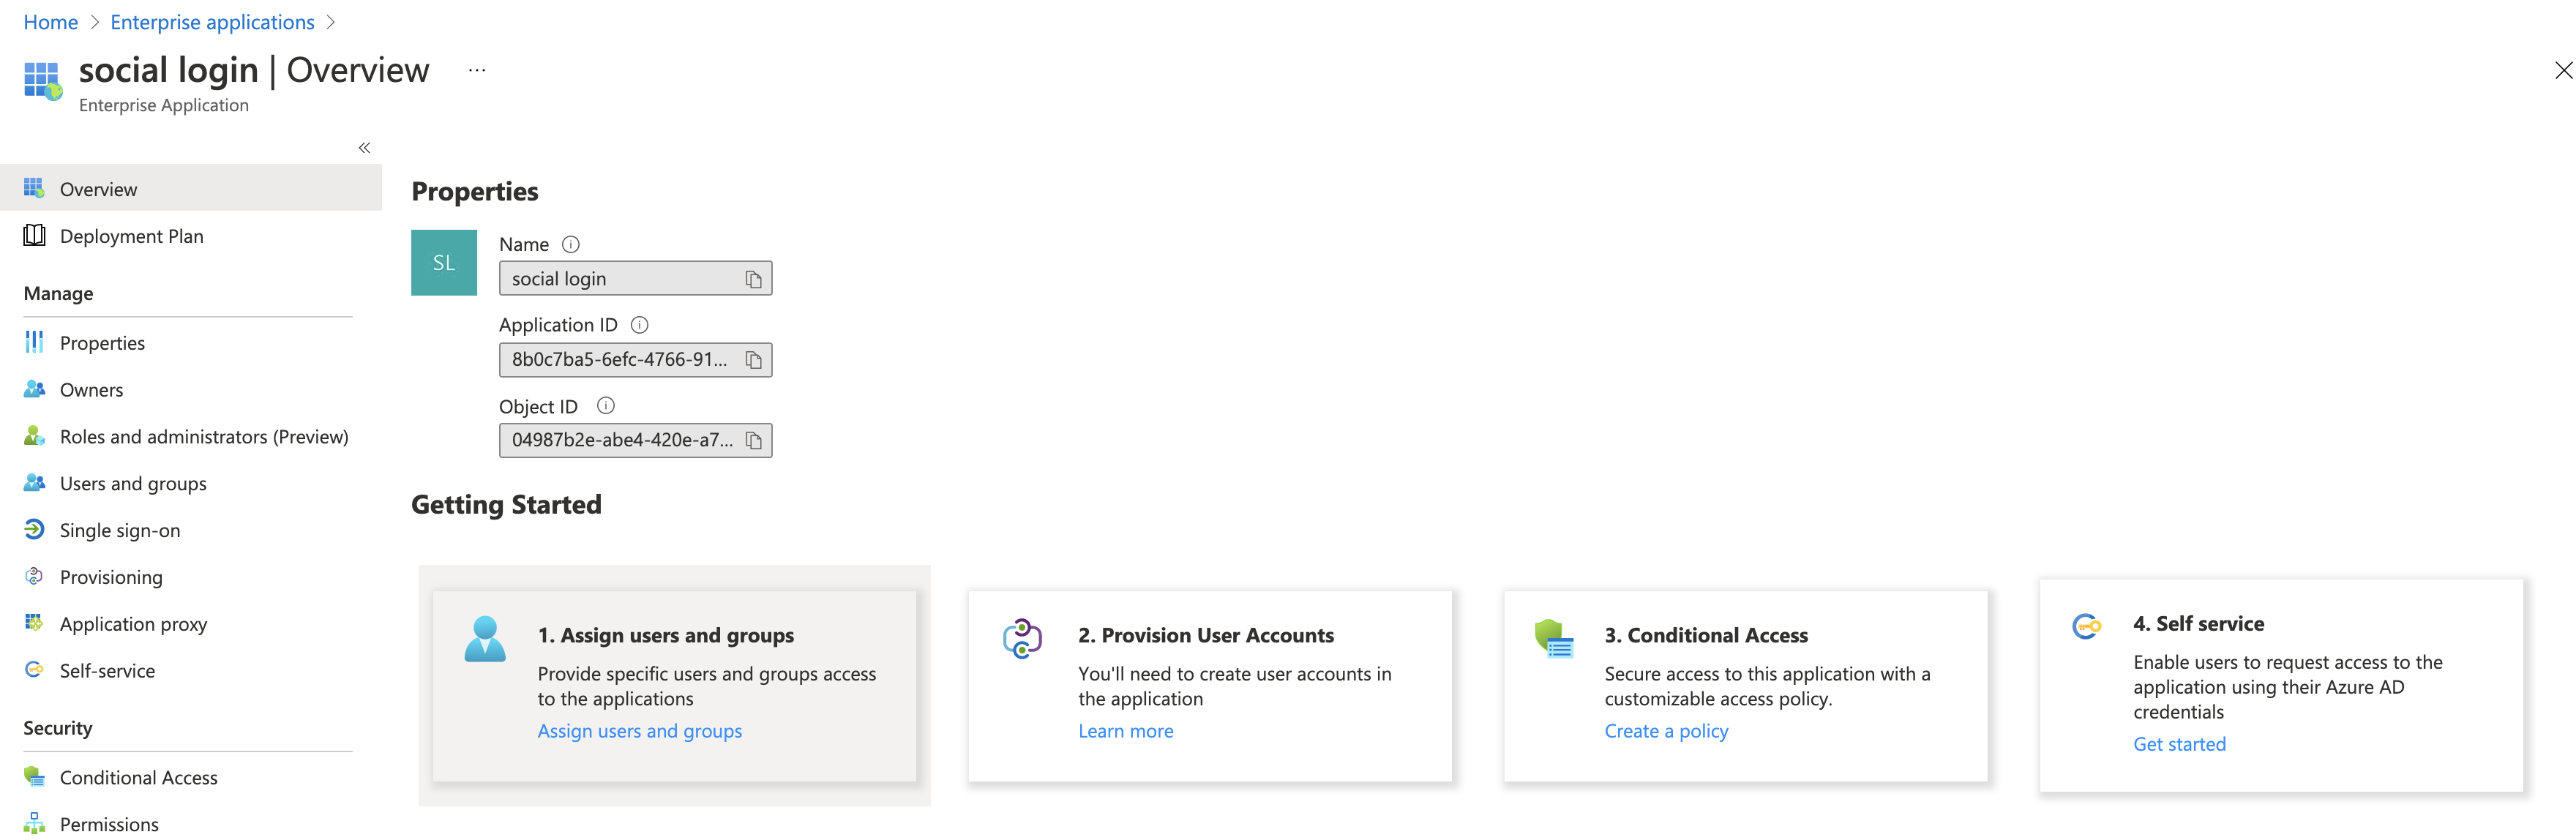
4. Under Add from the gallery, search for Social Login, and then select it.


-
Select Add.
-
Under Manage, select Single sign-on, and under Single Sign-on Mode, select Password-based Sign-on, and click Save.
-
Under Manage, select Users and groups > Add user > Users and groups.
-
Use the search box to search for the test user (if necessary) and select the test user in the list. Then click Select.
-
Select Assign.
Accept the invitation
Now sign in as the guest user to see the invitation.
-
Sign in to your test guest user’s email account.
-
In your inbox, find the “You’re invited” email.
In the email body, select Get Started. A Review permissions page opens in the browser.
-
Select Accept. The Access Panel opens, which lists the applications the guest user can access.
Please Note:
Please refer https://www.mist.com/documentation/ports-enable-firewall/
to pick appropriate Guest Wi-Fi Portal URL instead of portal.mist.com based on the Cloud instance the Org has been created.