AZURE PORTAL:
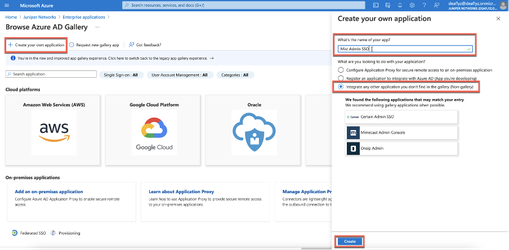
- Create
Azure Enterprise App
Azure Active Directory >Enterprise Applications >New Application
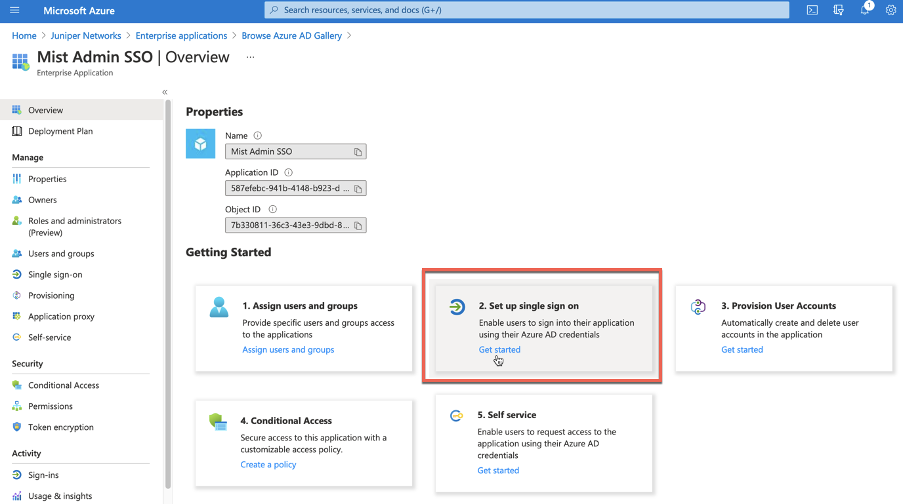
Select Set up single sign on:
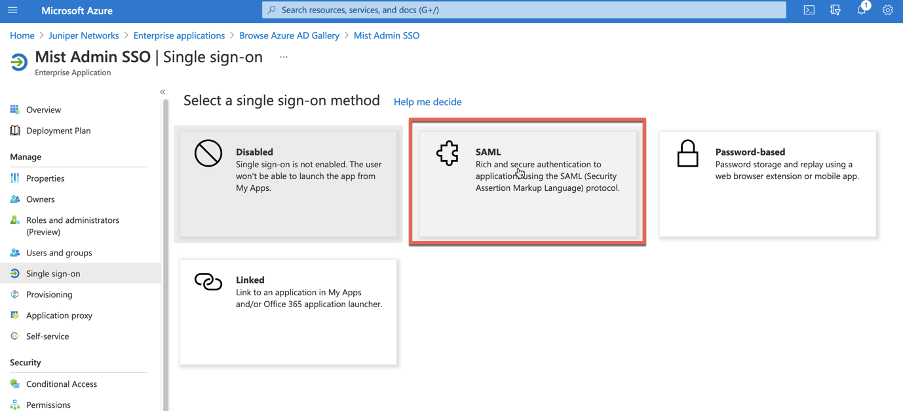
Select SAML:
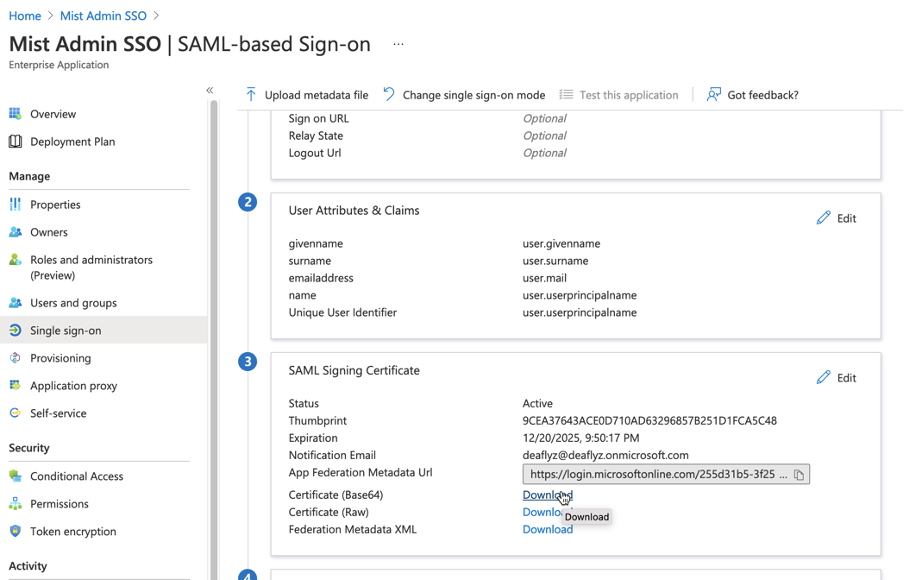
Copy and save:
· Azure ID Identifier
· Login URL
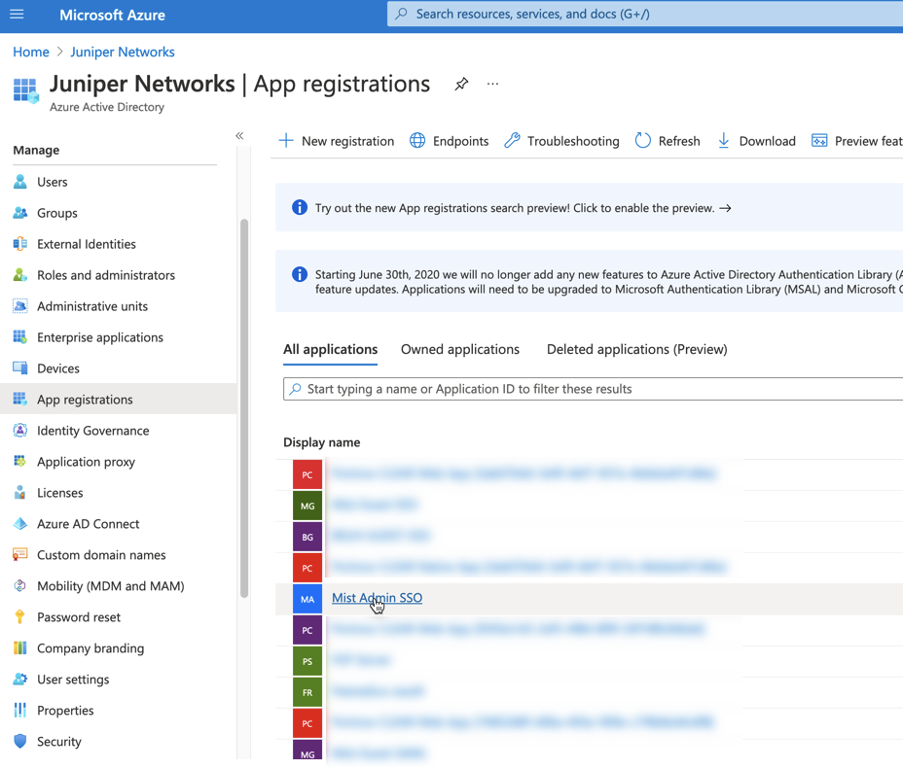
 Navigate to Azure Active Directory > App Registrations > {select your Mist SSO app}
Note: It is important to navigate to App Registrations and Not Enterprise Apps
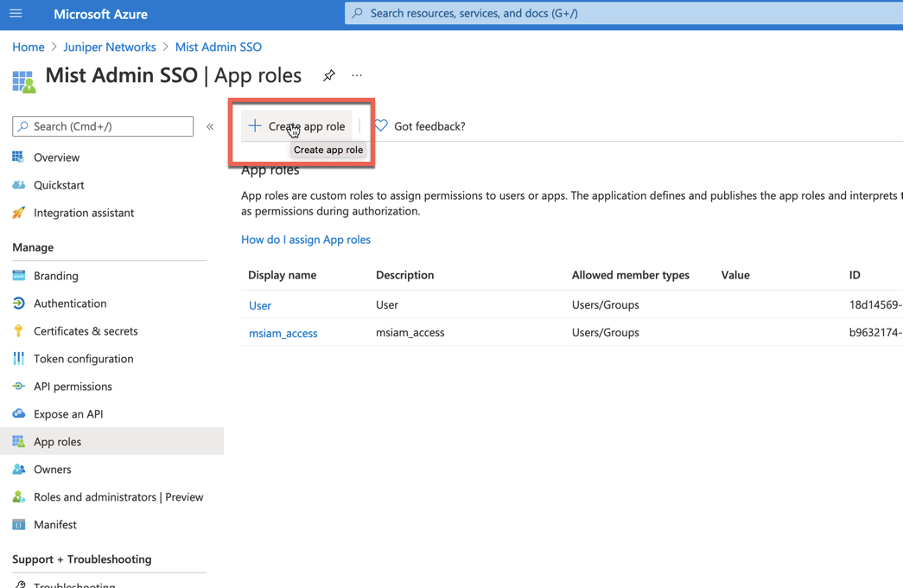
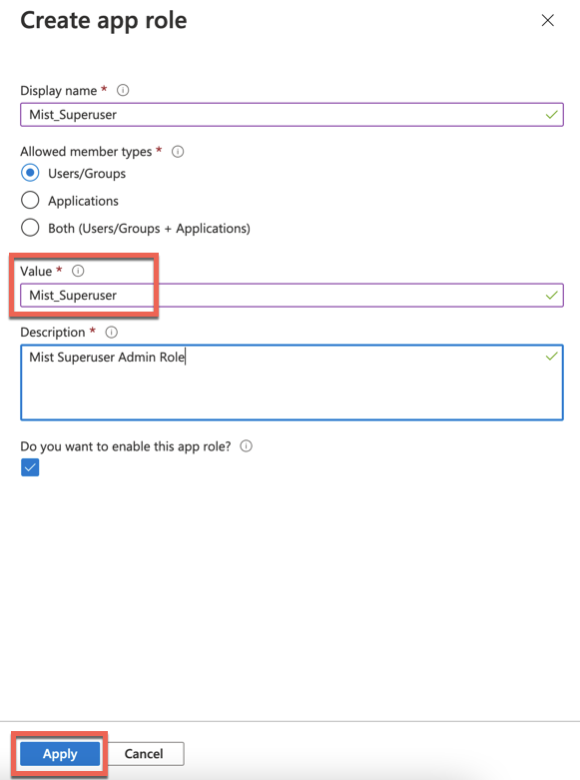
Go to App Roles and create a new Role. Use any role name of your preference, just remember it for later steps:
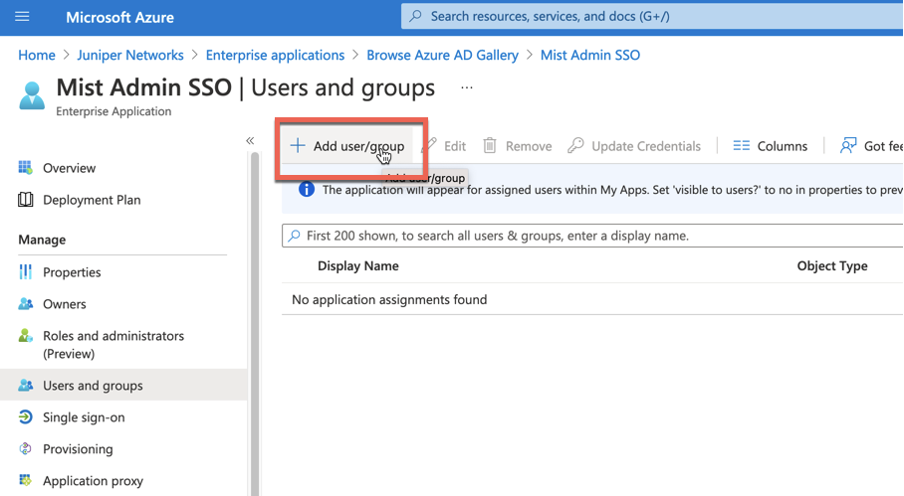
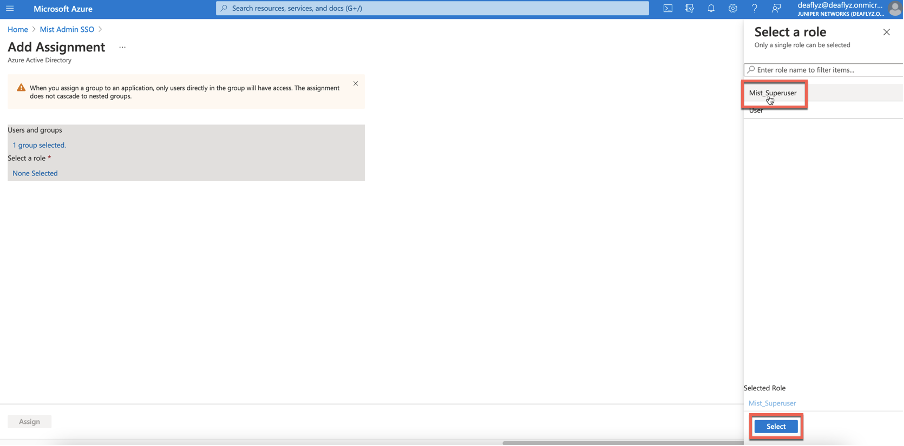
Now, head back to Enterprise Apps > {Mist Admin SSO app} > Users and Groups section and click add to add Users or Groups that will be allowed to authenticate via SSO application:

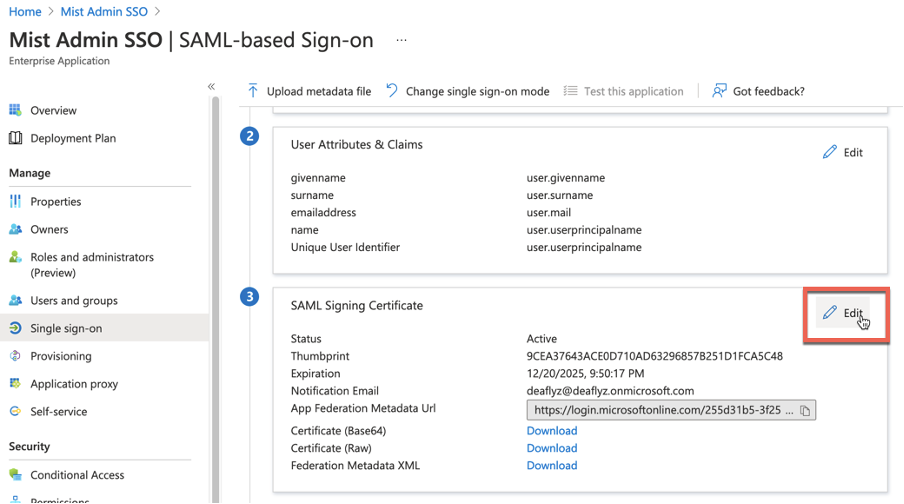
Head back to Single Sign On > SAML and click Edit SAML Signing Certificate:
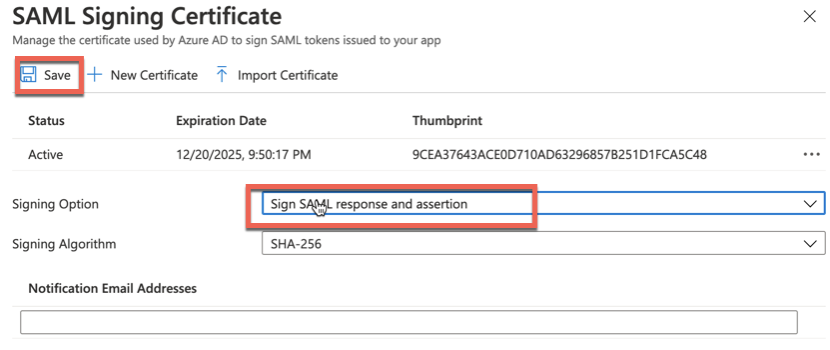
 Select to Sign both SAML response and assertion and Save:
Download certificate in Base64 format and save it for later:

MIST DASHBOARD
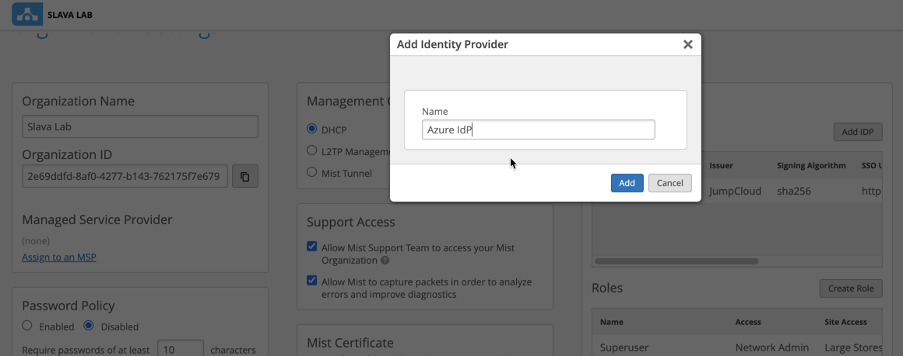
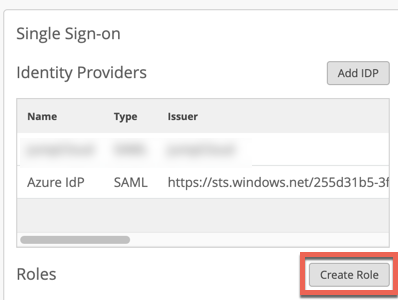
Navigate to Organization > Settings > Single Sign-On > Add IdP
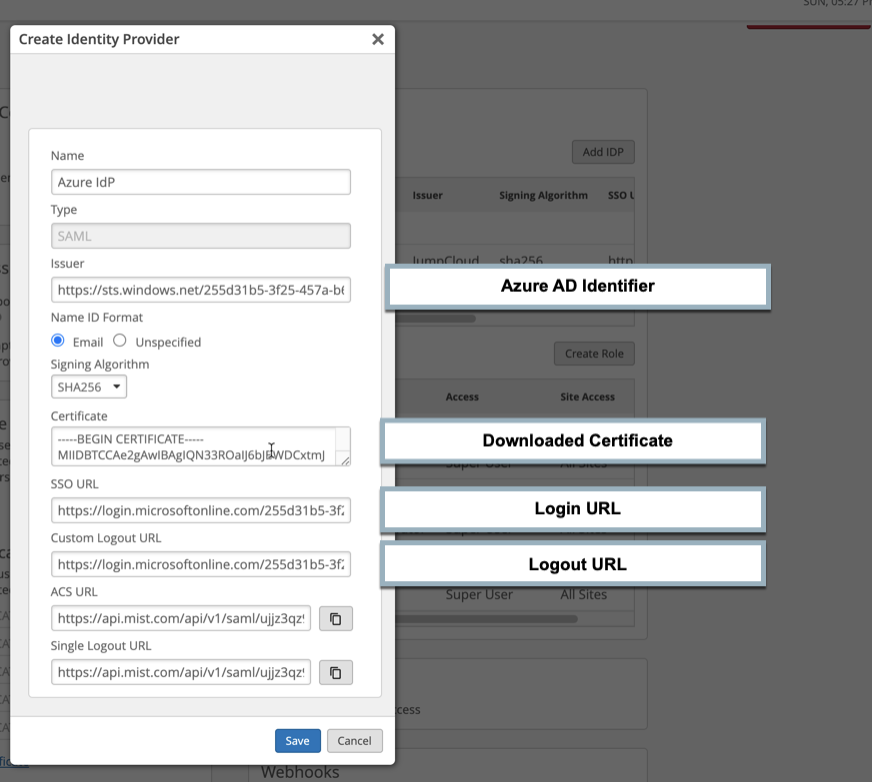
Now Copy ACS URL and save it:

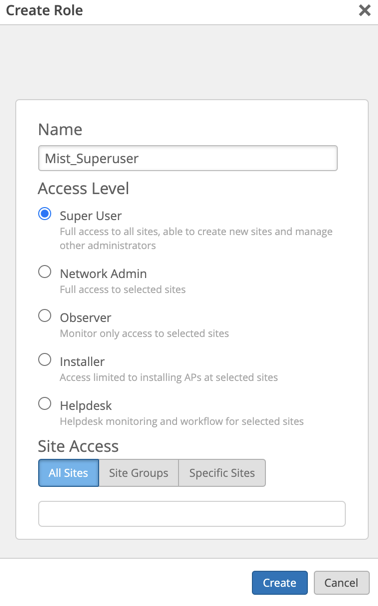
Under Single Sign-On create a Role to match any Roles that will be sent from Azure. In our case it is Mist_Superuser:
BACK TO AZURE PORTAL:
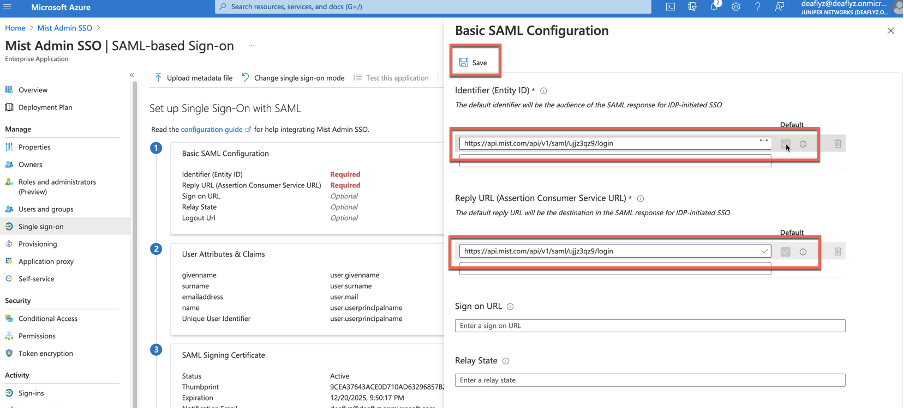
On Azure App config go to Basic SAML Configuration:
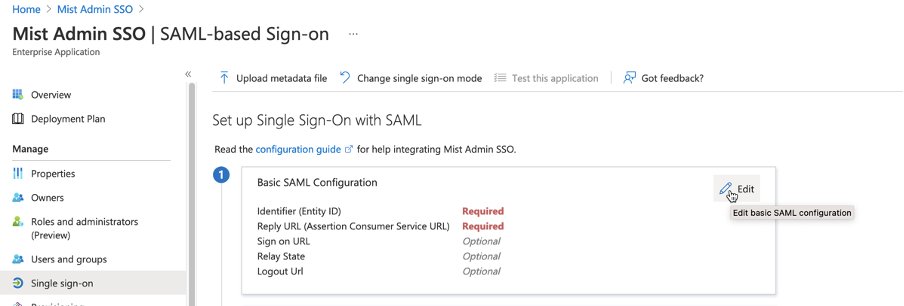
Paste the ACS URL into below two fields and Save:
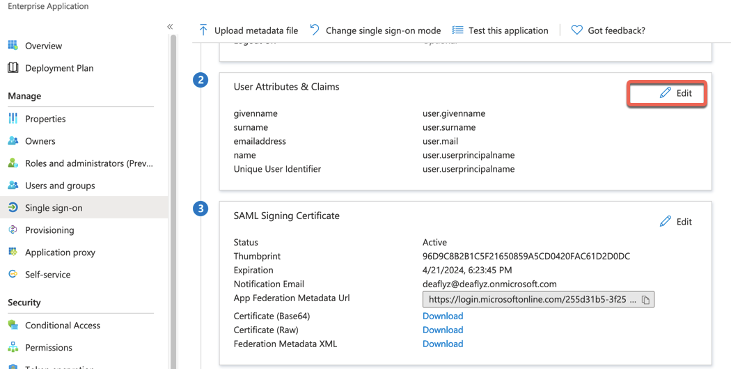
Now edit User Attributes & Claims section:
Delete “emailaddress” claim:
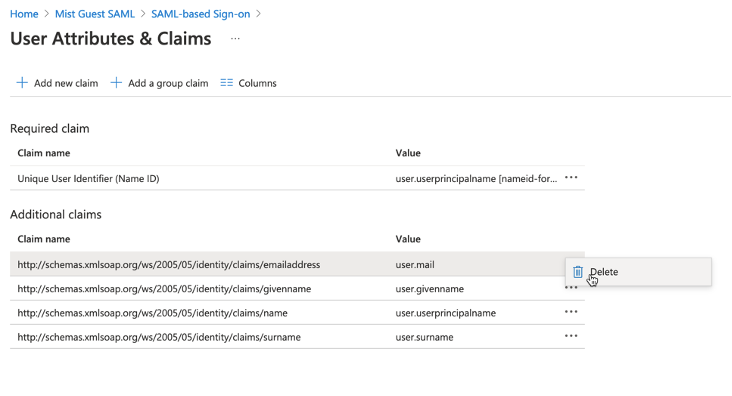
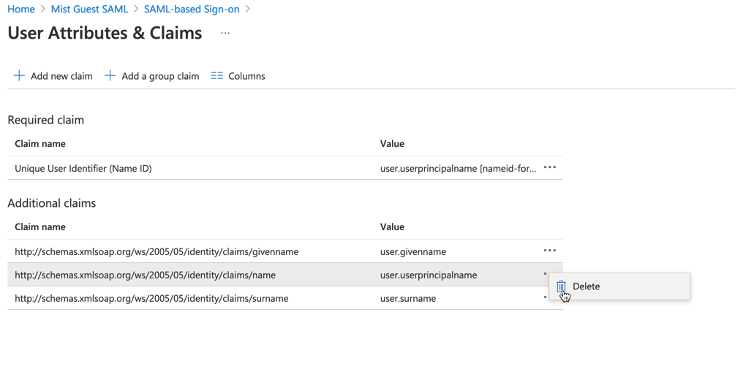
Delete “name” claim as shown below:
Edit “givenname” claim. Empty the Namespace field and change Name field to “FirstName”:

Edit surname claim. Empty the Namespace field and change Name field to LastName:

Add a new Role claim and configure it as shown below:

You can launch it from your Azure App:
click on test
 User will be marked as SSO User.