Adding an EX Series Switch to the Juniper Mist Cloud
Modified on
Overview of the Zero Touch Provisioning (ZTP) Process
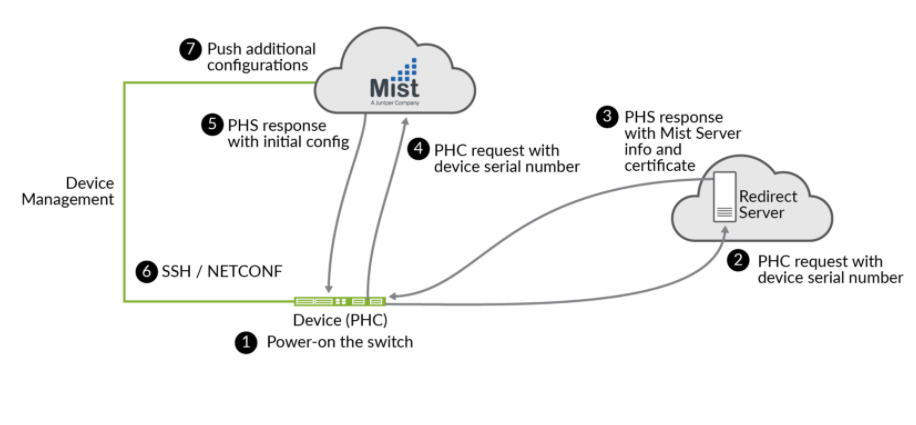
Once a cloud-ready switch is connected to the internet and powered on for the first time, it triggers an onboard phone-home client (PHC) to get configuration updates from the phone-home server (PHS) as shown in Figure 2. The default behavior is for the PHC to connect to a redirect server, which then redirects it to a phone home server where the switch can get the configuration or software image. This enables the switch to securely and automatically obtain the most recent Junos configuration or software image, with no intervention other than physically connecting the switch to the network. Alternatively, you can configure the switch to use a DHCP server with configured with the necessary ZTP options to complete the ZTP process. To revert to the ZTP default, you need to boot from factory default state (or you can issue the Junos request system zeroize command to reset the configuration).
Topology
Activating a Greenfield Switch
A switch-specific QR code is setup at the time of purchase. The switch will arrive in a box with the Cloud-ready logo, and a sticker with a QR code will be on the back of the switch near the fan exhaust and interfaces.
Using the Mist AI App to Add a Cloud-Ready Switch to the Juniper Mist Cloud:
Step-by-Step Procedure
Download and install the MistAI app to your phone.
Unbox your switch, connect the management port to the internet, and power it on. As part of the ZTP process, the switch will automatically access the PHC server (or the DHCP server if you have set this up instead) and then connect to the Juniper Mist cloud for configuration updates.
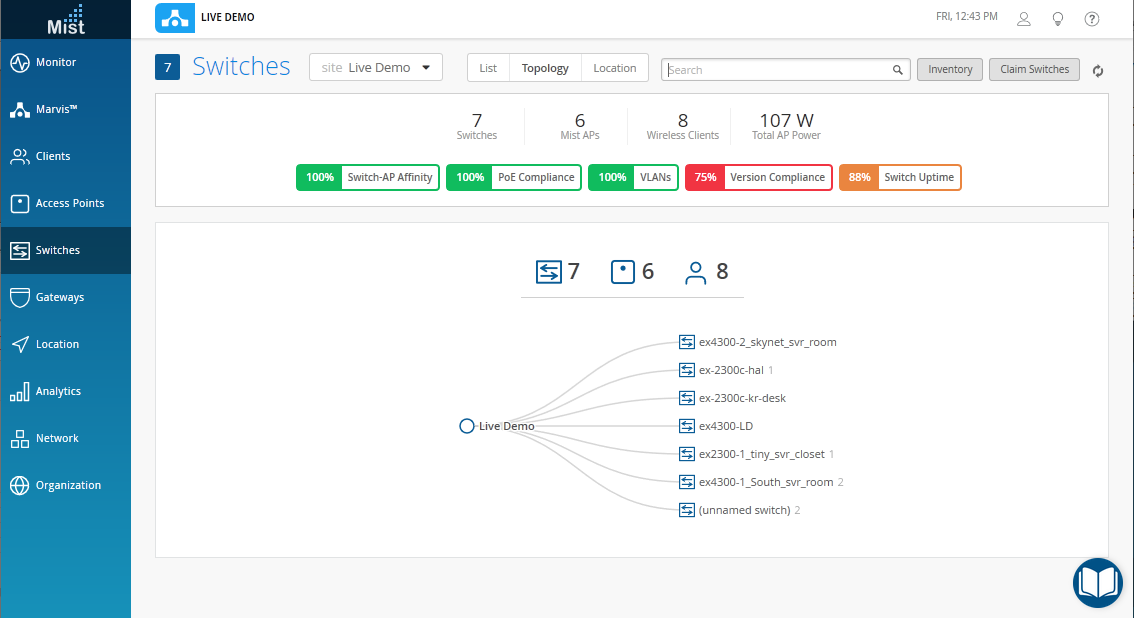
Using a web browser, log to your Juniper Mist account. The Monitor screen appears, showing an overview of the Juniper Mist cloud and any APs and clients that are already connected. In the menu on the left, click Switches to open that screen. Once the ZTP process resolves, the switch will automatically appear here (if the switch doesn’t appear after a few minutes, despite refreshing the web page, log out and then log back in, or go to the Troubleshooting section, below, to find out how to confirm whether the device is connecting to the cloud. The Switches Screen.
While the switch is being resolved in the Juniper Mist cloud, find the QR code on the front of the switch.
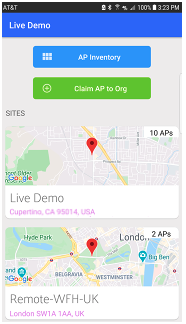
On your phone, open the MistAI app and log into your Juniper Mist cloud account. Tap the Claim AP to Org button that appears.
Point the QR Code viewer at the QR code on your switch. Once the QR code comes into focus and (that is, your camera is held at the right distance), the app automatically claims the device and adds it to your Organization’s inventory in the Juniper Mist portal.
To Manually Add a Cloud-ready Switch to the Juniper Mist Cloud:
Step-by-Step Procedure
To adopt a cloud-ready switch manually, you need an activation code for the switch (these are sent via email to the address on record at the time of purchase, or they can be obtained by contacting Juniper Mist Customer Engagement team). Using the Activation code will adopt the switch and any Juniper Access Points that are part of the purchase order, as well as to claim any subscriptions that are included in your purchase.
Start by unboxing your switch, connecting the management port to the internet, and powering it on. As part of the ZTP process, the switch will automatically access the PHC server (or the DHCP server if you have set this up instead) and then connect to the Juniper Mist cloud for configuration updates.
Using a web browser, log to your Juniper Mist account. The Monitor screen appears, showing an overview of the Juniper Mist cloud and any Juniper APs and clients that are already connected. In the menu on the left, click Organization > Inventory to open that screen.
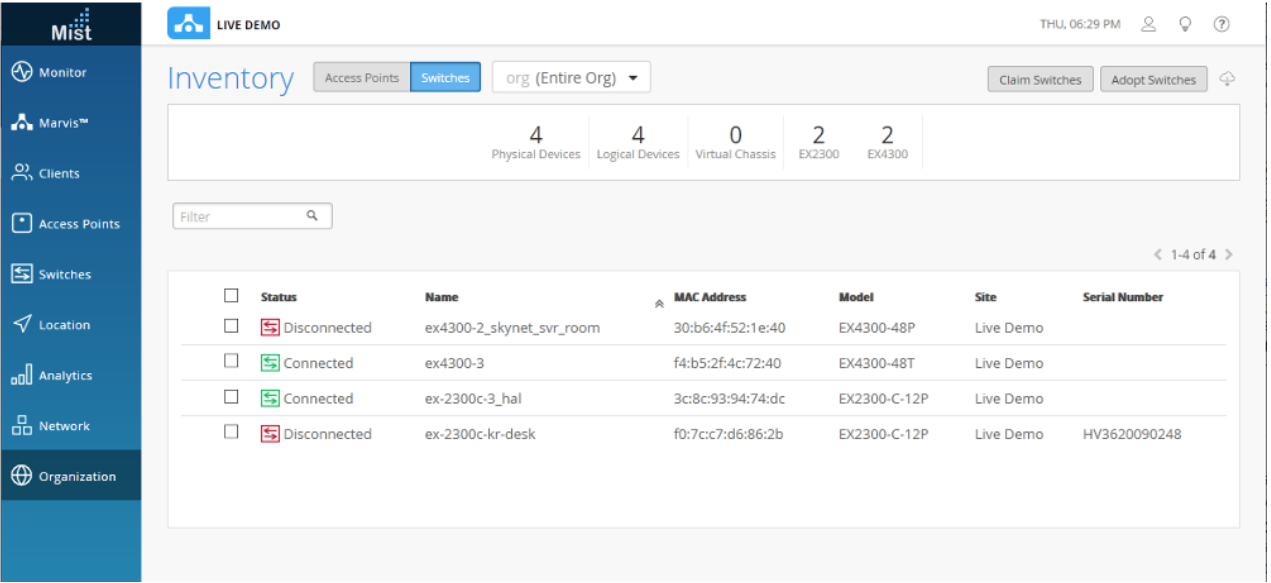
Choose Switches at the top of the Inventory screen, and then click the Claim Switches button and enter the claim code or activation code for the switch.
Fill out the other fields on the screen as you like. Note: If you deselect ‘Assign claimed switches to site’, the switch will not be listed in the Switches page. In order to see your switch in the Switches page, you must first assign the switch to the site from the Inventory page. Check Manage configuration with Juniper Mist and then enter a root password that for the switch. Note that this choice puts the switch under the management of Mist, and as such, Juniper recommends that local configuration using the CLI be restricted to prevent conflicts (for example, you may want to create a system login message on the switch to warn against making configuration changes locally, from the CLI).
Once the ZTP process resolves, the switch will automatically appear in the Inventory screen. If the switch doesn’t appear after a few minutes, despite refreshing the web page, log out and then log back in, or go to the Troubleshooting section, below, to find out how to confirm whether the device is connecting to the cloud.
Activating a Brownfield Switch
To prevent users from using the junos CLI to configure the switch after it has been adopted into the Juniper Mist cloud, you may want to create a system login message on the switch to warn against making configuration changes, or to restrict their management access altogether by changing the password or placing restrictions on the Junos CLI user accounts.
To Add a Brownfield Switch to the Juniper Mist Cloud:
Step-by-Step Procedure
This procedures describes how to set up a secure connection between a supported EX switch running a supported version of Junos. In it, you will make a few configuration changes on the Juniper Mist portal as well as some on the switch using the Junos CLI. Be sure you can log on to both systems.
Log to your Organization on the Juniper Mist cloud and then click Organization > Inventory in the menu.
Choose Switches at the top of the screen that appears, and then click the Adopt Switch button in the upper right corner to generate the Junos CLI commands needed for the interoperability. The commands create a Juniper Mist user account, and a SSH connection to the Juniper Mist cloud over TCP port 2200 (the switch connection is from a management interface and is used for configuration settings and sending telemetry data). The Switch Adoption Screen.
In the window that appears, click Copy to Clipboard to get the commands from the Juniper Mist cloud.
At the Junos CLI, type edit to start configuration mode, and then paste the commands you just copied (type top if you are not already at the base level of the hierarchy).
Back in the Juniper Mist portal, click Organization > Inventory > Switches and select the switch you just added.
Click the More drop-down at the top of the screen, and then the Assign to Site button to continue making your selections as prompted.
Confirm your updates on the switch by running show commands at the system services level of the hierarchy, and again at the system login user juniper-mist level of the hierarchy.
show system services


show system login user mist
Please note: by default we are using UID 63157 for the user mist.
mist@94bf94b9e087> show configuration | display set | match uid
set system login user mist uid 63157
Add the Switch to the Juniper Mist Portal and View Details
Now that the switch is able to register with the Juniper Mist portal, the next steps are to add the switch to the appropriate Site and to assign APs. You do this from the portal.
Step-by-Step Procedure
To add the switch to a site, click Organization > Inventory in the Juniper Mist menu and then the Switches tab at the top of the screen that appears. Select the switch you just added, and then click the More button, Assign to Site, and then choose a site from the drop down list that appears in the Assign Switches window. Click the Assign to Site button to complete the action.
Click Access Points to see a list of unassigned APs.
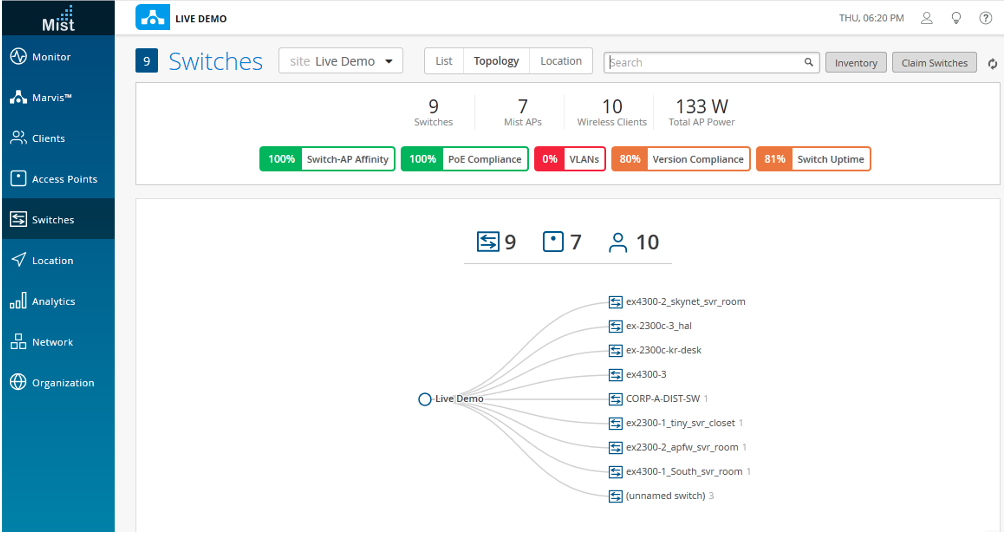
Click Switches to a list of switches. You can choose a switch from the list to confirm that it and the Juniper Mist portal are correctly provisioned. Note that the PoE compliance you set up earlier on the switch interfaces is shown with the switch, as are the VLANs and other details. The Juniper Mist Switches Screen Shows the EX Switch
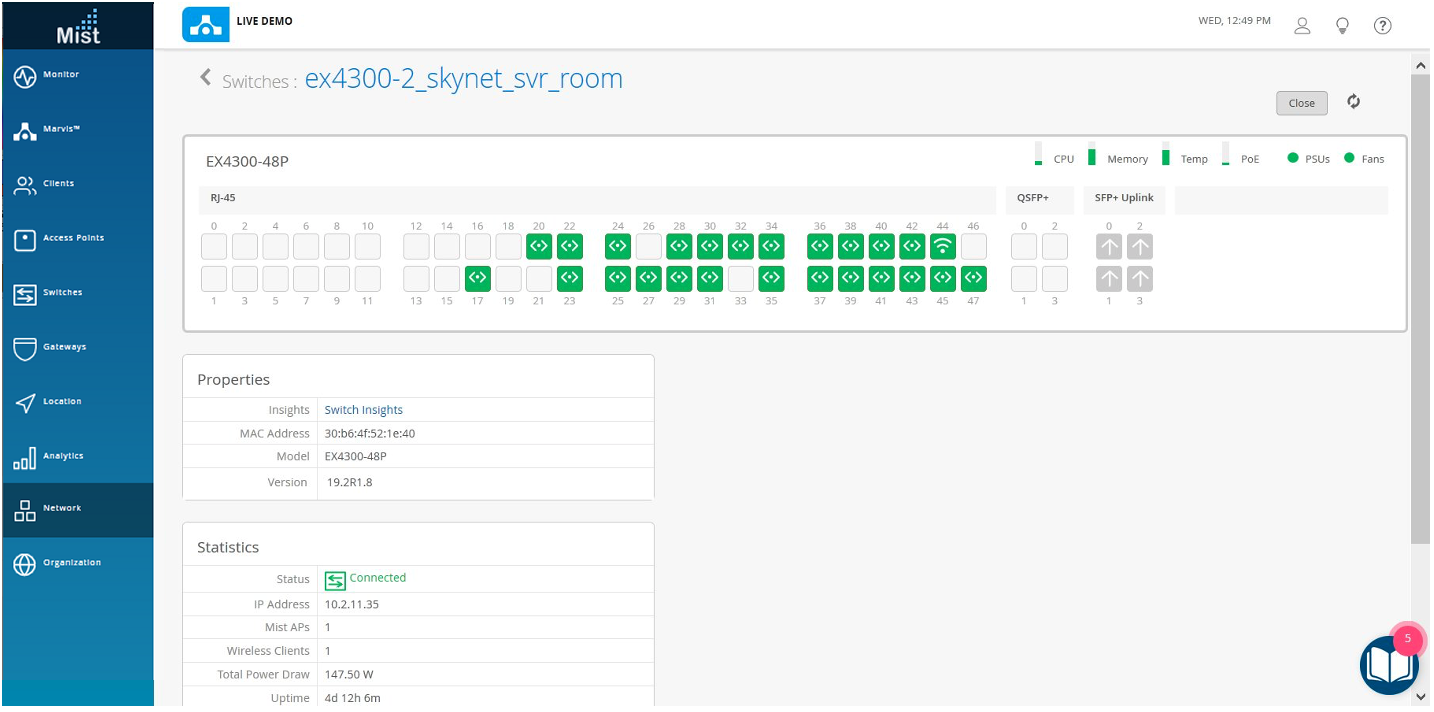
From the Switches page, click a switch name to drill-down into a detailed view of that switch, including connected APs and clients. For each switch on the list, you can view various properties, including the version, model number, CUP and memory Utilization, bytes transferred, power drawn by the PoE devices, and port errors.
Drill-down on a Switch in the Juniper Mist Switches Screen to View Switch Details
Finally, as the stepping off point of this NCE, open a Junos shell from the Juniper Mist portal by selecting the switch you just added and then clicking Open Shell in the upper right corner of the Switches screen. From here, you have full read and write access to the switch for any further configuration changes you wish to make.
Troubleshooting
Confirm your connection from the switch to the Juniper Mist cloud by running the Junos command below.
user@host> show system connections | grep 2200
The command output shows the switch connection to the Juniper Mist cloud. It includes the IP address of the management interface on the switch, the destination IP address of the Juniper Mist cloud, and the connection result..
If the SYN packet is not ACK’d, chances are that inbound packets over TCP port 2200 are being blocked by the firewall and this will need be resolved before the switch can appear in the Juniper Mist portal under Organization > Inventory > Switches


show system login user mist