Mist Access Assurance Overview:
Juniper Mist Access Assurance is a network admission control and access management platform built from the ground up eliminating the need of the typical NAC infrastructure components. This quick start guide will guide users through the steps from enabling Access Assurance to simple troubleshooting.
Prerequisites:
Mist AP (running firmware 0.6.x or above) or EX switch managed by the Mist cloud with any of the following Junos releases
- 20.4R3-S7 or above
- 21.4R3-S4 or above
- 22.3R3 or above
- 22.4R2 or above
- 23.1R1 or above
Step-1: Understanding use-cases
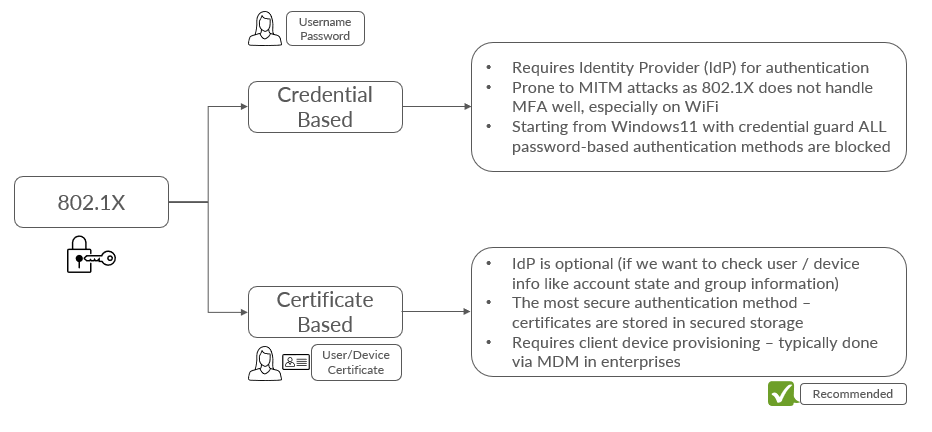
- 802.1X (Cred & Cert based auth)
The Radius 802.1X authentication enables network operators to automatically authenticate and authorize a user or device and let them into the network. This works with the typical user and device management systems such as Azure Active Directory, Okta, JamF etc.
Certificate based authentication is recommended to future proof the configuration.
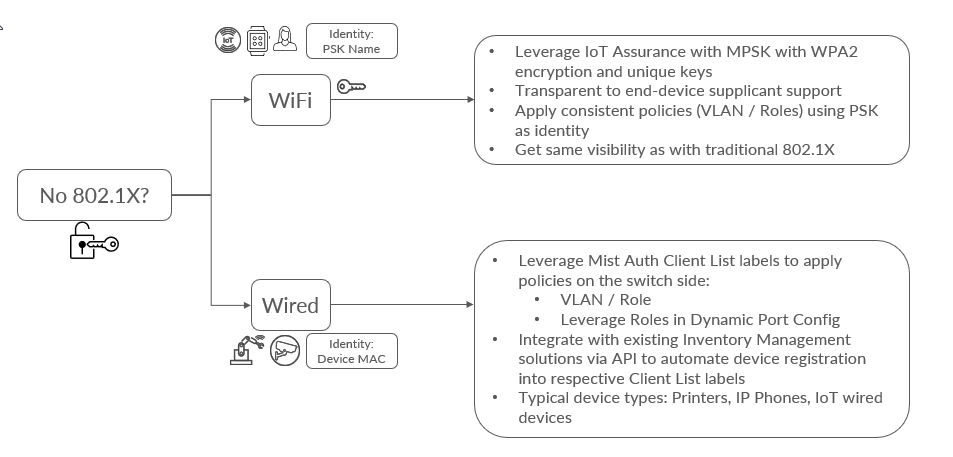
- Non-802.1X (MAB / MPSK)
This use-case is helpful to onboard devices that do not support 802.1X. Typical devices are IoT devices like security cameras, temperature sensors etc. Also when it comes to wireless devices, in some scenarios like BYOD you want to avoid dealing with 802.1X client provisioning for unmanaged devices, and prefer other simpler onboarding mechanisms.
For such wireless devices Multi-PSK option can be used for wireless devices for both IoT and BYOD scenarios and MAB (MAC Authentication Bypass) option for wired devices.
Step-2: Enable Mist Authentication
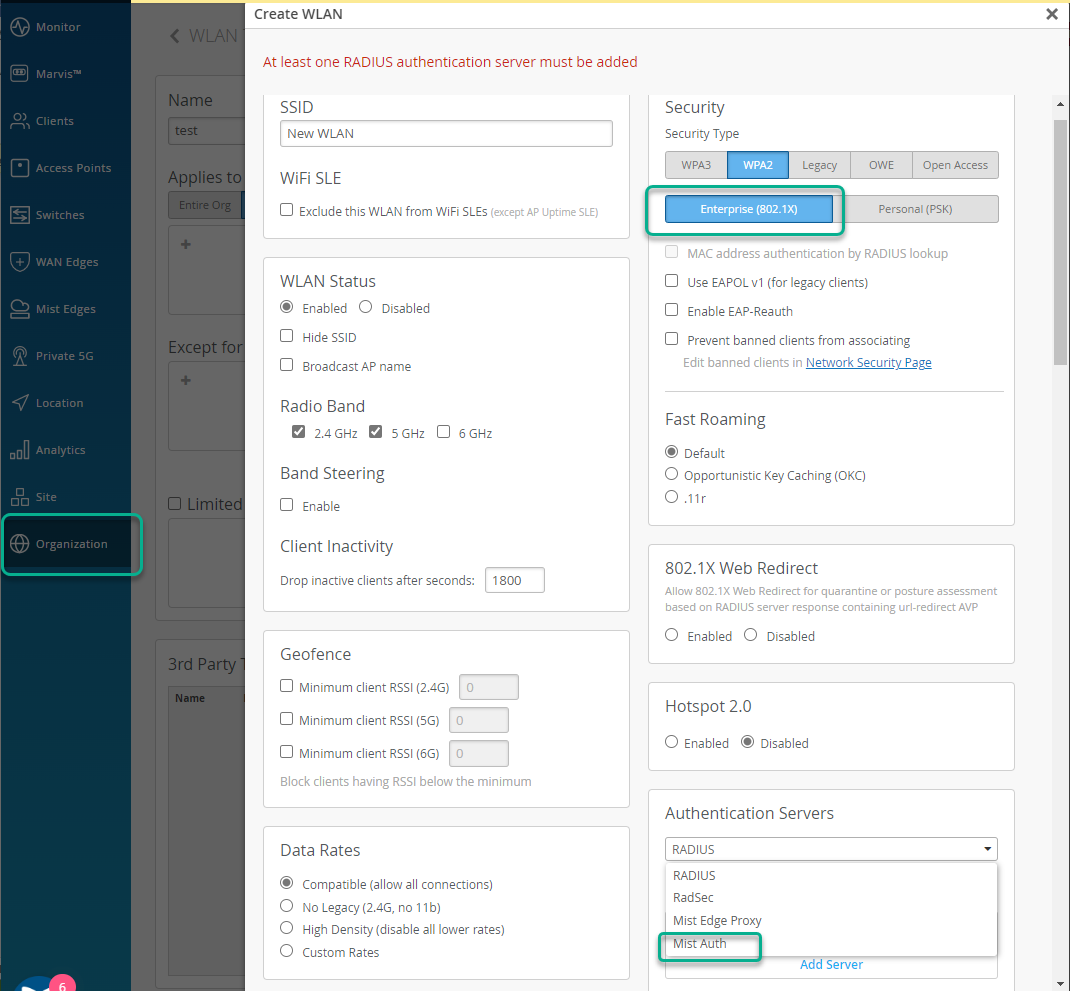
For the wireless devices enable Juniper Mist Access Assurance from the WLAN Templates menu option. Select Security as “Enterprise (802.1X)” (either WPA2 or WPA3) and select Authentication Servers as “Mist Auth”
For Wired Clients, Authentication Servers is configured under Wired -> “Switch Templates” option.

Step-3: Configure certificates
Certificates section manages Trusted Certificate Authorities, as well as Mist Access Assurance Server Certificate configuration.
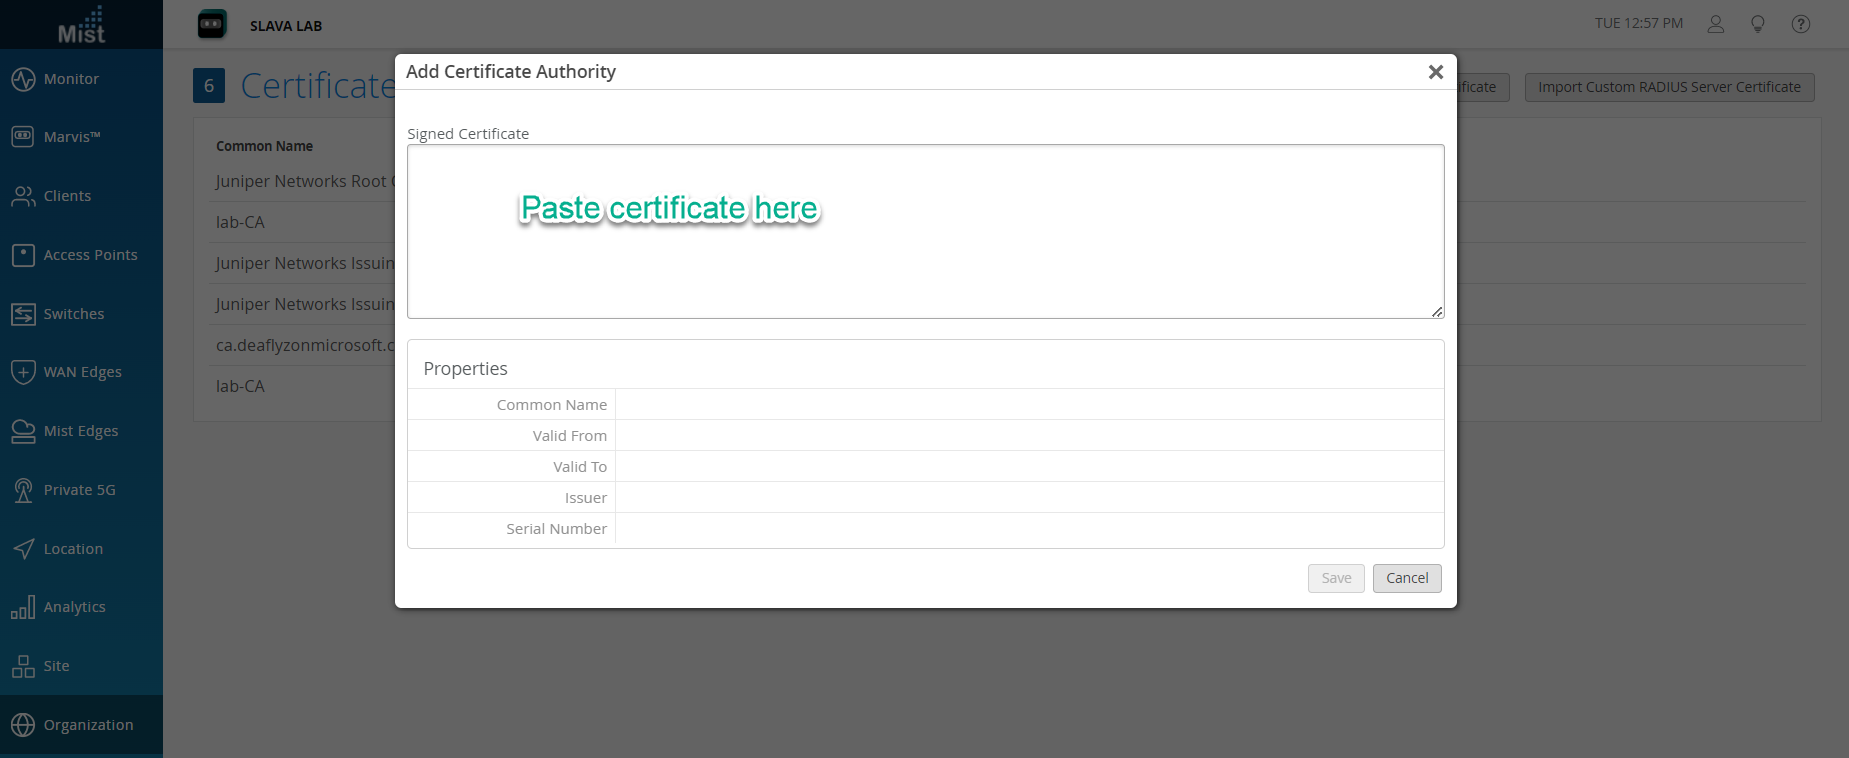
In order for EAP-TLS certificate-based authentication to work, you must add trusted Certificate Authority into the Mist dashboard, this will let Mist Auth service trust client certificates signed by added CAs. Trusted CA Certificates can be added from the Organization -> Access -> Certificates -> Add Certificate Authority page.
CA Certificates can be directly pasted and system will automatically parse and decode imported CA cert. We recommend to add your Root CA, as well as all your Intermediate or Issuing CA certificates one by one.
Step-4: Configure Identity provider
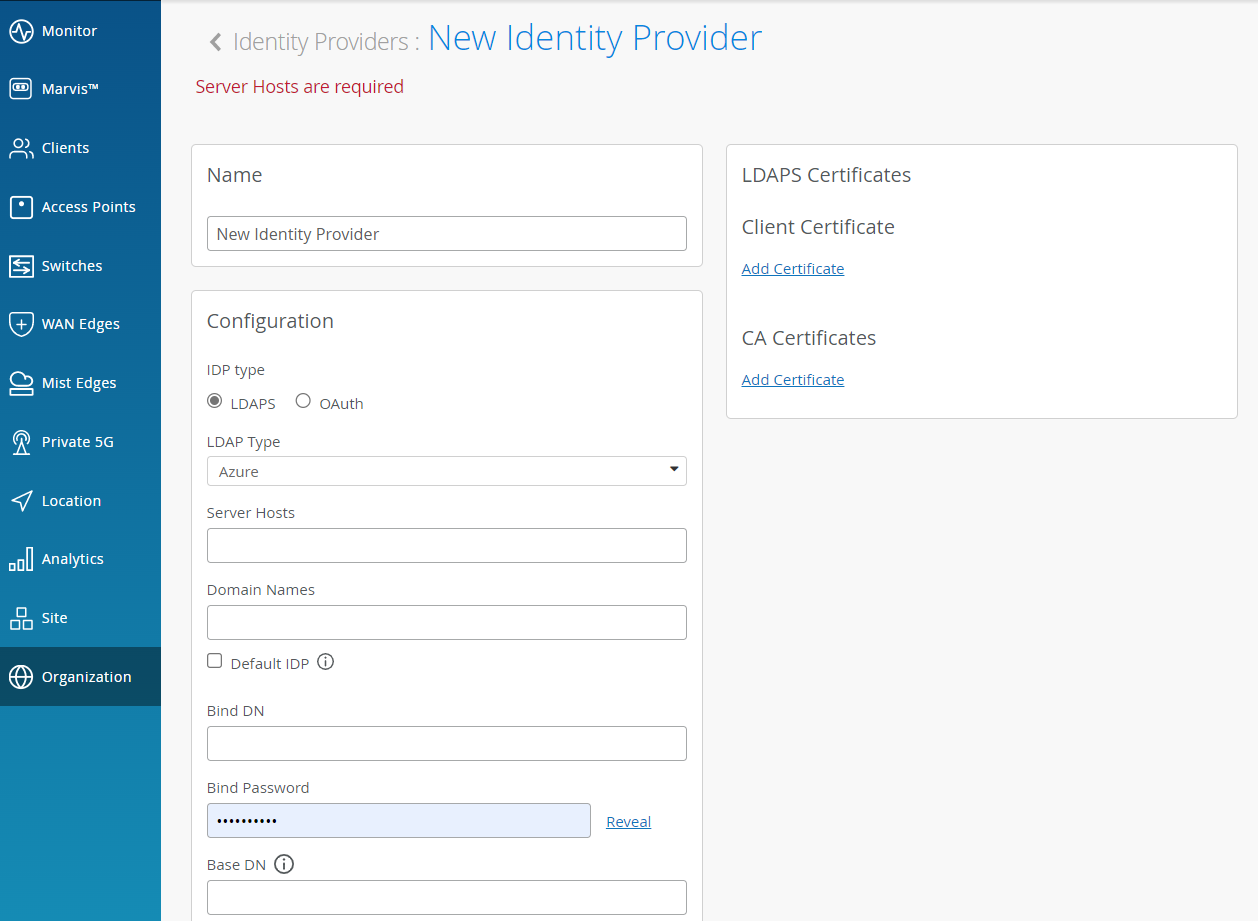
Identity Providers can be used to either get additional identity context for clients authenticated via certificates or IDPs can also authenticate clients when they are using password based authentication via EAP-TTLS/PAP
Identity providers can be configured from Organization -> Access -> Certificates -> Identity Providers page. This step is optional for EAP-TLS (cert) authentication and it is mandatory in case of EAP-TTLS (credential based) authentication.
Identity providers serve as authentication source (in case of EAP-TTLS) and authorization source (by obtaining user group memeberships, account state etc) for EAP-TLS or EAP-TTLS.
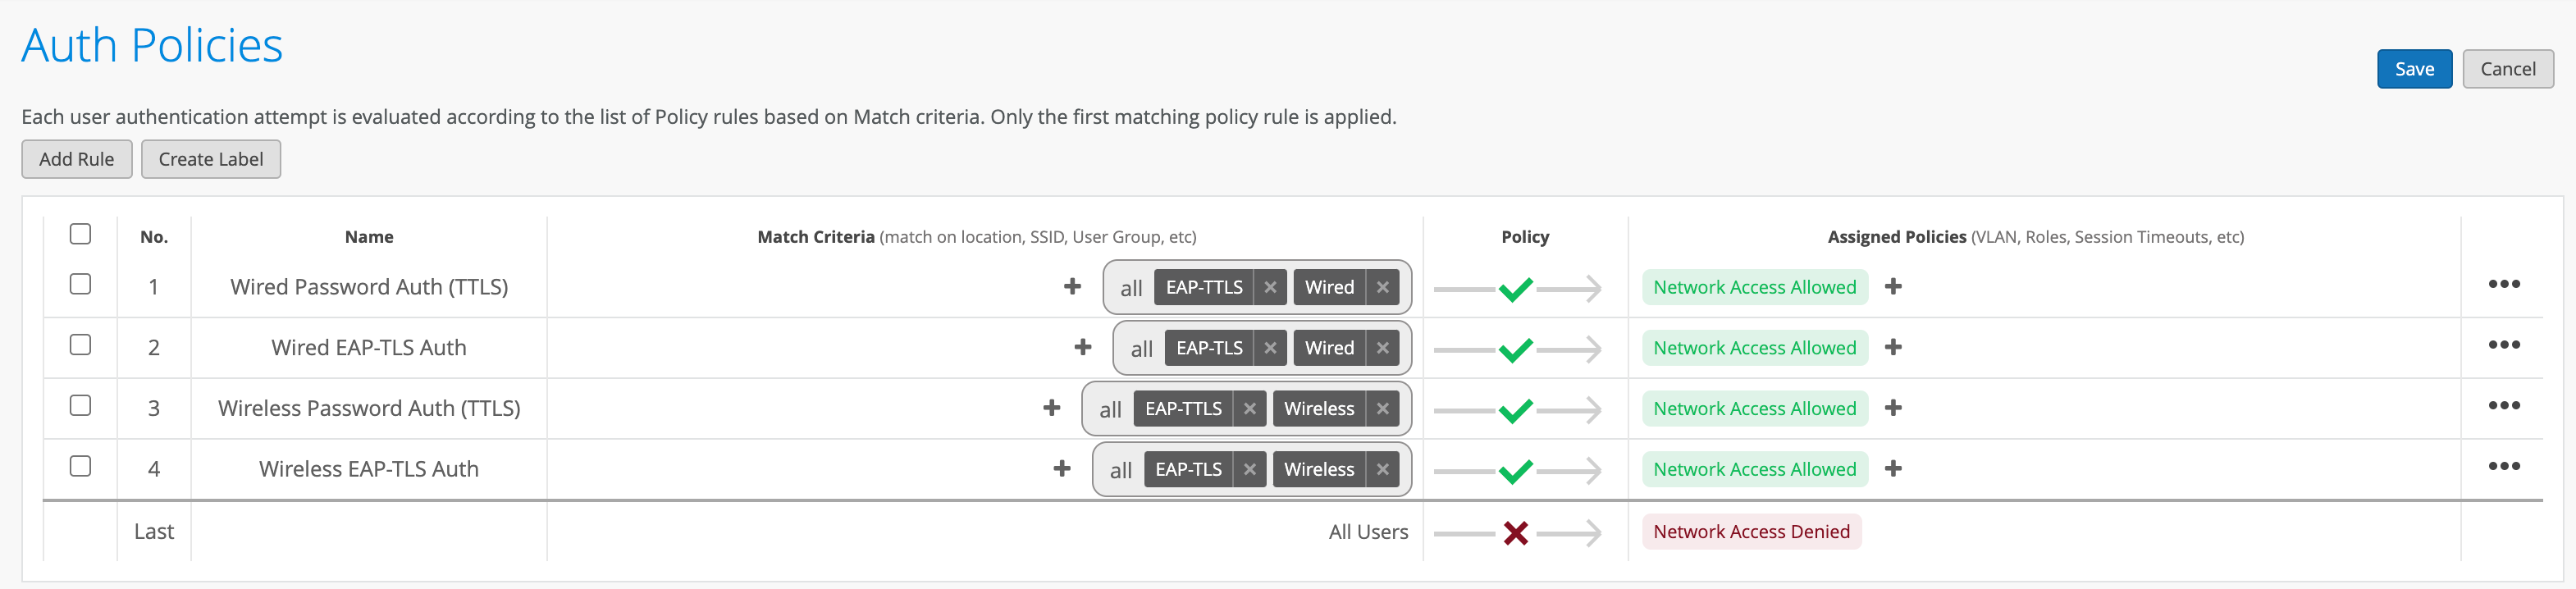
Step-5: Create Policies
Auth Policies leverage labels to determine the identity signature of the client device in order to decide whether network access should be allowed, and which additional attributes (like VLAN, Role, GBP Tag) needs to be applied. Labels can be matching criteria or the actions that need to be performed after the match.
Labels can be created directly from the Organization > Access > Auth Policies page or from the Organization > Access > Auth Policy Labels menu. Click on “Add Label” to add a matching criteria or action.
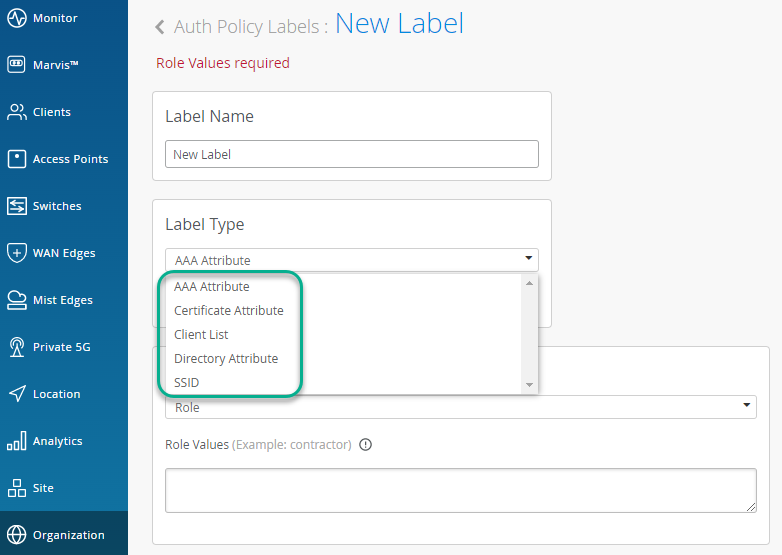
You can match users or devices based on the following criteria:
- Certificate Attributes (like common name, subject, issuer etc)
- Directory attribute, i.e. user Group membership
- List of MAC addresses or MAC OUIs. For non-802.1X capable devices you can leverage Client Lists to allow approved devices on the network. Examples: 1122AA33BB44 and/or 11-22-AA-33-BB-44 and/or 11-22-AA*
- Location
- SSID
- Site or list of Sites
- Site Groups
After a user or device has matched a specific rule, you can assign following actions:
- VLAN
- GBP Tag
- Role – leverage with Wireless policy or Switch policies
Auth Policies can be created from Organization > Access > Auth Policies menu. New Rules can be added by clicking on the “Add Rule” option and choosing Match Criteria and Assigned Policies.
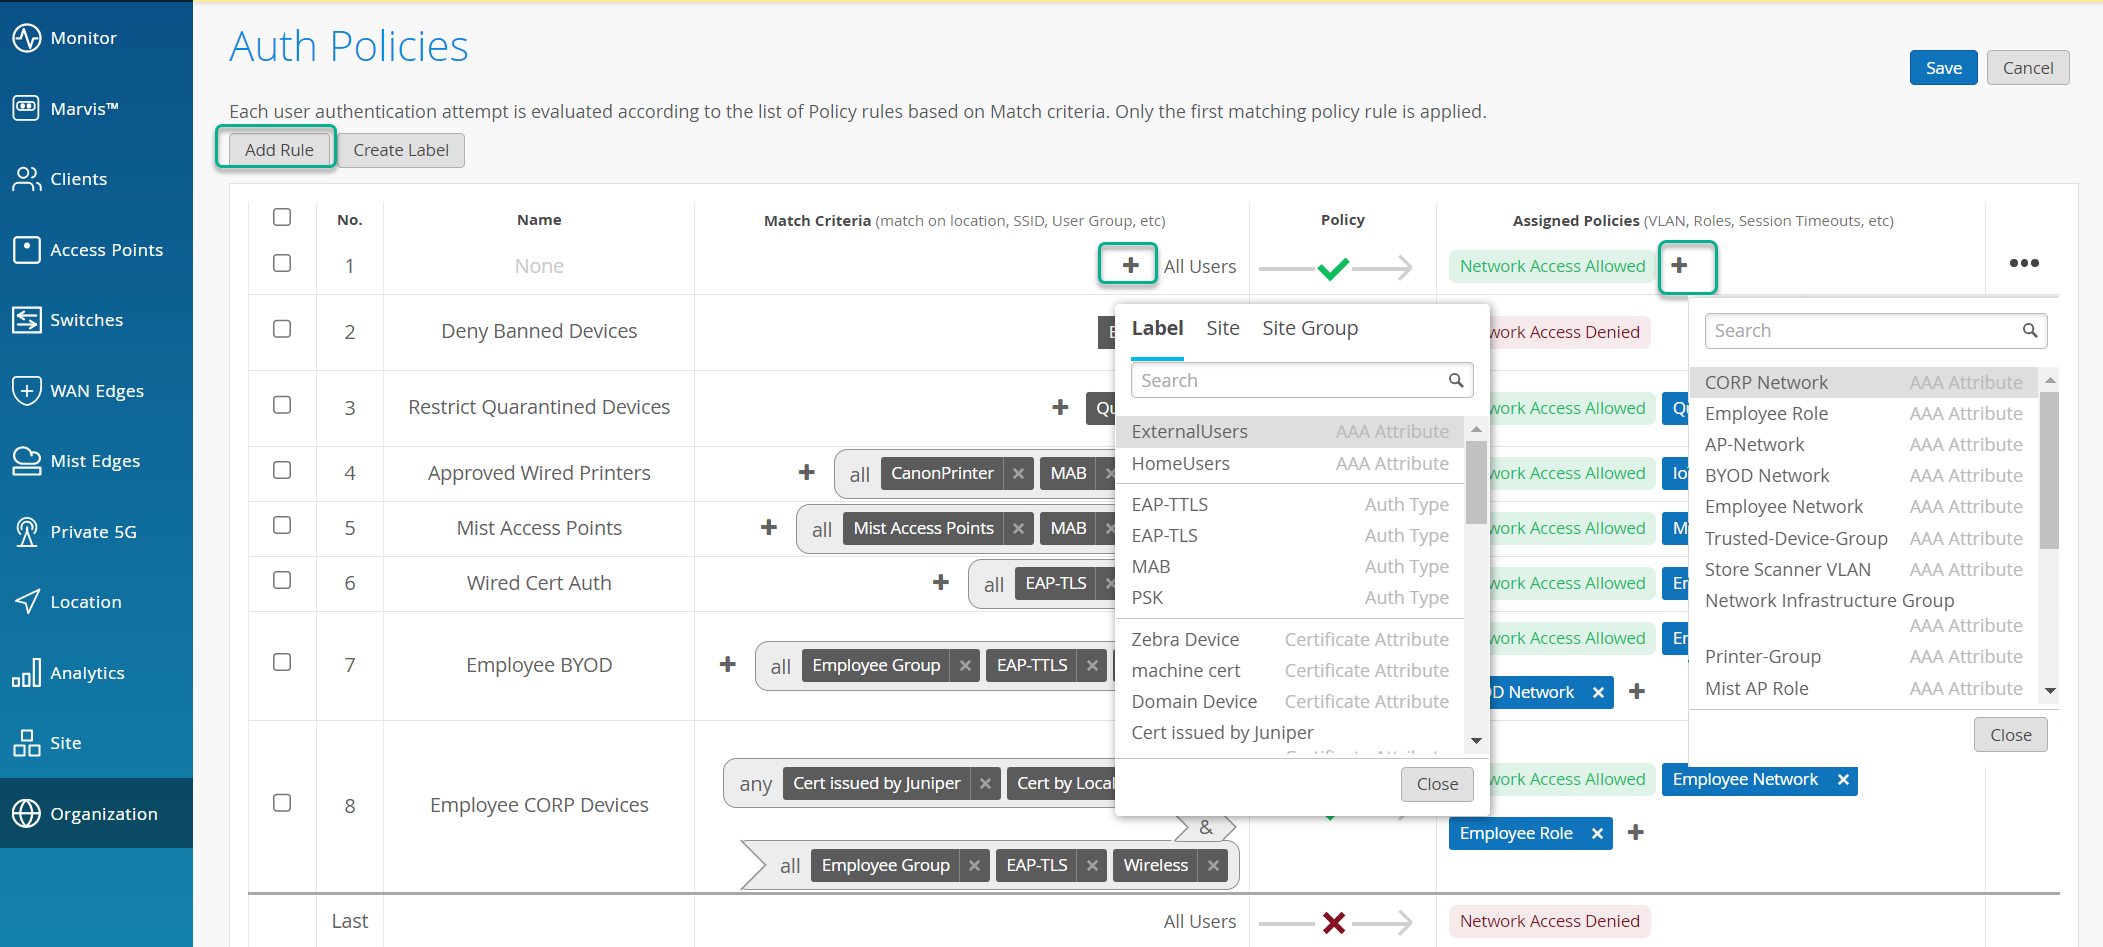
A simple basic policy to authenticate Wireless clients using EAP-TLS would look like this:
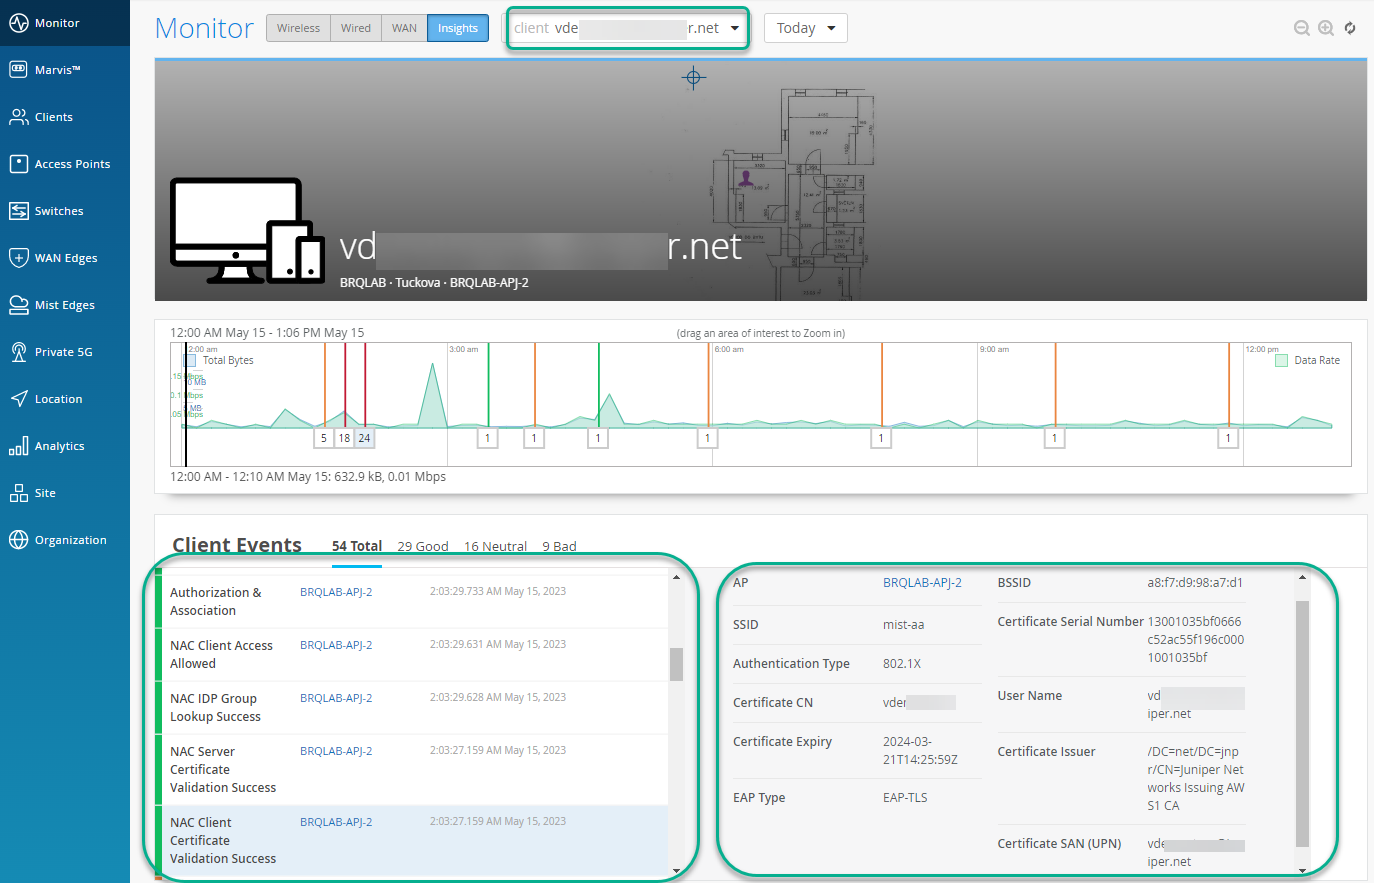
Step-6: Client visibility and troubleshooting
All client events from both the network side and Access Assurance site are under Client Insights.