Get Started
Setup your Mist account and claim your Mist Devices (Access Points, EX Switches or SRX/SSR WAN Edges)
What’s Needed:

A web browser with Internet access

Mist Access Point(s) connected to network

About 10 minutes
Step 1 – Create Your Account
Create a new account by going to https://manage.mist.com and clicking on Create Account.


A verification email will be sent to the email address provided in the “Create Your Mist Account” form. Verify your account by following the link in the email sent to you.
Once your account is active, it’s time to get started! You can either make changes to your account settings or create a new organization from this page.
For more details regarding creating an Organization or editing the account settings, follow Mist documentation here:
https://www.mist.com/documentation/create-mist-org/

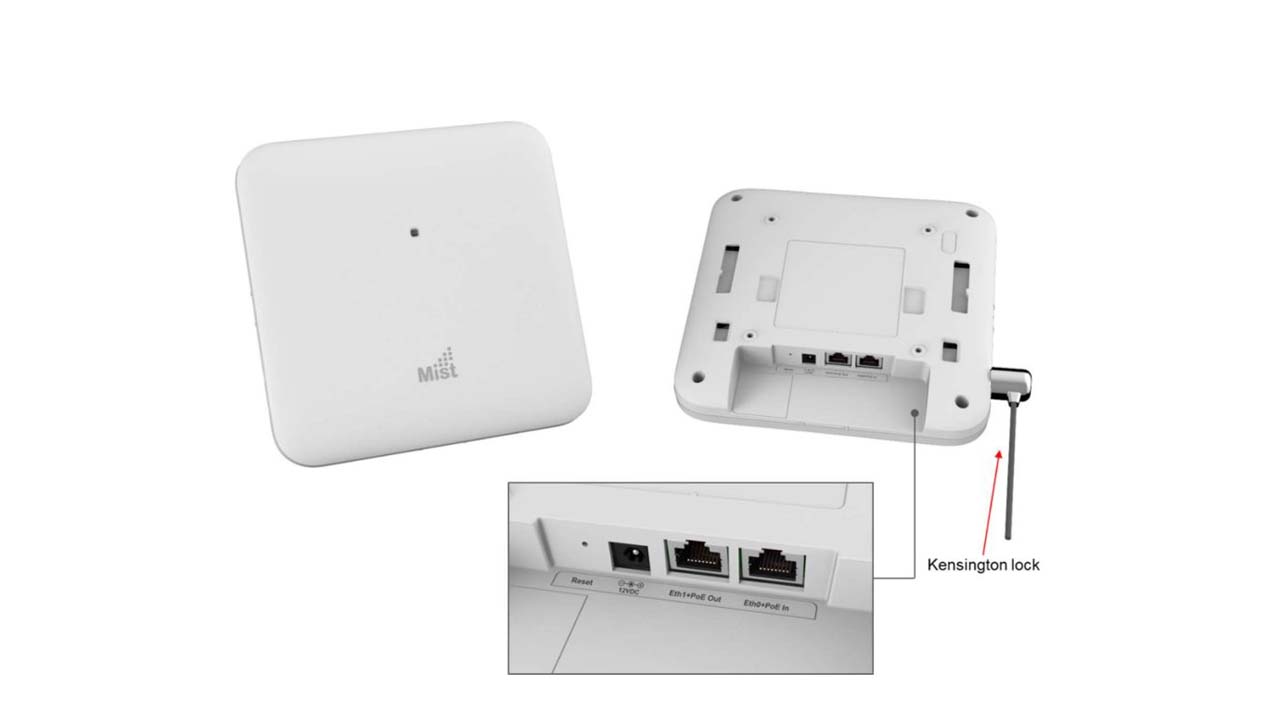
Step 2-a – Powering Your Mist Access Point
All Mist APs require external power. Below are 3 options for powering your Mist AP:
1) PoE+ from Ethernet Switch: Connect an Ethernet cable from a PoE+, 802.3at or UPOE switch to the “Eth0+PoE” port on Mist AP. (This port is farthest on the right)
2) PoE+ from Power Injector: Connect an Ethernet cable from the ”data out” port on an 802.3at power injector (e.g. PD-9001GR/AT/AC) to the “Eth0 + Poe” port on Mist AP. (The “data in” port of the power injector should be connected to an Ethernet switch.)
3) 12V DC Power Supply: A DC-01 12VDC power supply can be plugged into the “12VDC” connector on the Mist AP

Step 2-b Powering Your EX Switches, SRX and SSR Devices
For more details regarding power EX, SRX or SSR series devices, please refer to links below.
https://www.juniper.net/documentation/en_US/release-independent/topics/task/installation/ex-series-switch-power-connecting.html
https://www.juniper.net/documentation/us/en/hardware/srx300/topics/topic-map/srx300-connecting-power.html
Note: Ensure the Mist Devices are connected to the network with Internet access. If there is a firewall on the path, please ensure the relevant firewall ports are open. https://www.mist.com/documentation/ports-enable-firewall/
Step 3-a Claim Your Order with Activation Code
First, locate your activation code in the shipment notification email. Activation code is an important piece of information which is linked to all the subscriptions and the devices.

Go to your Mist account on the dashboard and click on Organization > Subscriptions

Click on ‘Apply Activation Code’ link and enter your activation code in the pop-up window.

Applying activation code will add all the Subscriptions for the Organization, tied to that shipment notification.

The above step will ensure the Mist devices will get claimed into the Organization.
The claimed devices like Access points, Switches or WAN Edges can be viewed on the inventory page.

Step 3-b Claiming Your Devices without Activation code (Demo/POC Environment)
All the newly created Mist Organizations include 90 day trial subscriptions by default for all the services.

Every Mist Accesspoint and ZTP Enabled EX Switches/ WAN Edges will have their respective claim-codes and QR code printed on the back of the hardware.
The devices have to be claimed individually by navigating to Organization > Inventory > Claim APs (or Switches, Wan-Edges) and entering in the claim code.


Optional :
The Mist devices can also be claimed into organization via QR codes from Mist AI App. Please refer to following link for working with Mist AI Mobile App.
https://www.mist.com/documentation/mist-ai-mobile-app/
Other References:
For Claiming Brownfield EX Switch (Switches without QR code or Claim Codes)
https://www.mist.com/documentation/adding-an-ex-series-switch-to-the-juniper-mist-cloud/
For Claiming Brownfield SRX WAN Edges
https://www.mist.com/documentation/srx-adoption/
Working in a Home Setup
A typical home network setup will have two components: a modem and a wireless router. A modem receives the signal from your ISP (AT&T, Comcast, etc.) and converts it for your home to use. Modems usually just have two ports – one connected out to your DSL/Cable source, and one connected to your wireless router, providing the WAN link for your home.
Please Note: Do NOT connect APs directly to your modem.
APs need to be connected to your home router.
A router provides DHCP services so devices on your local LAN can get IP addresses whether wired or wireless. An AP connected to a modem port will connect to the cloud but not provide any of these services.
A wireless router should have at least 4 ethernet ports acting as your LAN switch and one ethernet acting as the WAN link which is connected to your modem. The WAN port will be labelled either as “WAN” or “Internet”. Connect your AP to any of the LAN ethernet ports on your wireless router in order to get an IP and connect to the cloud.
Your home may also just have a single modem/router combination. The same guidelines should be applied in this case. Only connect the APs to one of the LAN ethernet ports.

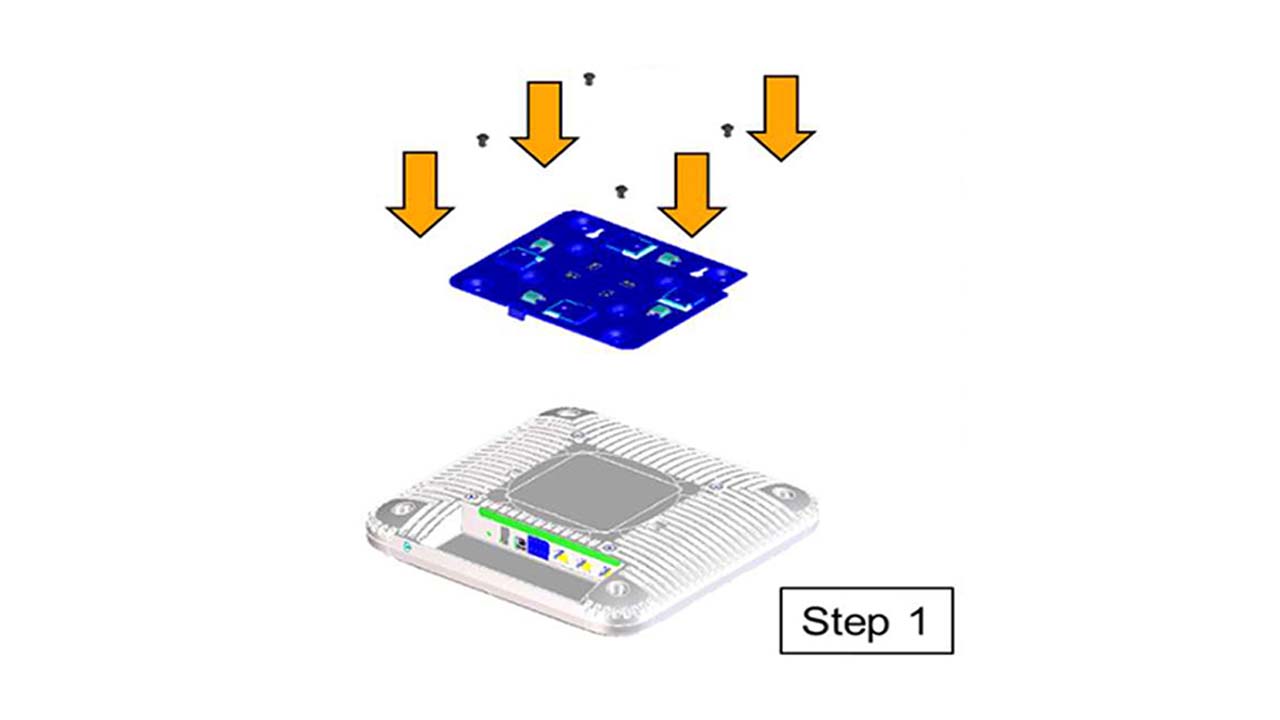
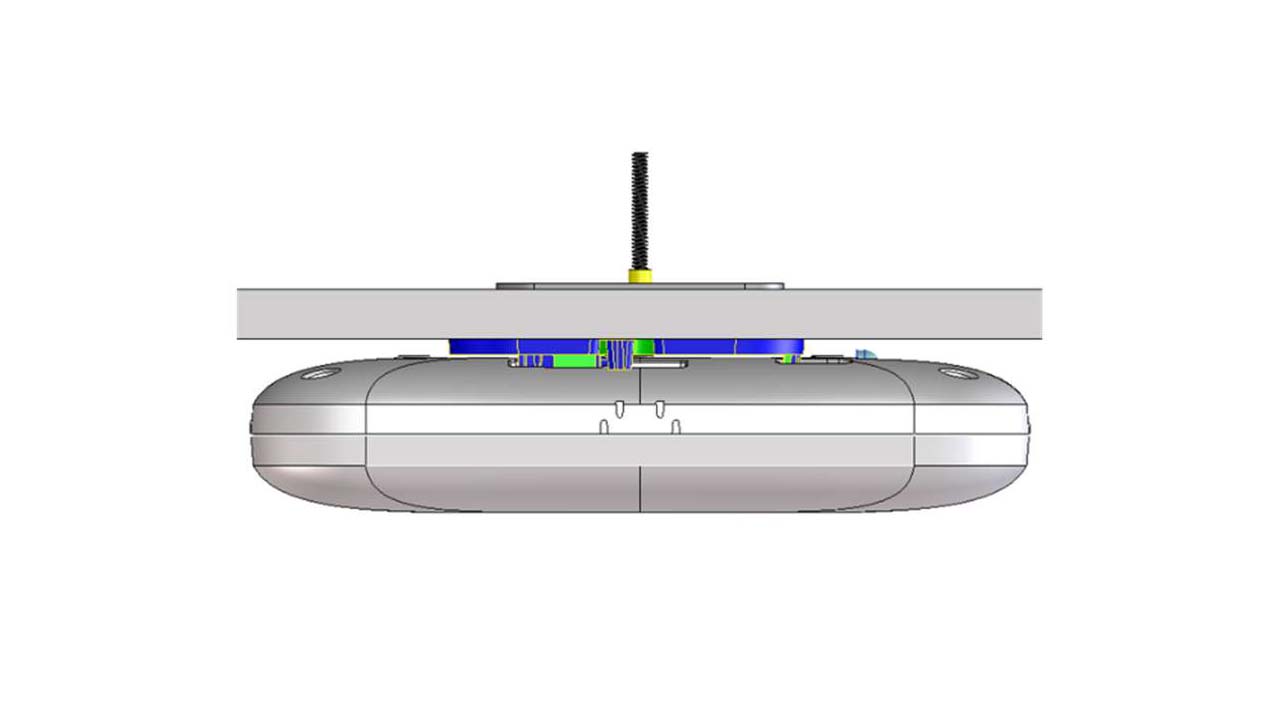
Mounting the Mist Access Points

Visit the Mist Support page at support.mist.com to learn and experience Mist’s new age wireless.
For any other questions, feel free to drop an email to support@mist.com.