Marvis
Actions – Insufficient Capacity
We are introducing a new Insufficient Capacity Marvis Action as a part of the AP section. This new Action will detect any capacity issues related to an anomalous increase in an AP’s utilization (usually seen with a significant peak in client traffic) and provide a floorplan visual of the APs on your map experiencing these issues. Use this visual to find the reduced capacity APs identified on your site and make the necessary improvements. Make sure you have a Floorplan set up in Location Live View in order to take advantage of the Insufficient capacity visibility. These are areas Marvis does not think RRM can fix.
Please keep in mind that this is still considered a Beta feature and there may be some bug fixes needed. We are working on ironing out any issues for a more complete release of this in the near future.
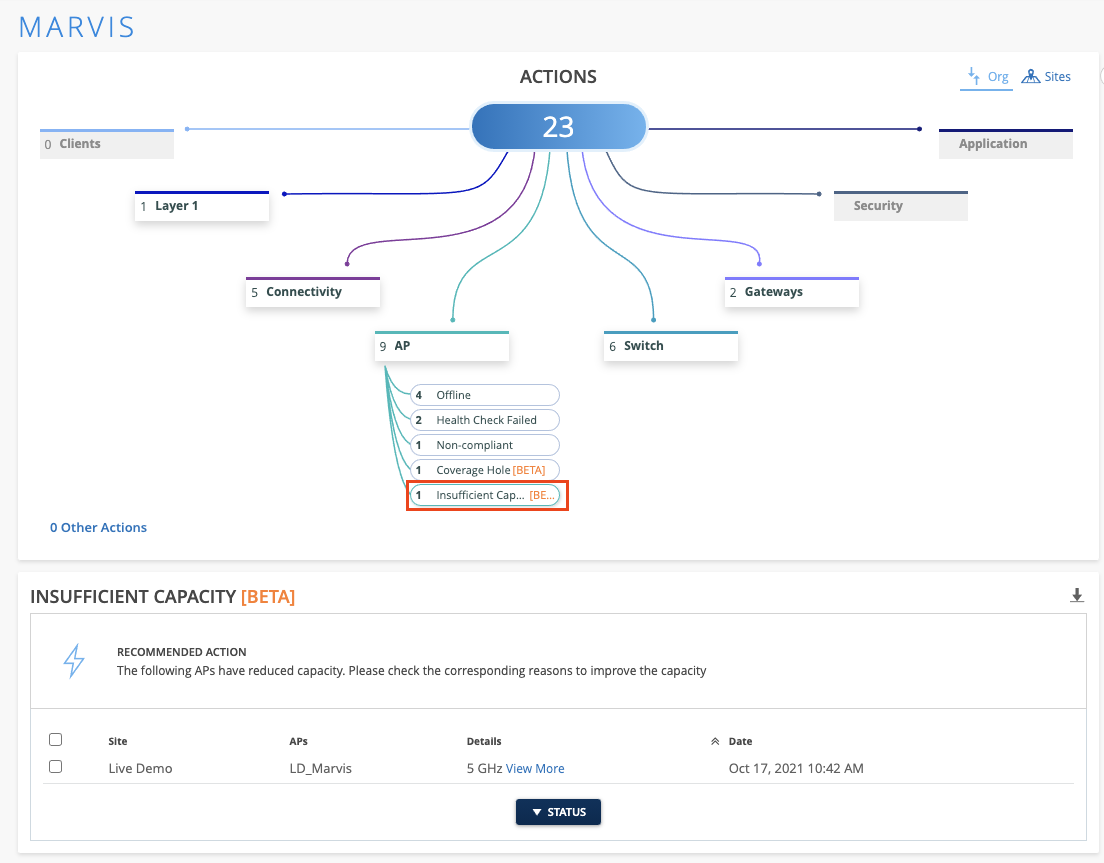
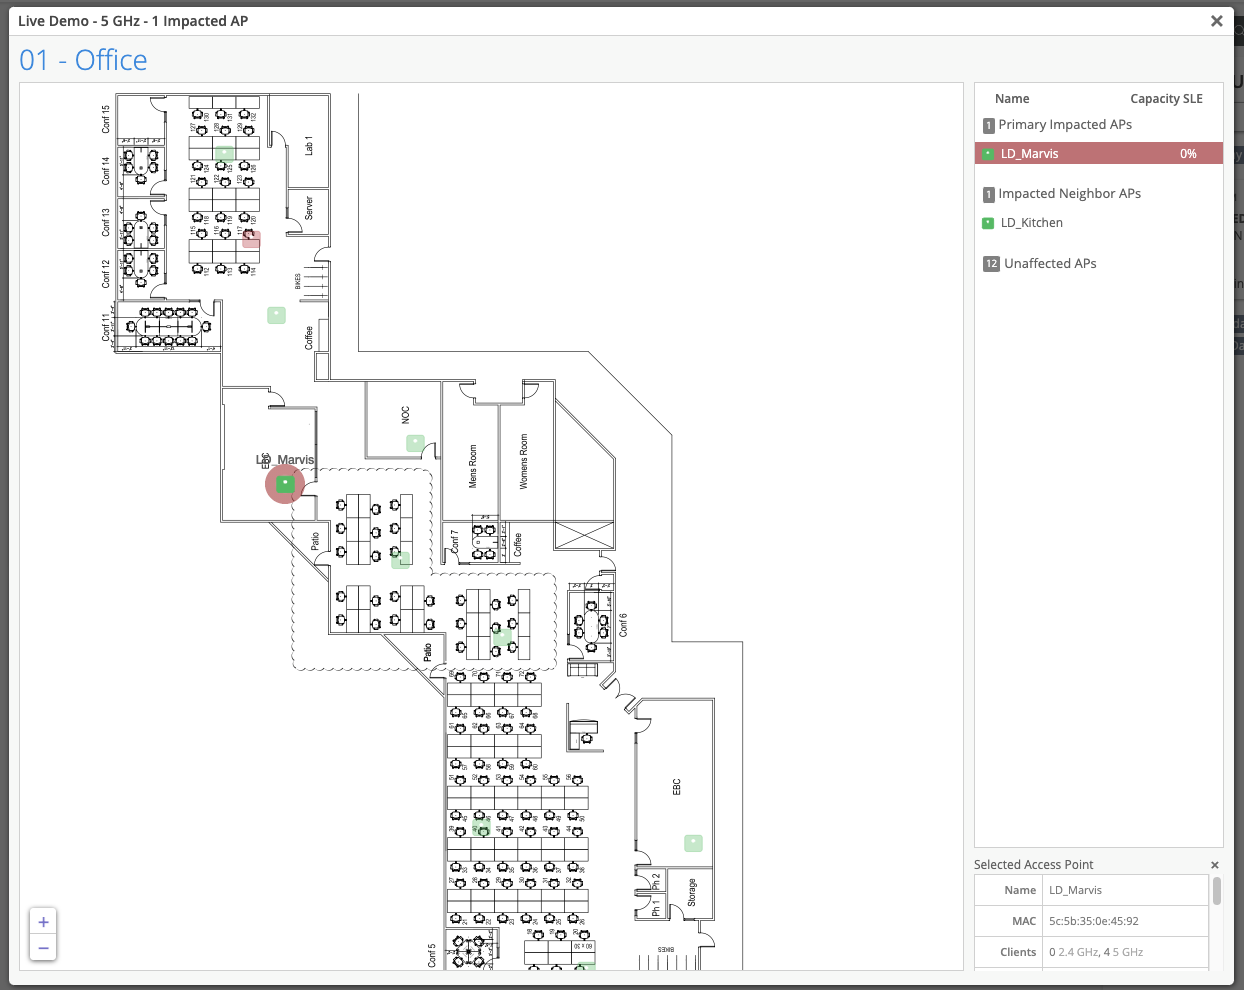
Select the ‘View More’ link to open up the map view of your sites’ APs.
Authentication Failures – Scope of Failure
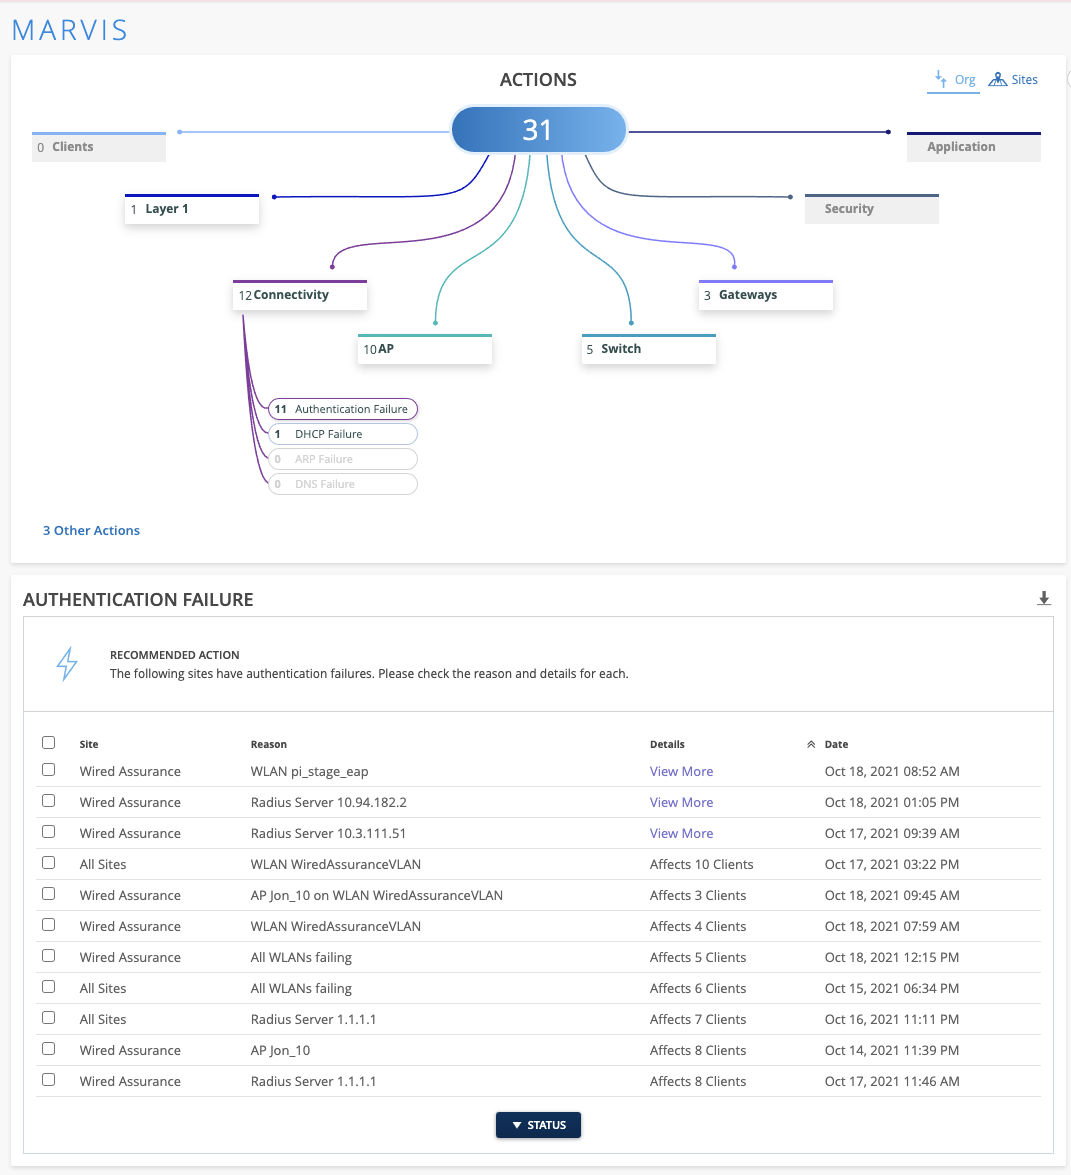
Authentication failures now include the scope of each failure. With persistently failing clients, you can see individual clients failing authentication (scope of a client). With the authentication anomalies, you can see when anomalous failures started happening. And now the final step is complete with regards to conclusively indicating if the failure scope is a server, WLAN, AP across the site or org. The scope of failure for Authentication events are indicated in the Reason column.
Here we can see cases where all WLANs are failing on a site, and cases where all Sites are experiencing the same WLAN failure.
Conversational Assistant – Gateways
Marvis has now made strides into WAN with the conversational assistant providing you a way to troubleshoot your gateways
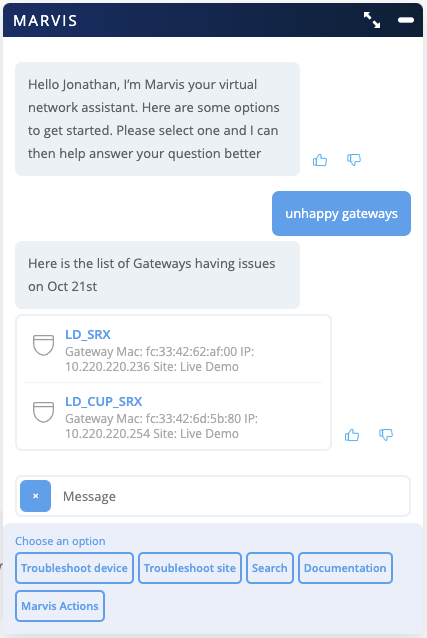
Now you can search for problematic gateways on your site with some basic troubleshooting questions such as “how is <gateway>”, “troubleshoot <gateway>”, or “unhappy gateways” Marvis will return the list of gateways having issues and provide the list of problems it is encountering.
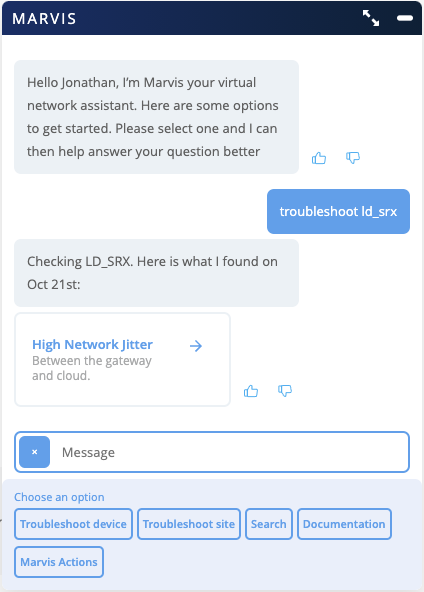
Clicking on the High Network Jitter result, will reveal more information about the result:
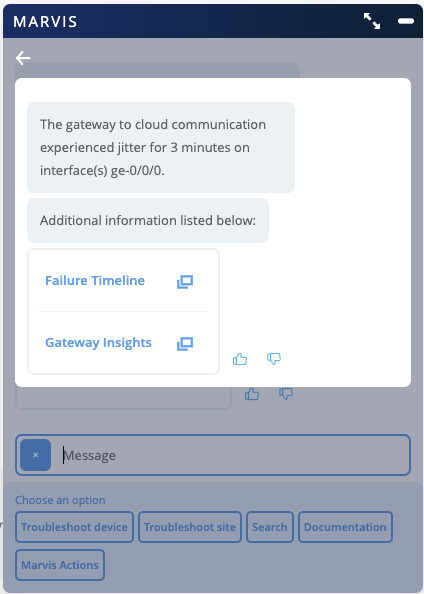
Clicking on the Failure Timeline will bring you to the WAN SLE page showing the timeline of failures. Selecting Gateway Insights will bring you to the Insights page for the gateway.
Wired Assurance
Replace Switch
This week we are excited to announce the new Replace Switch feature! Much like our Replace AP feature, this allows you to replace any standalone switch with another switch already in your inventory while retaining the device configurations. Doing so will not disrupt service on your network topology as all the existing configurations will be transferred to the new switch. Please note that this feature is only compatible with Standalone switches – this is not supported for any Virtual Chassis setup.
To use this feature, make sure that you have your new switch claimed to your organization but in an unassigned state (not assigned to any Site on the Org). Navigate to your Switch Details Page, and from the Utilities dropdown, select Replace Switch.

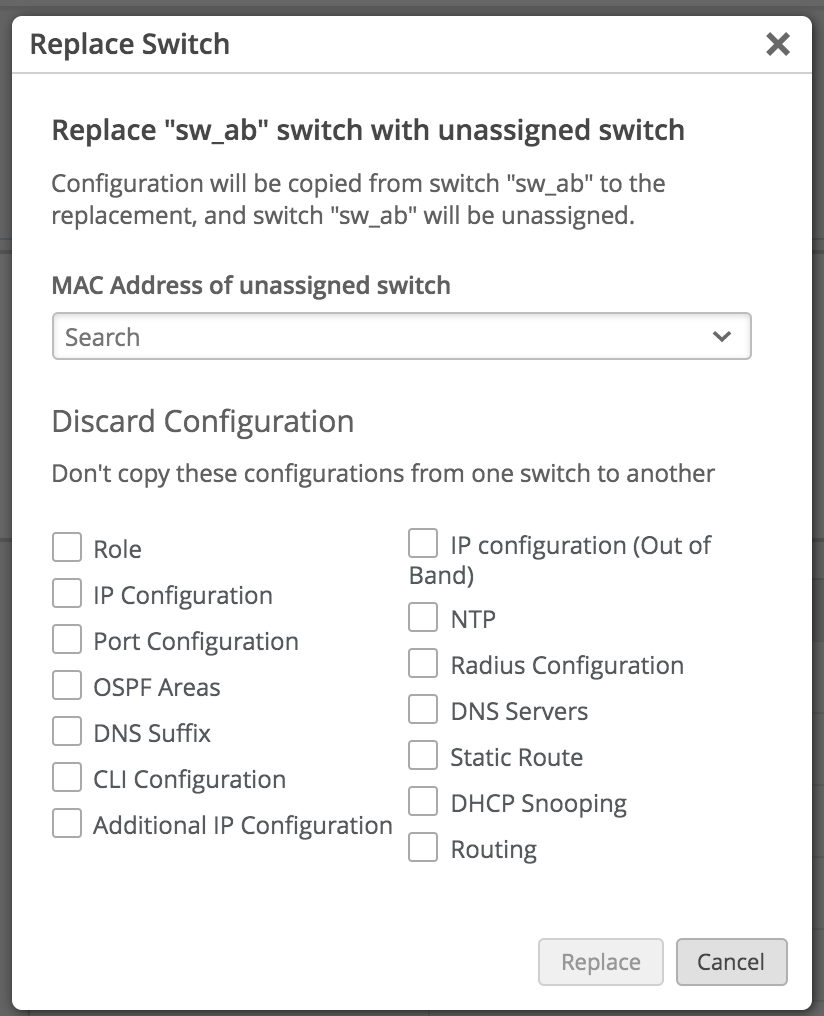
This opens up the Replace Switch modal, where you will select the desired switch to replace with from the MAC Address dropdown menu. In the Discard Configuration section below, you may select configurations that you don’t want to copy over to the new switch. Once your selections are made, click on the Replace button to finish the procedure. Your old switch will transition to an Unassigned state once finished and be replaced with the new switch.
Some things to note:
Existing EX switches can only be replaced with another EX switch and not by QFX nor SRX.
If a switch with a higher number of ports is getting replaced with a switch with lower number of ports, the UI by default will discard the port configurations to be copied. Hence the Port Configuration checkbox will always be checked by default in such scenarios.
To see the full step-by-step process, please refer to this page: https://www.mist.com/documentation/replace-switch/
Static Route GA
Earlier we announced the ability to configure static routes on your supported Juniper EX switches as a Beta feature. Starting this week, this is now considered a GA feature that is fully fleshed out. The switch uses static routes when
- The switch does not have a route to a destination that has a better (lower) preference value.
- The switch cannot determine the route to a destination.
- The switch is forwarding unroutable packets.
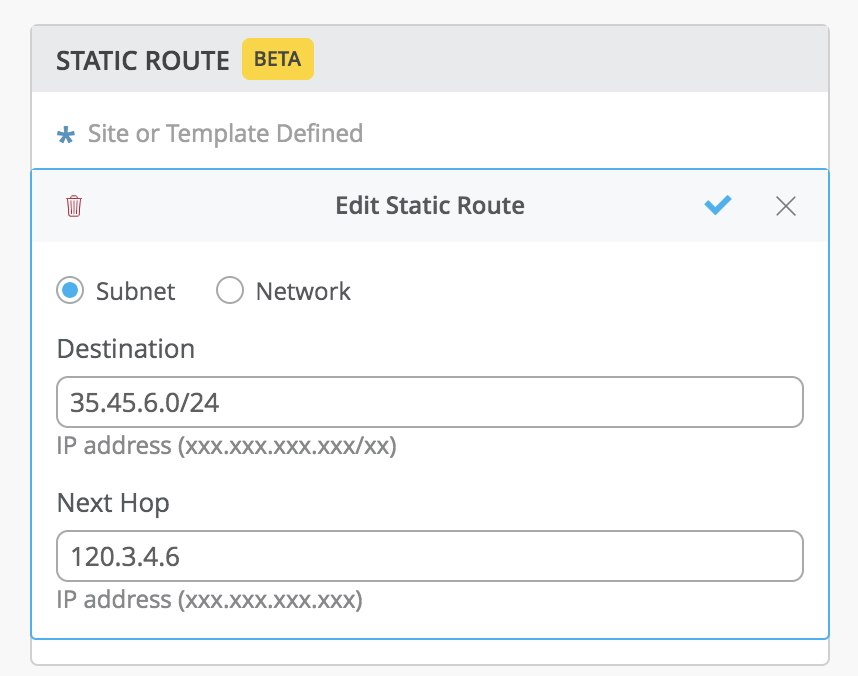
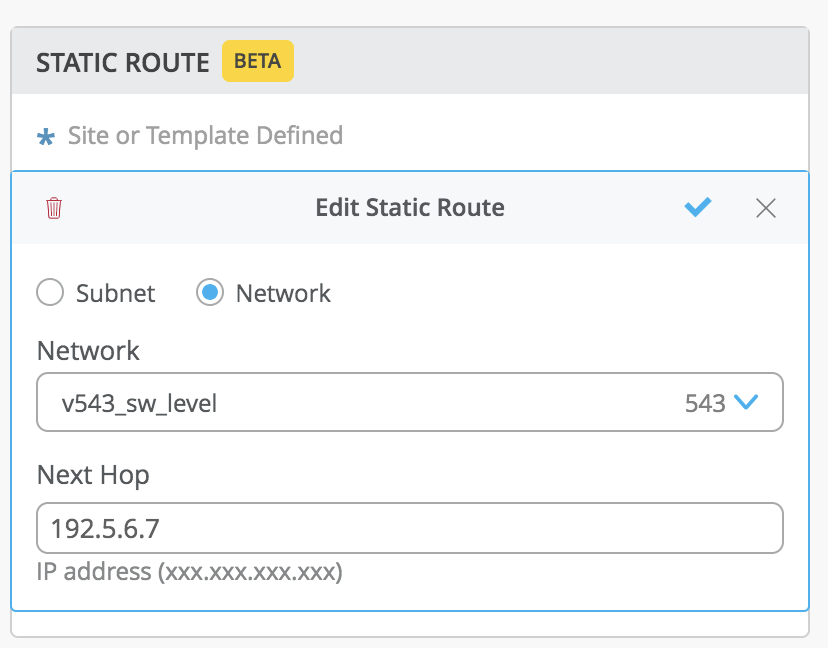
In the Switch Details page (Switches > Select a switch) find the Static Route section. Here, you can configure your static route either by Subnet, or Network.
To configure by Subnet, enter in your ‘Destination’ IP address in the CIDR format, as well as the Next Hop IP Address.
To configure by Network, select from the dropdown list. Make sure to create/add ‘subnet’ for the VLAN ID network you intend to use for the static route. Also add a ‘Next Hop’ IP Address.
Other Areas where Static Routes can be configured:
Site level – Navigate to Network > Switch Configuration to select the site where you wish to configure static routes.
Org Template level – Navigate to Organization > Switch Template and select a template to configure your static routes.
Mist Edge
Enhancements
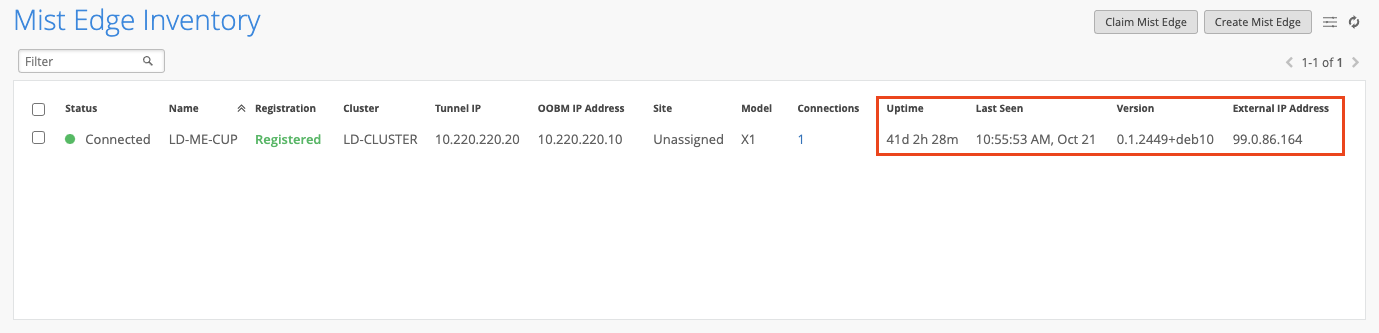
We are now providing a more granular view of Mist Edge stats by including new columns in the Inventory page for your Mist Edges. Here, you will now be able to see Version, Uptime, External IP, and Last Seen time.
Find your Mist Edge Inventory page by navigating to Organization > Mist Edges.