Marvis: Action Dashboard
Troubleshoot your network using Marvis Actions
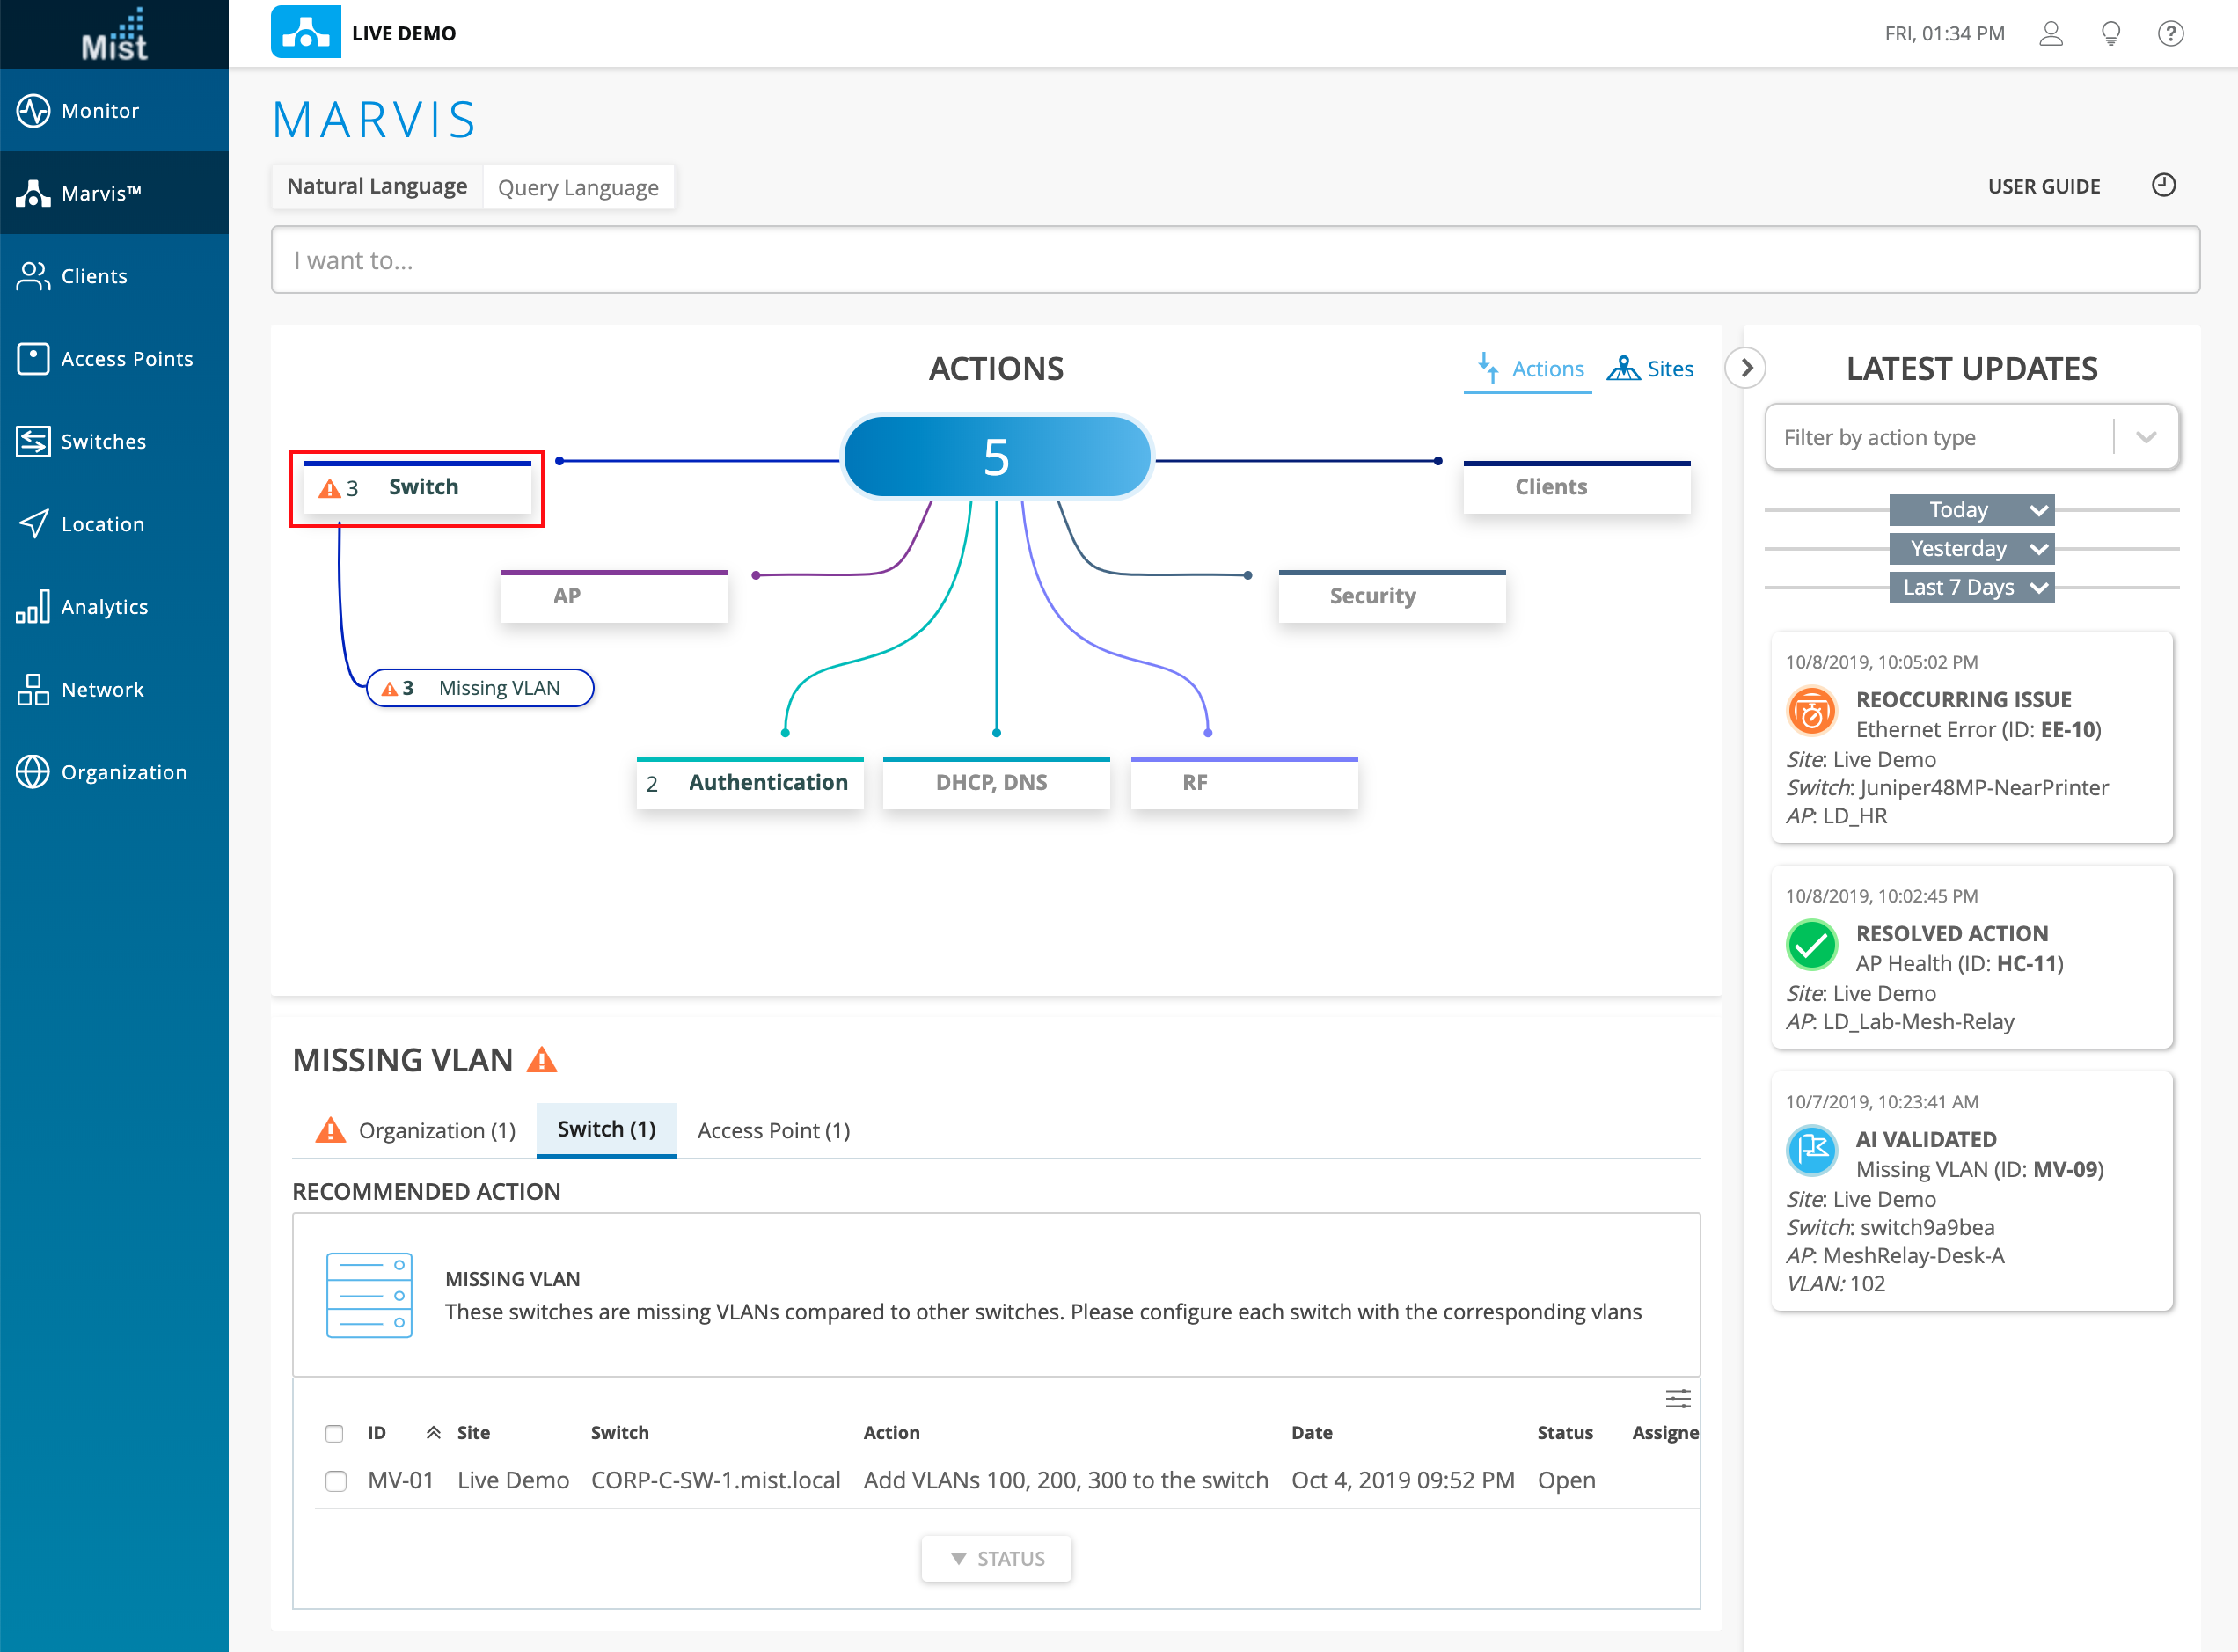
Marvis Actions is the proactive method of using Marvis to highlight/bubble up high user-impacting issues across a customer’s organization. This is the next level of our AI capabilities (dpcap, AI driver RRM, VNA etc.), wherein our customers can now experience the beginnings of a self-driving network. The Action Dashboard is meant as a first look for admins to get an immediate status view across their entire organization. From this one page, you can see various types of issues affecting your site, regardless of how small or large the impact is. Currently, this feature is viewable for Super Users and Network Admins with access to all sites on the Org, and limited to those with a Marvis VNA Subscription.
As part of Phase 1, the actions we are going to address are:
Missing VLAN – This will indicate if an AP, switch or multiple APs across multiple switches across multiple sites is missing a VLAN(s) on the switchport. If left unresolved, this would continue to result in clients (connecting to these APs) unable to obtain an IP address on the WLAN they are trying to connect to. This can also manifest as a client roaming issue and eventually clients will fail to successfully connect.
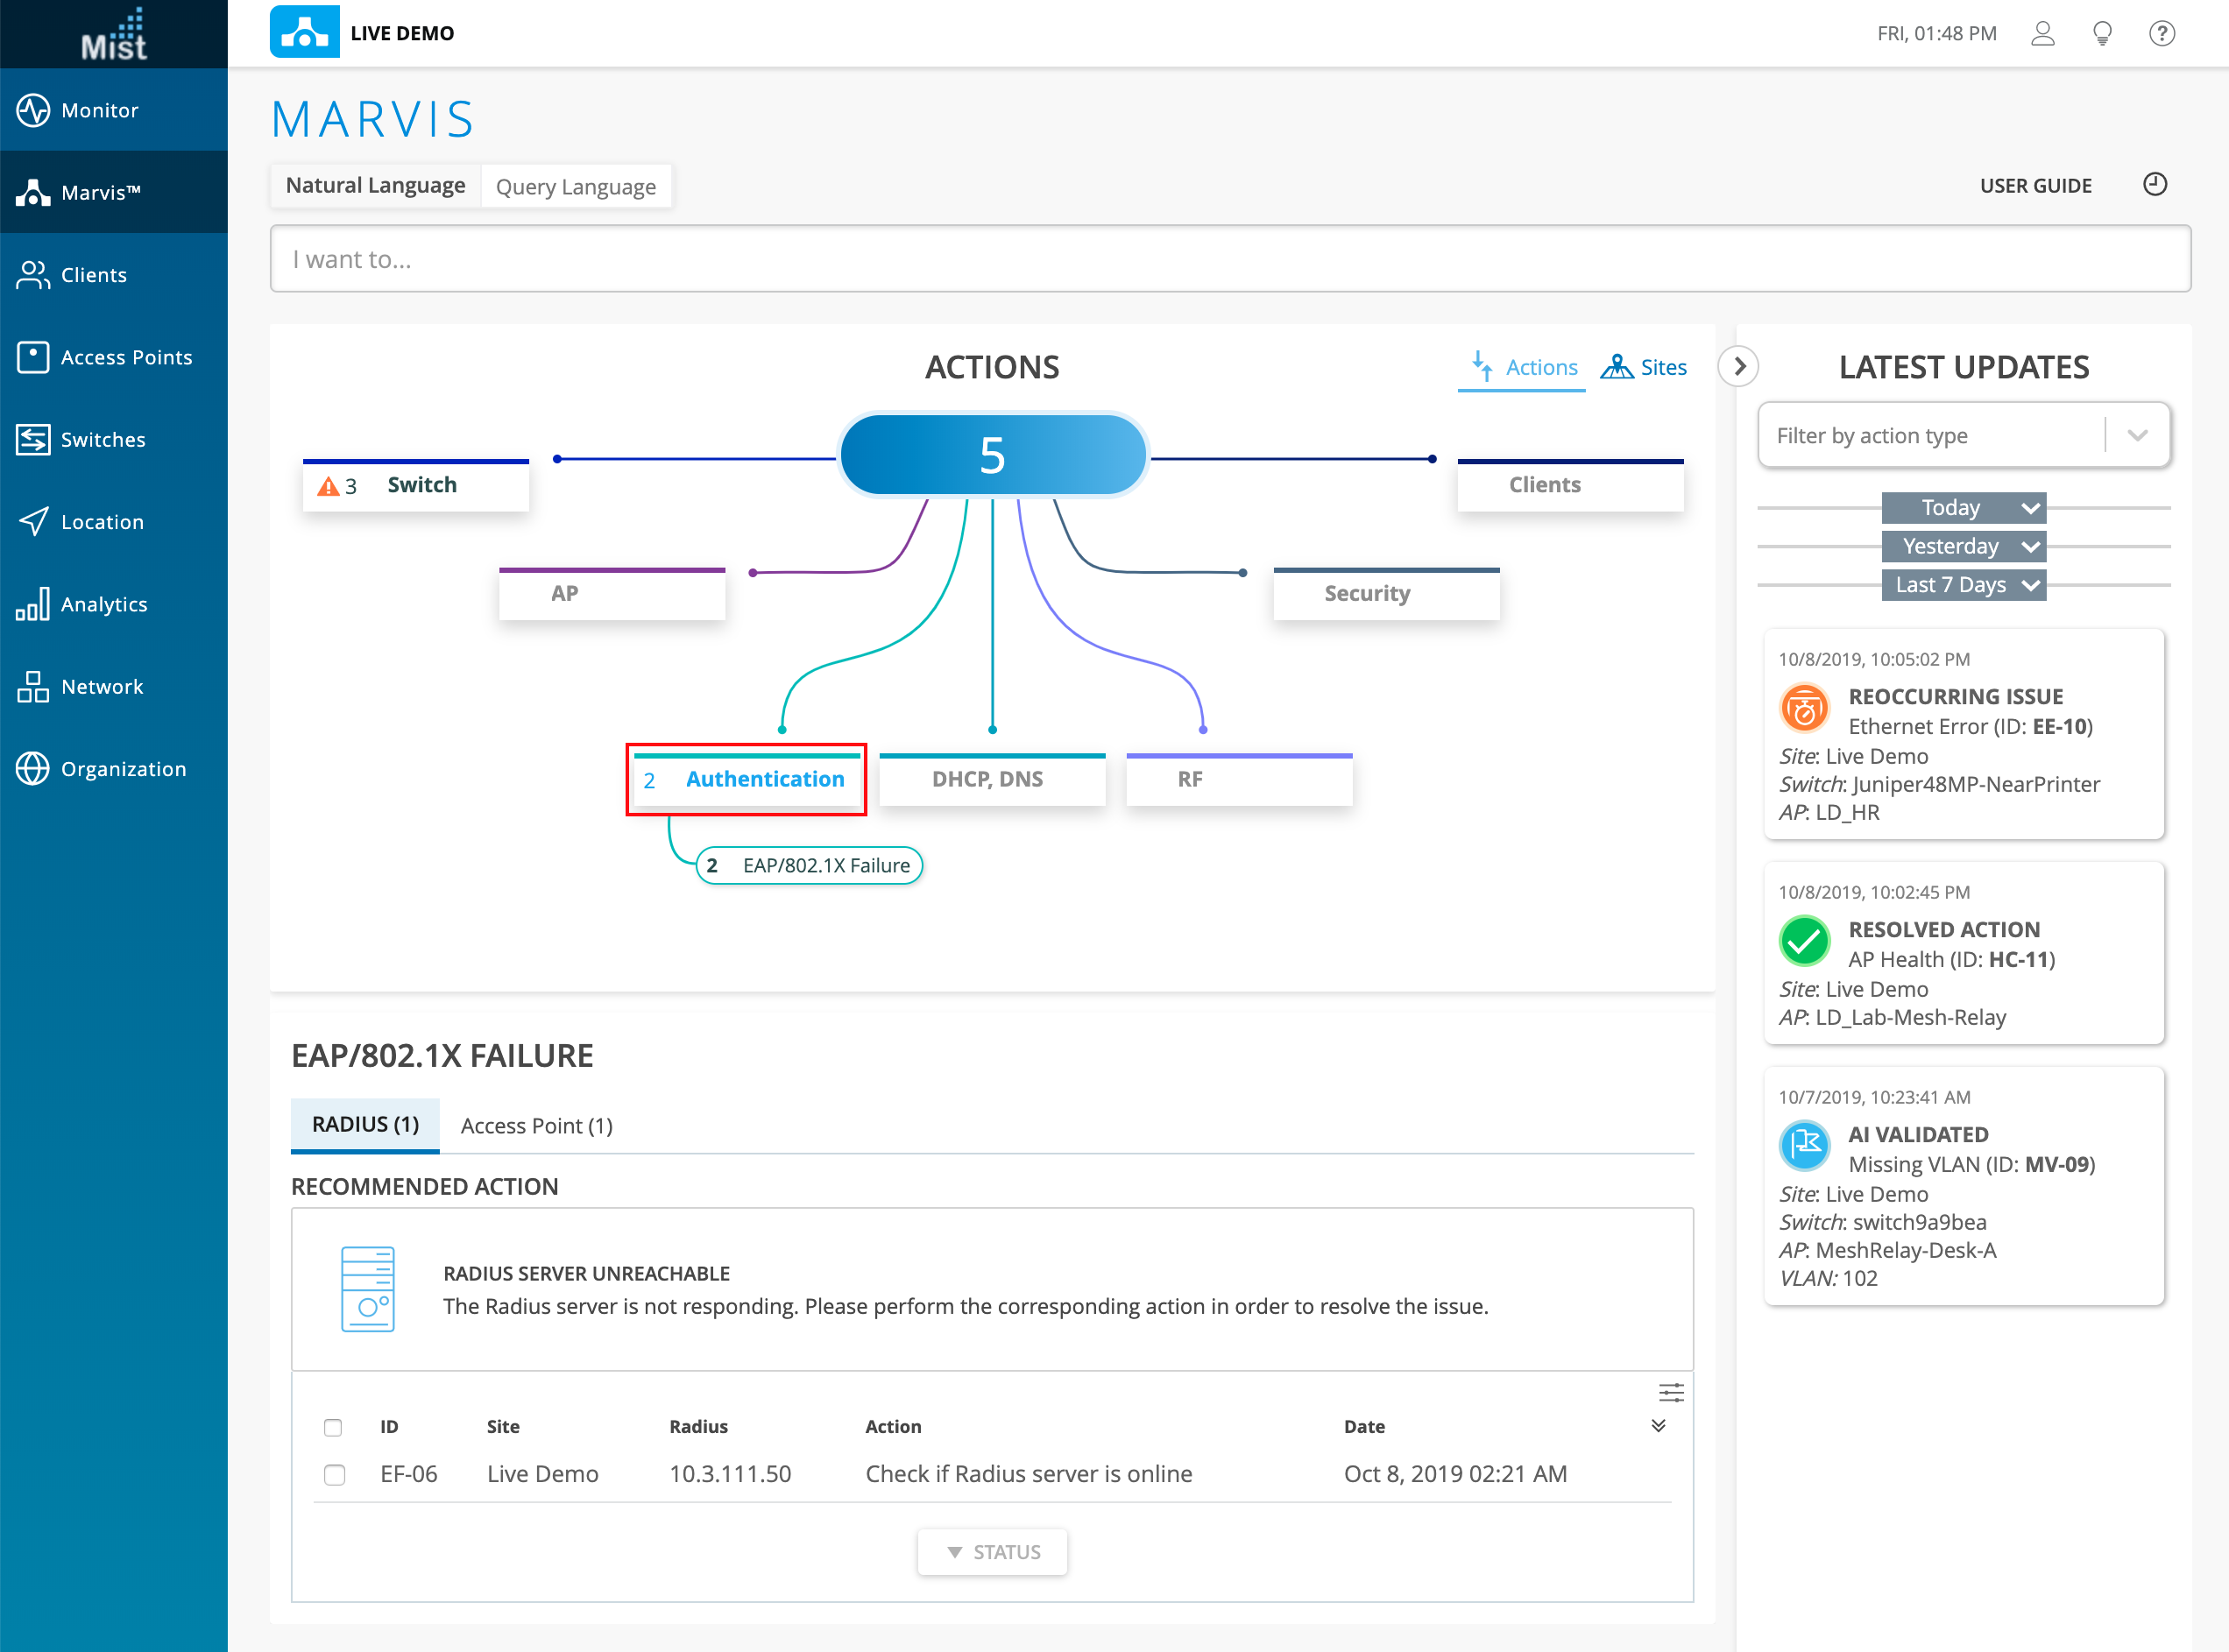
EAP/802.1X failures – This is based on anomaly detection which will indicate if a Radius server at a site is not responding to EAP requests, based on a high number of clients failing 802.1X authentication on the WLAN, and/or if an AP is missing as a NAS client, based on all clients failing 802.1X authentication on that AP. This too will lead to clients eventually failing to successfully connect.
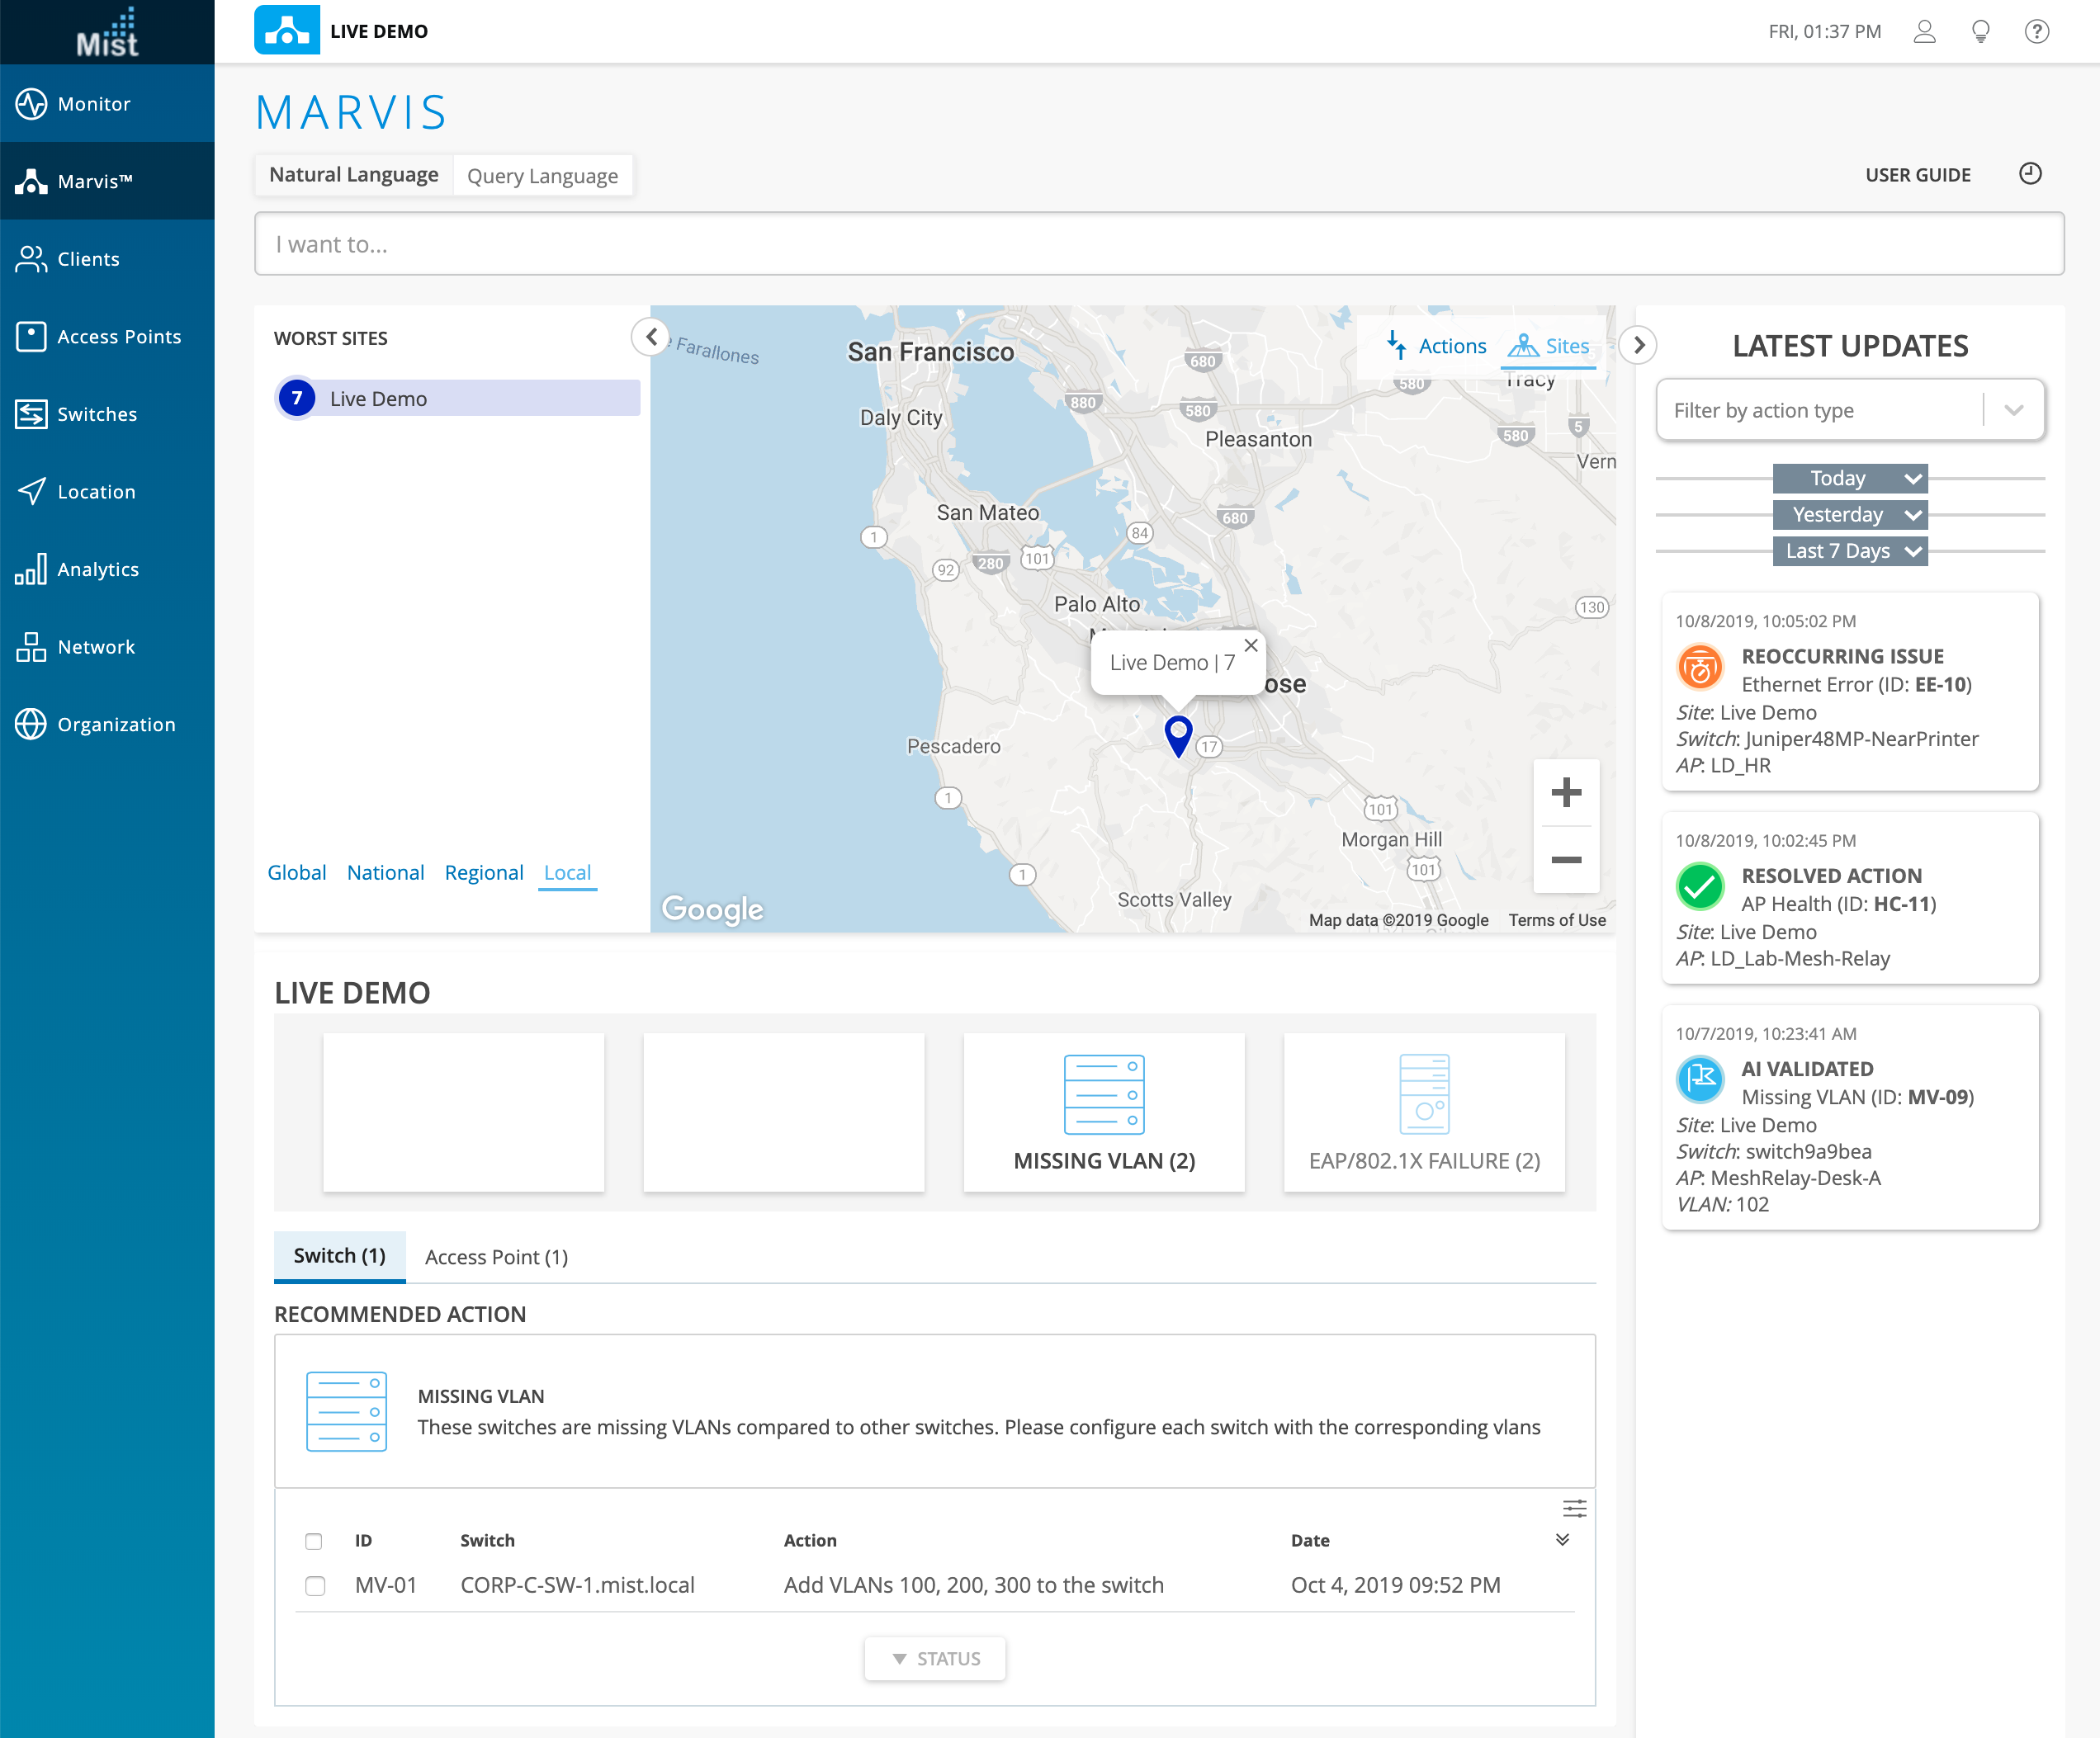
In the Site view, look at your various site locations on a world map to filter out and highlight the important sites you are trying to troubleshoot. Here, the site-specific issues and their corresponding recommended actions will be displayed.
See the Marvis Action Dashboard in action, and read more about the feature here:
https://www.mist.com/documentation/what-is-marvis-actions/
Simplified Operations
Wired Packet Capture (requires 0.5.x or newer firmware)
This week we are greatly improving the functionalities of one of our most important troubleshooting tools. Wireless packet captures are helpful when trying to dissect and dig down into the root cause of any wireless issue between a client and AP. You can determine if packets being sent are actually reaching their destination as well as identify if packets are corrupted.
With our enhanced packet capture flow, we are introducing the ability to capture packets on the wired side of your network as well. This data is captured from the Eth0 port of your AP, and will examine the packets between the AP and the rest of your wired network. This includes any RADIUS, DHCP, or DNS servers you have set up. With this expanded range of visibility, network admins now have the ability to capture the wired side packets to debug issues with servers on their own network. For example, with wired packet captures we can see the AP send DHCP requests. If no DHCP responses are coming back then we can then pinpoint the DHCP server as the culprit behind the failing connection attempts in the network.
Please navigate to Network > Packet Captures to start your capture. NOTE: Currently we only have the ability to capture either Wireless OR Wired packets. Simultaneous capture of both is not yet available at the moment.
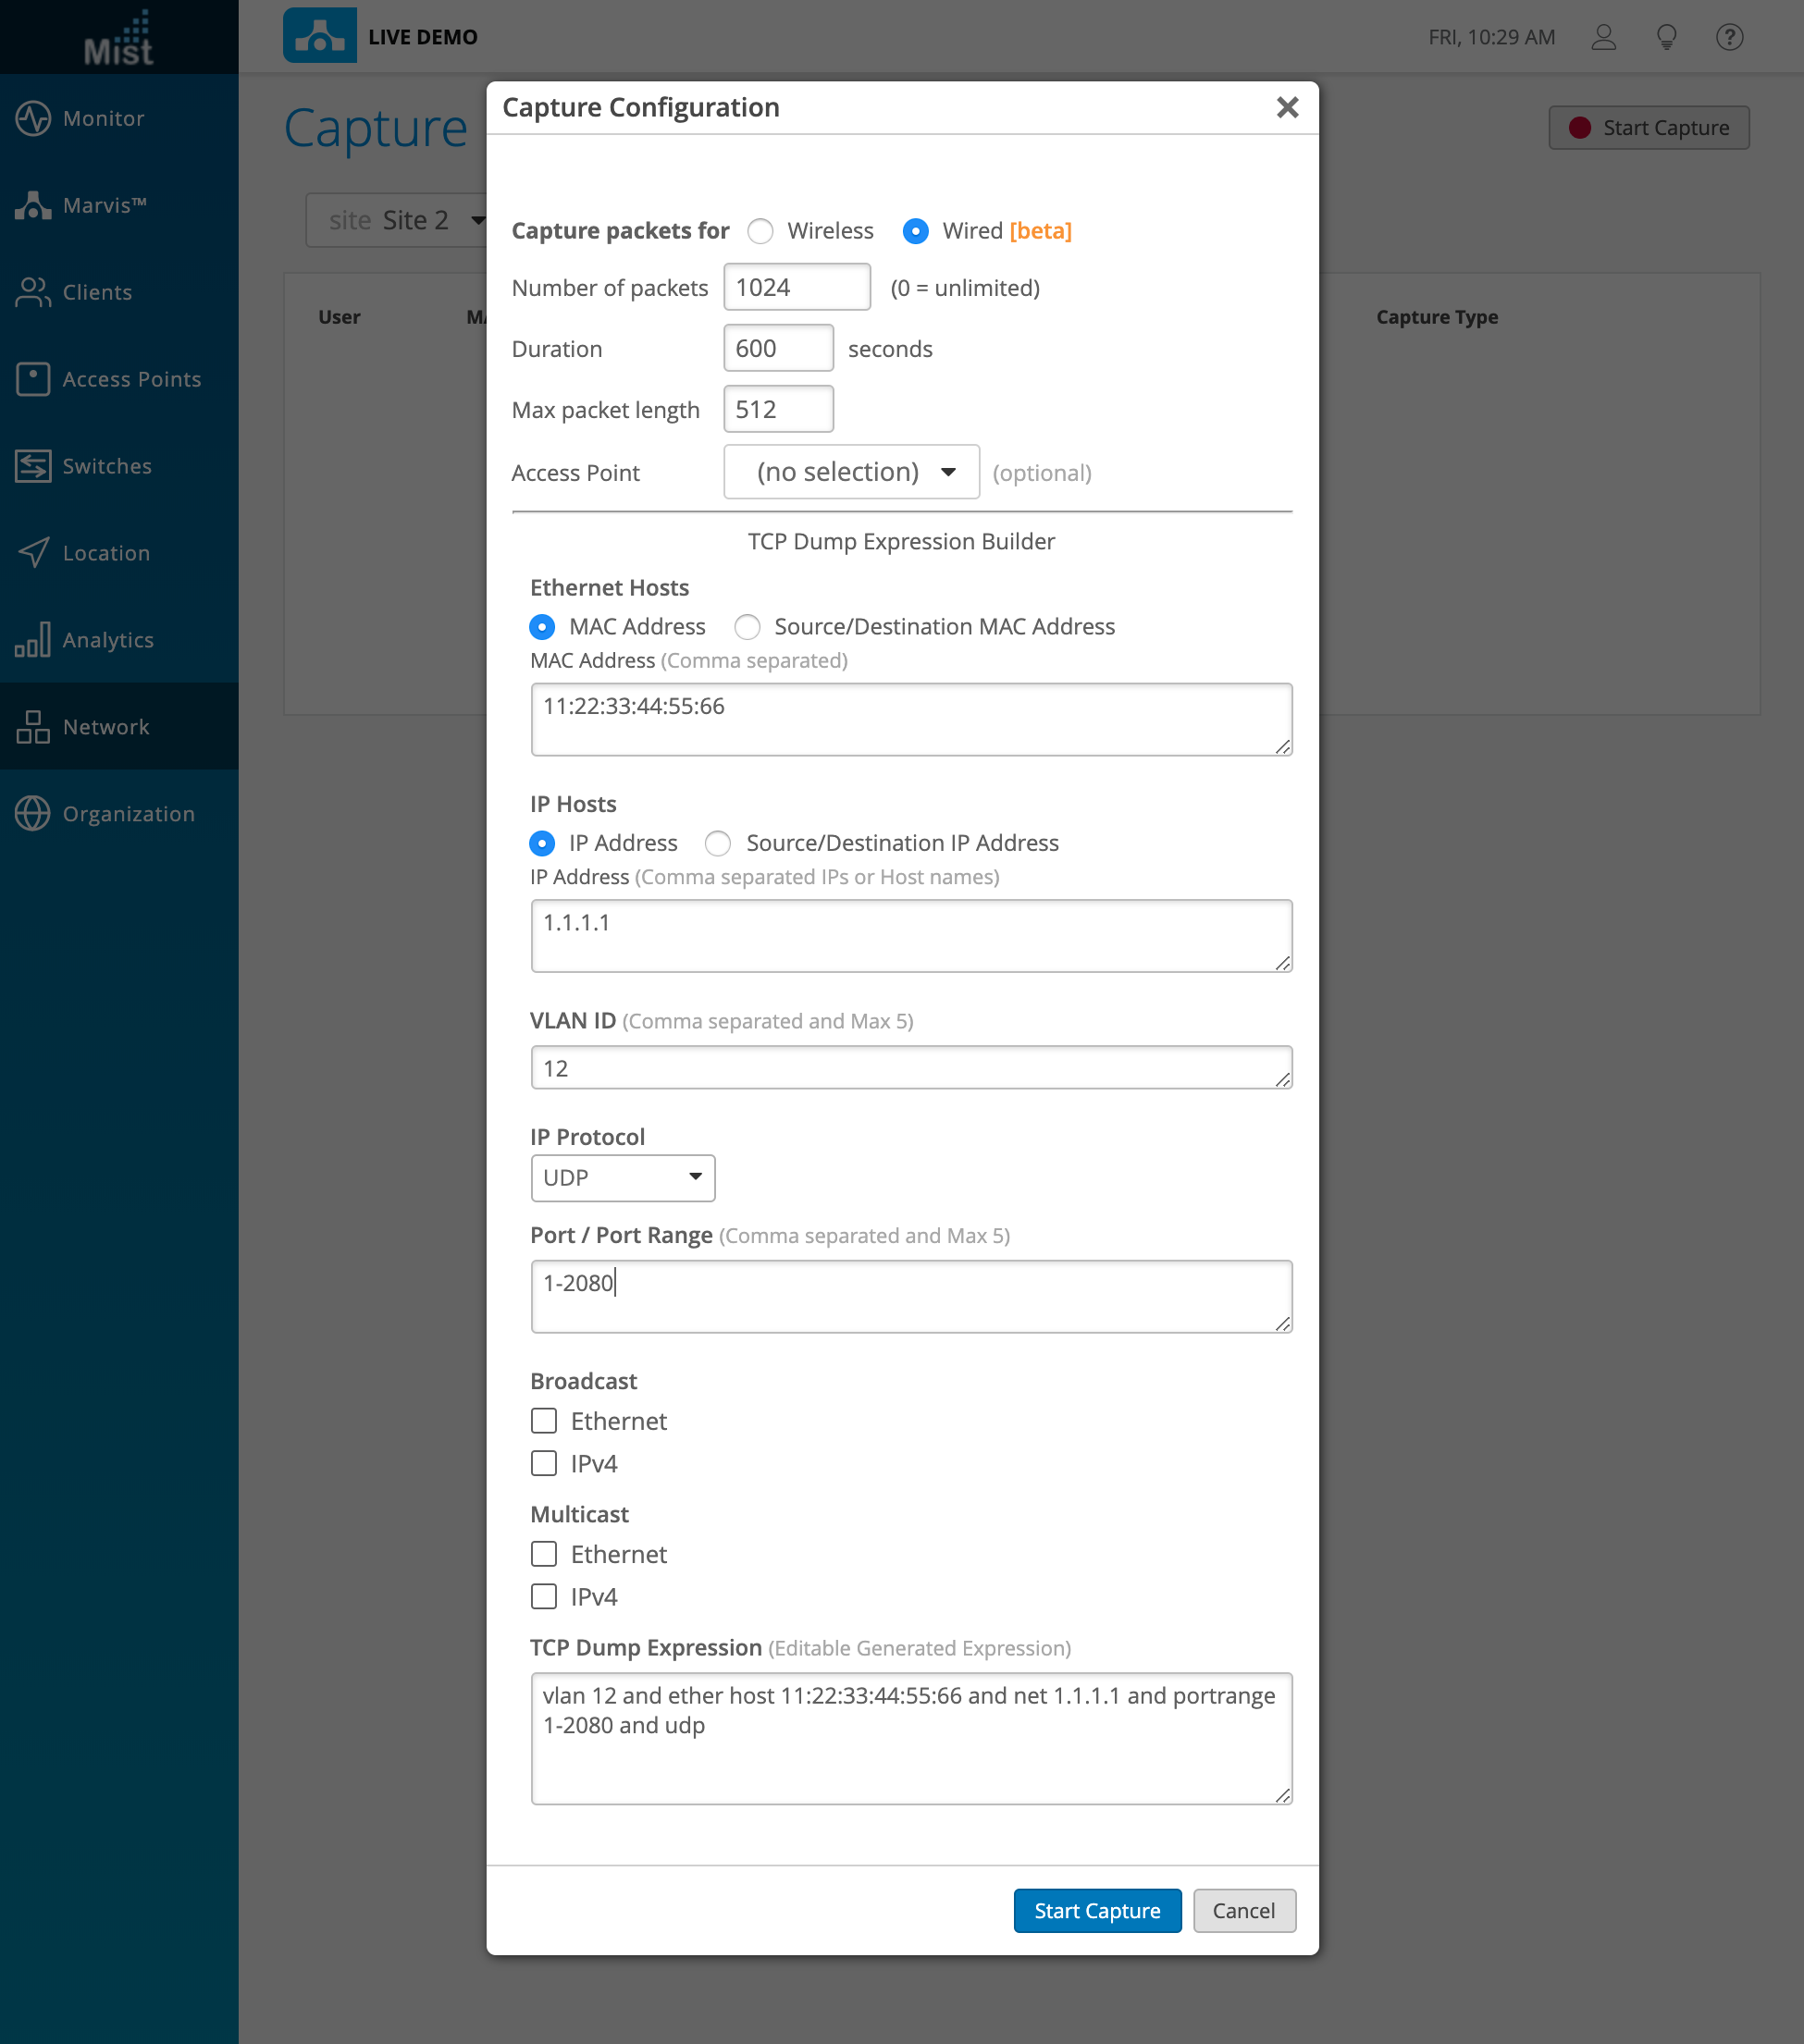
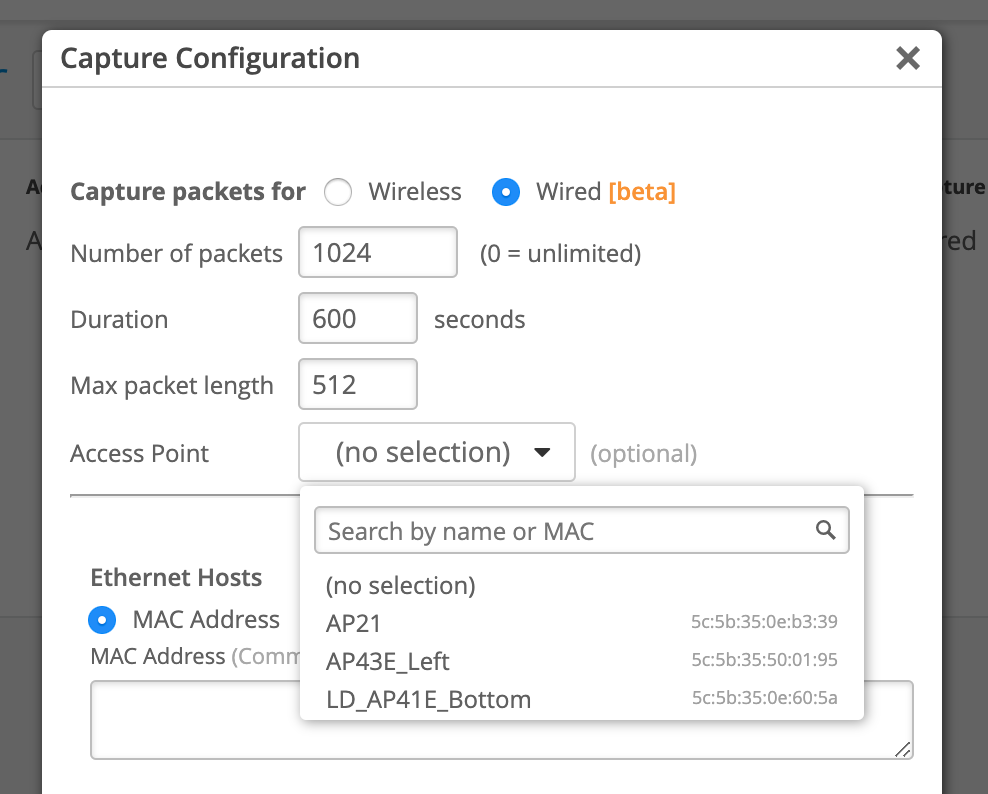
The Capture Configuration allows you to adjust your packet capture settings by specifying the number of packets captured (if set to 0, then there will be no limit), duration of the capture, as well as the maximum packet length. Select the Access Point you wish to capture packets for. If none are selected, then the packets on all APs will get captured.
The wired PCAP uses TCP Dump (a packet analyzer tool) on the AP side to retrieve data. Use the TCP Dump Expression Builder provided on our UI to fill in your desired fields. The TCP Dump expression will be automatically generated for you at the bottom. Feel free to directly edit this expression if you are familiar with the TCP dump formatting.
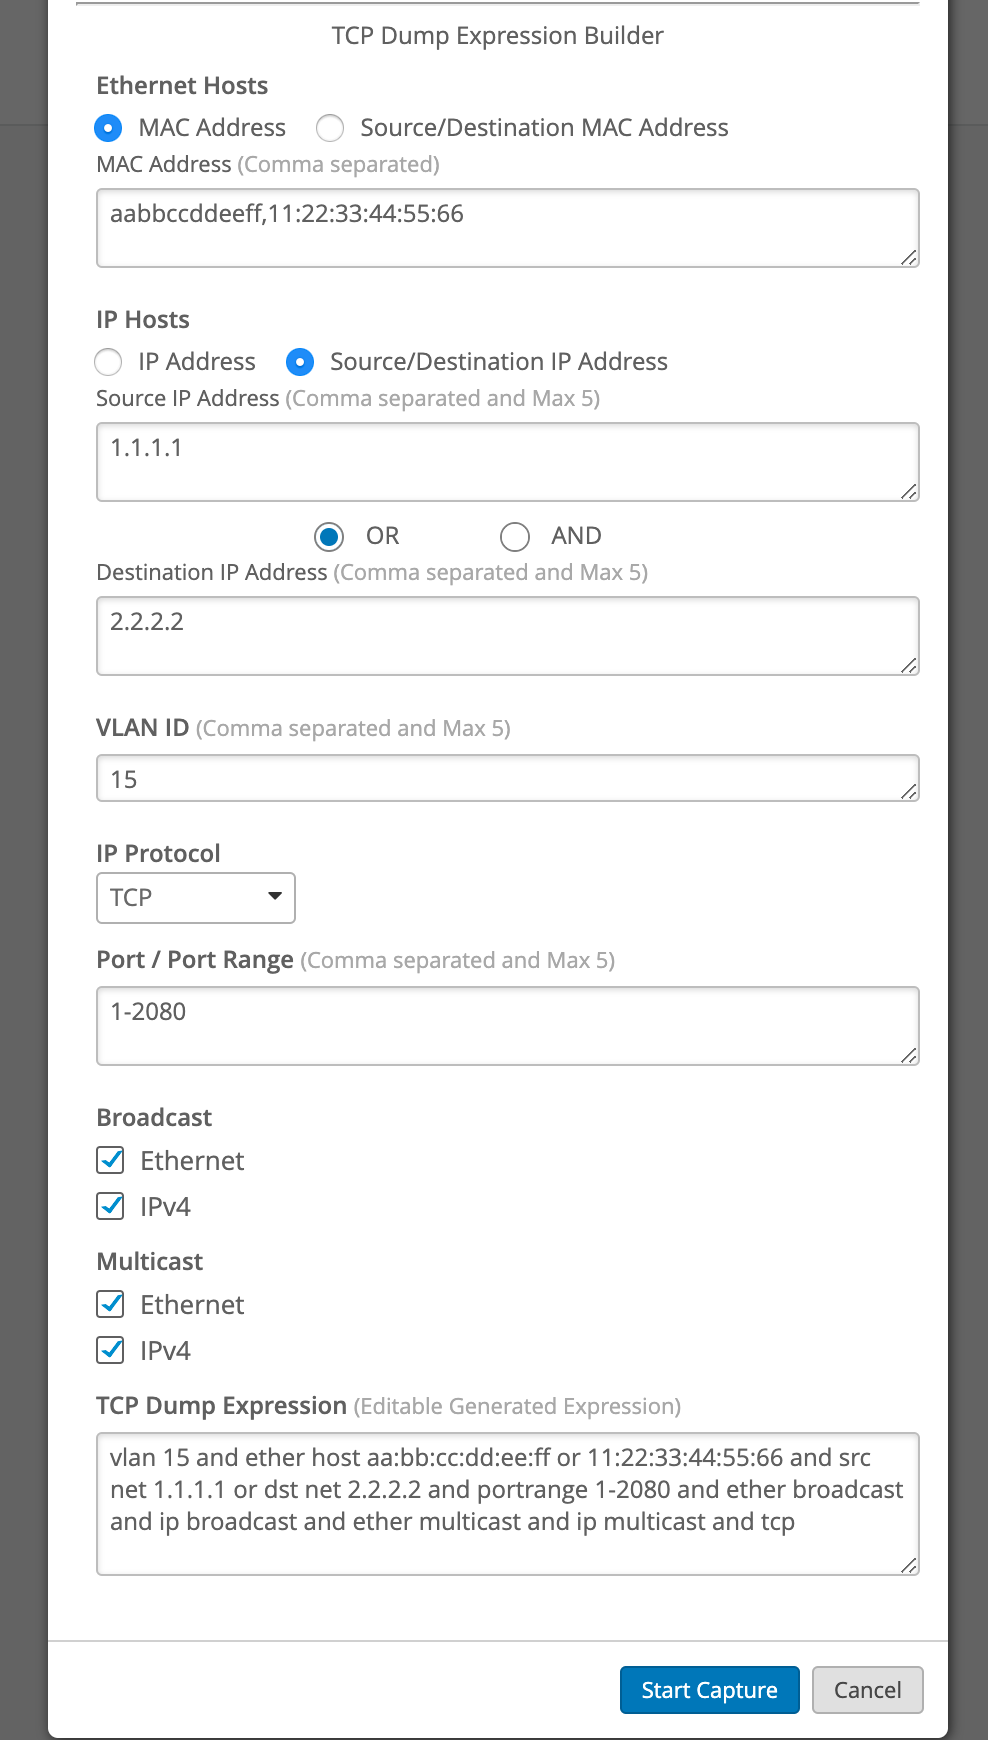
NOTE: You may have noticed that the expression builder automatically inputs “vlan” regardless of if you entered a VLAN or not. This is the intended behavior. If you are editing the expression directly, please do not remove “vlan” as this may cause trouble for the packet capture.
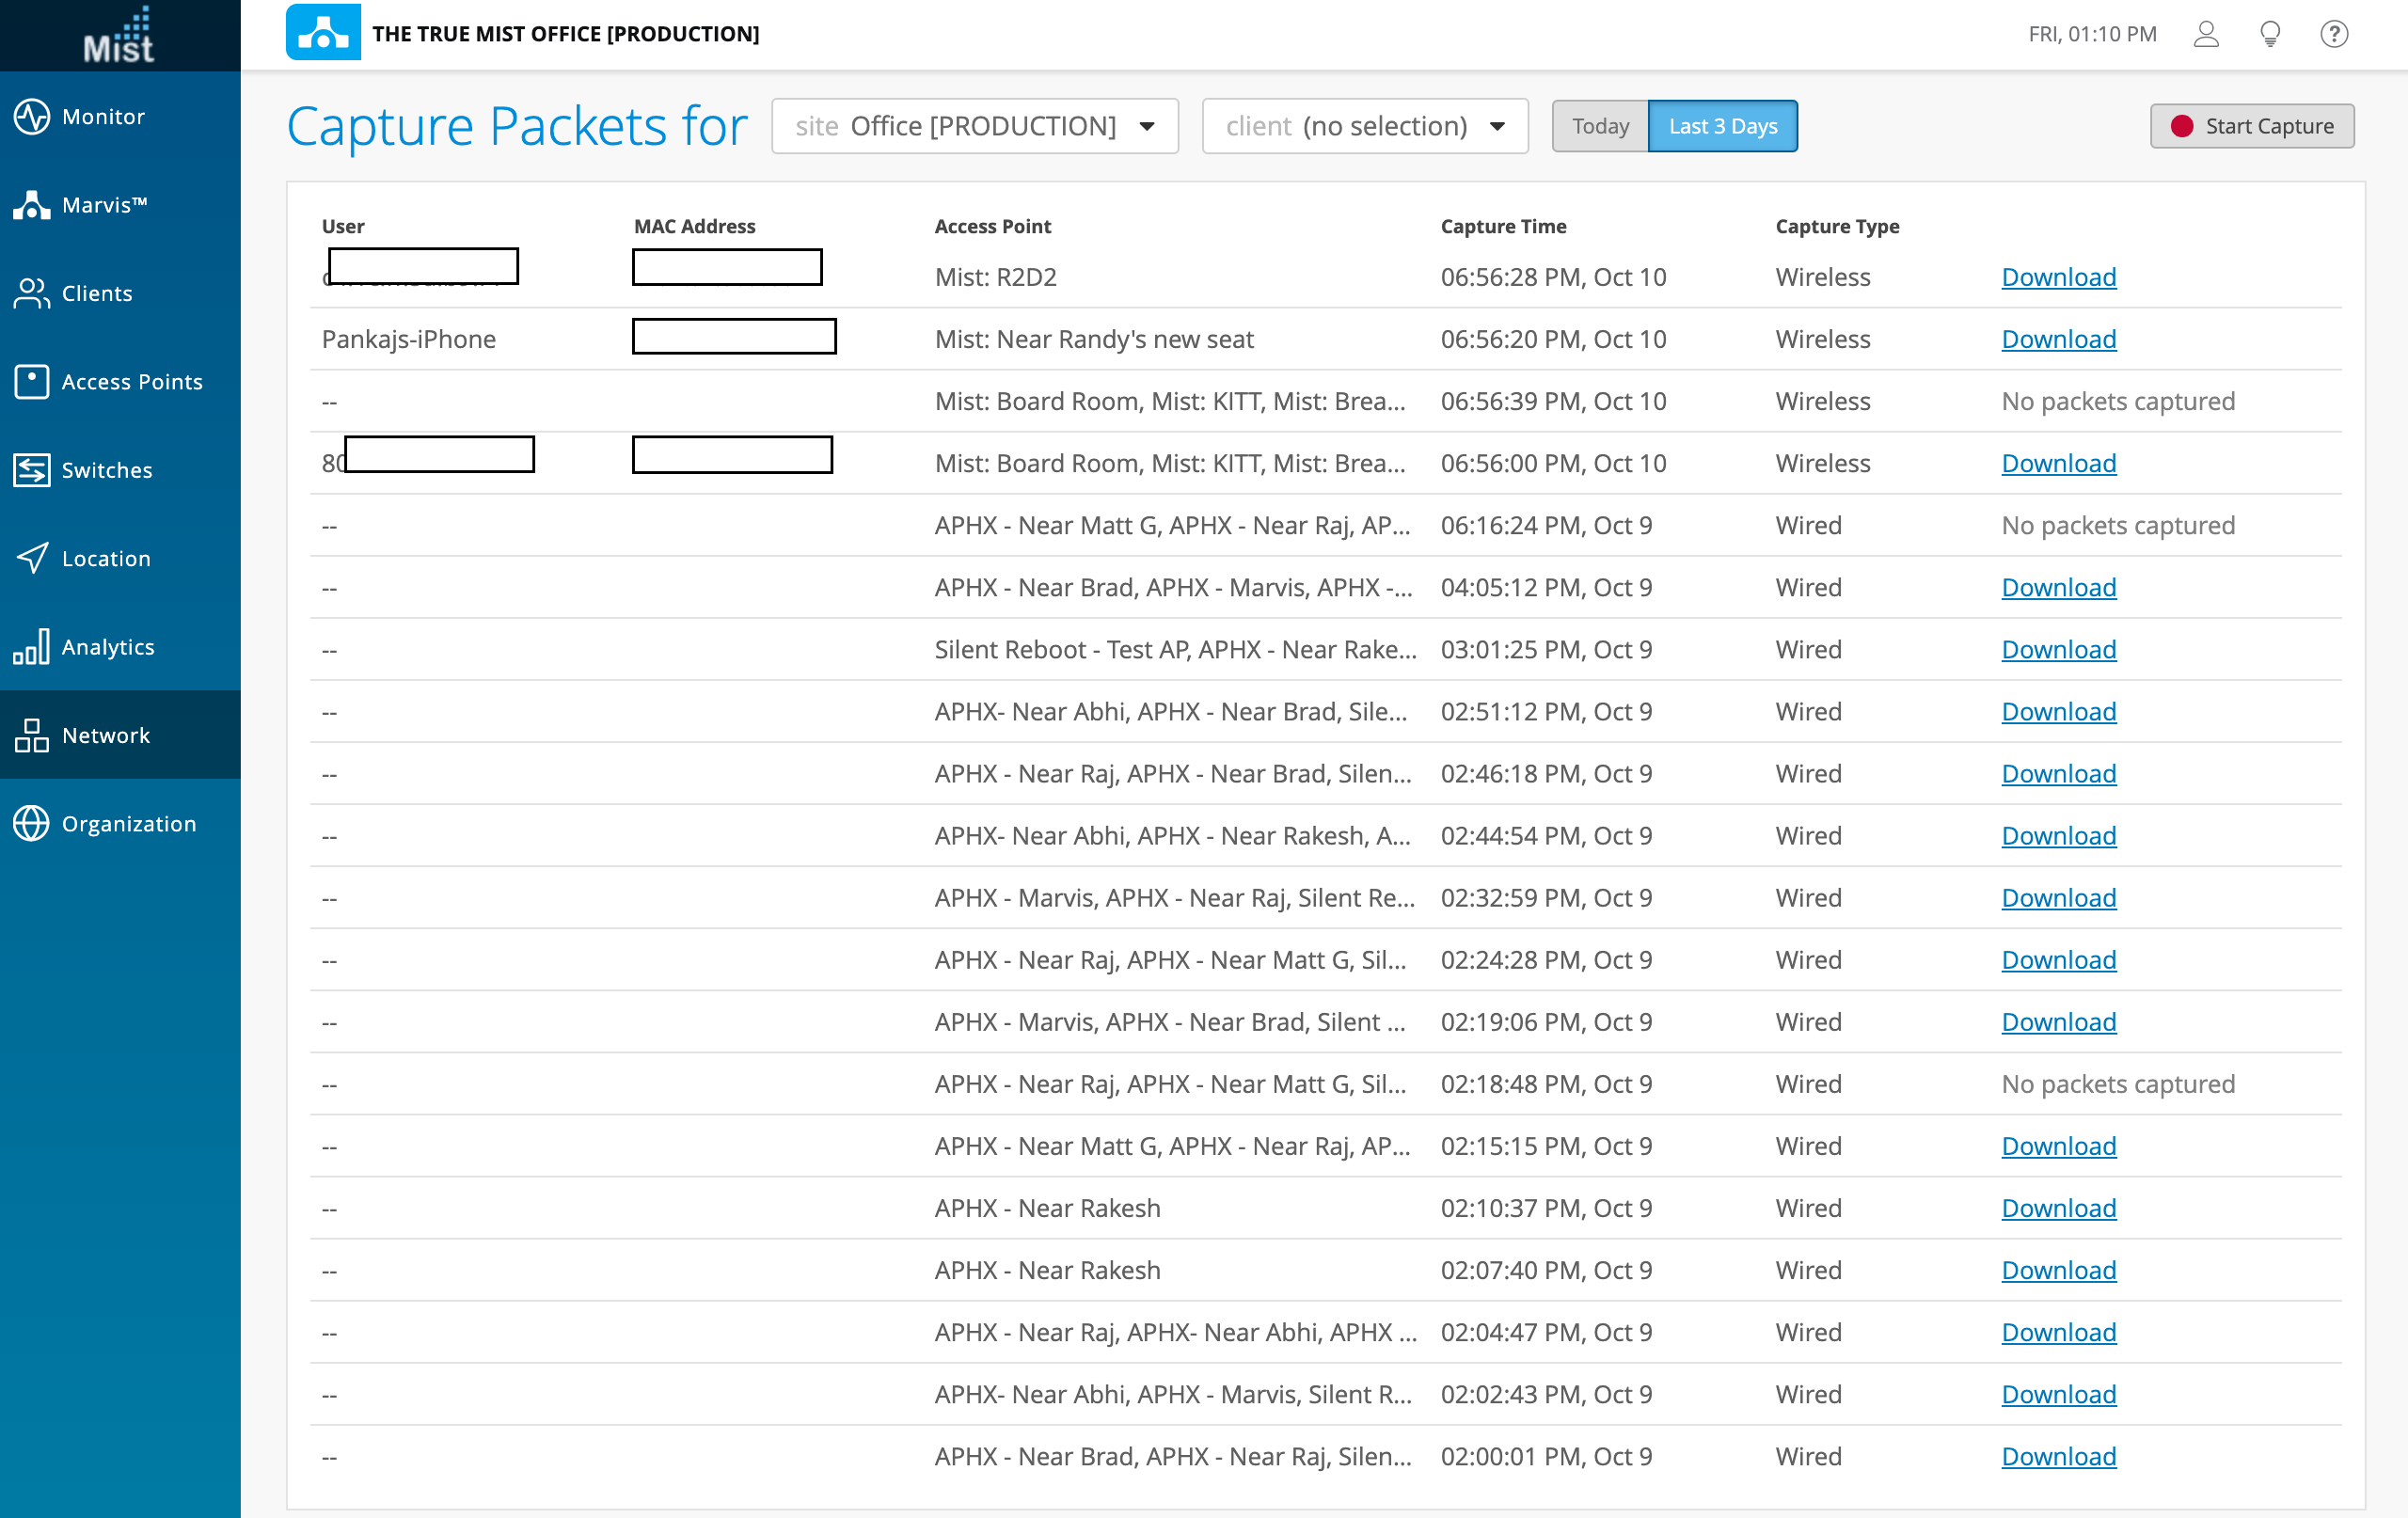
Select Start Capture and your packet capture will appear on this page in a list format for you to download and examine using Wireshark.
Please refer to this page to make sure your Wireshark client is set up to properly open PCAP files: https://www.mist.com/documentation/setting-wireshark-packet-captures/
Network Programmability
Guest WLAN Opt Out
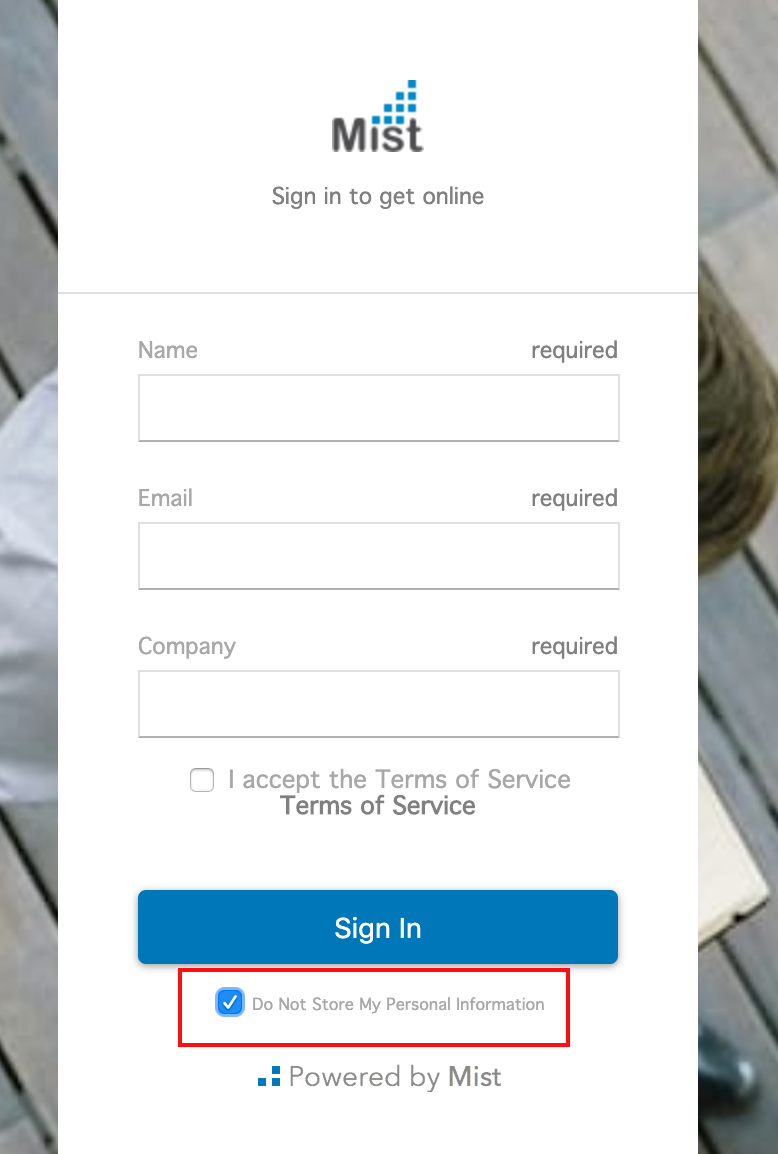
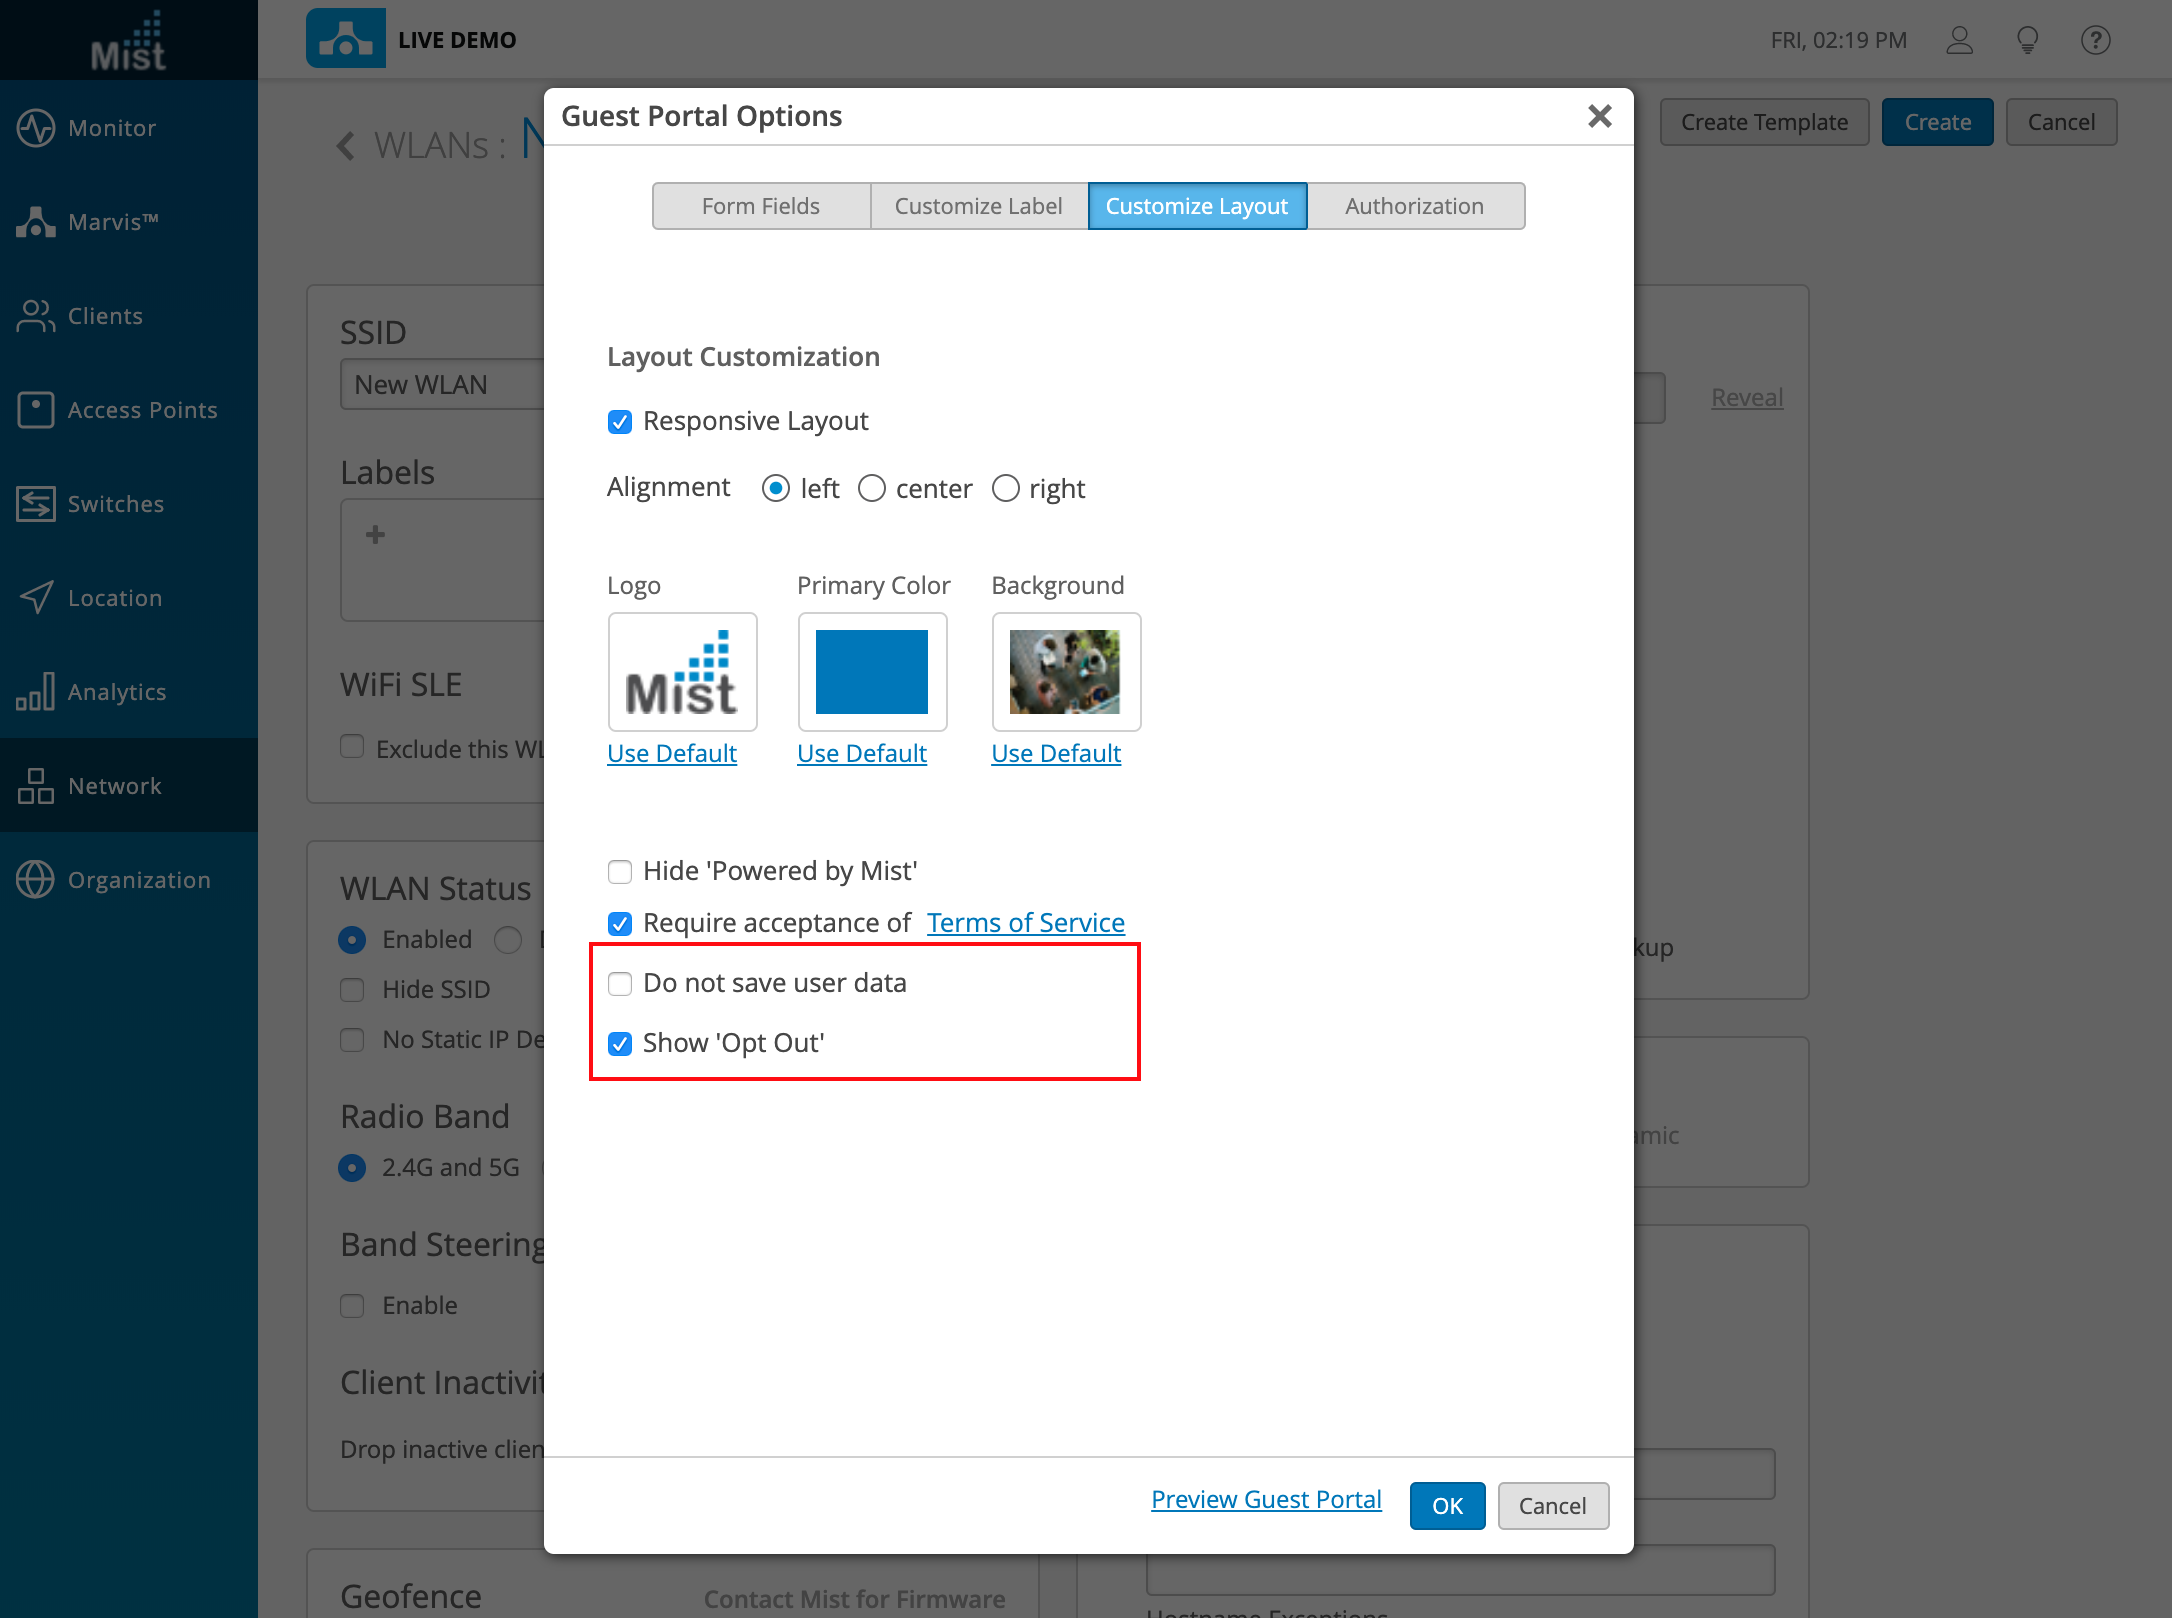
We are improving the customizability and privacy settings for our guest captive portal WLANs by including an option for guest users to opt out of sharing their data with the Mist cloud. When a guest portal WLAN is configured without the “Do not save user data” option enabled, you may instead select “Show Opt Out” which allows the users signing onto the WLAN to opt out of sharing data themselves. For users who do not have an issue with sharing data, they can ignore the option and still use the portal normally.
Create a guest portal WLAN by navigating to Network > WLANS. When configuring your portal, select Show ‘Opt Out’ in the Customize Layout tab.
From a user side, when logging onto the guest network, they will now have the option to select Do Not Store My Personal Information