Switch Functionality
Testing Tools and Reboot
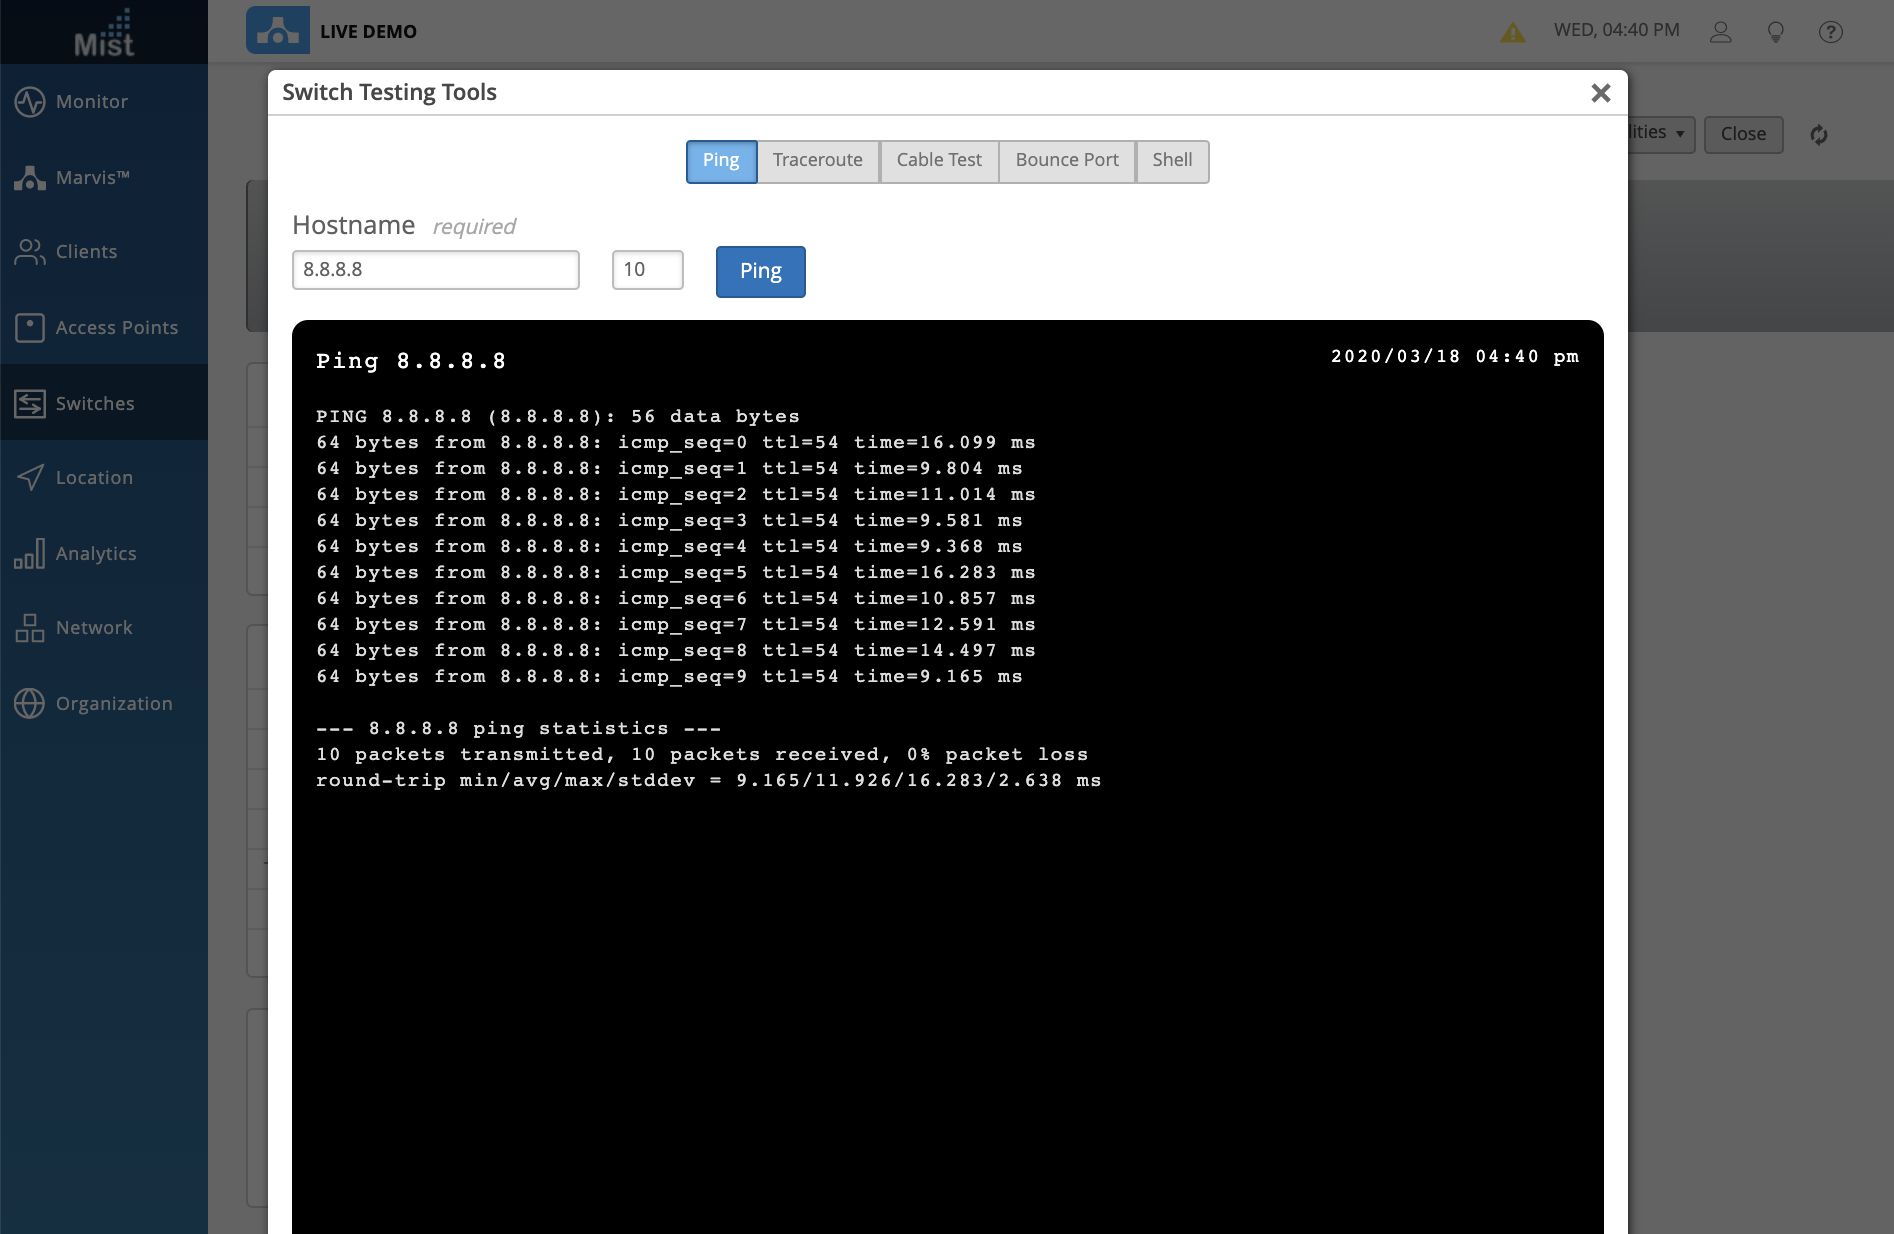
We are excited to bring Testing Tools and Reboot functionality to our Switches page! For certain supported models of Juniper switches which are adopted to your site, we now have the ability to perform tests to monitor switch health directly from our Mist dashboard. Similar to our AP Testing tools in the AP Details page, the Switch Testing Tools also allow you to run Ping and Traceroute (both UDP and ICMP) tests from your switch. Just provide your desired hostname, and run the test:
Ping
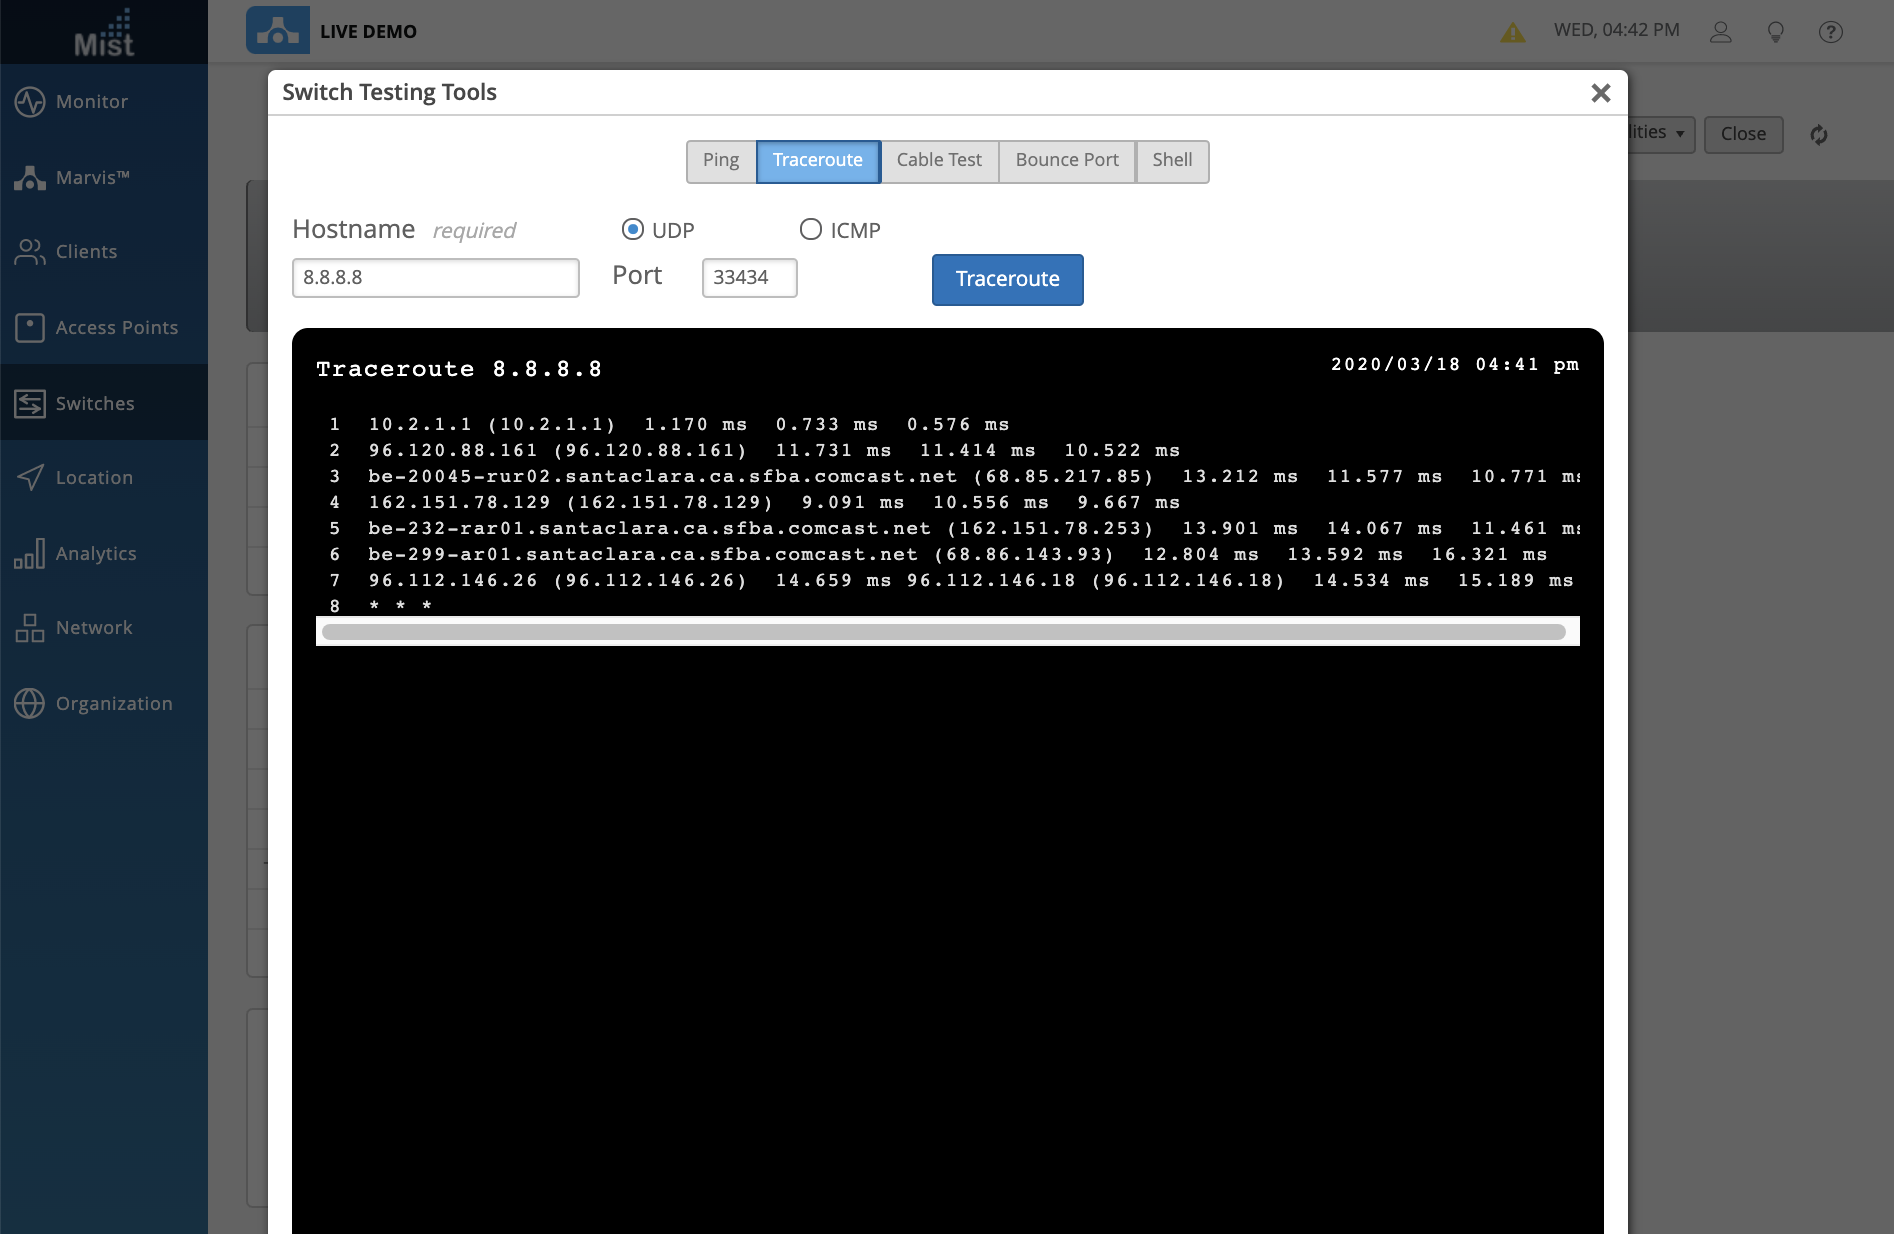
Traceroute
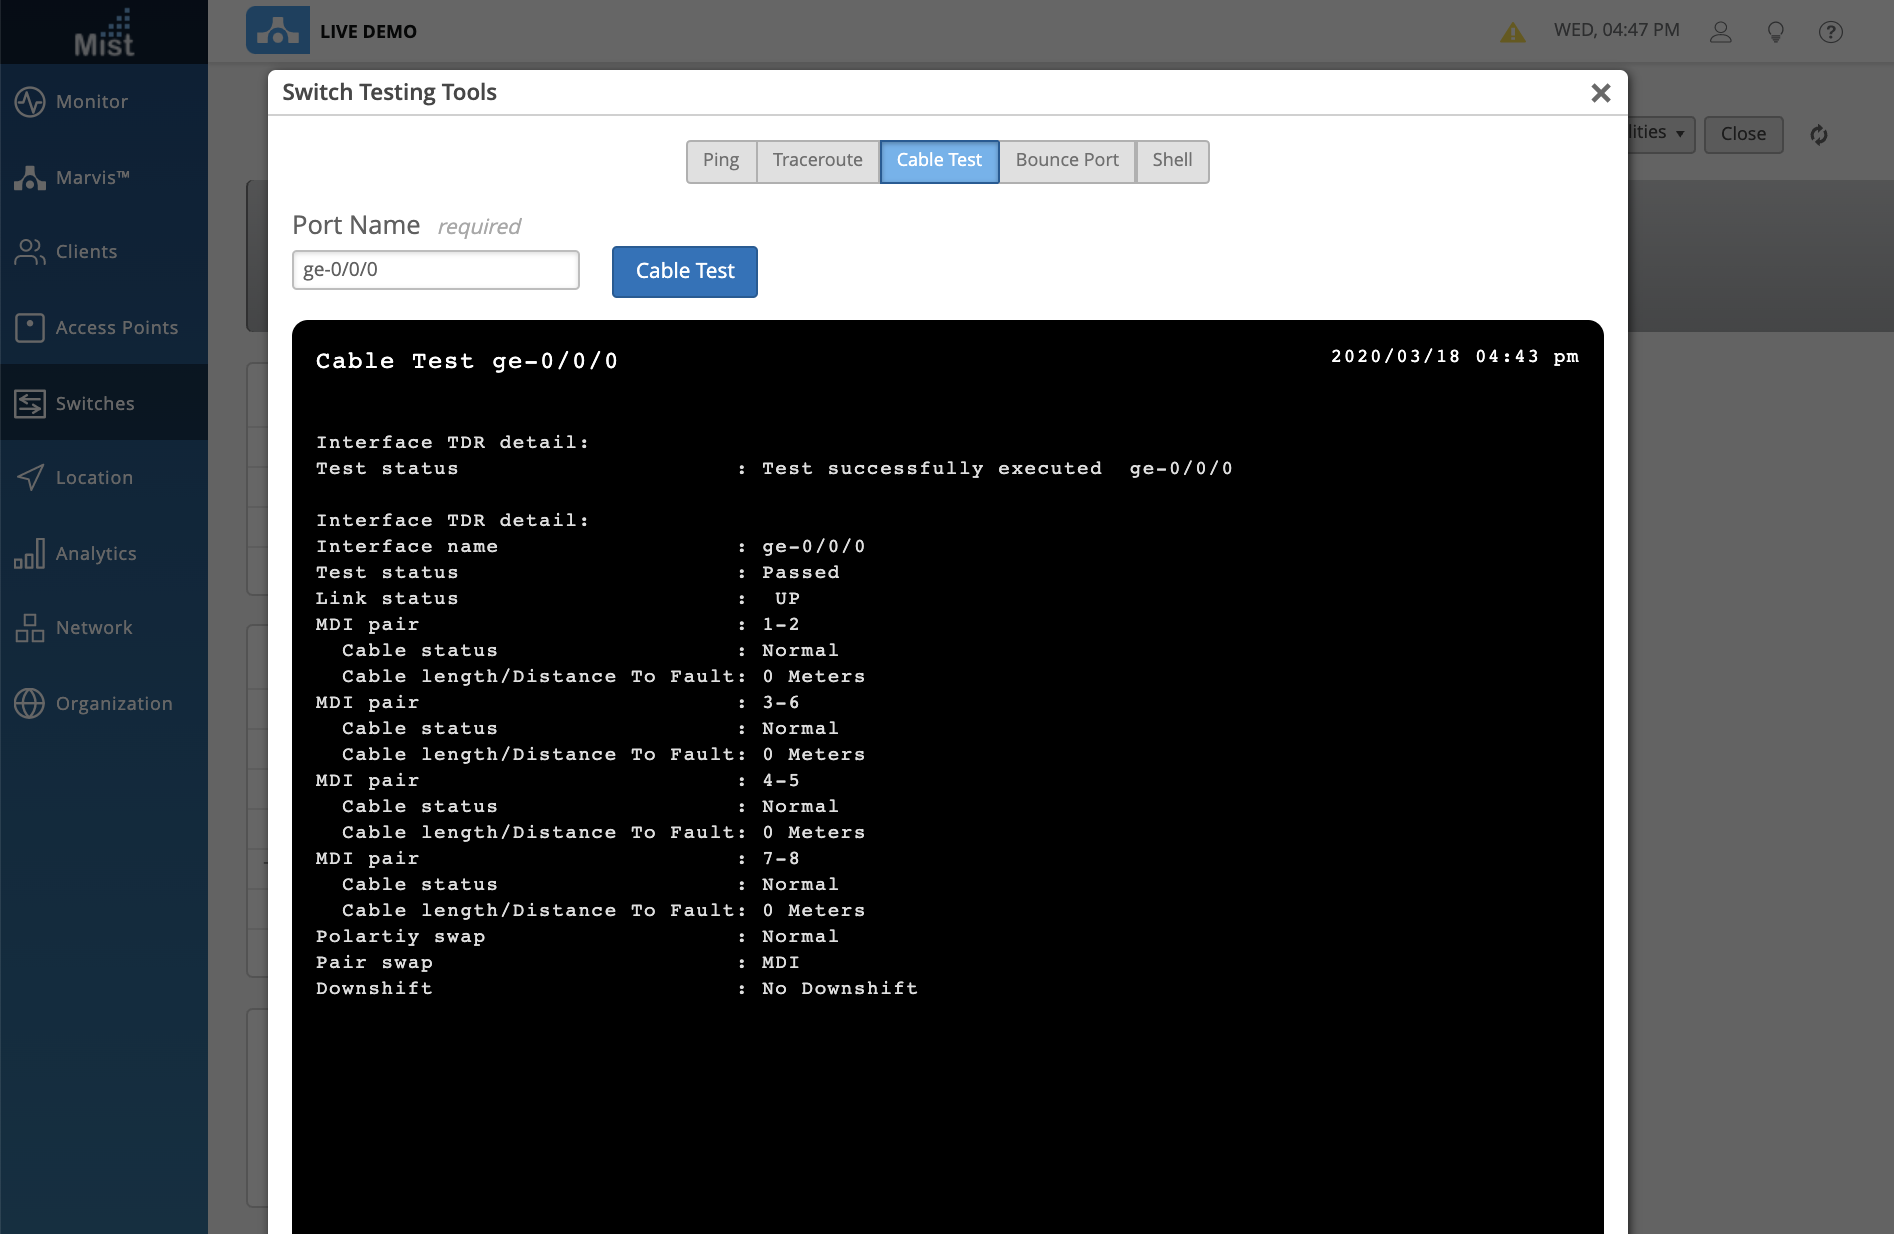
In addition to Ping and Traceroute, Switch Testing Tools can also run a Cable Test on the port provided. Use this to monitor the connection health of the cable on your specified port:
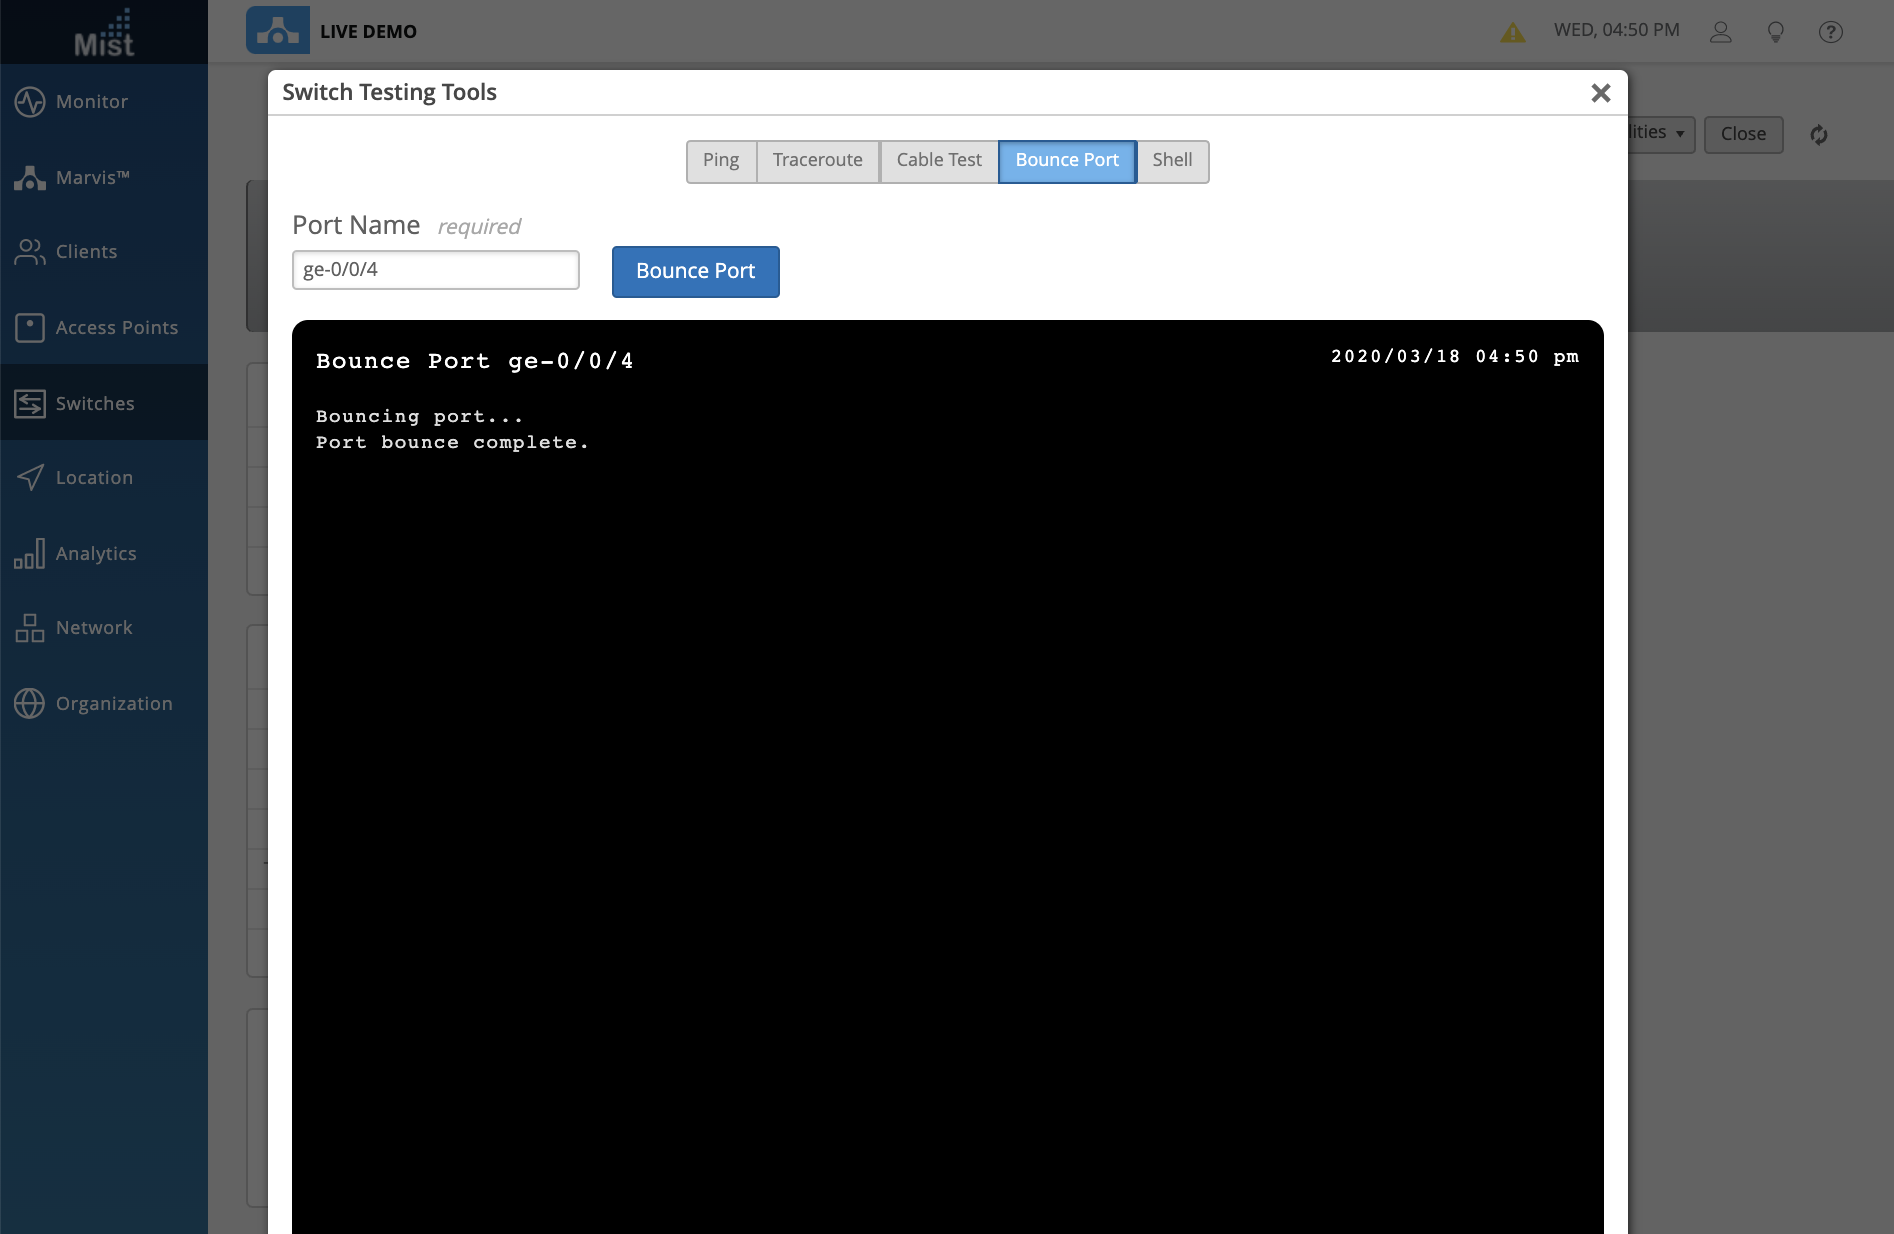
Use the Bounce Port tool to restart any unresponsive ports on your switch:
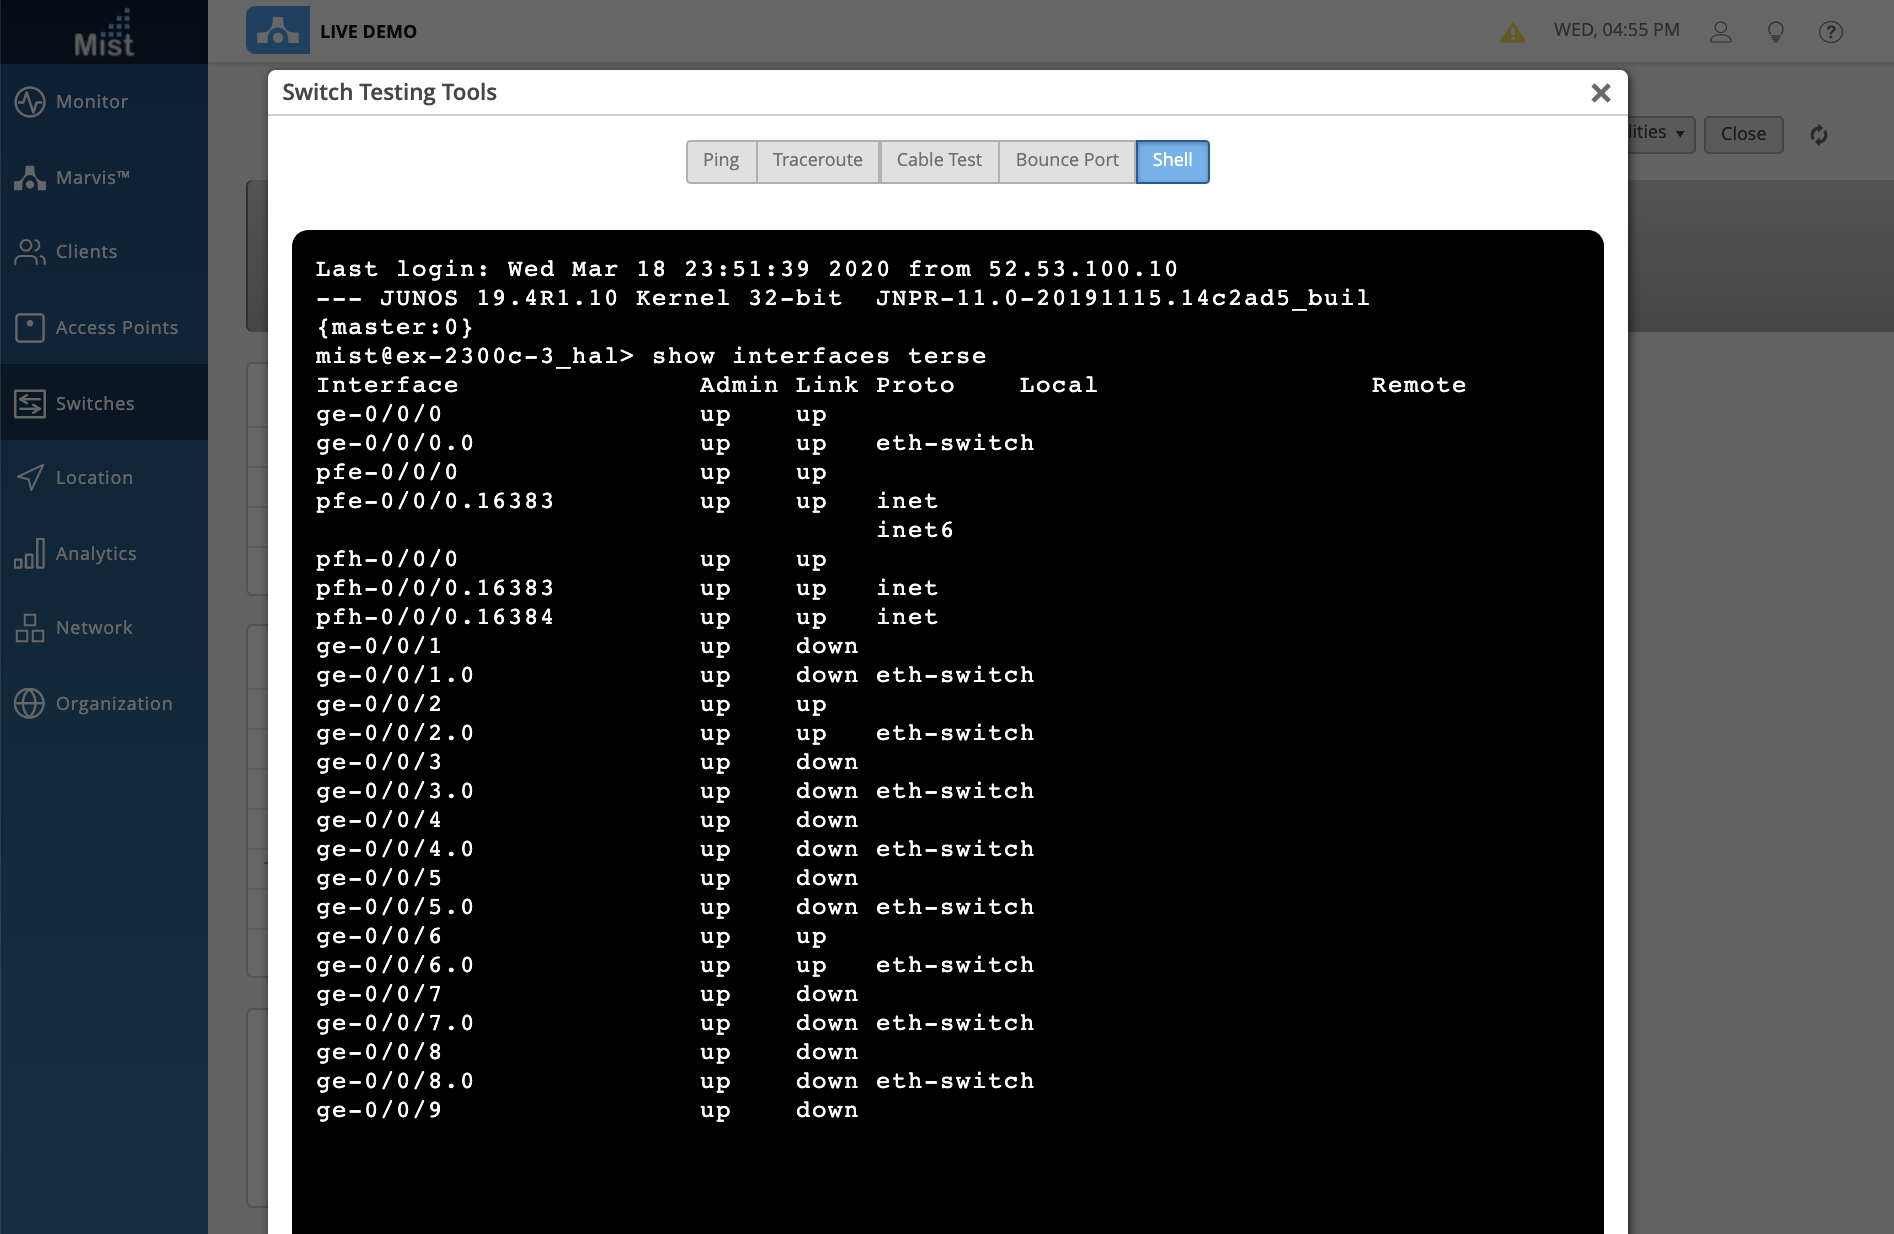
The Shell tool lets you type any commands on the CLI of the switch without physically connecting a console cable or using SSH to access the switch. Access the command line directly through the Mist Dashboard! Use this to run any other commands needed that aren’t provided by a shortcut on the Switch Testing Tools page. Here we are checking the “show interfaces terse” command:
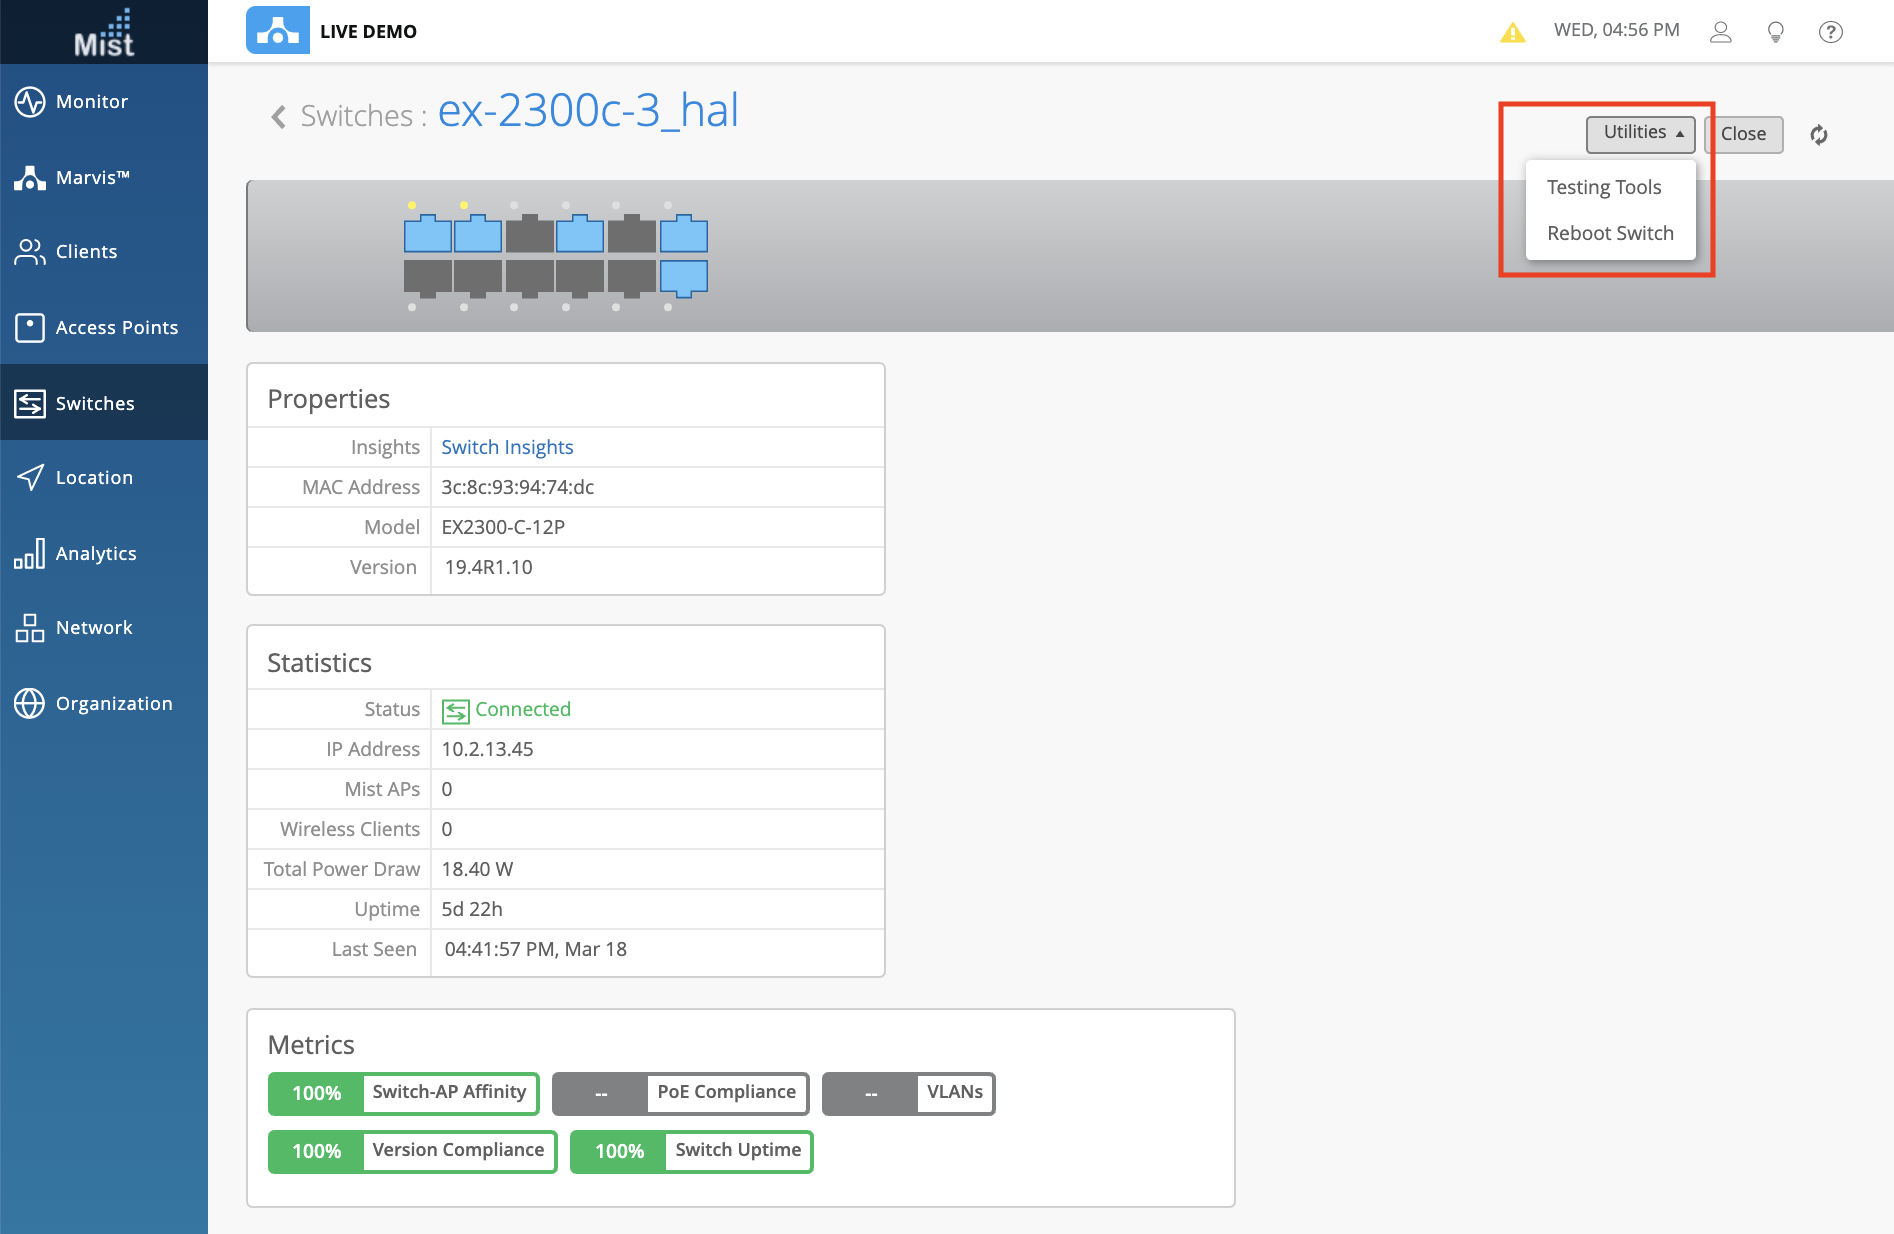
Lastly, if you just need to reboot the entire switch you may do so by simply selecting the Reboot Switch button from the Utilities dropdown menu. With Juniper switches integrated directly into our Mist Dashboard, managing your network through the cloud has never been easier.
Access these switch testing tools by navigating to the Switches tab and selecting an adopted switch to see the Switch Details page. Select the Utilities dropdown and open up Testing Tools:
Here is the list of Juniper switch models that are currently compatible with adoption onto the Mist dashboard:
EX2300-C-12P
EX2300-48P
EX2300-24P
EX3400-48P
EX4300-48P
EX4300-48T
EX4600-40F
SRX320-POE
Action Dashboard
DHCP Events
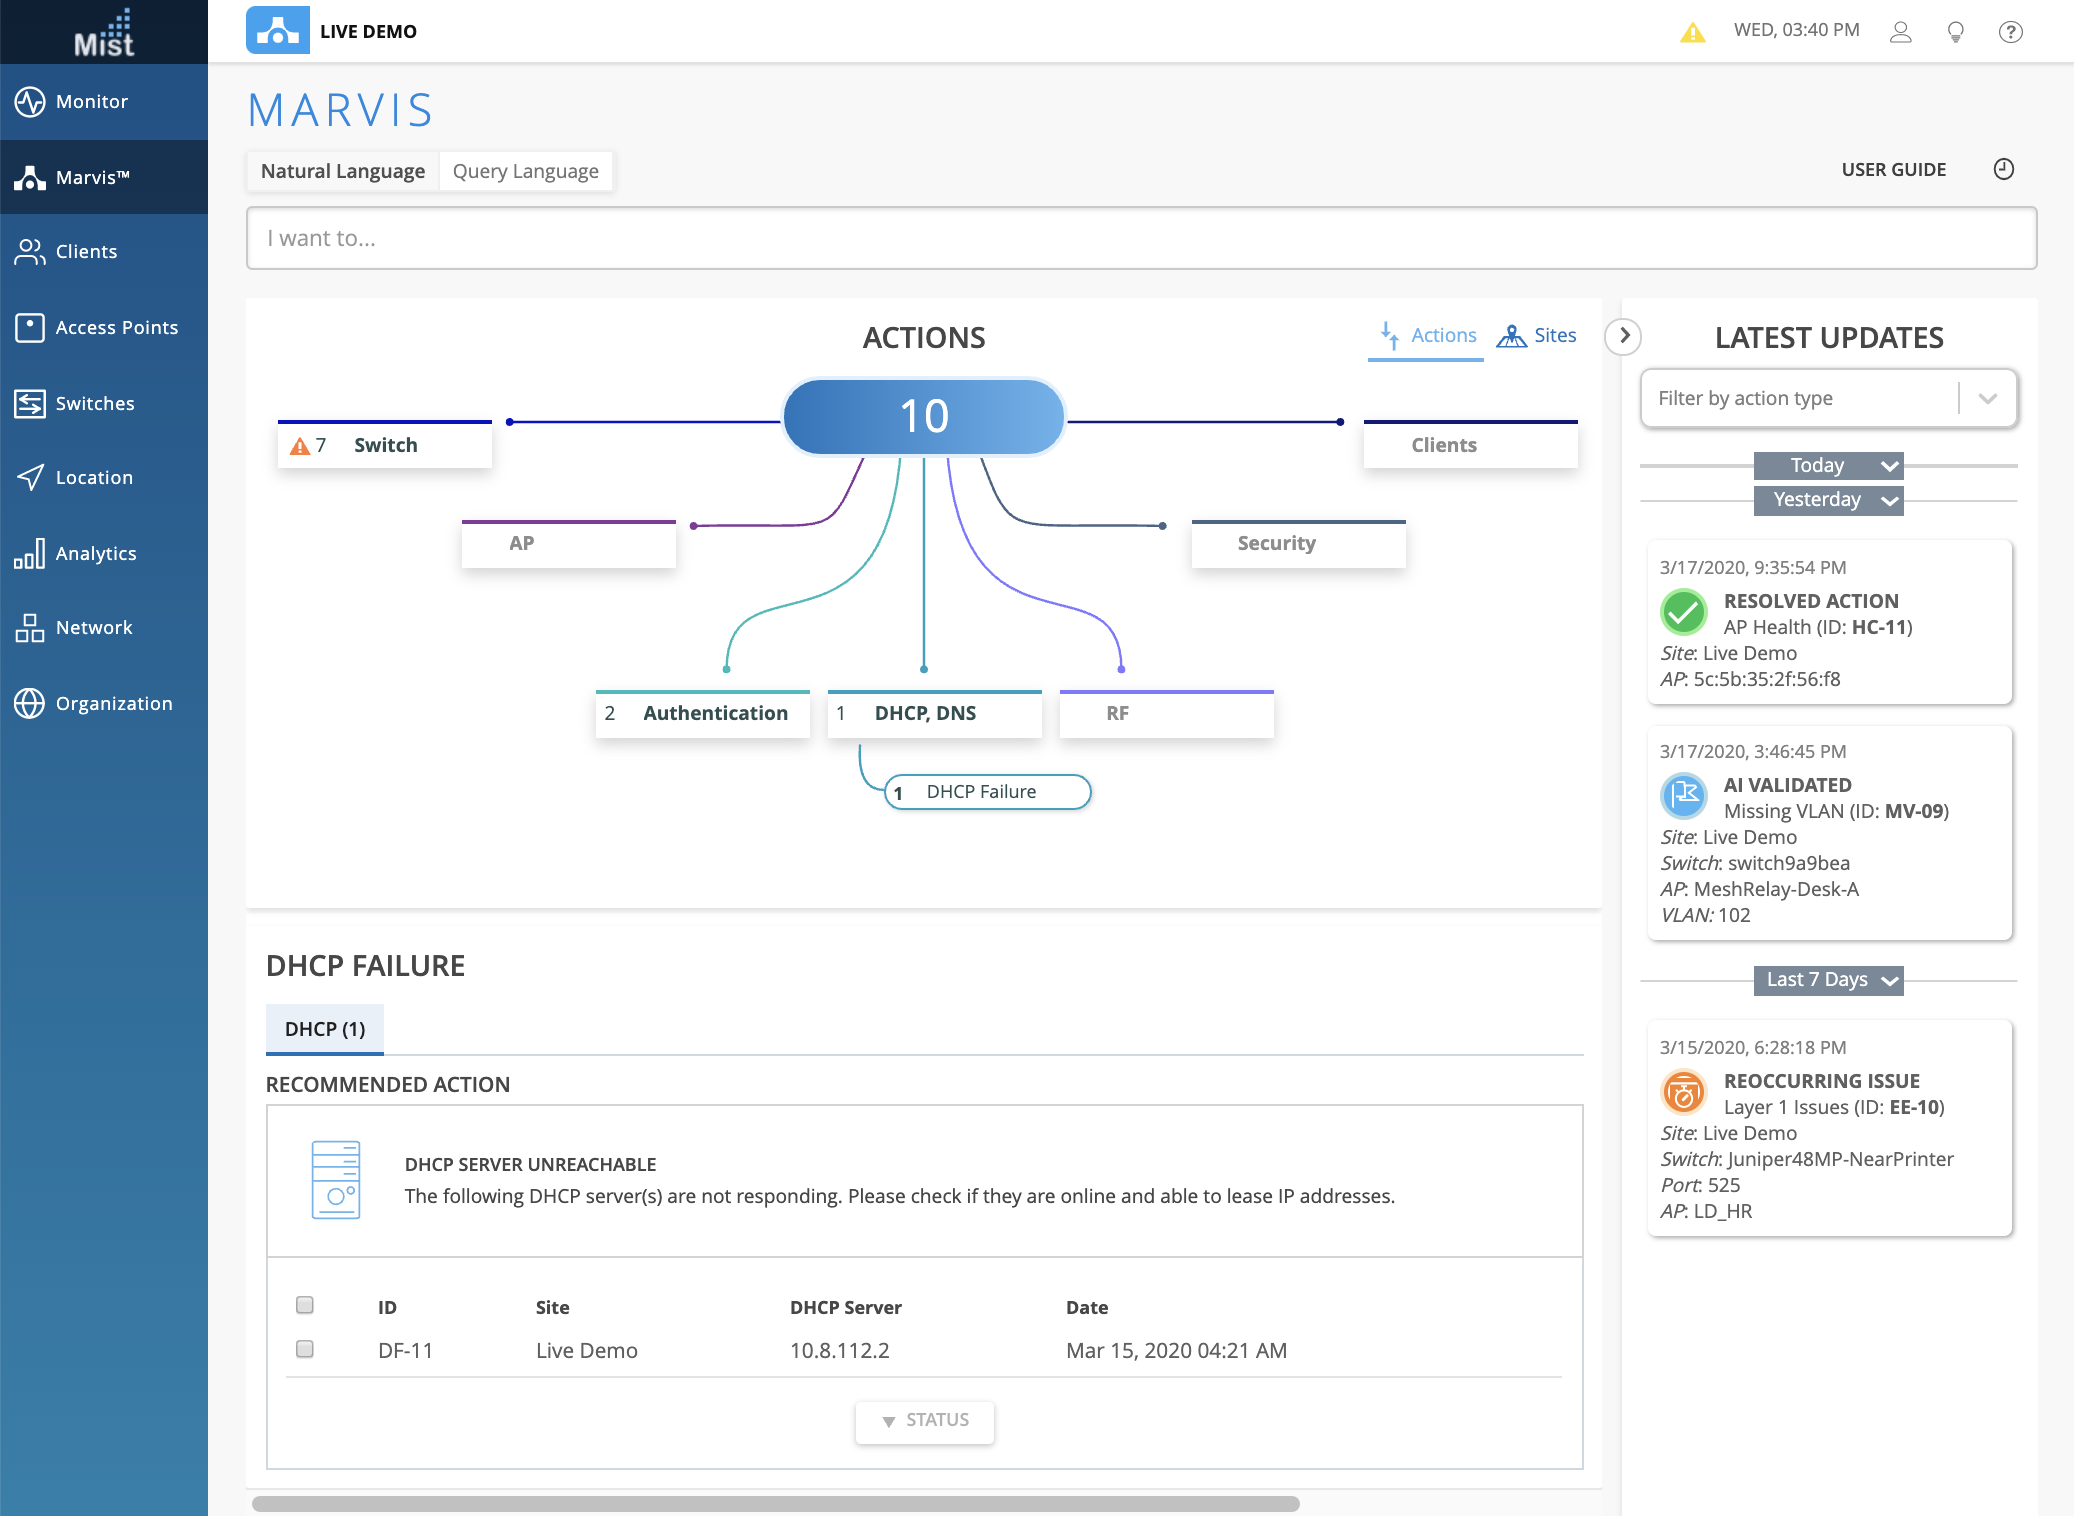
We are constantly adding new features and functionalities to our Marvis Action Dashboard to help improve your user experience with the page. Now we can detect DHCP failures found on your sites caused by offline or unresponsive DHCP servers. In the Action Dashboard we will expose the specific DHCP servers causing issues for you to quickly troubleshoot and resolve the problem on your network.
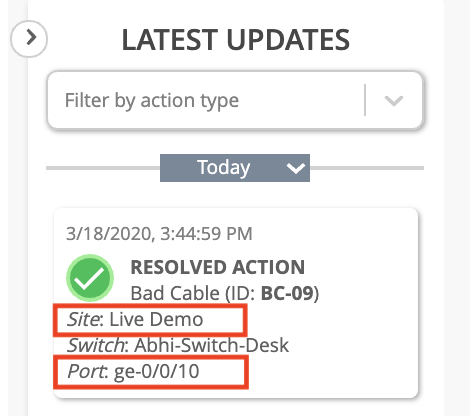
Bug Fixes/Improvements
This week we fixed some minor UI bugs and made some improvements in the Latest Updates Column of the Marvis Action Dashboard page. The site name is now shown, instead of the site ID for the resolved actions. Also, for actions involving bad cable, we will now display the port information where the bad cable event occurred.
Simplified Operations
Edit and Add AP Notes
AP Notes were first introduced as an easy way to mark and label APs straight from our Mist AI mobile app. Now this feature is fully functional on the Mist Dashboard. You are no longer limited to only viewing notes made on the Mist AI app. Instead, you can now add and edit notes from the web interface as well. Use this handy feature to keep track of all your APs on your sites.
Click into the Details Page of an AP from the AP List view to edit your AP Notes.

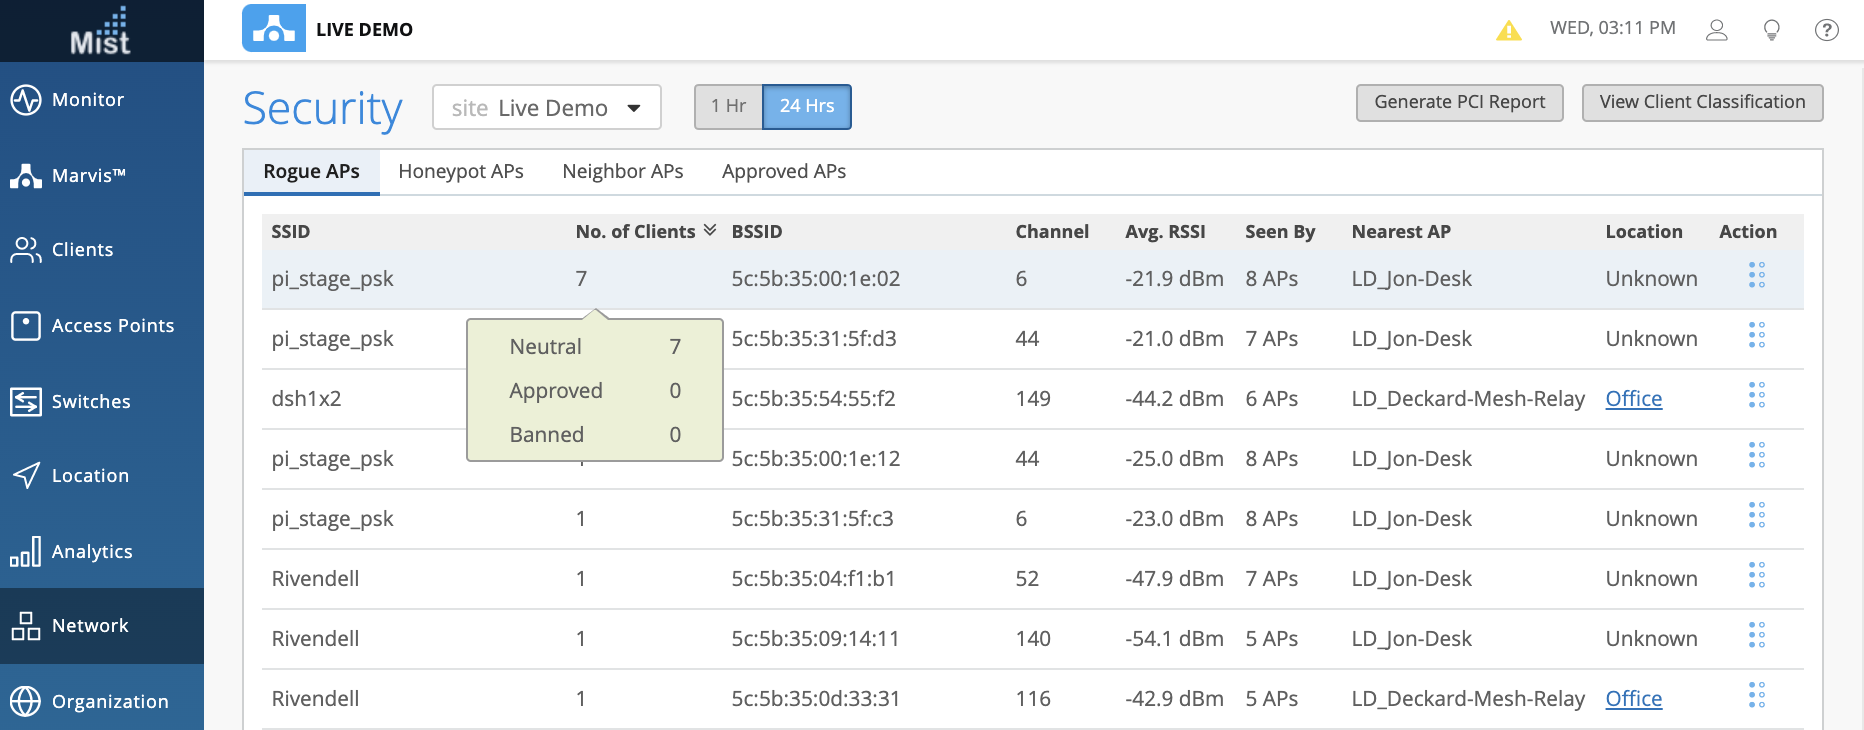
Renaming the Client Classifications
As a part of our Rogue Client Detection, we allow you to label and classify certain clients as “sanctioned,” “unsanctioned,” and “watched” to assist in identifying and labeling potential threats to your network. This week we are renaming these client classifications as follows:
| Old Classification | New Classification |
| Sanctioned | Approved |
| Unsanctioned | Neutral |
| Watched | Banned |
Learn more about WIPS Security and Client classification here: https://www.mist.com/documentation/rogue-clients-detection/
To see your Rogue clients, navigate to Network > Security
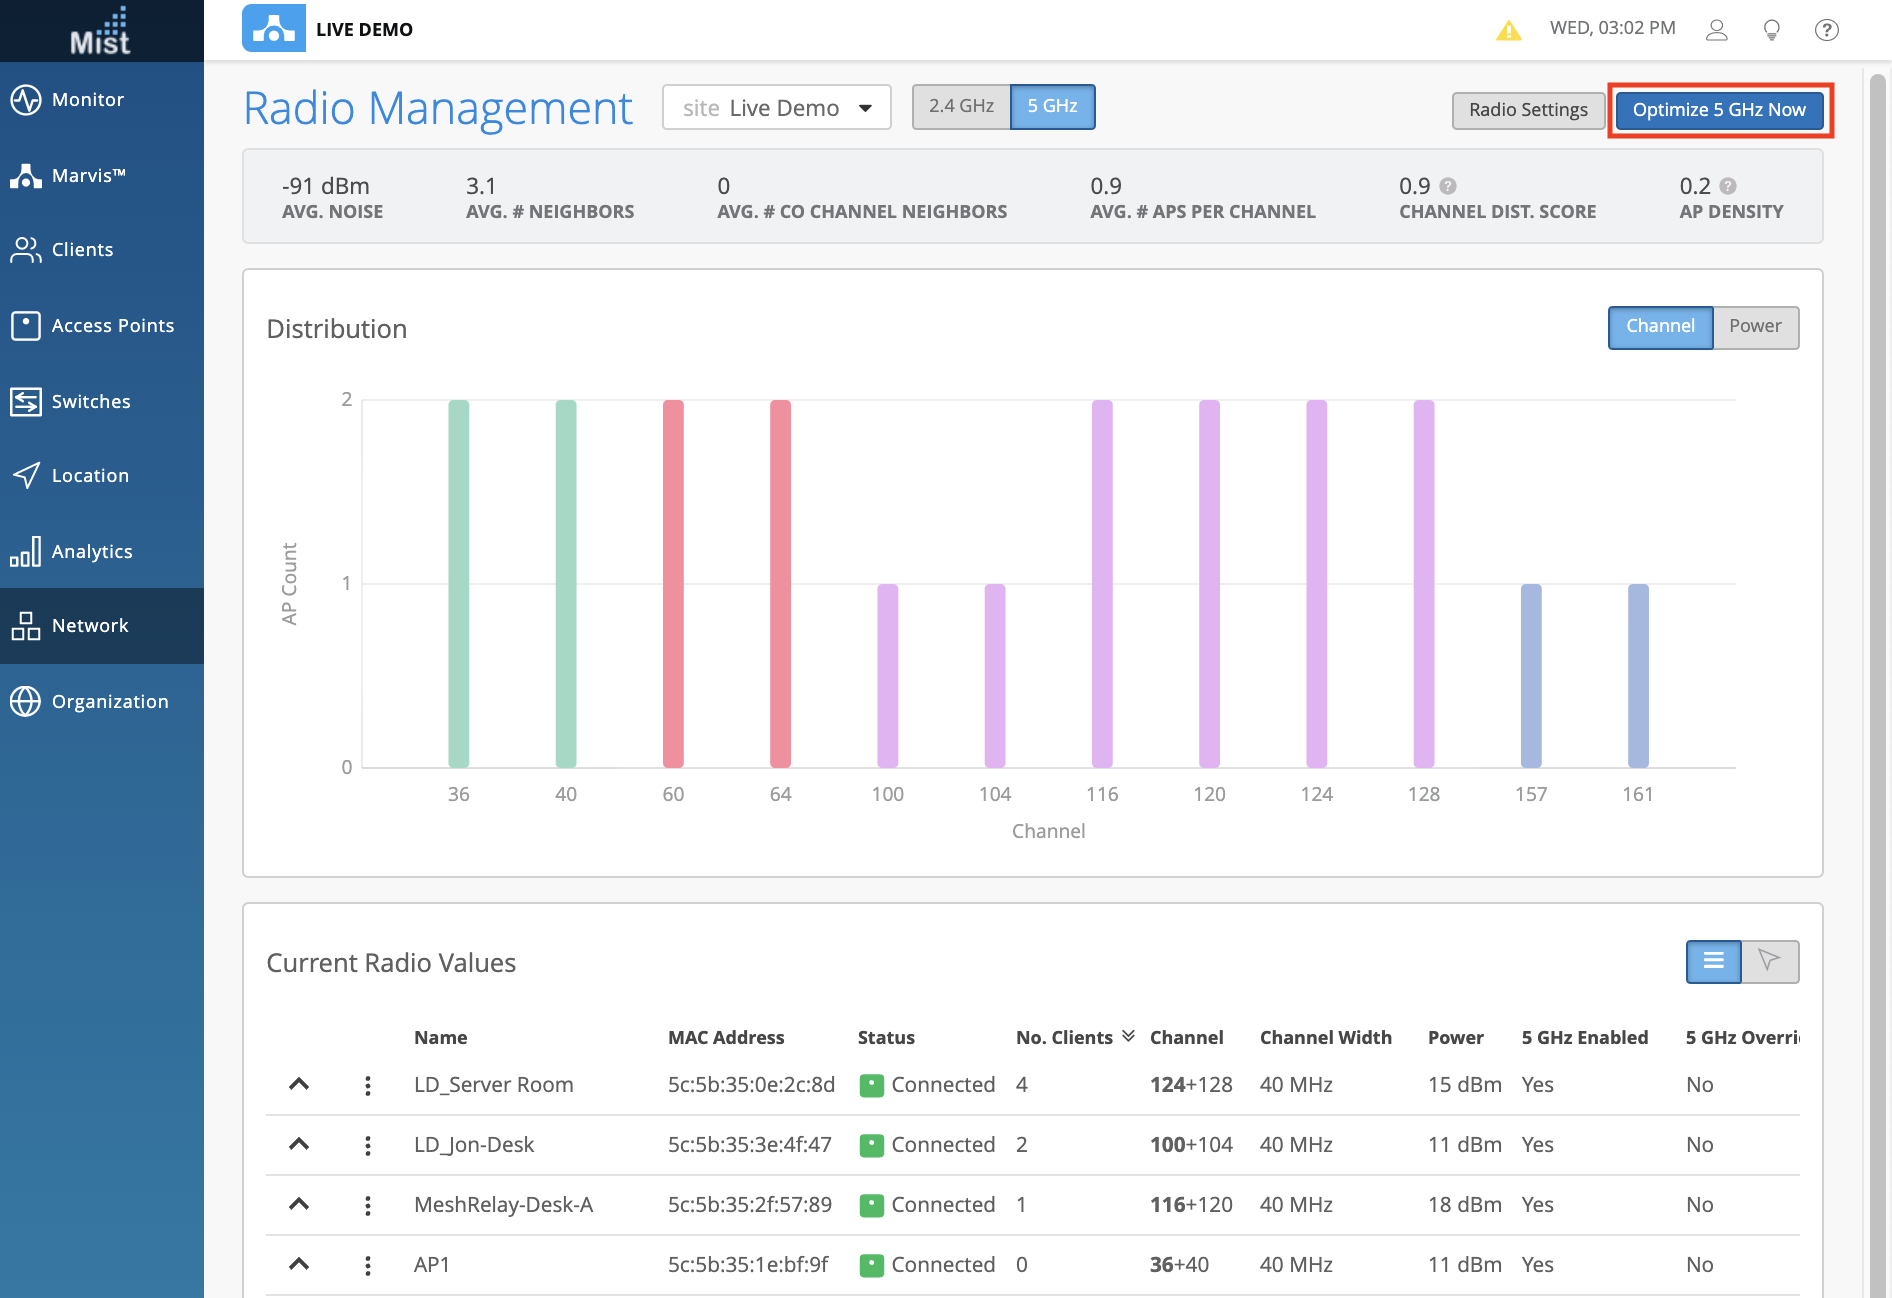
RRM Optimize Now Button
To make things more clear, we have included the specific radio band on our Optimize Now button in the Radio Management page. Clicking the optimize now button will trigger any channel, power, or channel width changes to your APs to optimize performance and minimize interference on your network. Now it is clearly labeled for which radio band you are choosing to optimize.
Learn more about our Radio Management functions in this section of our documentation: https://www.mist.com/documentation/category/rrm-and-rf-config/