Simplified Operations
Network Security Enhancements
Rogue Clients Detection
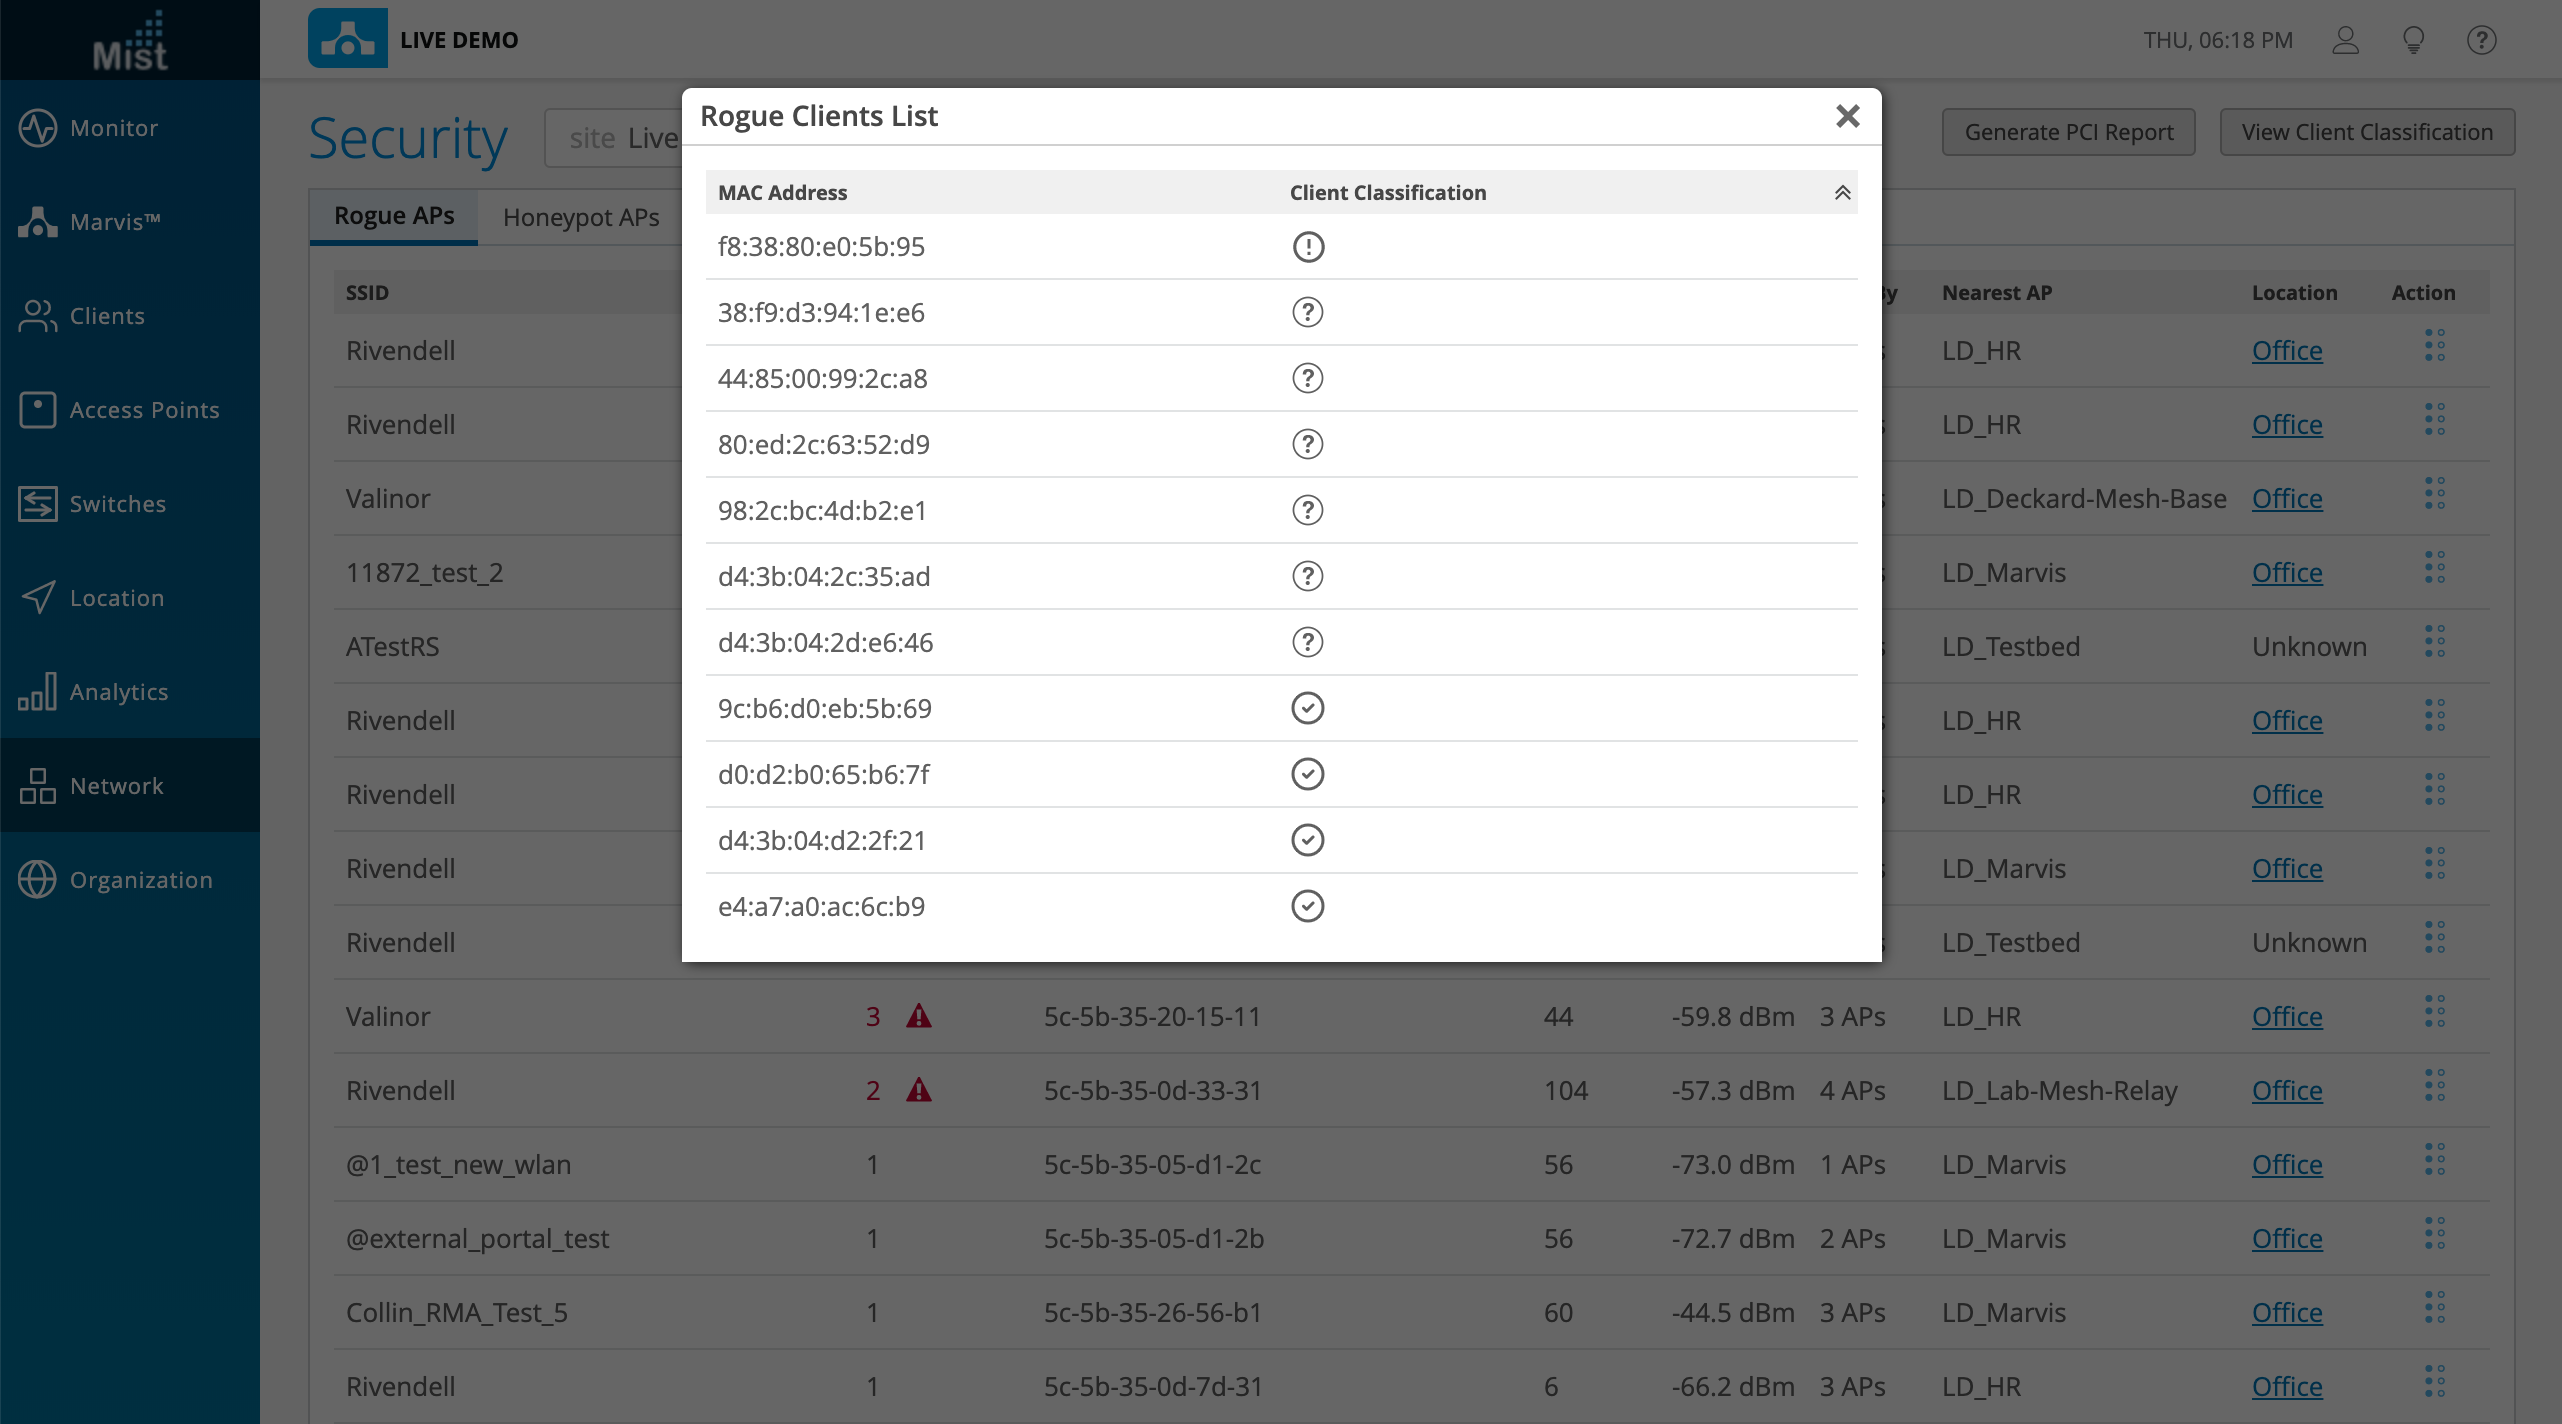
Rogue APs are any APs that share your same wired network, but are unknown to your Organization. Clients connected to any of the Rogue APs are defined as Rogue Clients. To view detected Rogue APs, navigate to Network > Security and select the Rogue APs tab. Click on any of the SSIDs to see a list of Rogue clients connected.
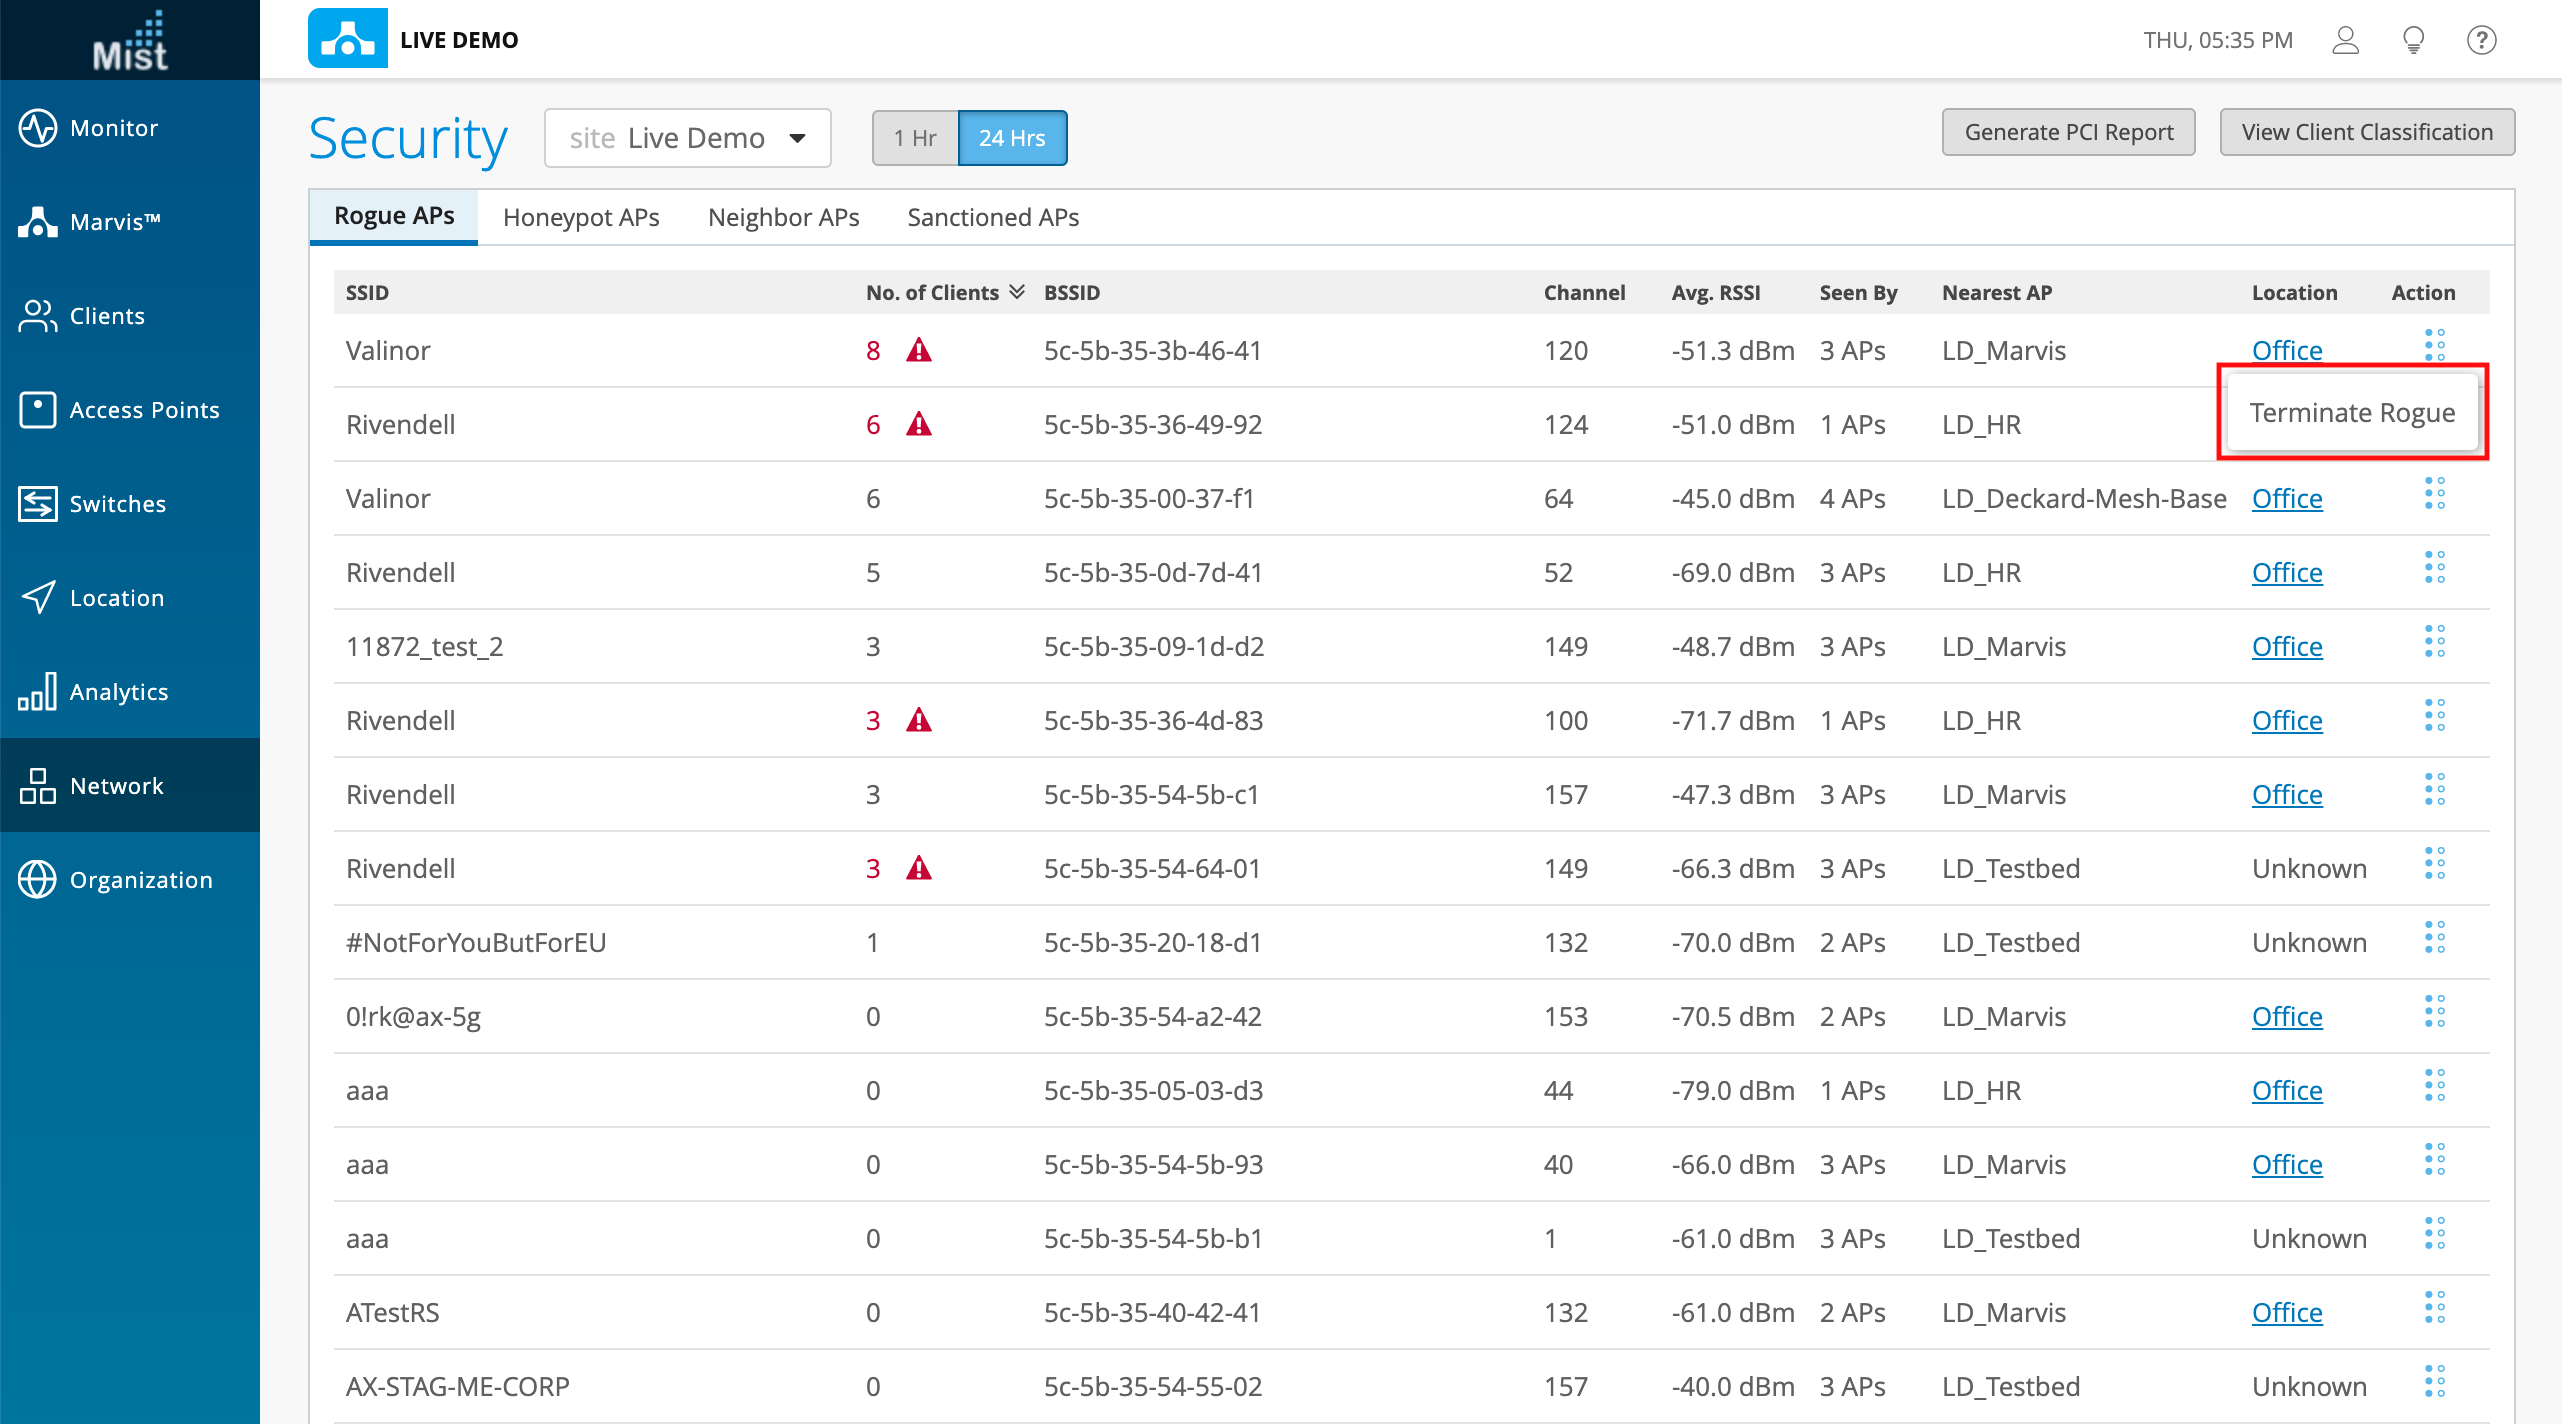
We provide the ability to terminate Rogue devices as a security measure for your own network. Any client connected to the selected Rogue AP will be kicked off their network when you select the Terminate Rogue command on the Rogue SSID. This is found in the Action column. Clicking on the dotted menu button will reveal the Terminate Rogue capability.
Please refer to this page for more information about Rogue, Neighbor, and Honeypot APs: https://www.mist.com/documentation/rogue-neighbor-honeypot-aps/
Client Classification
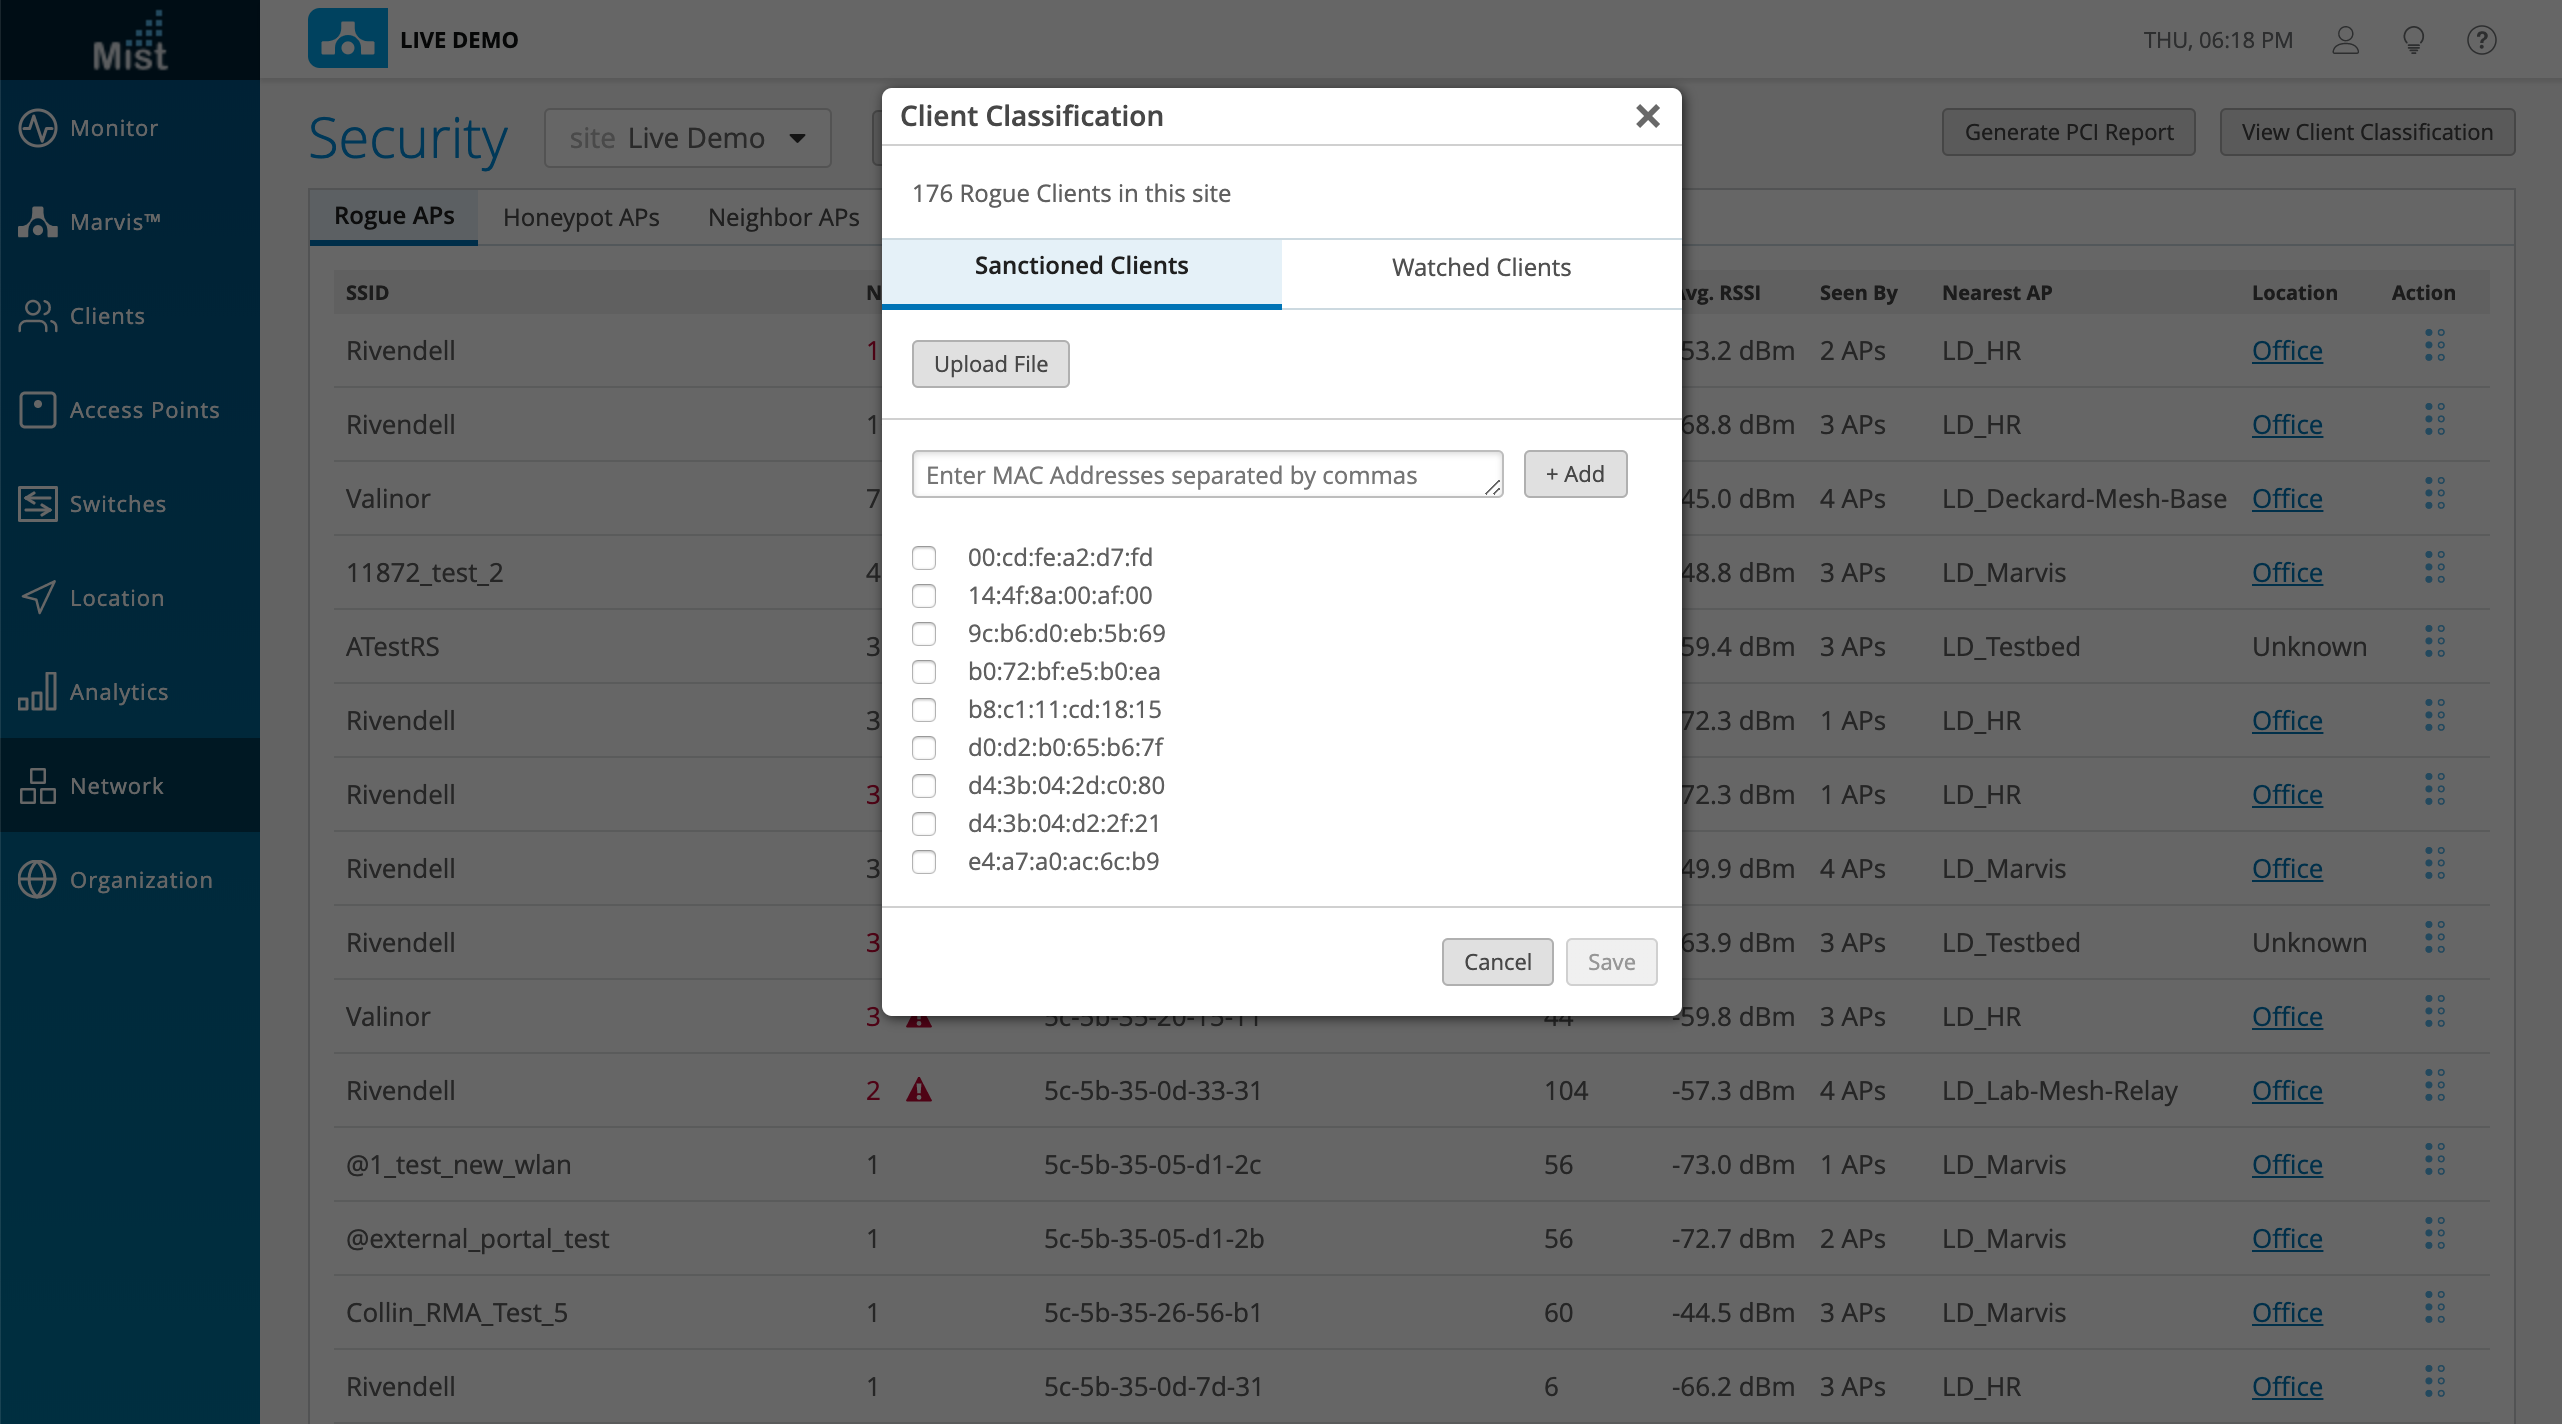
We are improving our network security functionality by including client classifications for better visibility for identifying threats to the network. Clients who you want to allowlist on your site can be labeled as sanctioned clients. Watched clients are the clients you wish to ban from your site. Clients which are sanctioned or watched are classified as unsanctioned.
To assign classifications to clients, navigate to Network > Security and select the View Client Classification button on the top right corner. Here, you may add the MAC addresses of clients you wish to either sanction or watch. Either type out manually (comma separated), or upload a CSV file of your list.
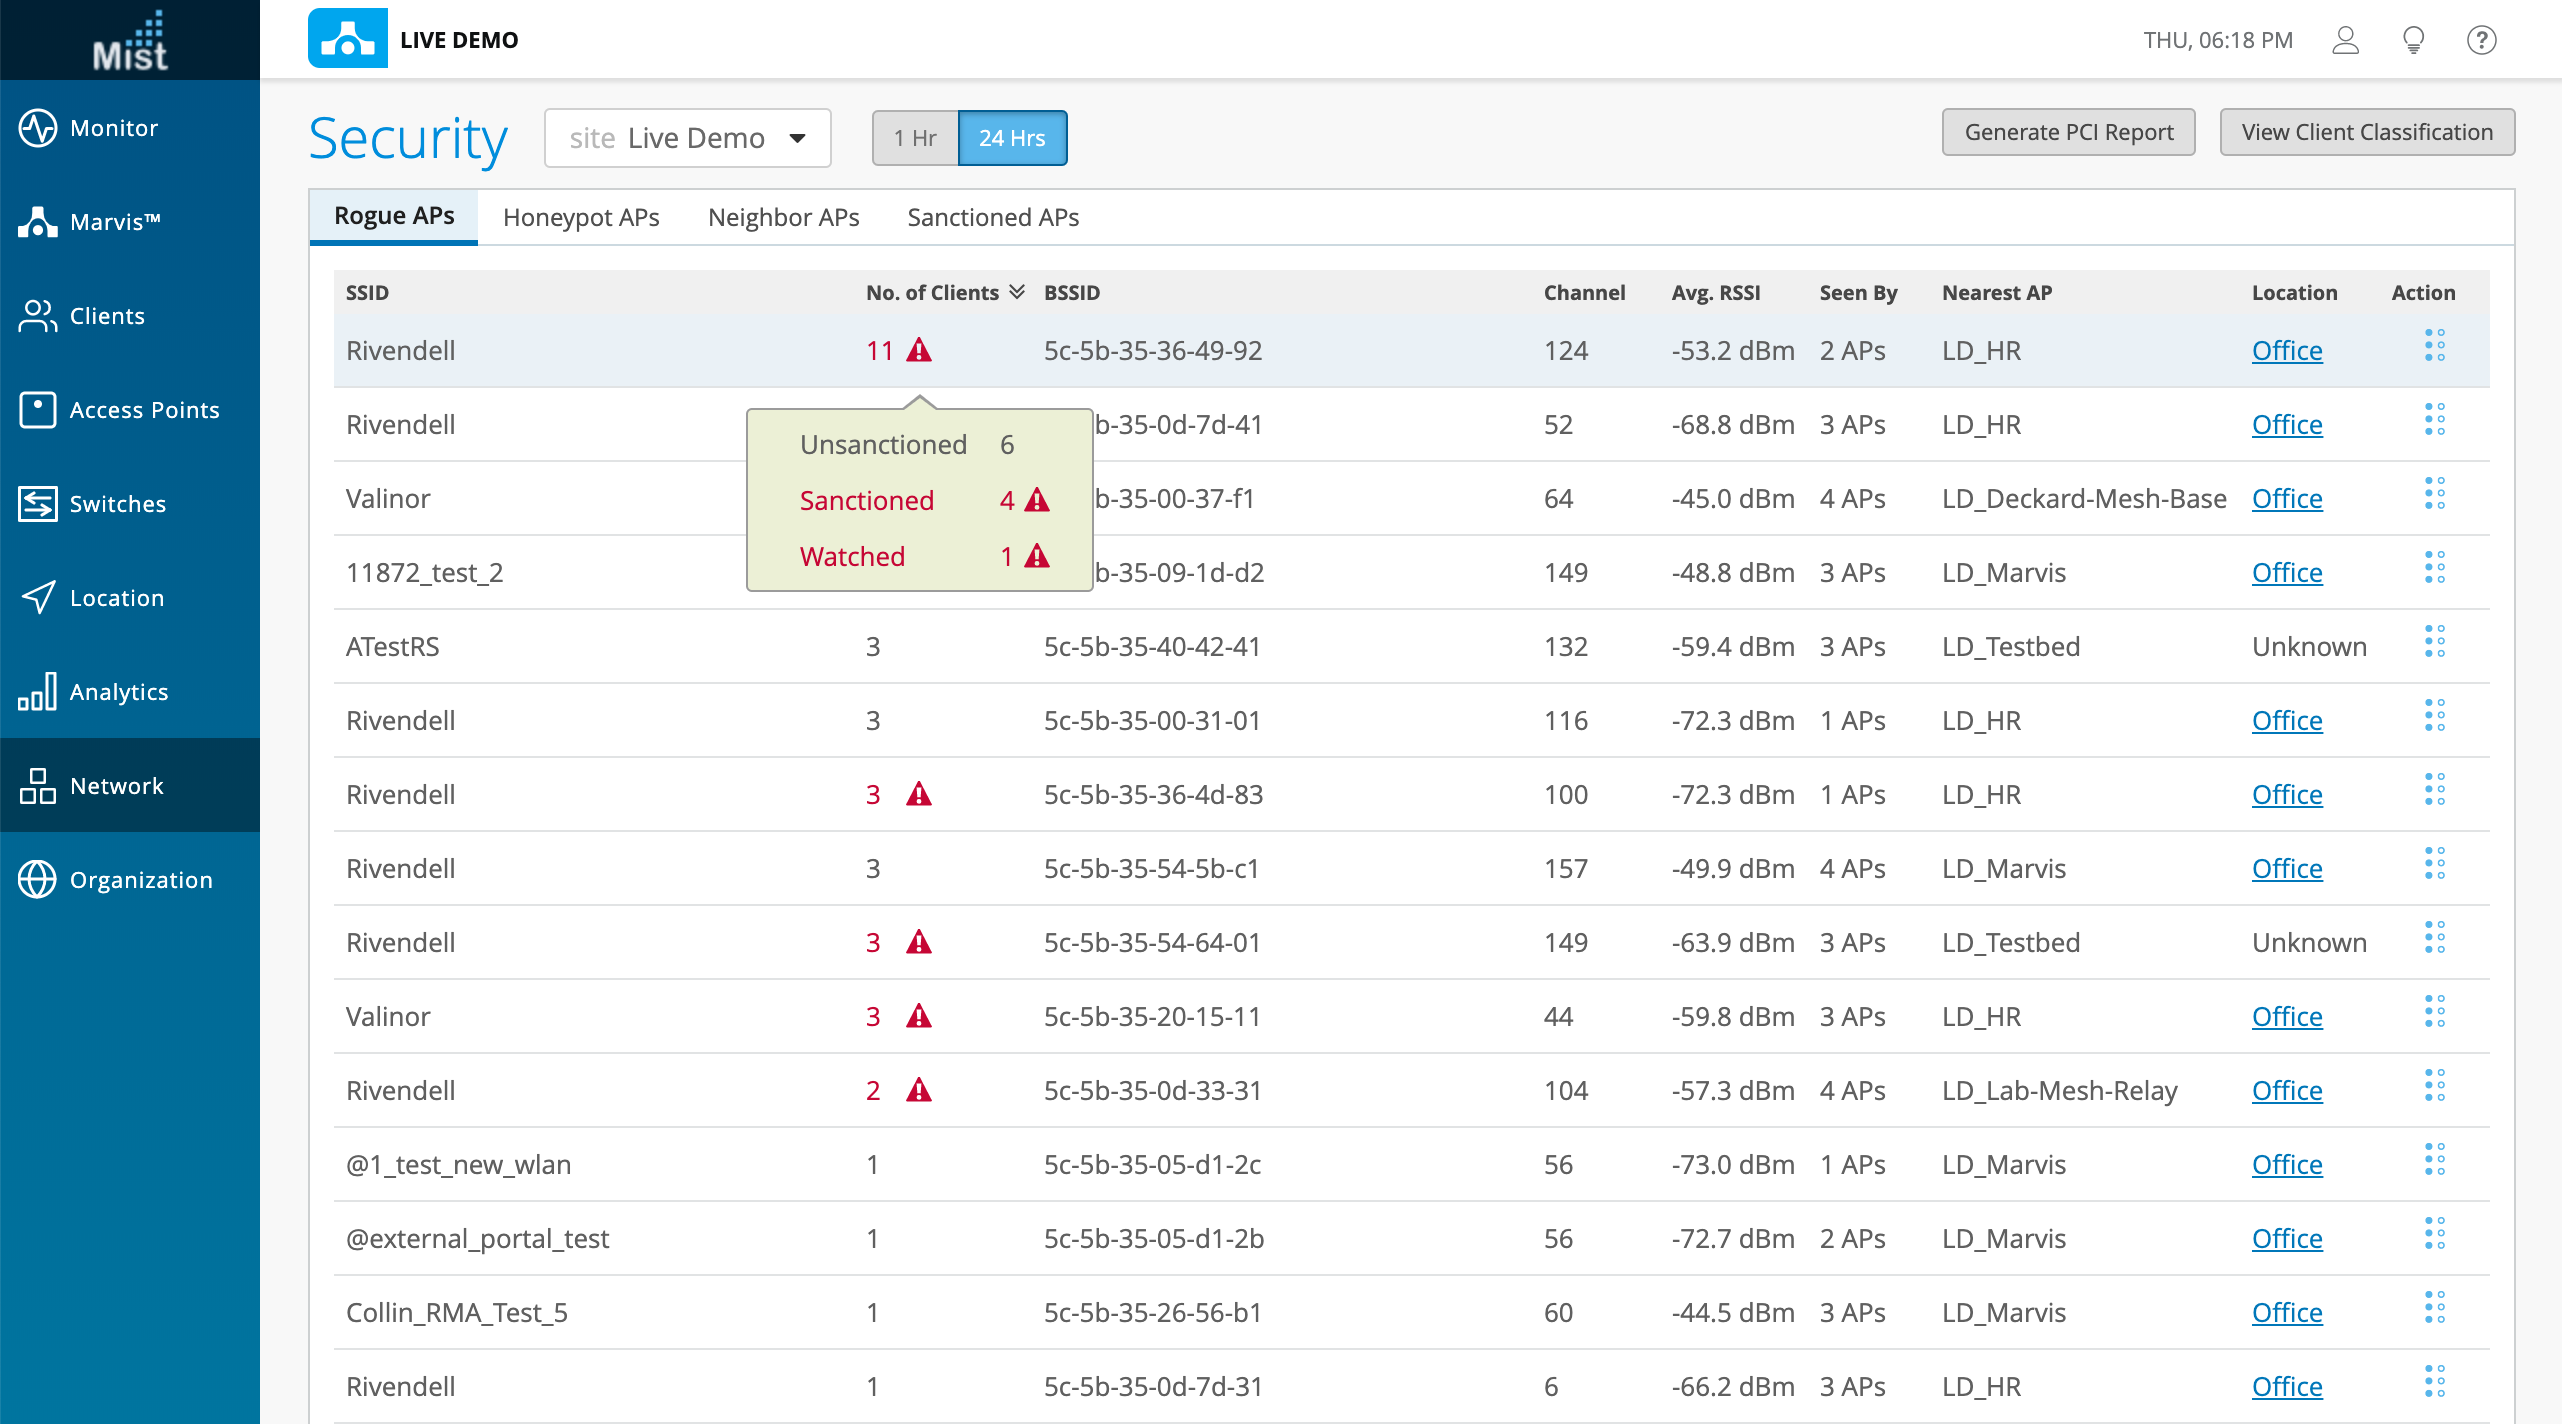
In your Rogue AP and Sanctioned APs tabs, you can see the number of Rogue clients detected from that AP or SSID. Hovering over this client count will reveal the breakdown of sanctioned, unsanctioned, and watched clients as defined in the Client Classification menu.
Labeling the clients with specific classifications is our first step in the roadmap to blocking and allowing clients from connecting to your Site. We will keep you updated with future enhancements in dealing with allowlisting and blocklisting specific clients.
Guest Portal Language Selection
The Guest Portal defines the landing page customers are directed to when you configure a WLAN with portal configurations. This week we are introducing the ability for multiple language selection on Guest Captive portal for a friendly end-user experience for global deployments. Select the languages you want to include, and in these templates type in the foreign language text you would like to display on the portal.
When setting up a guest portal WLAN, in the Customize Label tab, you can now use the dropdown menu to Select Locale and choose the countries you want to include in your portal.
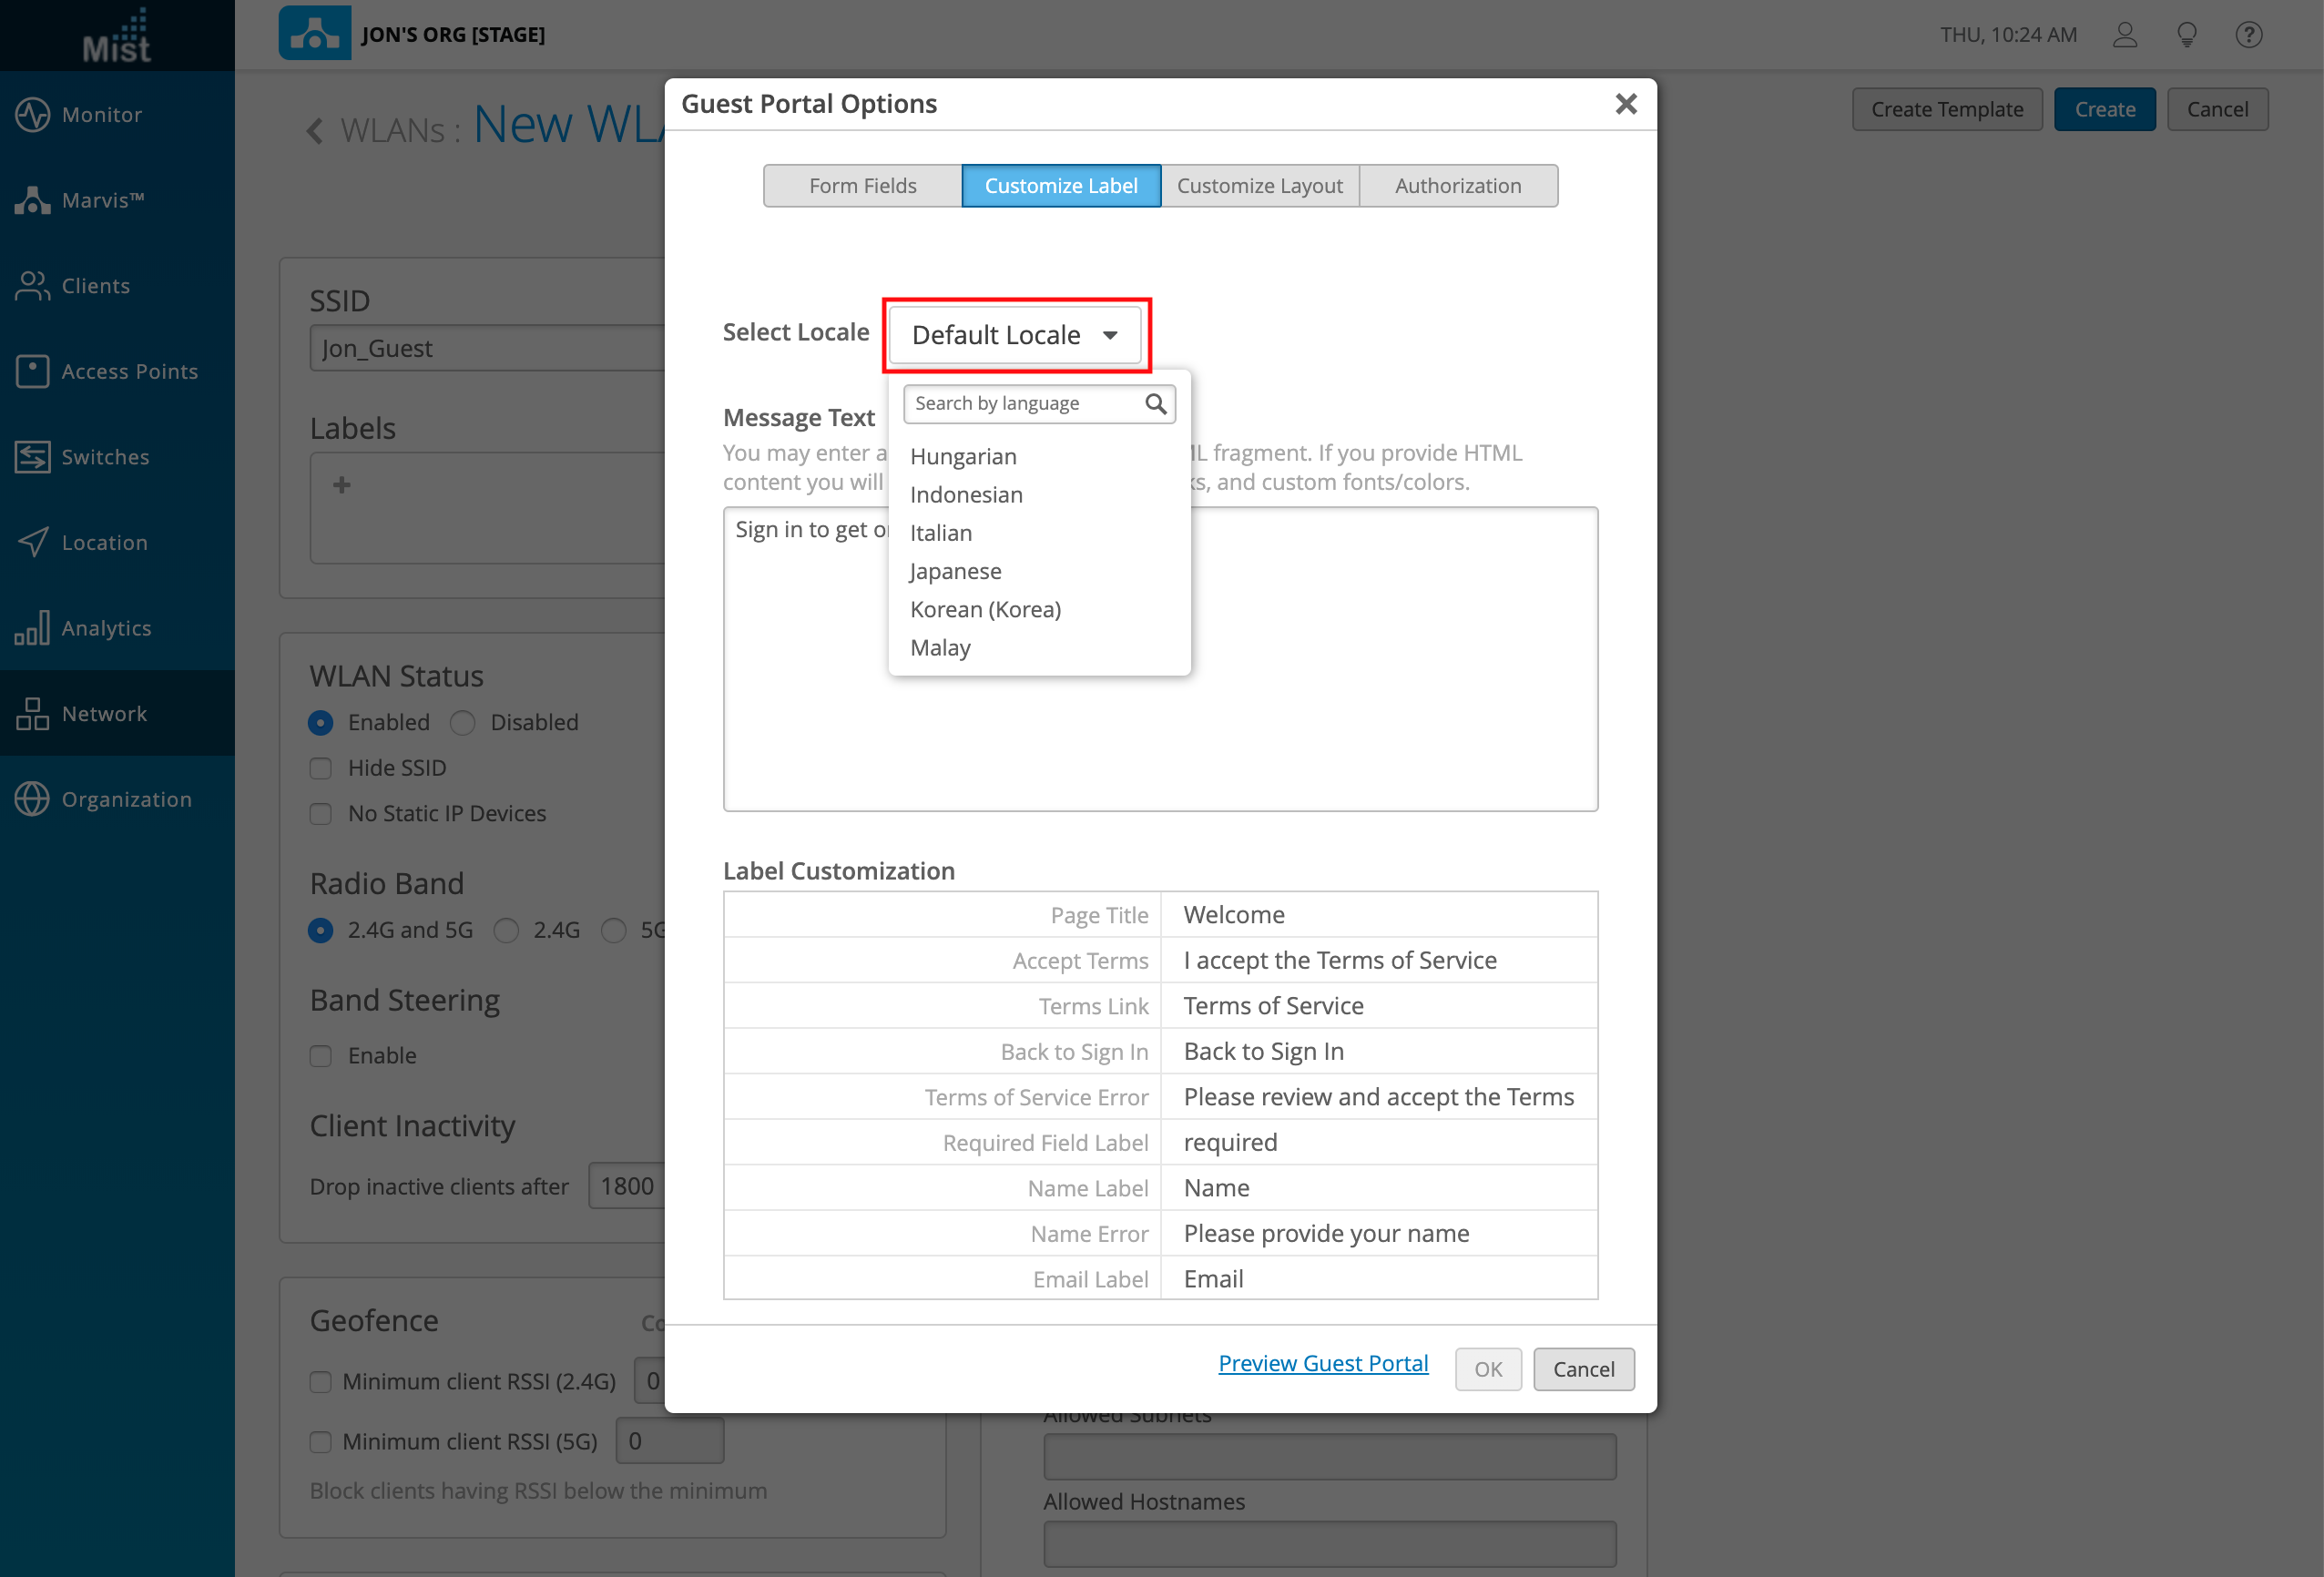
In this example we create a Japanese language portal. Note that you need to fill in the text portion yourself – fully customize the portal messages to your liking.
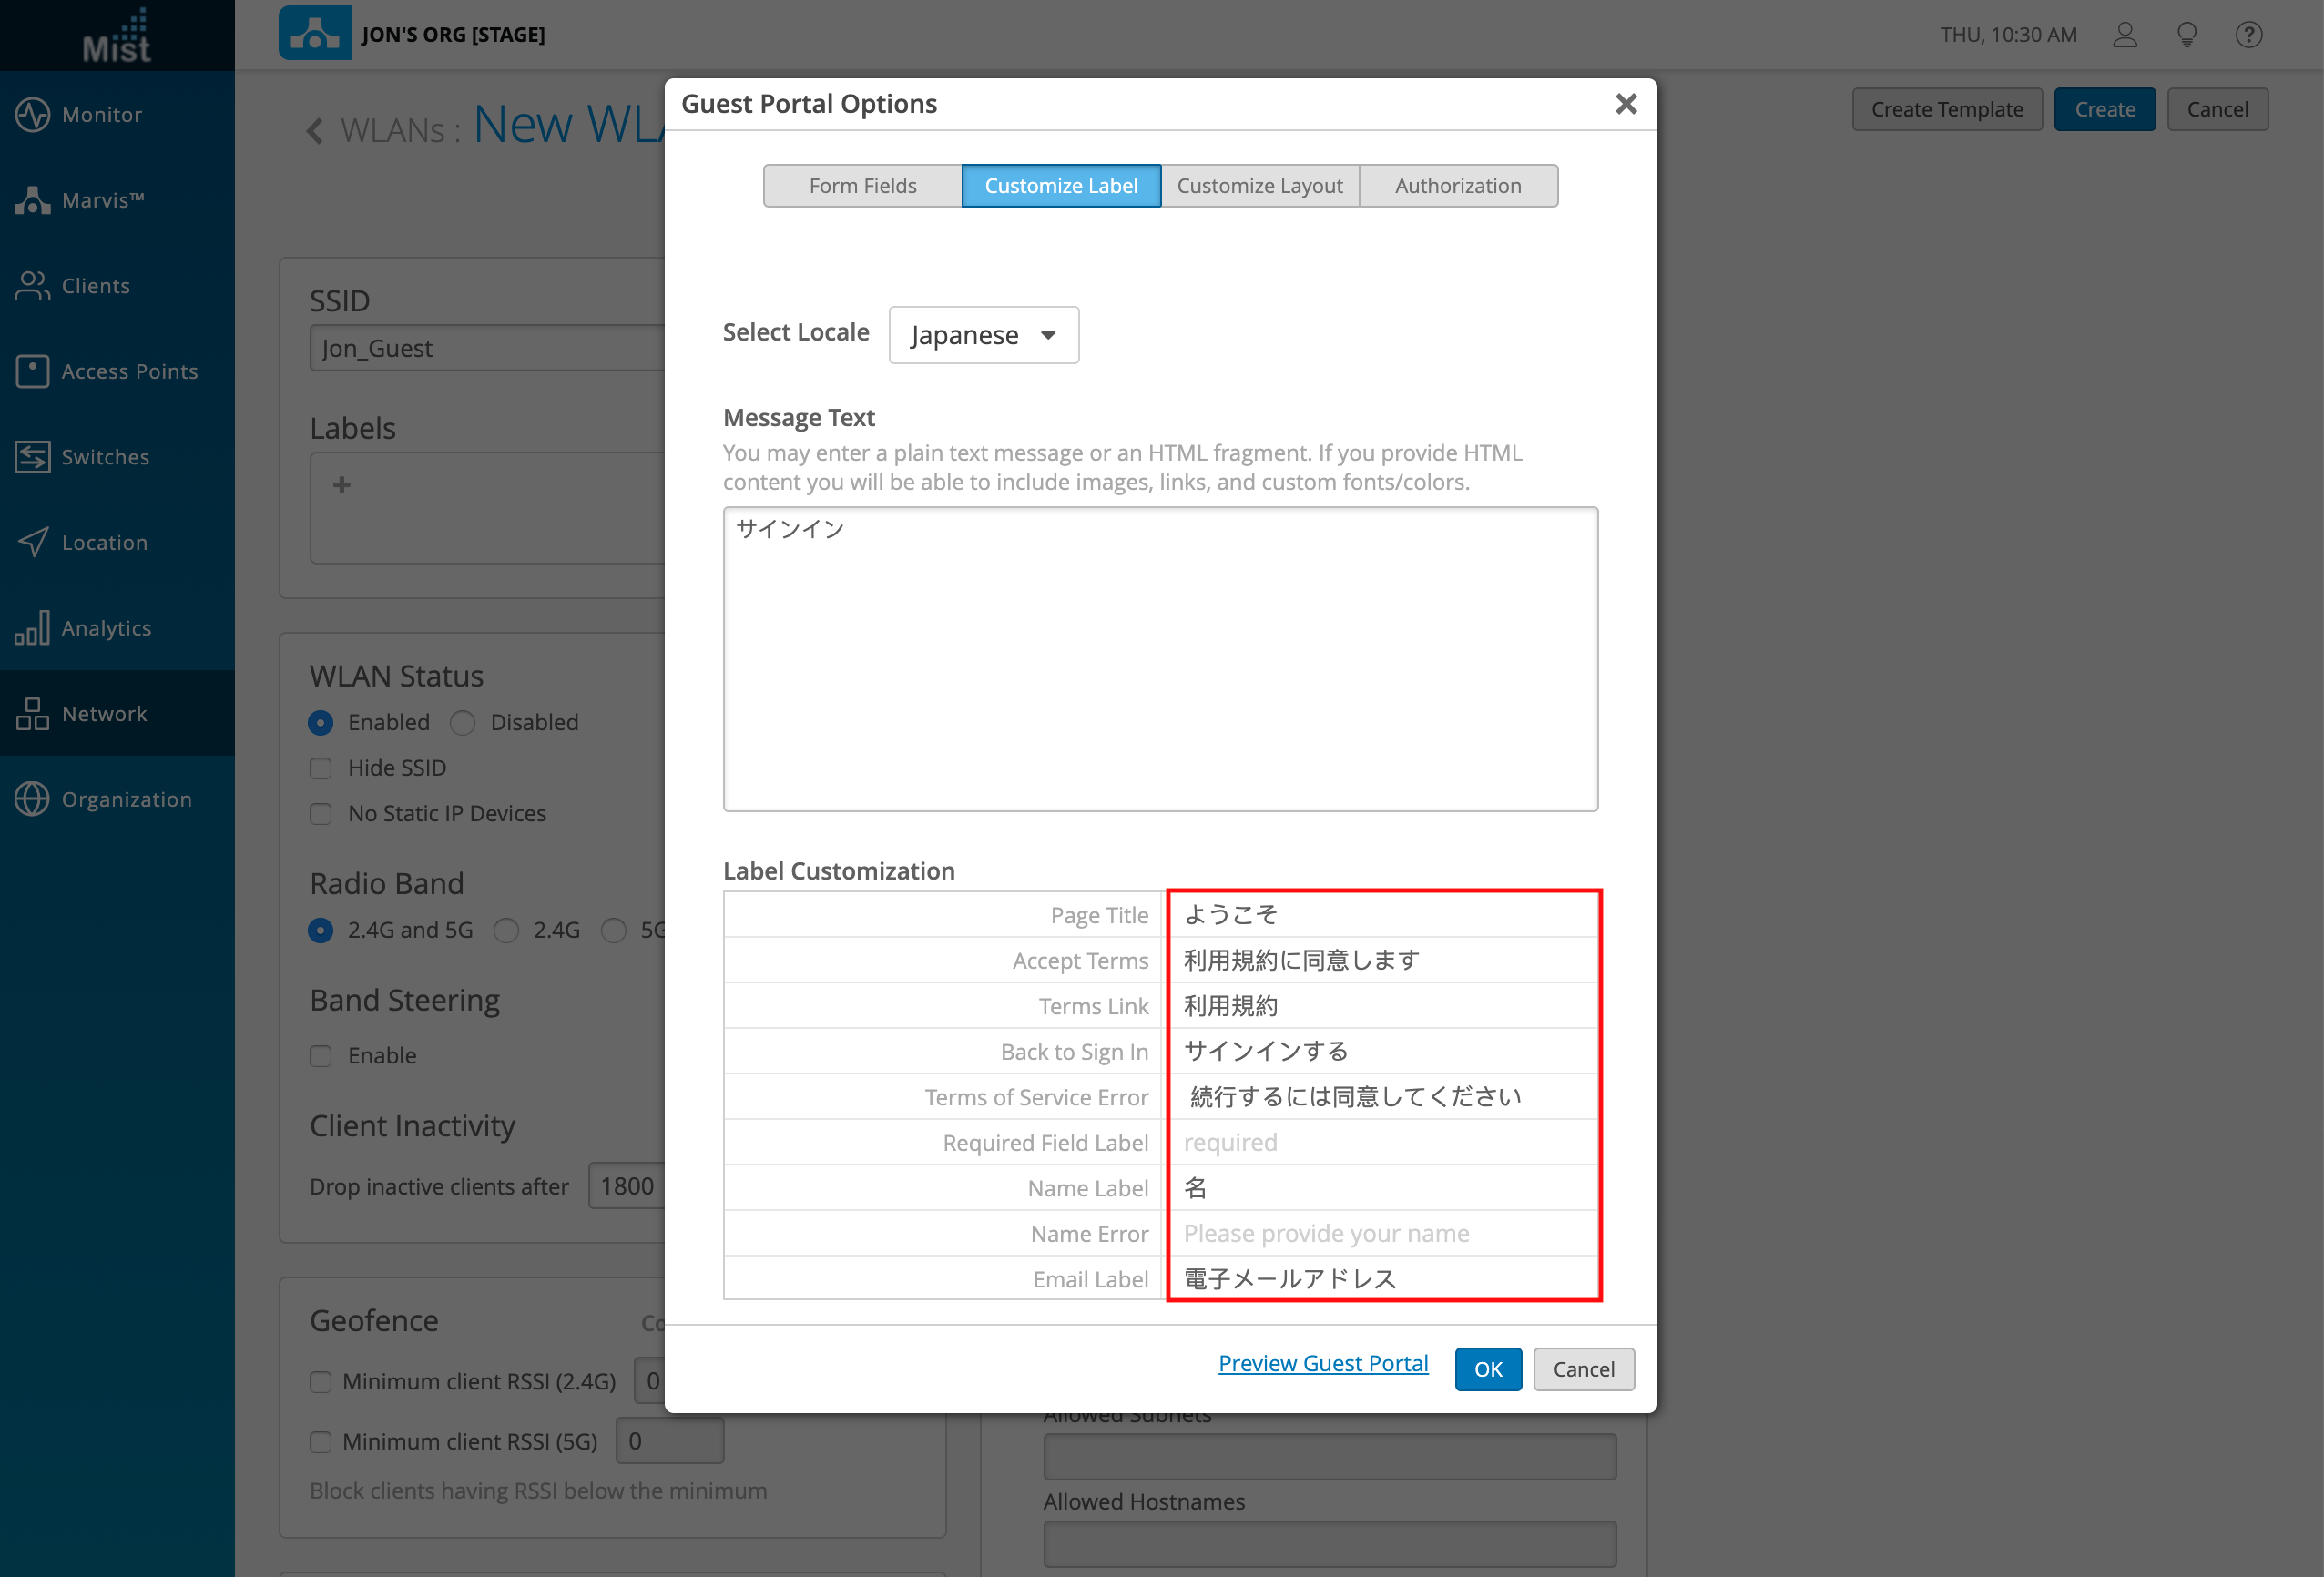
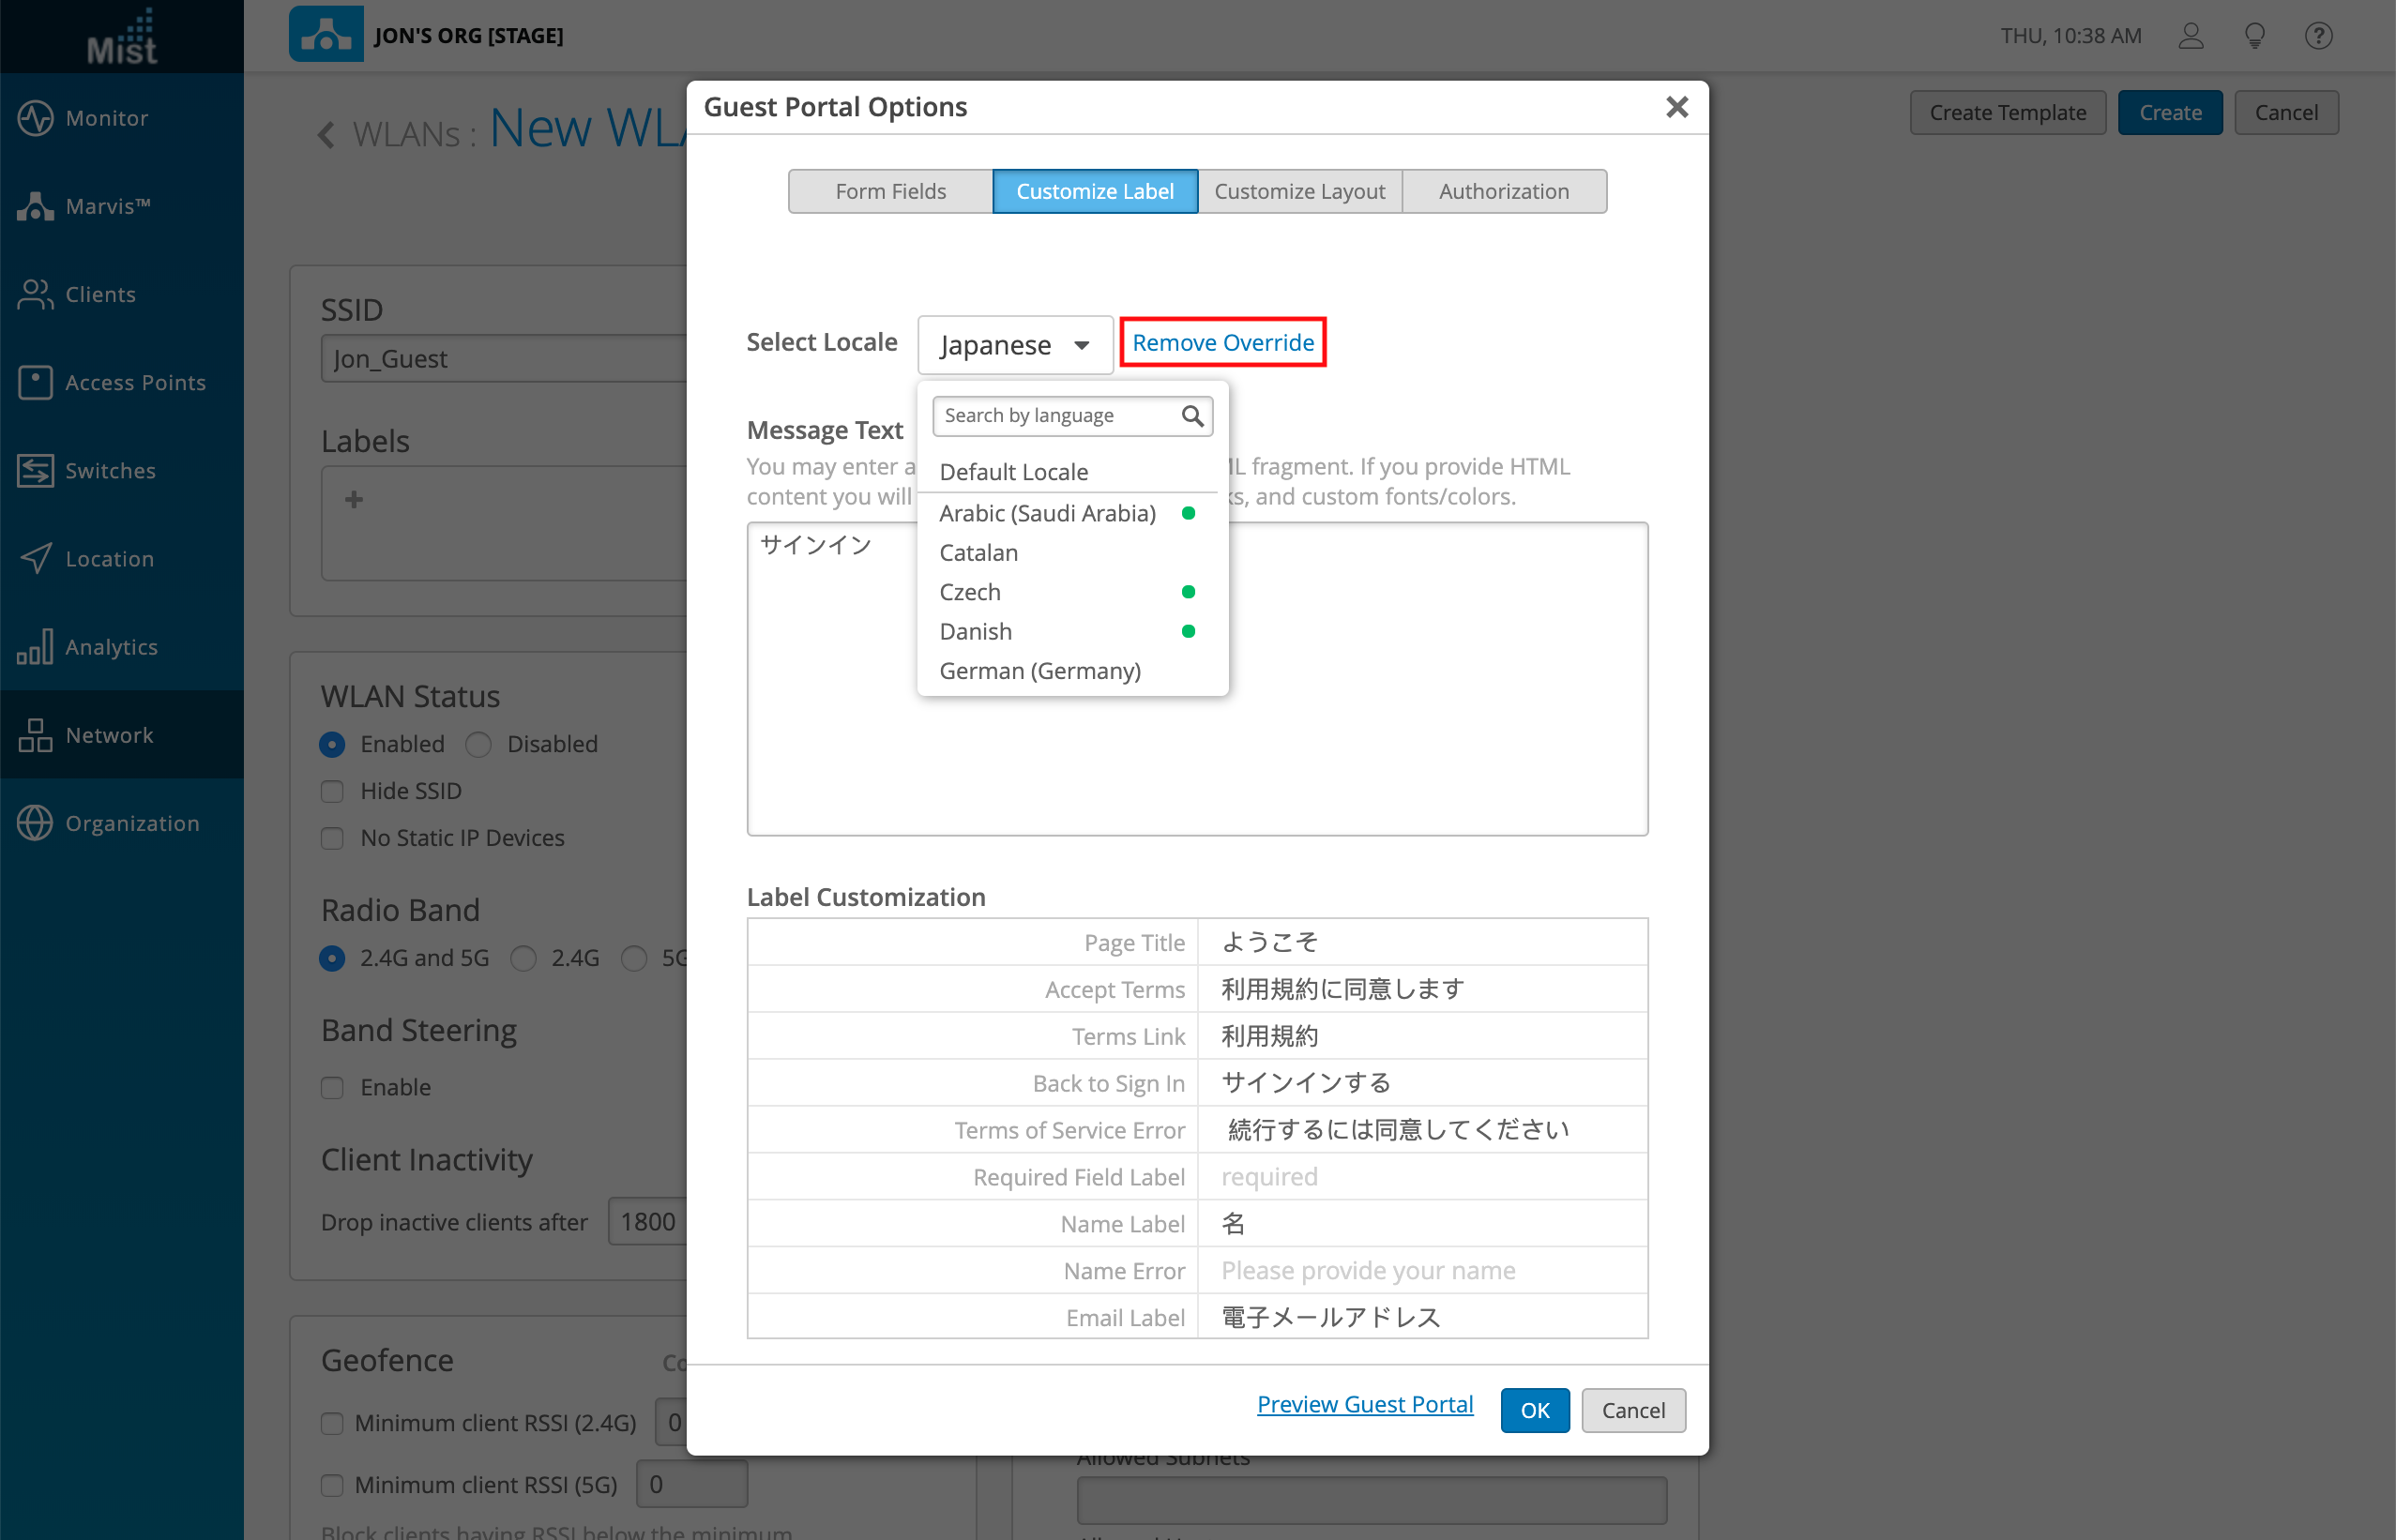
Select OK to finish setting up your portal. You may also create more language portals for other countries as well. In the dropdown menu, you will see a green dot next to the countries in which you have made a template already. Select Remove Override to delete said template if you don’t want to include it in your portal anymore.
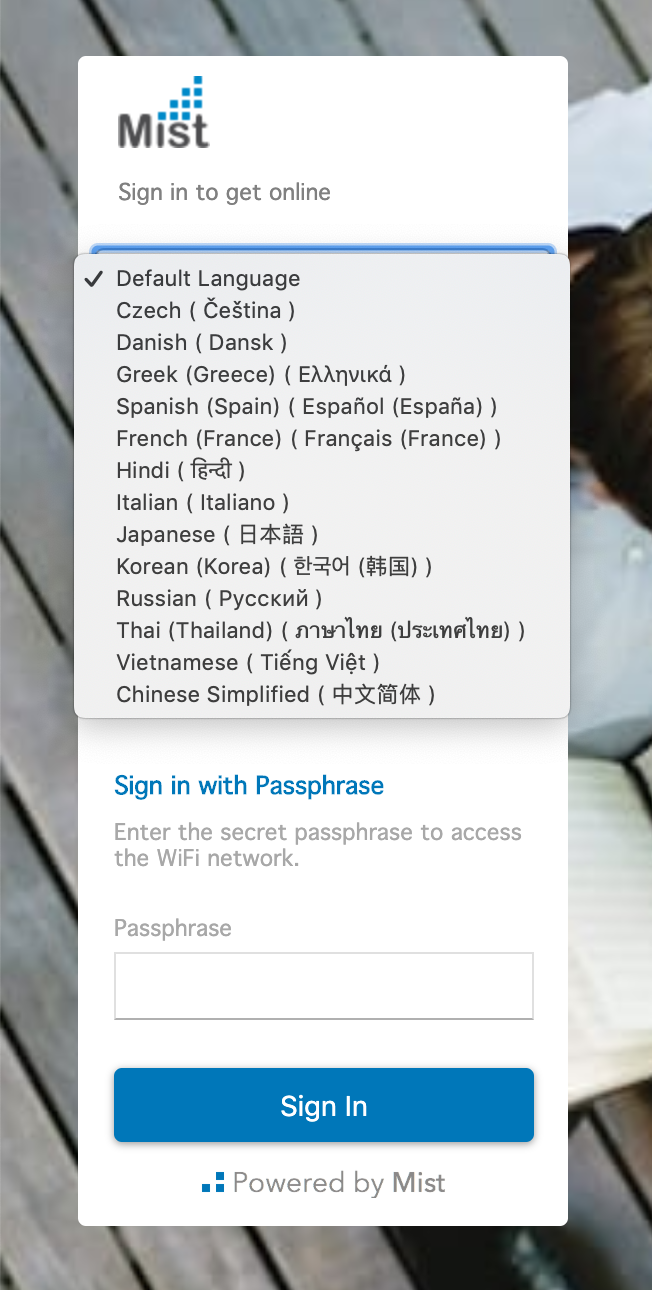
Your guest portal page will now show a language dropdown menu for the user to select their desired language.
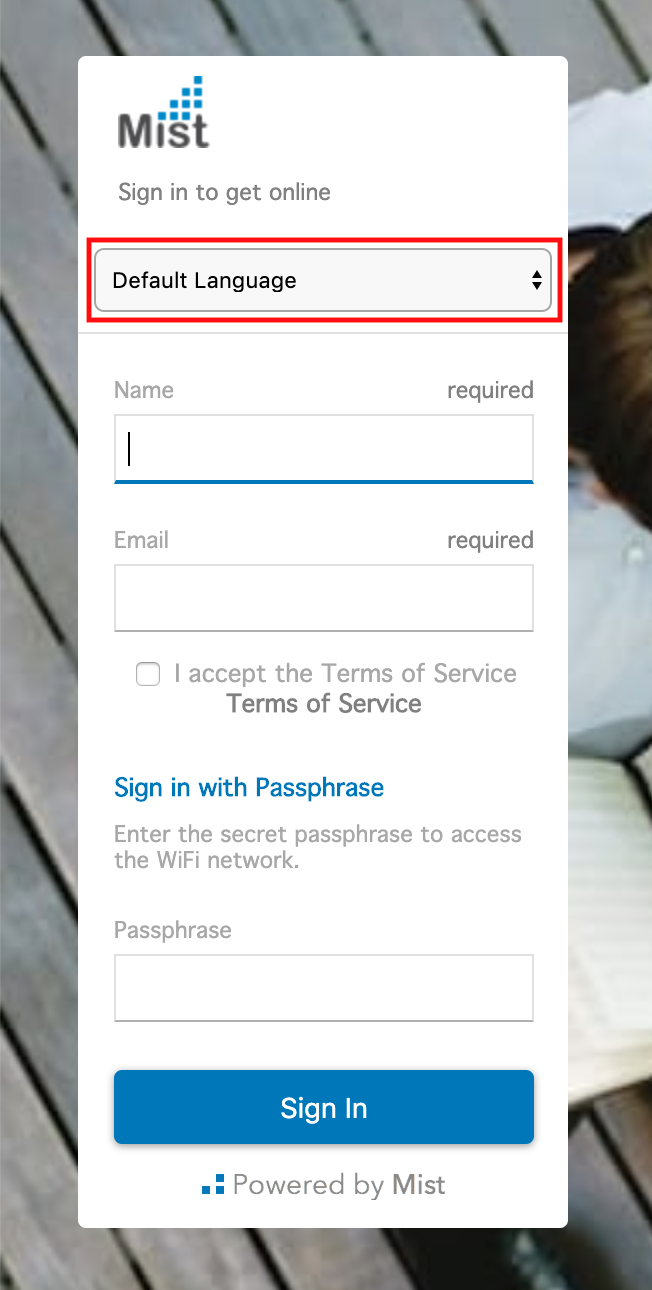
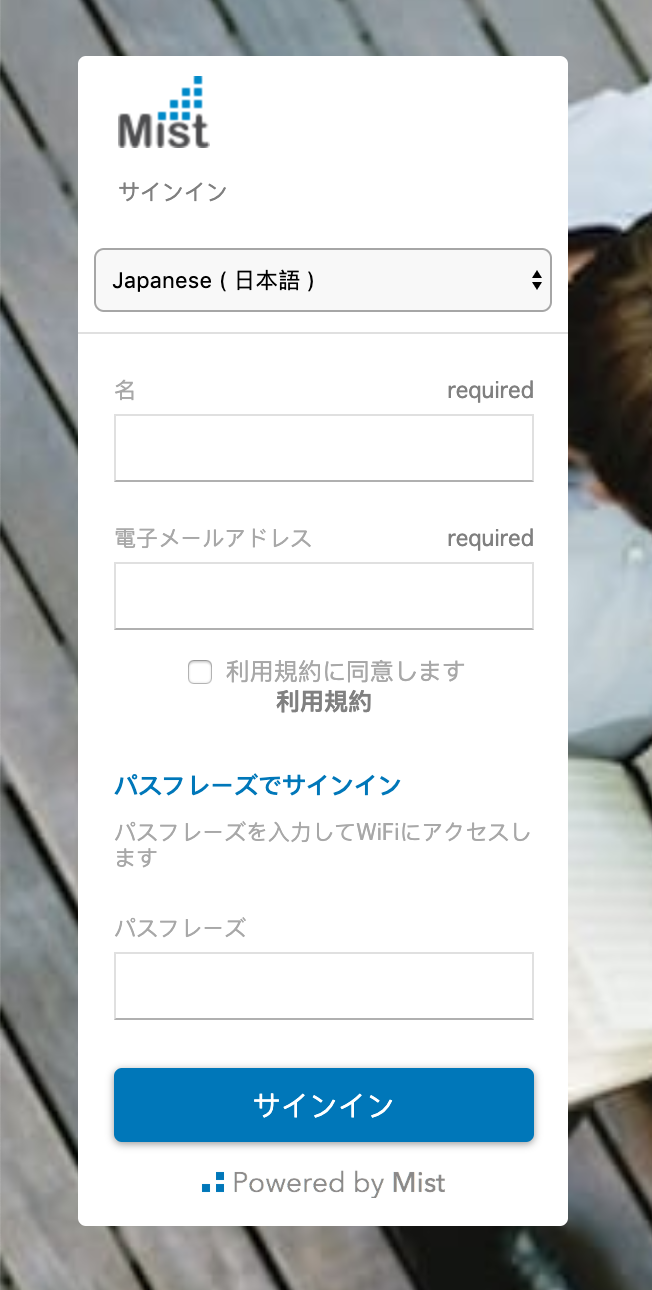
Here we select the Japanese template we made in this example. The label values and descriptions display with our customized text.
To learn more about Guest WLANs, please refer to this page: https://www.mist.com/documentation/mist-guest-portal/