Simplified Operations
Side Navigation Menu Improvements
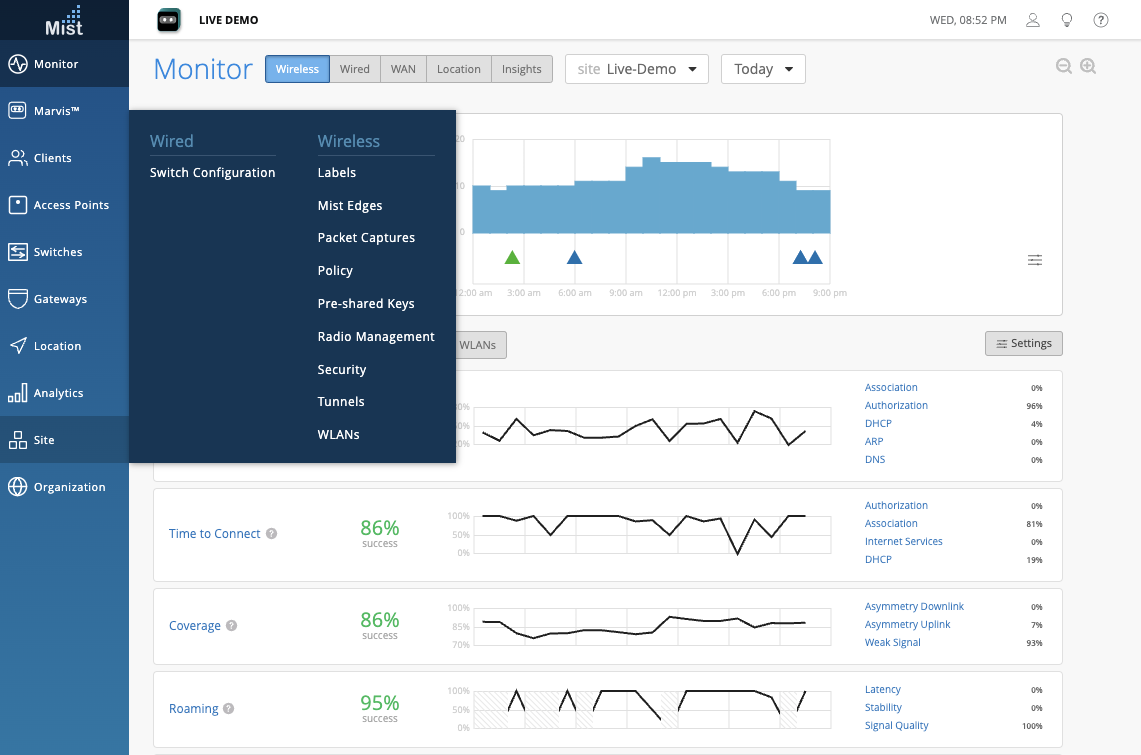
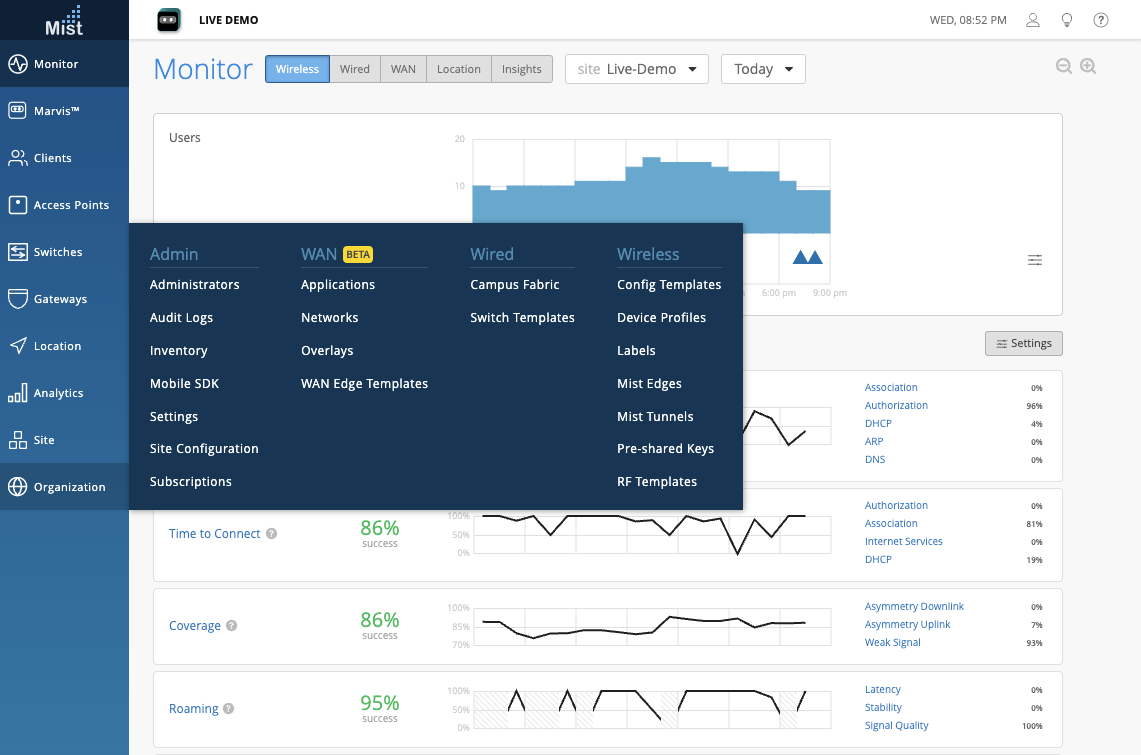
This week we made some updates to the side navigation menu to be more user-friendly. Most submenus have been rearranged alphabetically, the “Network” tab has been renamed to “Site”, and the “Site” and “Organization” submenus are split by WAN, Wired, and Wireless configuration elements.
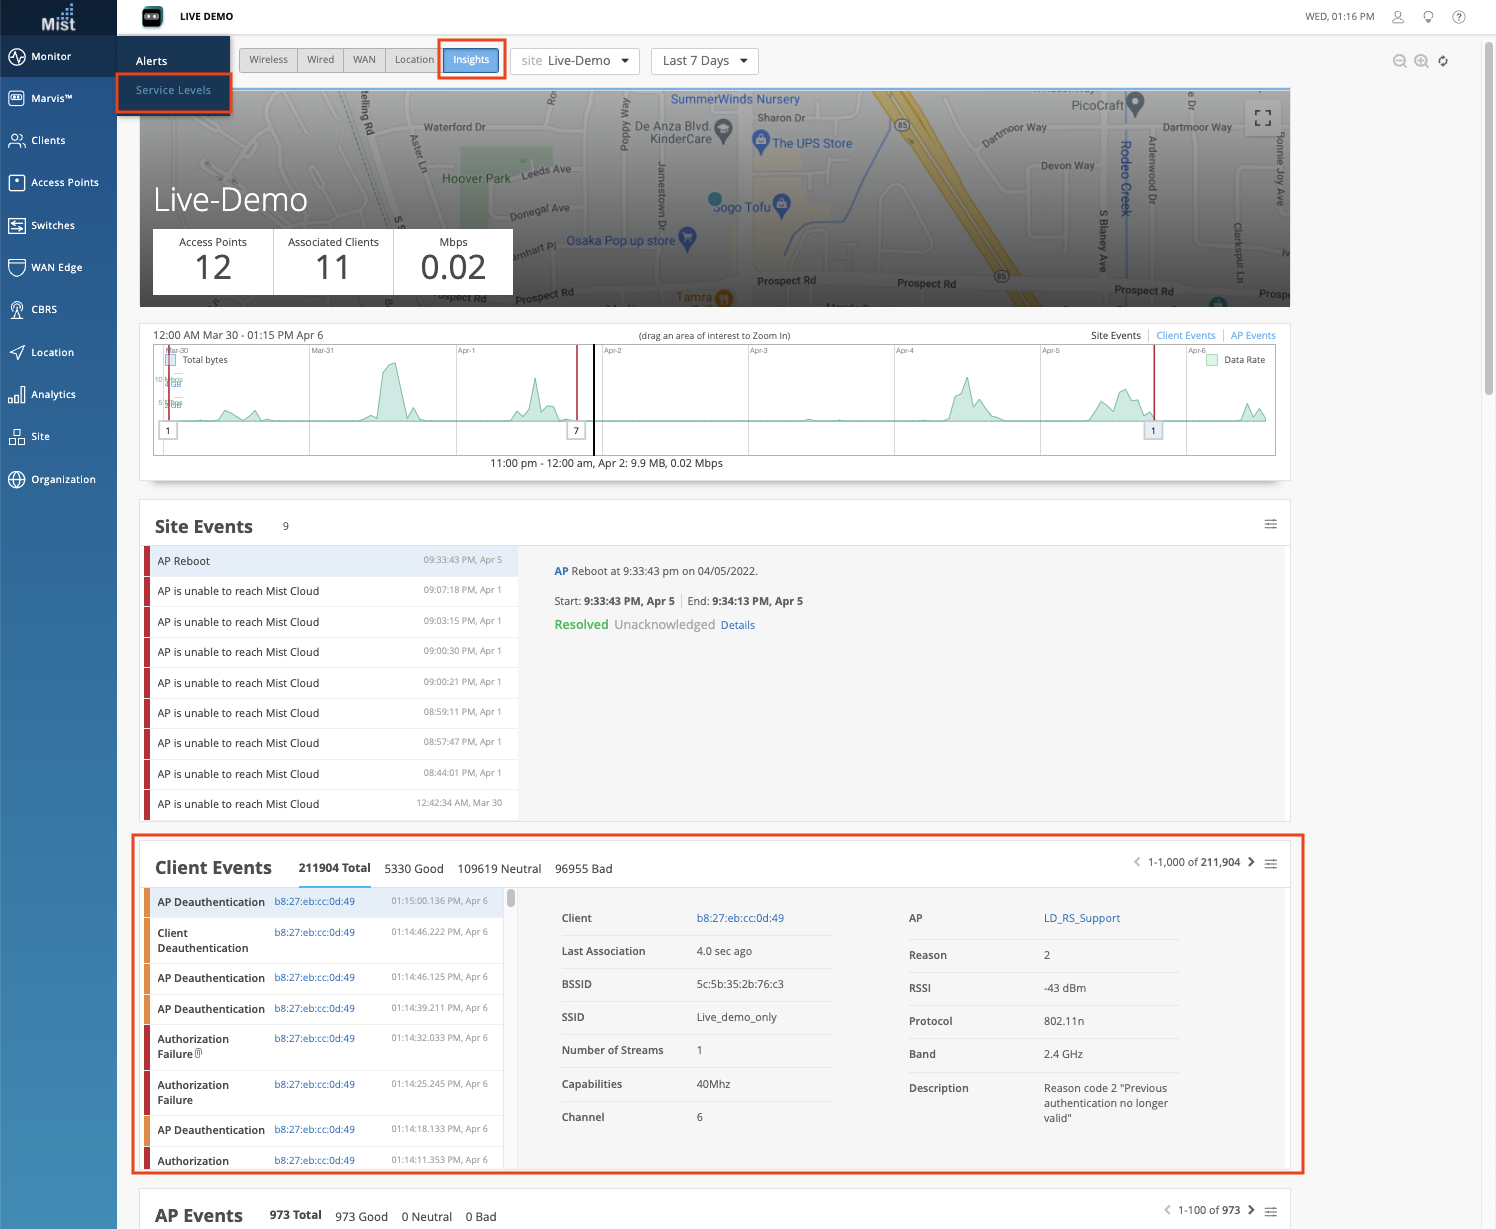
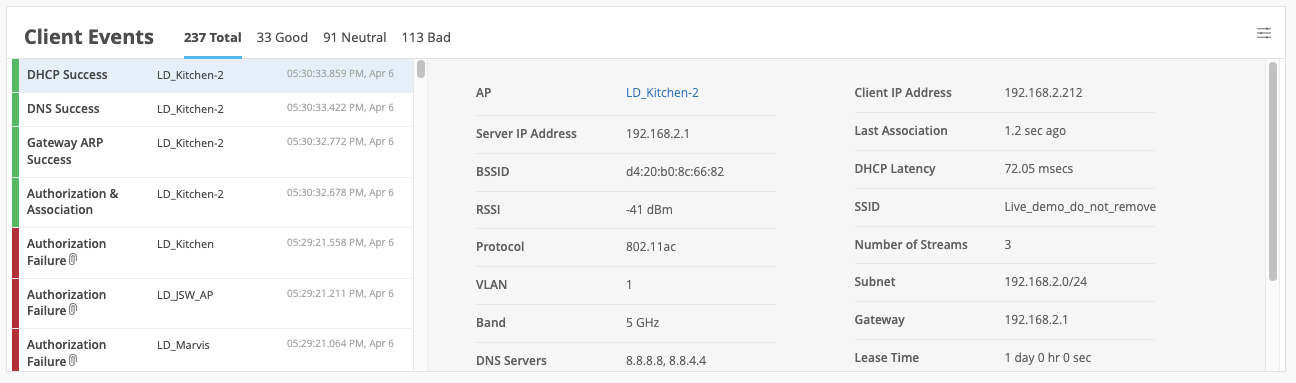
Client Events on Site Insights Page
Client Events have been an integral part of what makes Wi-Fi Assurance at Mist Systems so innovative. The ability to view all Good/Bad/Neutral events and dynamically capture packets for specific users at any point in time is extremely helpful in proactively troubleshooting network issues for individual clients. Previously Client Events were only available on the Client Insights and AP Insights pages, and starting this week it will also be available on Site Insights pages.
To access your Site Insights page, navigate to Monitor > Service Levels, and select the Insights tab.
Enhancements to Client Events on AP Insights Pages
On our AP Insights pages, we had a maximum 2 hour time range limit set for Client Events to be displayed. This was to avoid the potential for loading thousands of client events for a time range and subsequently slowing down the loading of our page. Now we are introducing pagination for Client Events on all Insights pages so that these events can be displayed for any selected time range, with a limit of 1000 events being displayed at one time.
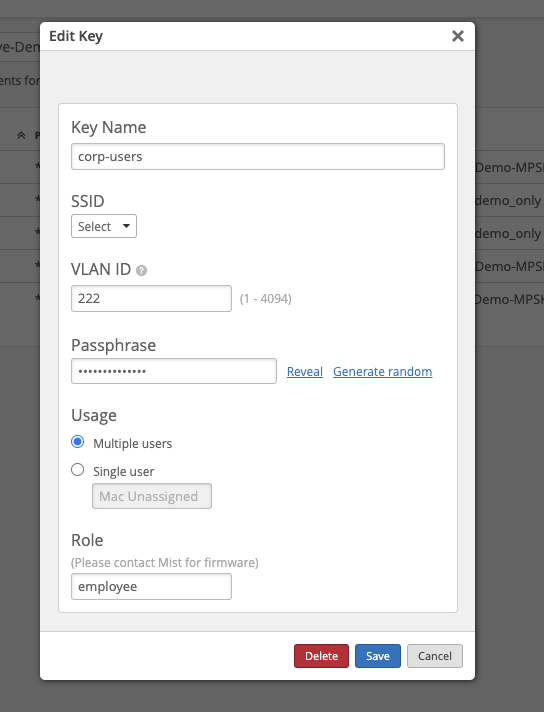
GA PSK Role and VLAN
This week we made a couple options on PSK generally available. Now everyone has the ability to configure VLAN ID and Role designations for users authenticating using a Pre-Shared Key. Make sure you have a Multi-PSK WLAN set up on your site in order to add PSKs (see our Multi PSK page for more details: https://www.mist.com/documentation/multi-psk/).
Please Note: We require your APs to be running on firmware version 0.10.x or newer in order to use the Role functionality.
Marvis
Encouraging Use of Conversational Assistant
When opening Marvis Virtual Network Assistant and selecting “Natural Language” for the first time, open the Marvis Conversational Assistant in the bottom-right corner of the page. Please note that this will only happen for the very first time you access the Natural Language search on the Marvis search page. Once you close the Conversational Assistant the first time it won’t automatically pop up again. However we do encourage you to transition into using the Conversational Assistant for asking any query, whether it be related to troubleshooting, documentation search, or just network monitoring.
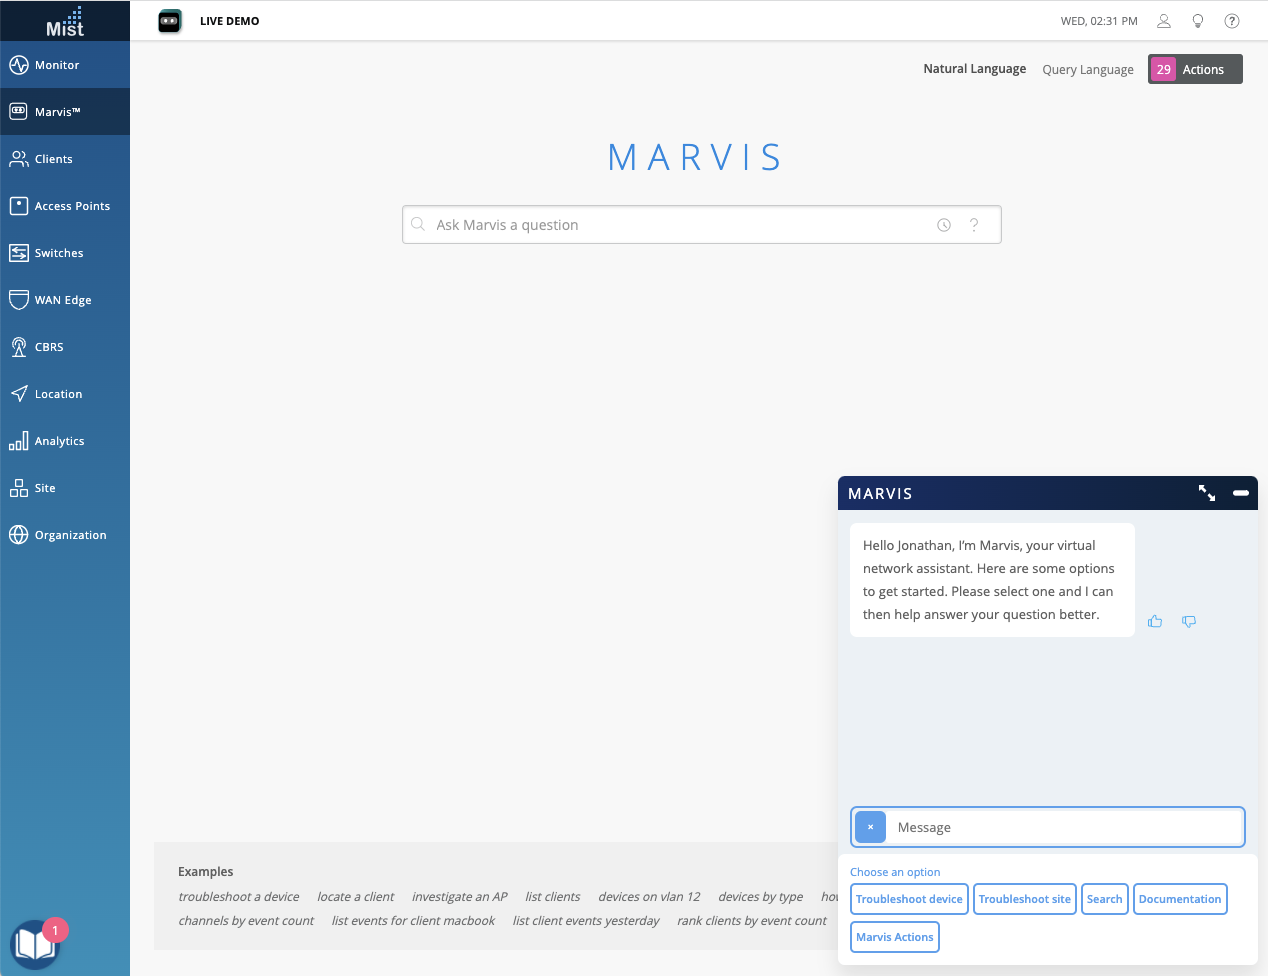
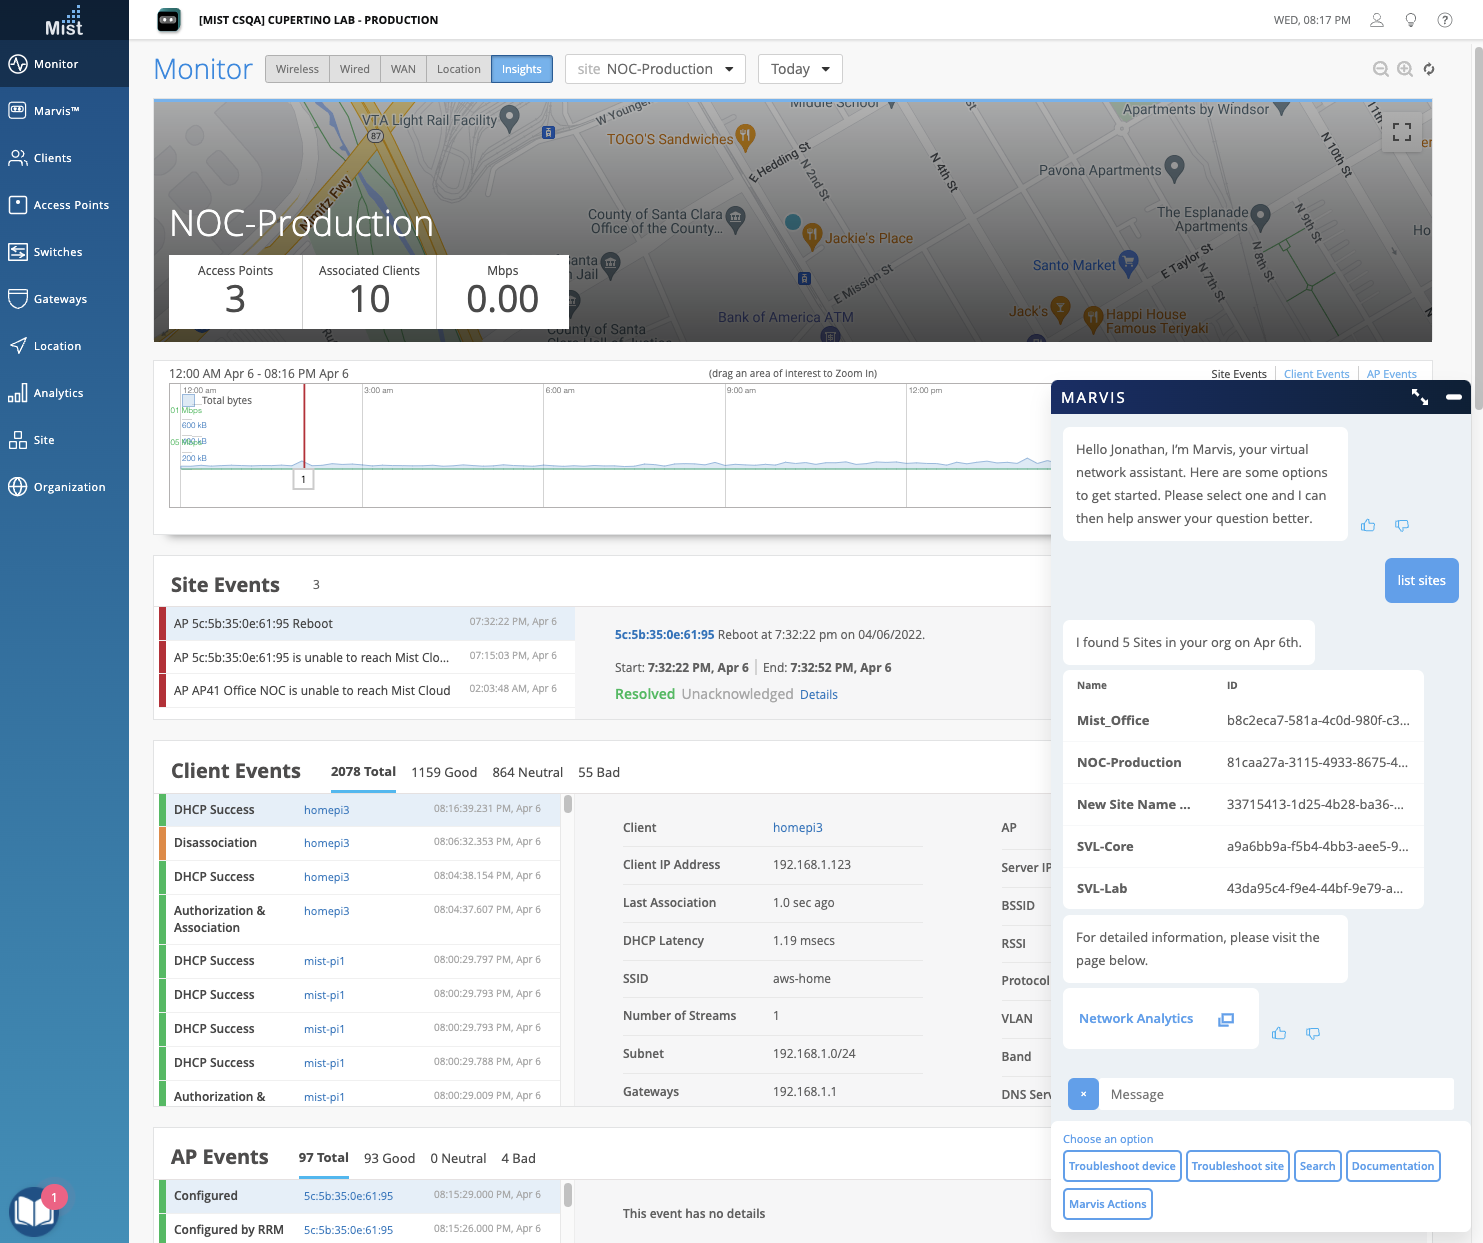
Conversational Assistant: List and Show Sites
Quickly check with Marvis for a list of all sites on your organization with the “List sites” and “Show sites” query in the Conversational Assistant box. Marvis will provide you the list as well as a link to your Network Analytics page for further analysis of your network.
Wired/WAN Assurance
GA of EVPN/VXLAN – Multihoming topology
Please note: We have removed the previously required evpn tag for this feature, so it is generally available as long as you have the correct Wired Assurance subscriptions.
An Ethernet VPN (EVPN) enables you to connect dispersed customer sites using a Layer 2 virtual bridge. Read more about the details of EVPN on this page: https://www.juniper.net/documentation/us/en/software/junos/evpn-vxlan/topics/concept/evpns-overview.html. Starting this week, the EVPN/VXLAN Multihoming topology is generally available for those with the correct Wired Assurance subscriptions.
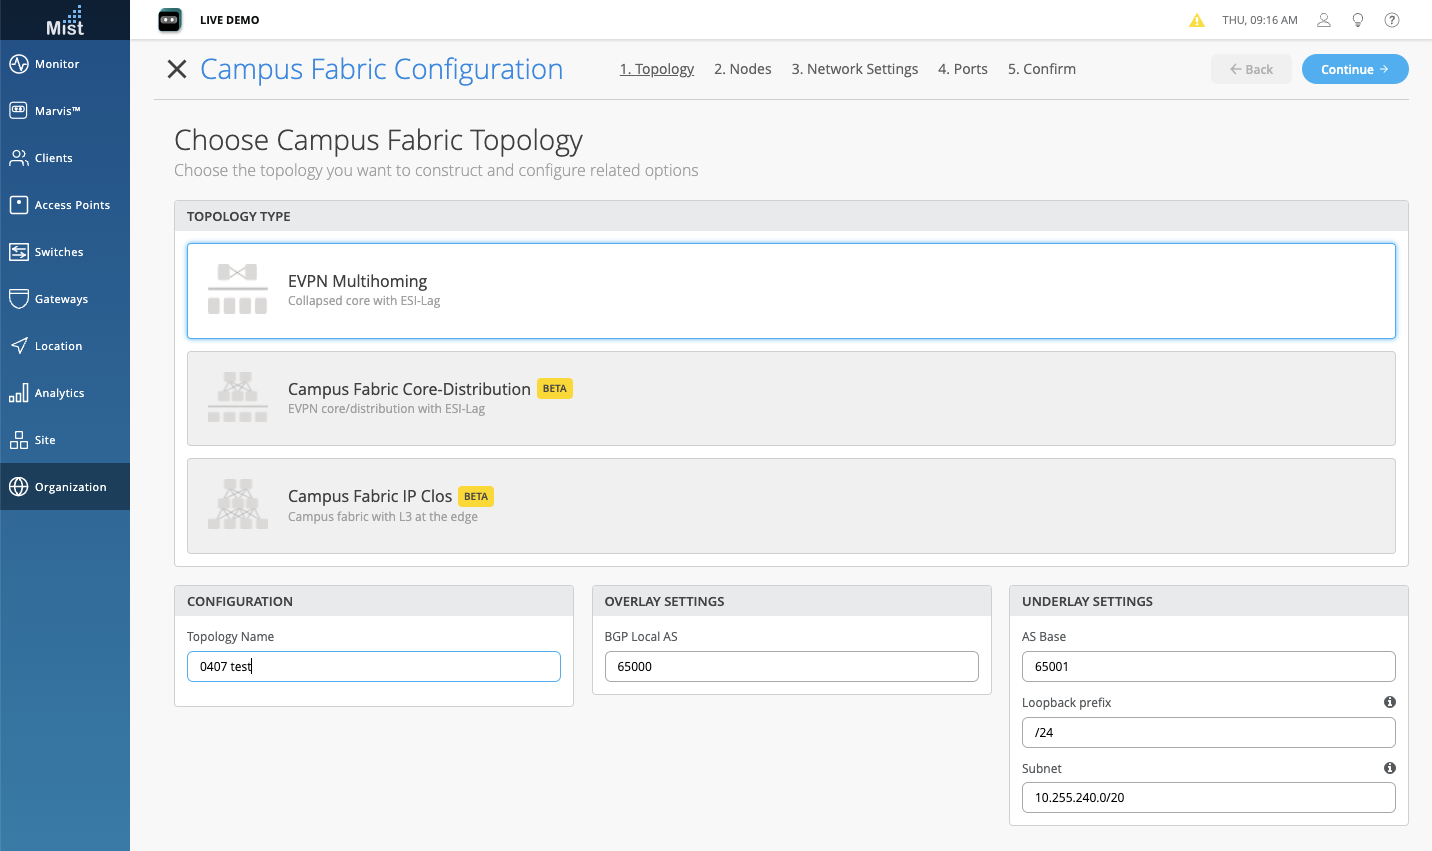
1. Topology: To set up your EVPN, navigate to Organization > Wired > Campus Fabric and create a new Campus Fabric. Select EVPN Multihoming as your topology type and be sure to give it a name in the Configuration section. Select Continue.
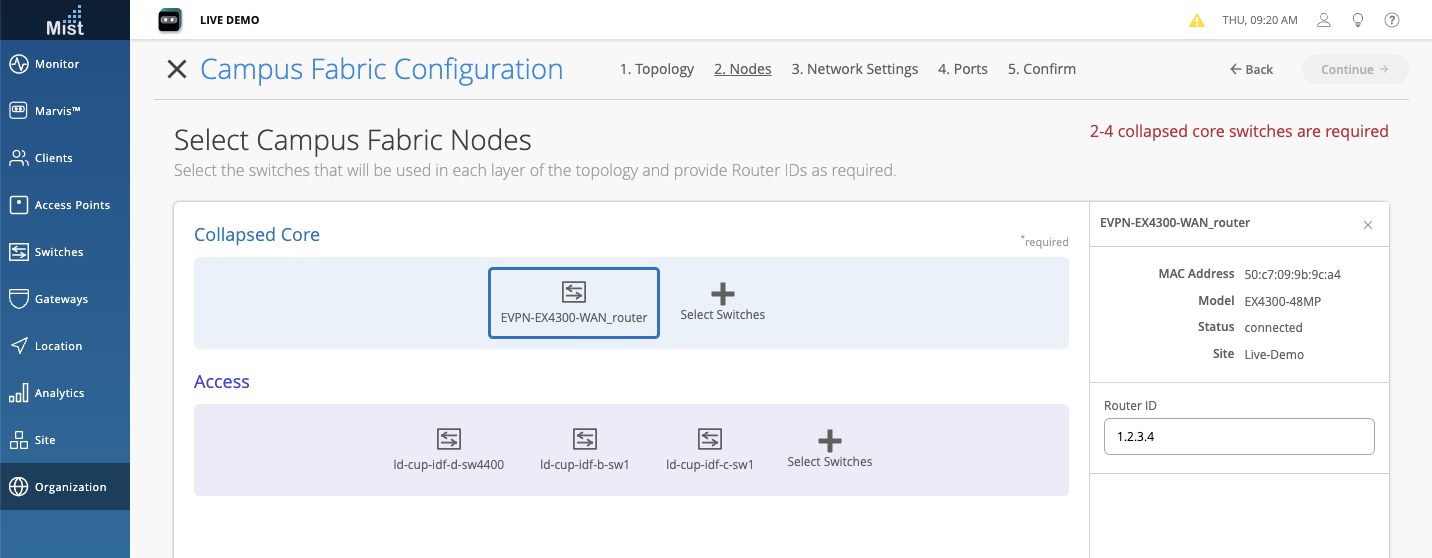
2. Nodes Selection: Next, select switches for your Collapsed Core and Access sections using the pop up list.
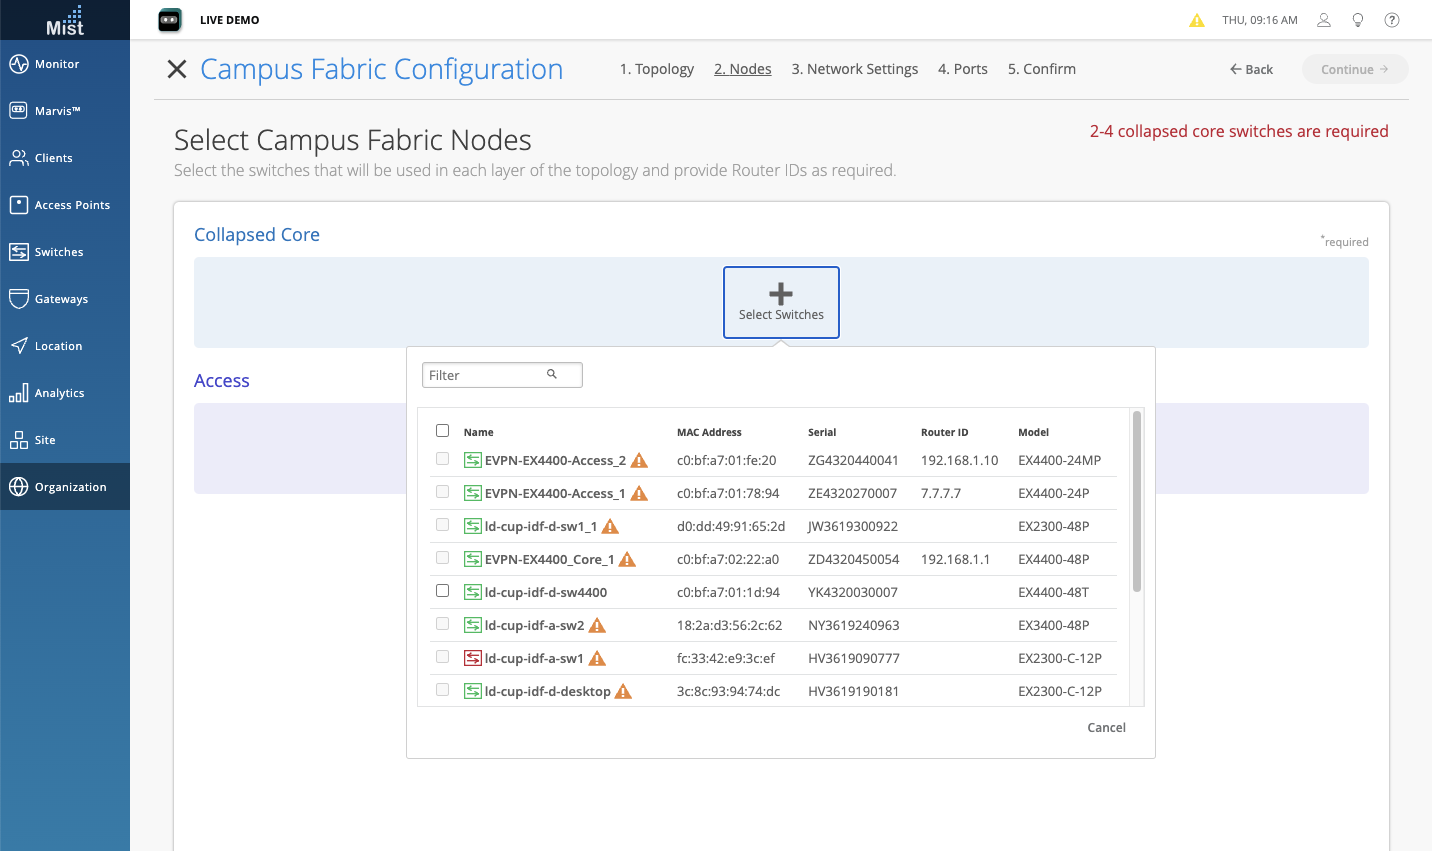
A Router ID configuration is mandatory for Collapsed Core switches. You can select a switch with collapsed core and add/edit the router-id on the tab that opens on the right hand side.
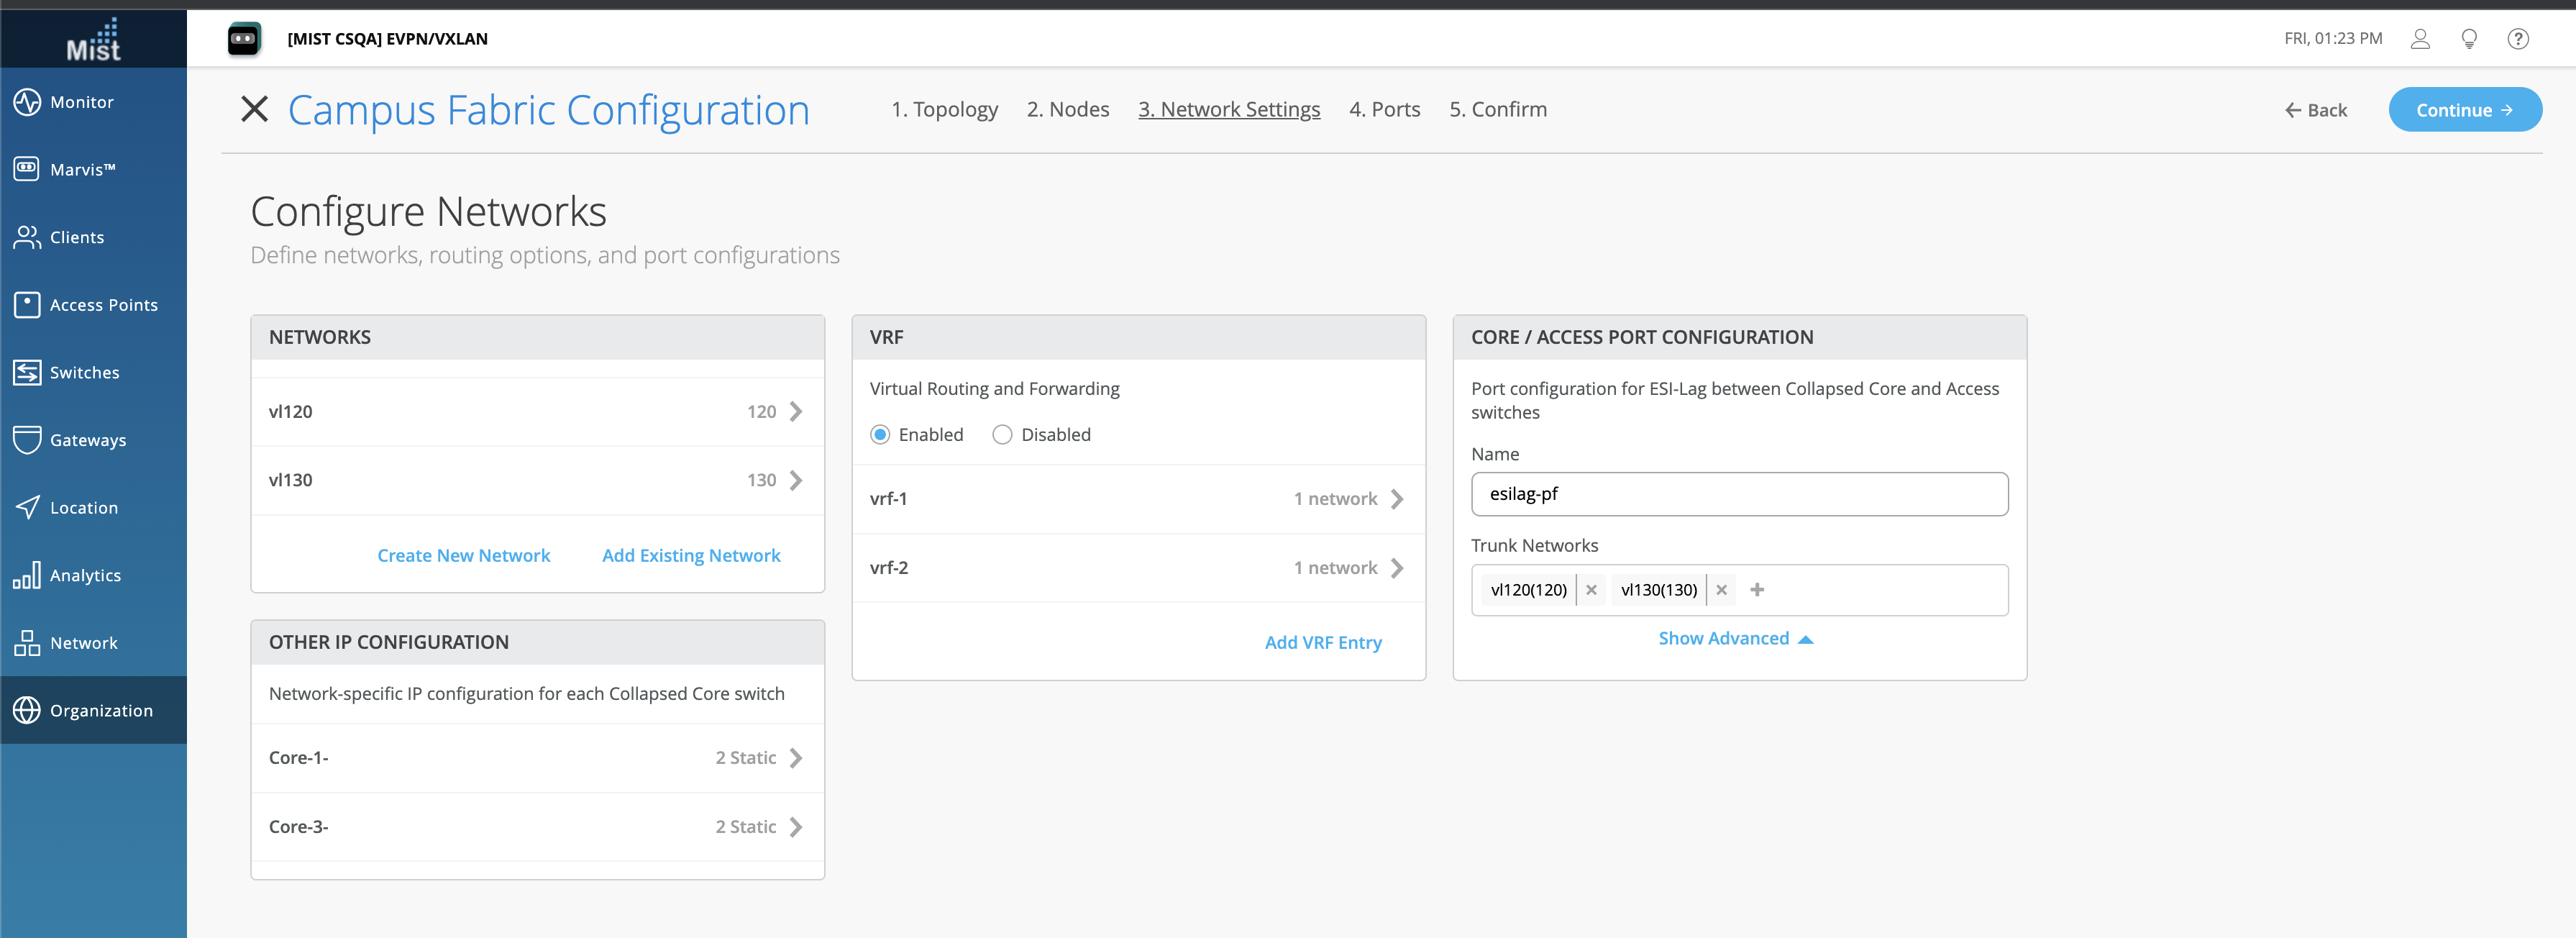
3. Network Settings: On this tab we define the networks, routing options, and port configurations. Creating a Network will automatically add them in the Other IP Configurations section with a Static Auto-Assigned IP address from the given subnet for each of the collapsed core switches. These Networks will also be trunked on the core-access profile.
Subnet and Gateway are Mandatory fields for the EVPN Networks, the IP address from Gateway field will be Assigned as “virtual-gateway-address” for Irbs of corresponding core switches.
Reference these documents to learn more about Virtual gateway address functionality:
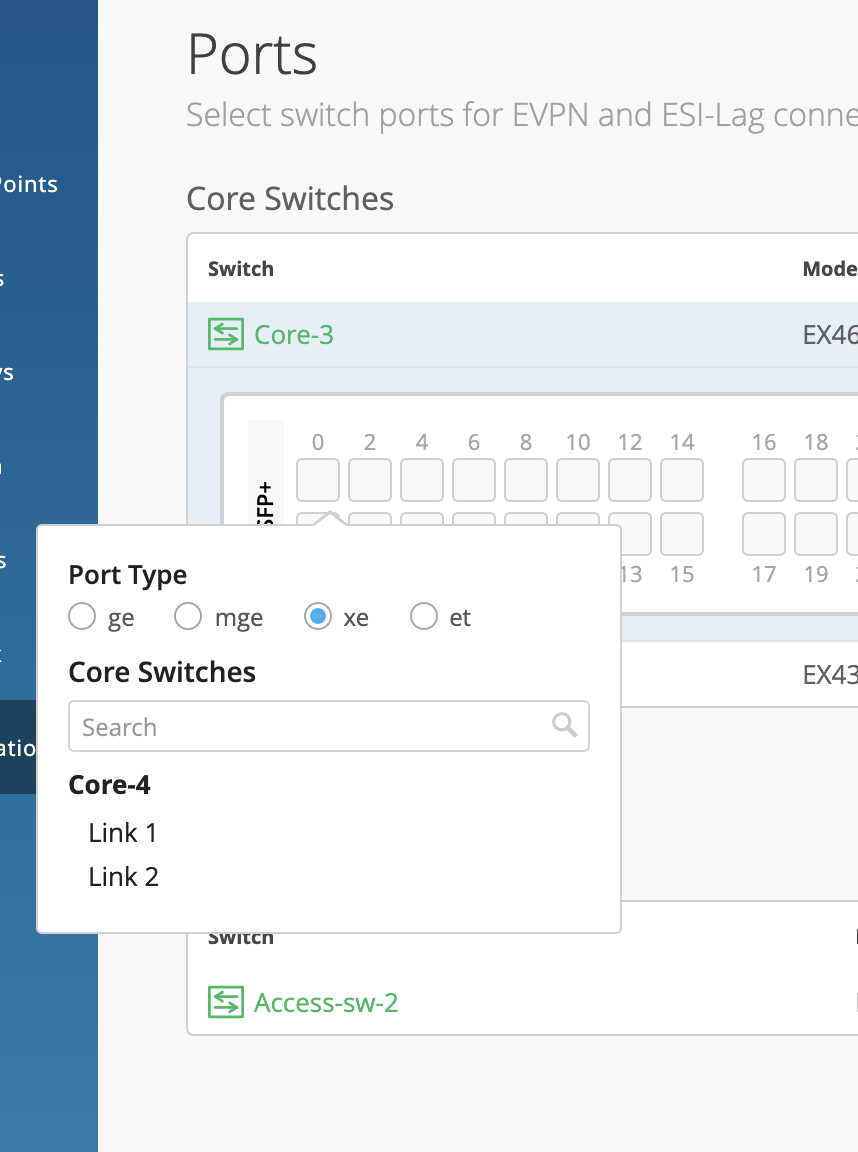
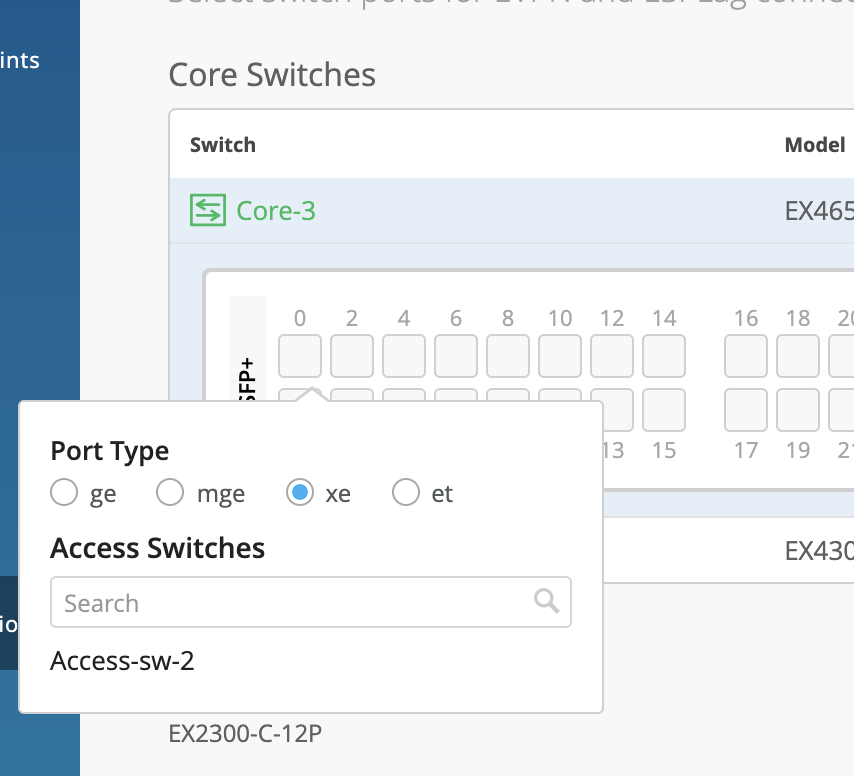
4. Ports Selection: For Core switch, click on the port on the front panel of core switch. Change the port type if required and click on one of the two Port Connection types.
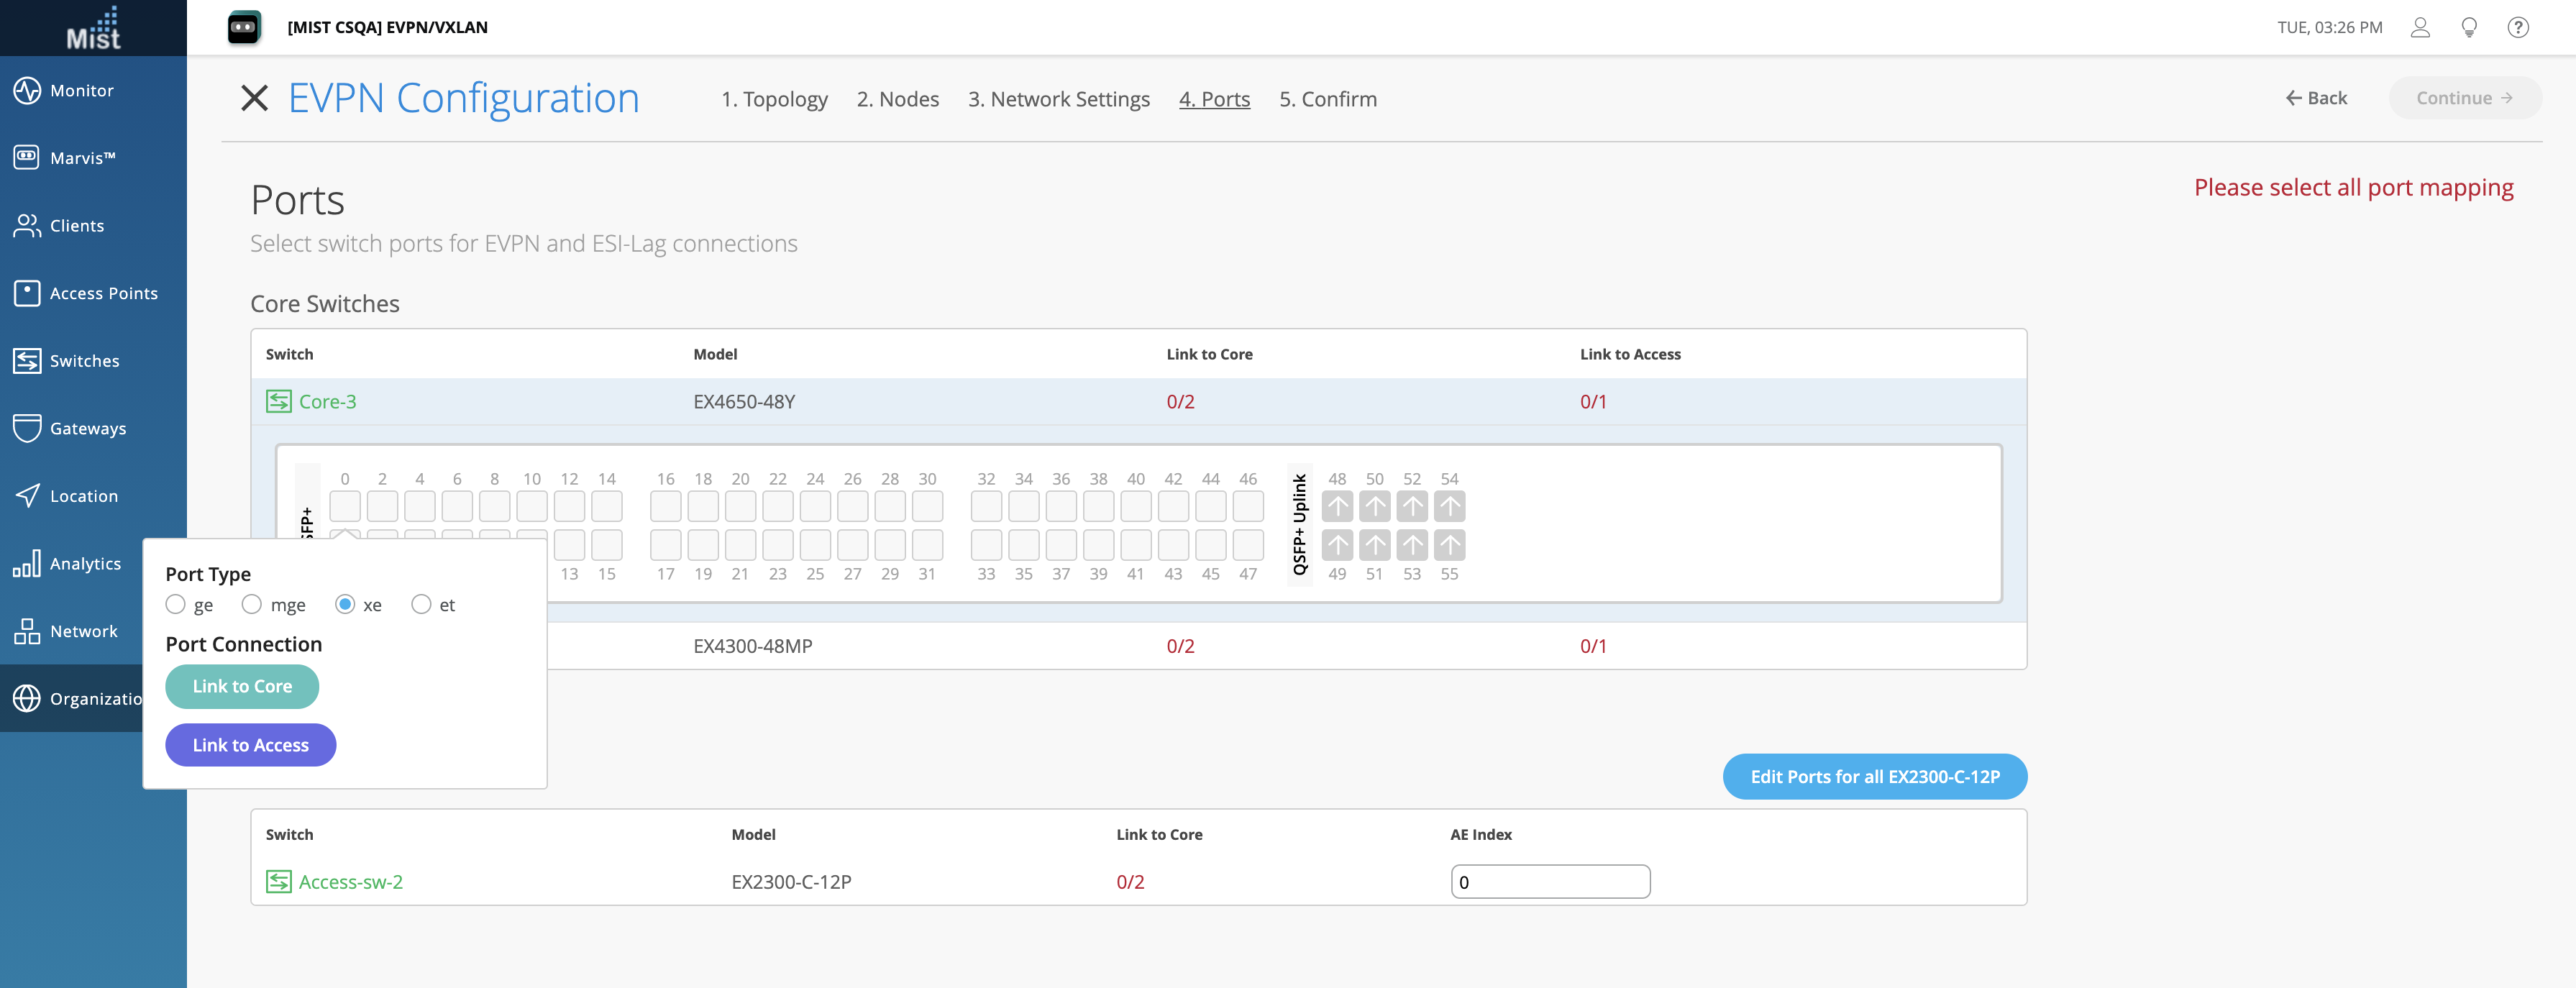
Link to Core will display the link selections to interconnect the core switches. Select the ports to connect.
Link to Access will display the link selections for the link going to the Access Switches. Select the Access switch name to which the port will connect.
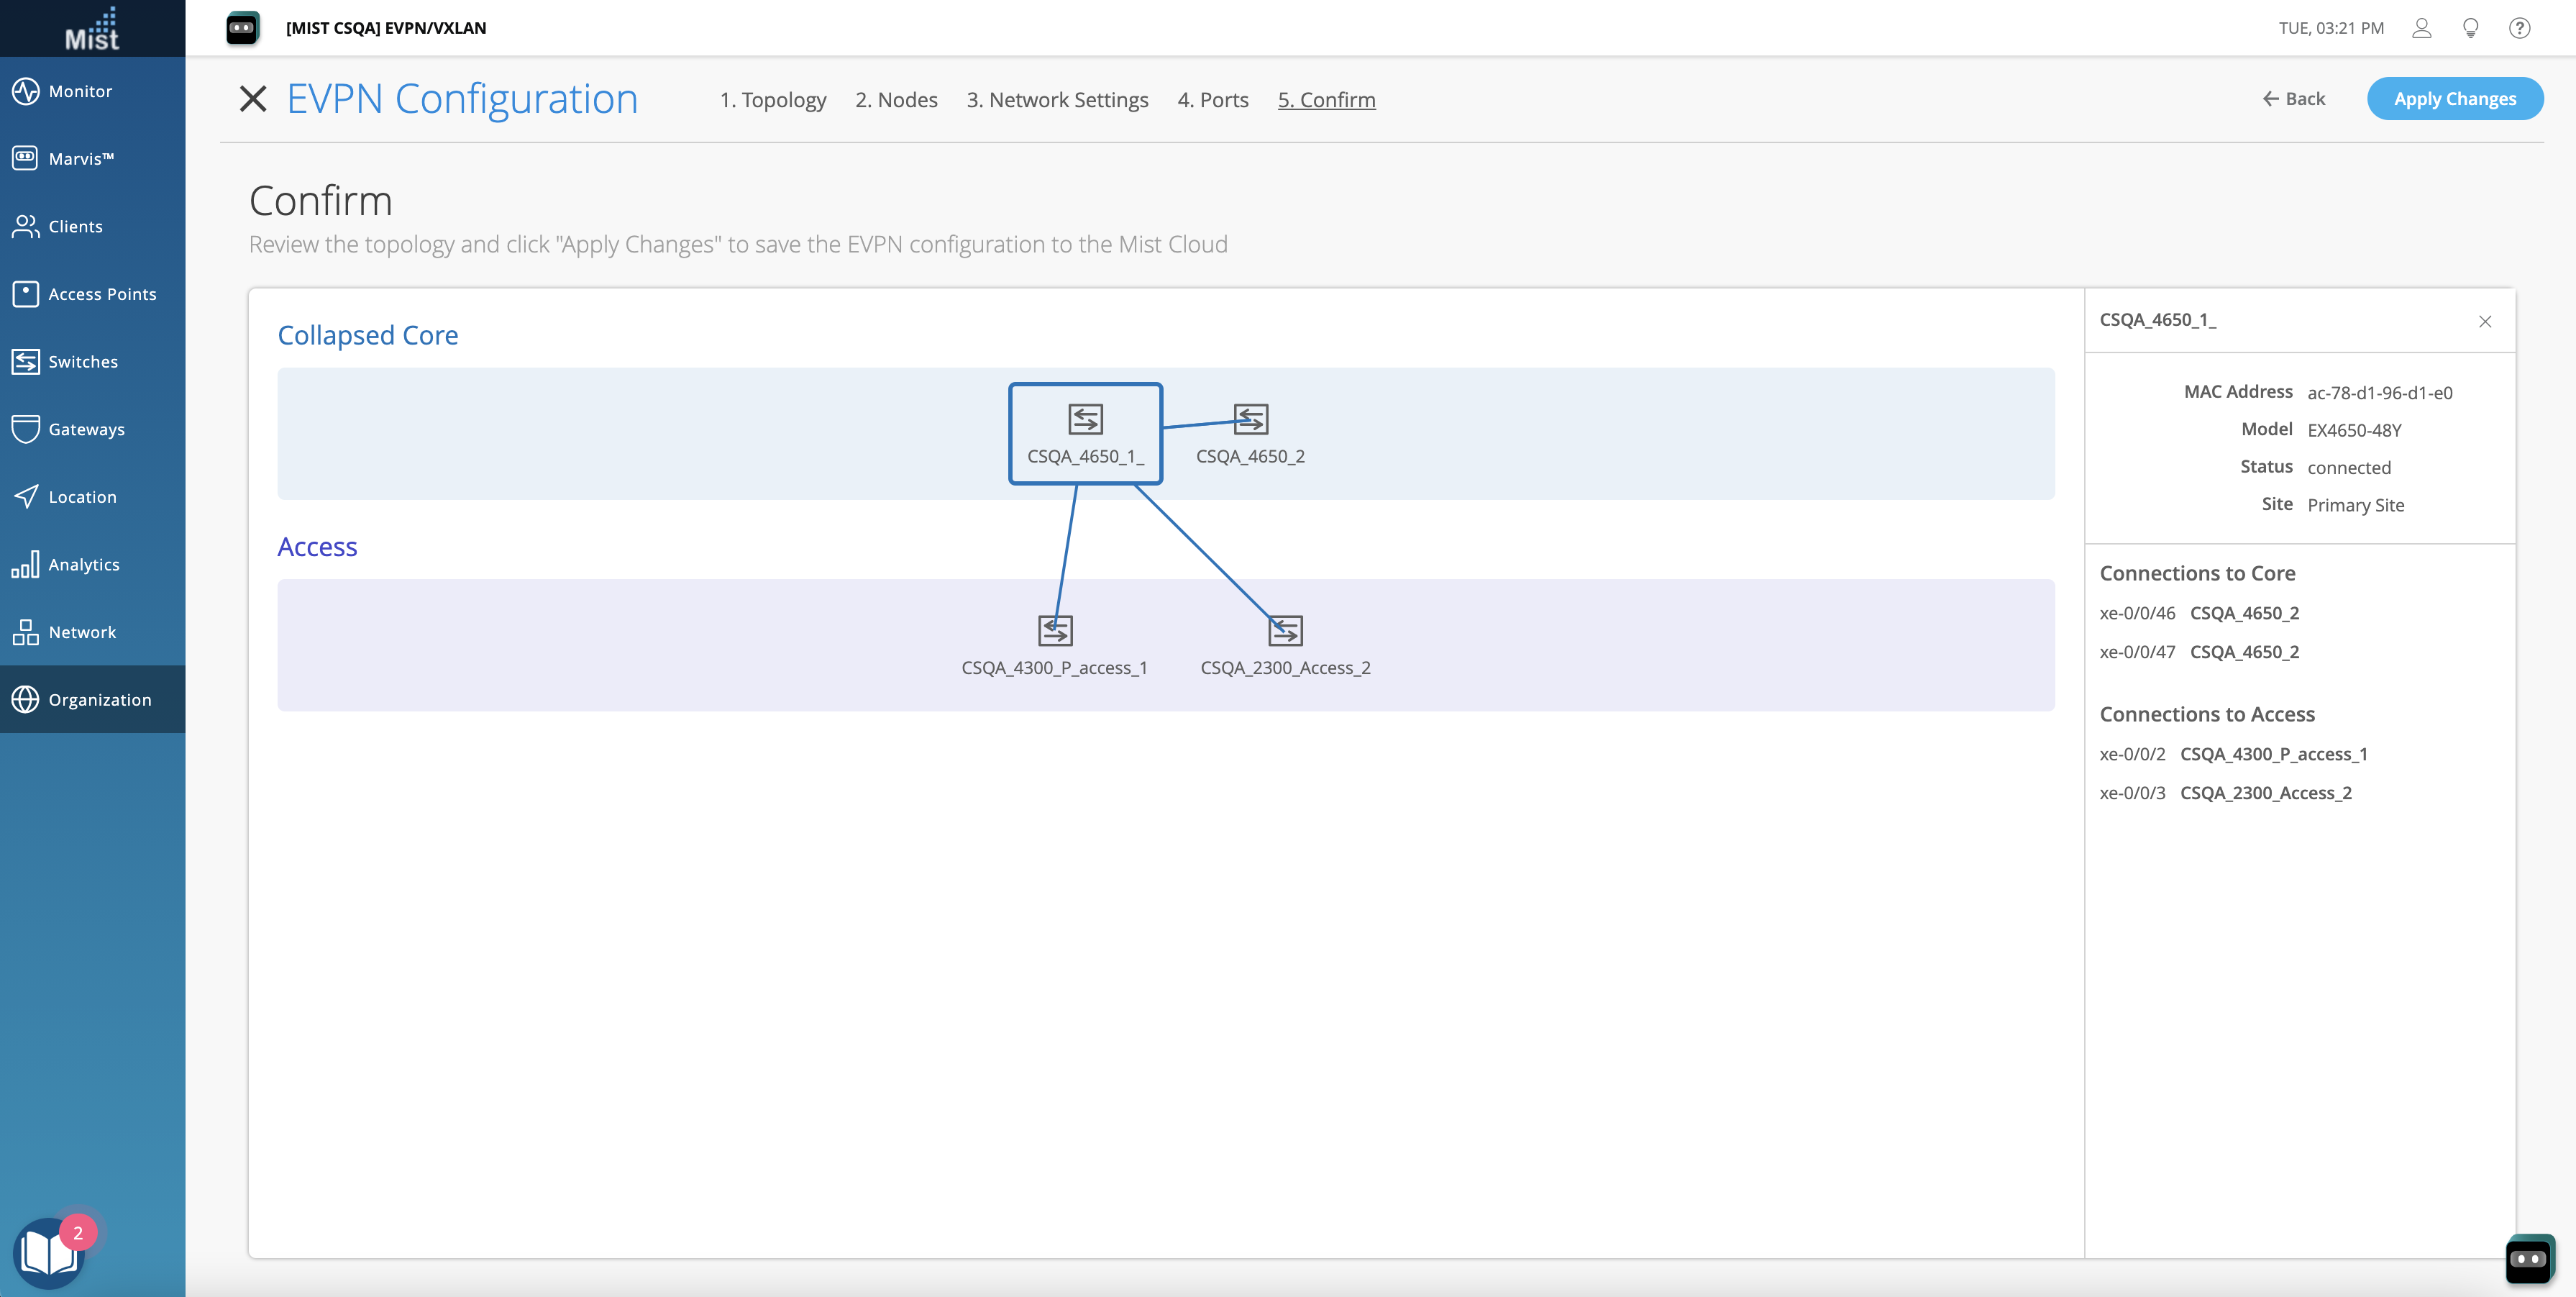
Once All the Port selections are completed, click on Continue. In the final Confirmation page, you can review and confirm the topology you have set up before applying the changes.
Support for Additional Switch Models
We are constantly expanding the support for Wired Assurance. Now, the following switch models will also be compatible with our features:
- QFX10002-36Q
- QFX10002-60C
- QFX10002-72Q
WAN Assurance 2.0 [BETA]
Please note that this requires you to have supported SRX or SSR devices in order to use these features.
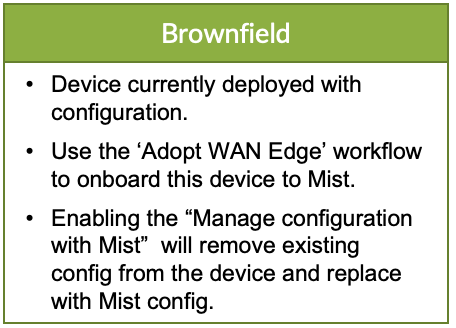
With this next iteration of WAN Assurance, you can now claim and configure your SRX and Juniper-certified SSR devices through the Mist cloud. Similar to our EX switches, your gateway devices can be claimed either through Greenfield or Brownfield methods, described below:
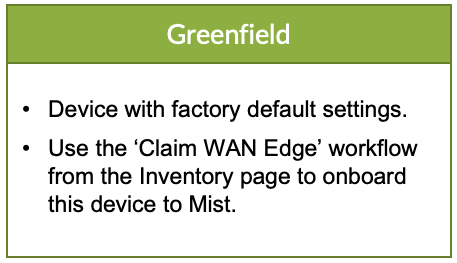
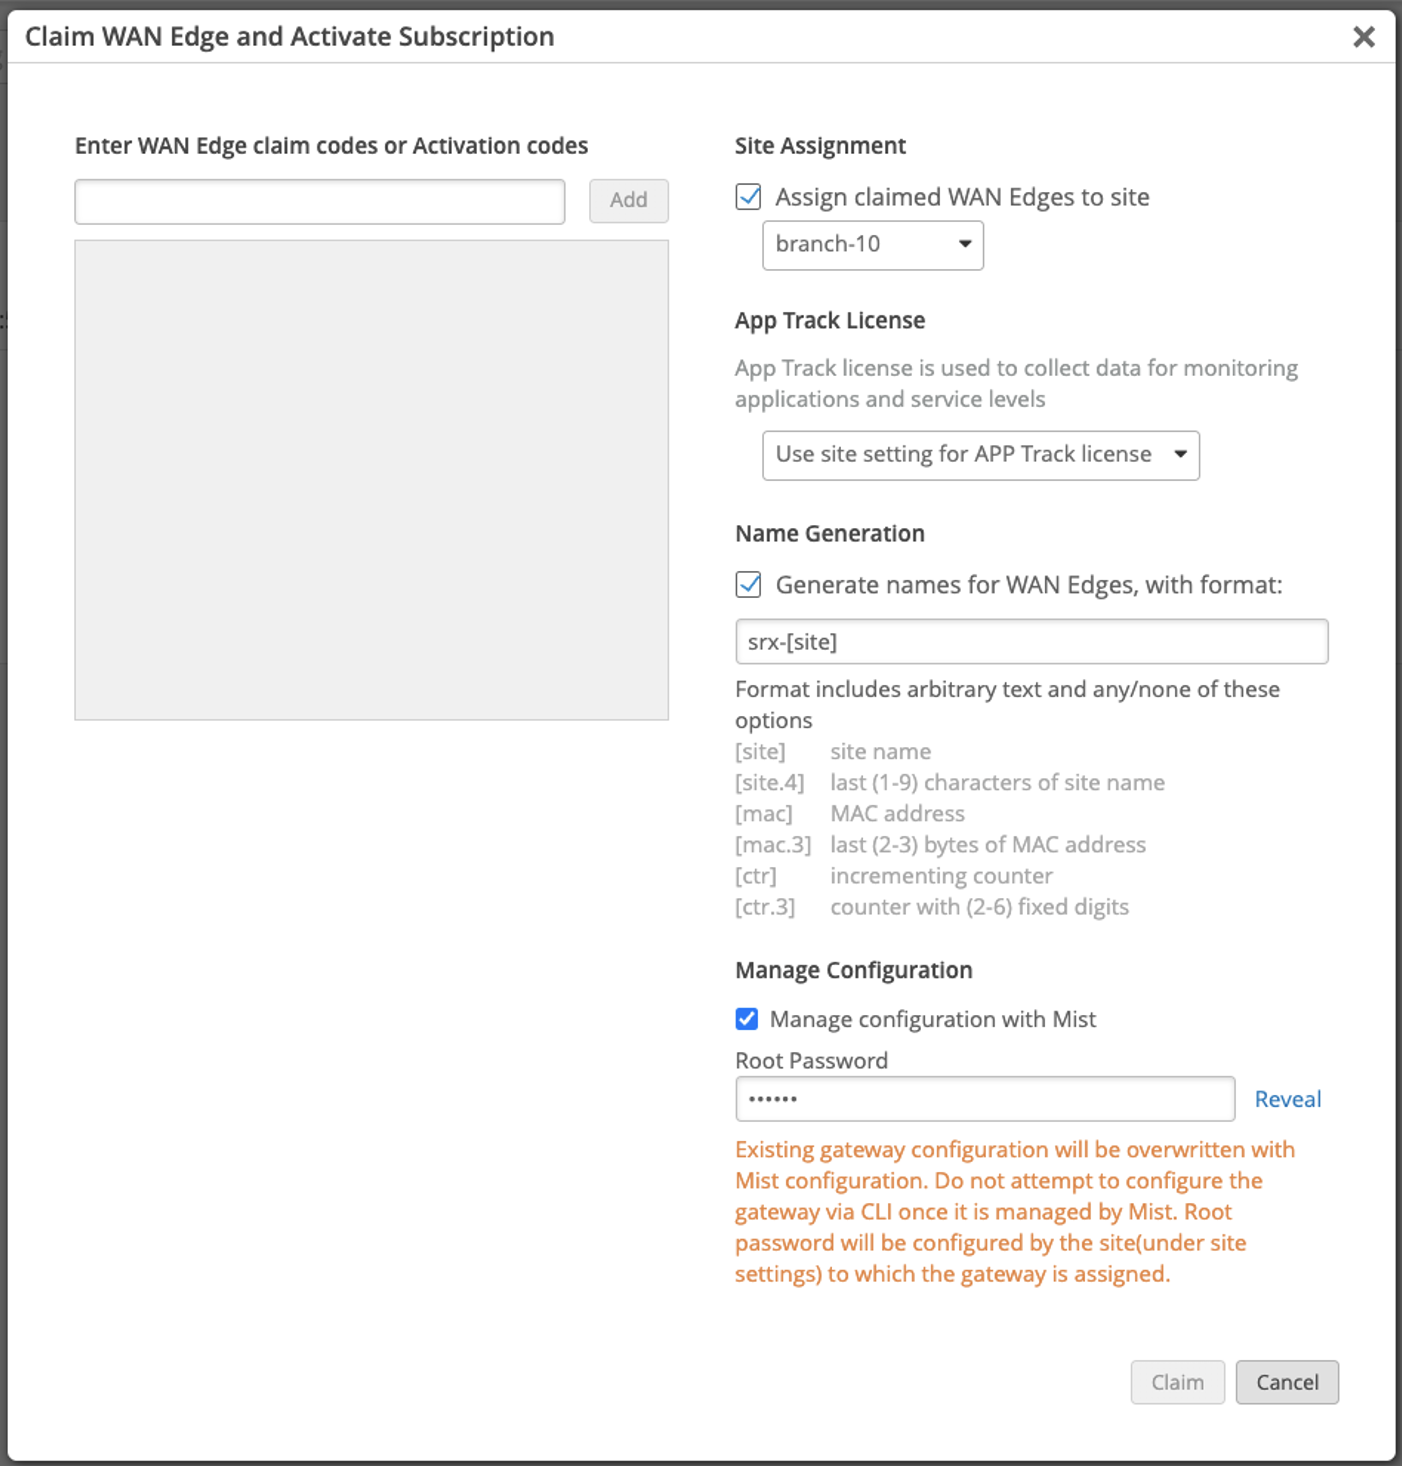
Claim your device using Zero Touch Provisioning (Greenfield Method):
Entering the individual WAN Edge Claim Code, or Entering the activation code from Mist PO that includes full stack. The device is registered as Mist managed device on the Juniper redirect server and when the device phones home it gets redirected to Mist.
OR
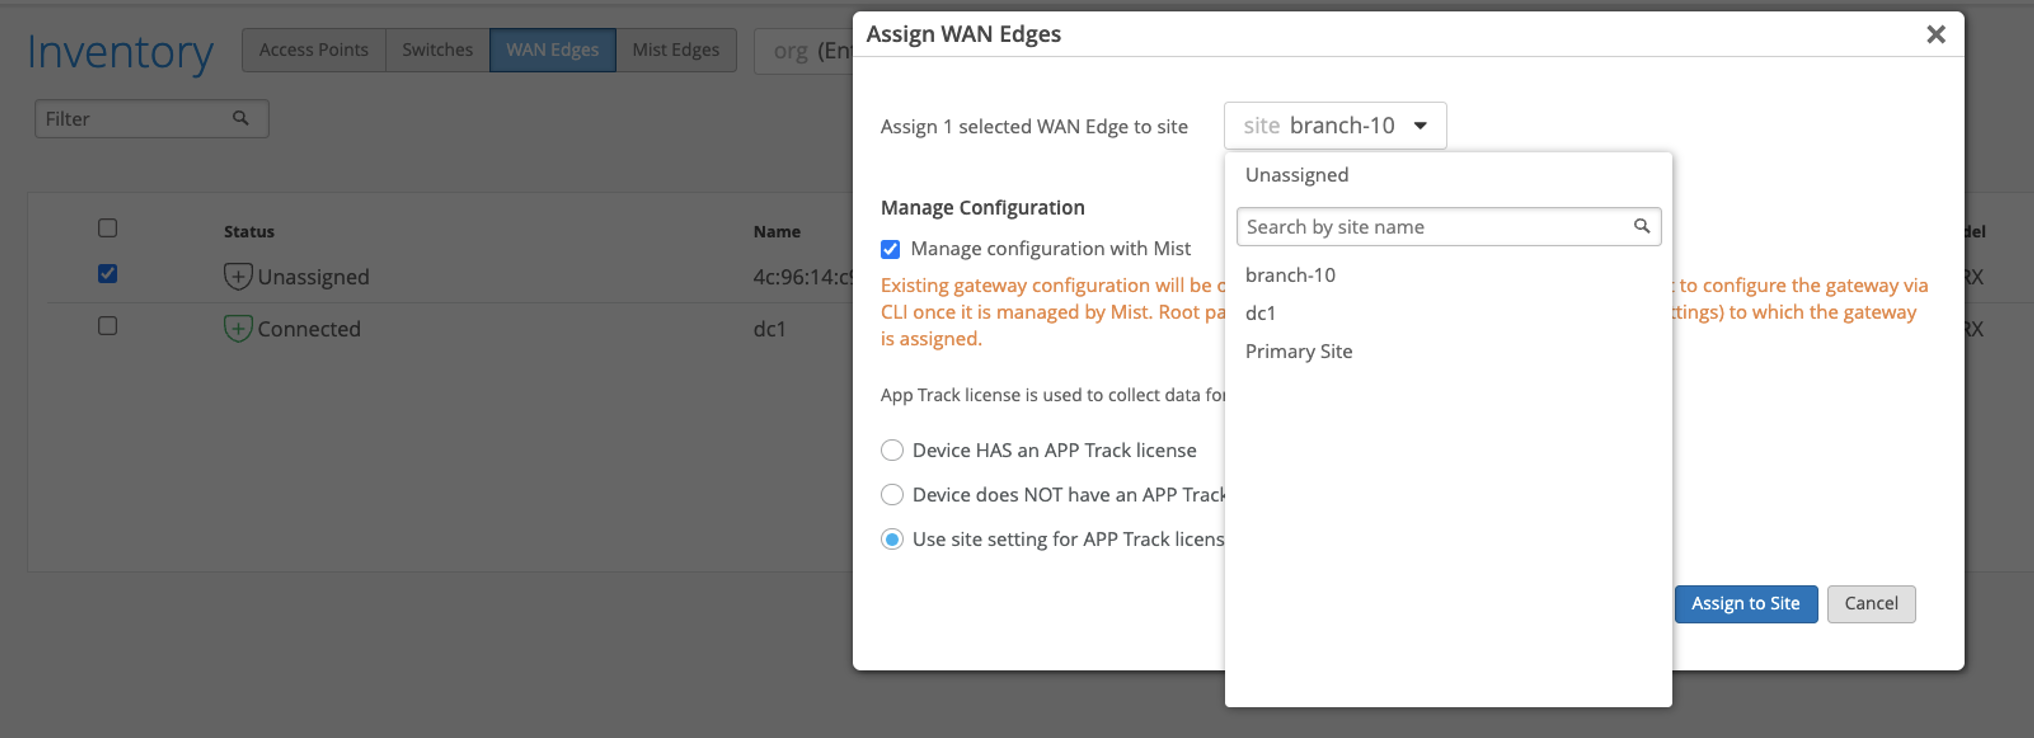
Adopt your device using CLI (Brownfield Method)
Adopt your device by copy/paste the set commands onto the device. After which it will show in inventory. Assign the device to the intended site.

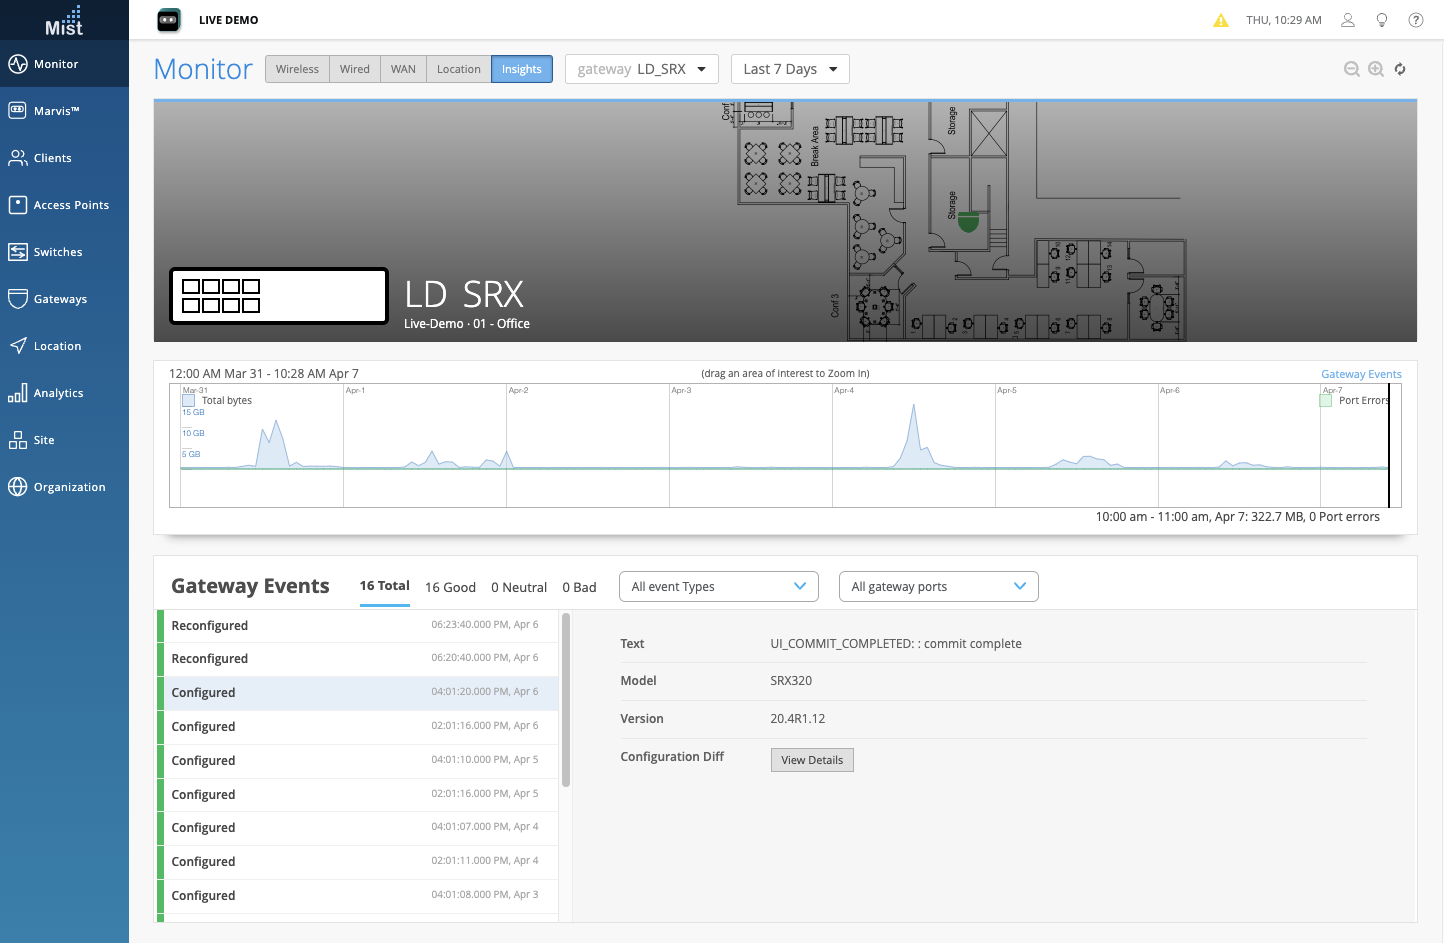
Once claimed and adopted, you may view your device details in the Gateways section (found on the left menu bar).
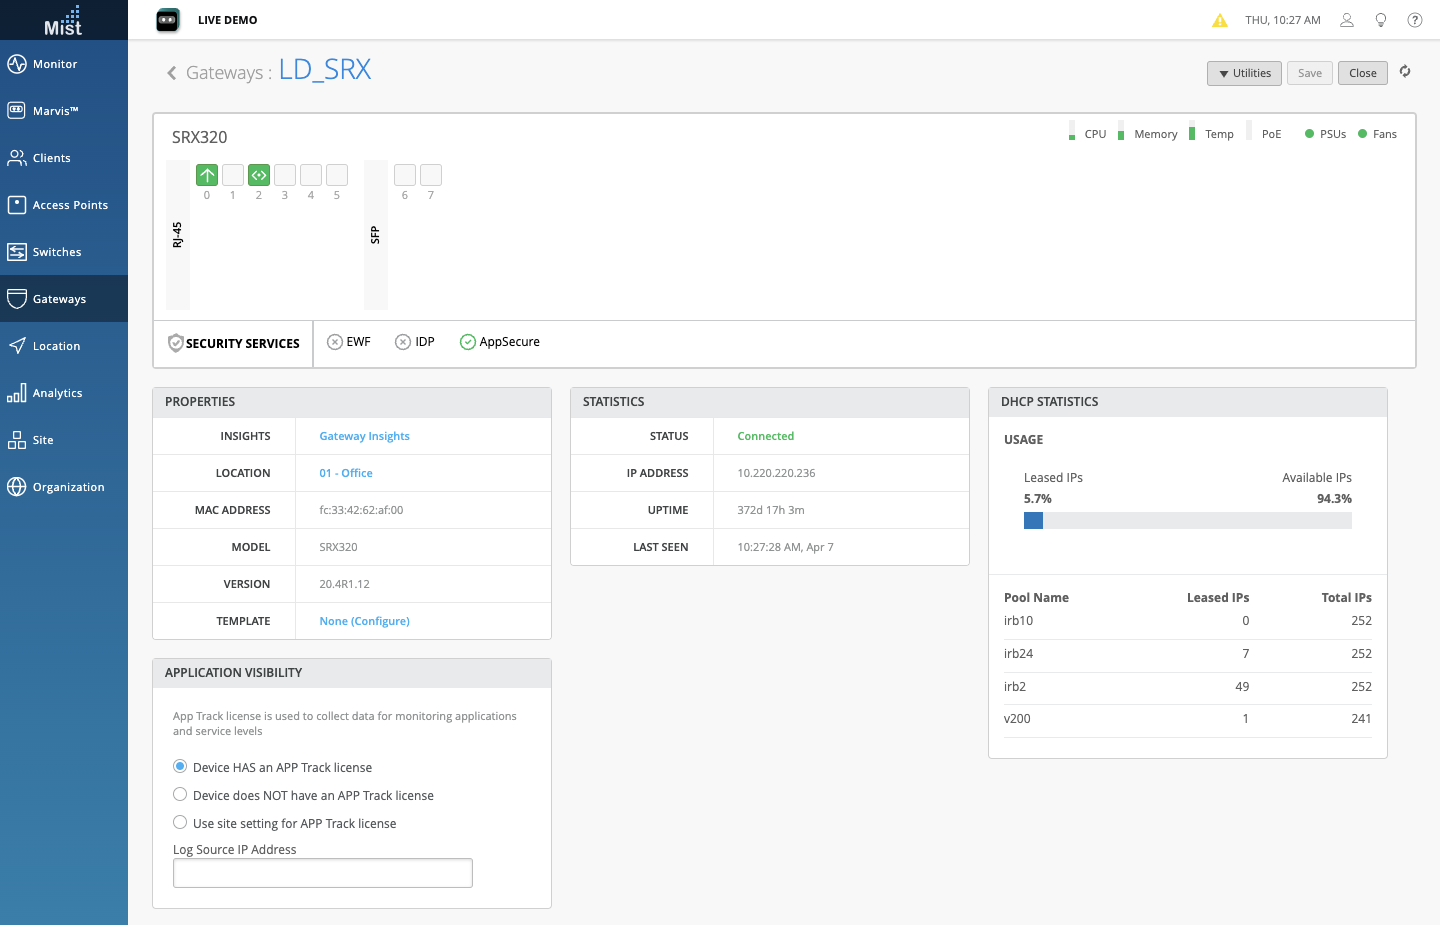
Click on the Gateway Insights link to open up its Insights page, where you can monitor Gateway Events, Tunnels, Applications, and Properties. This will look familiar to you if you’ve used our Site Insights or Switch insights views.
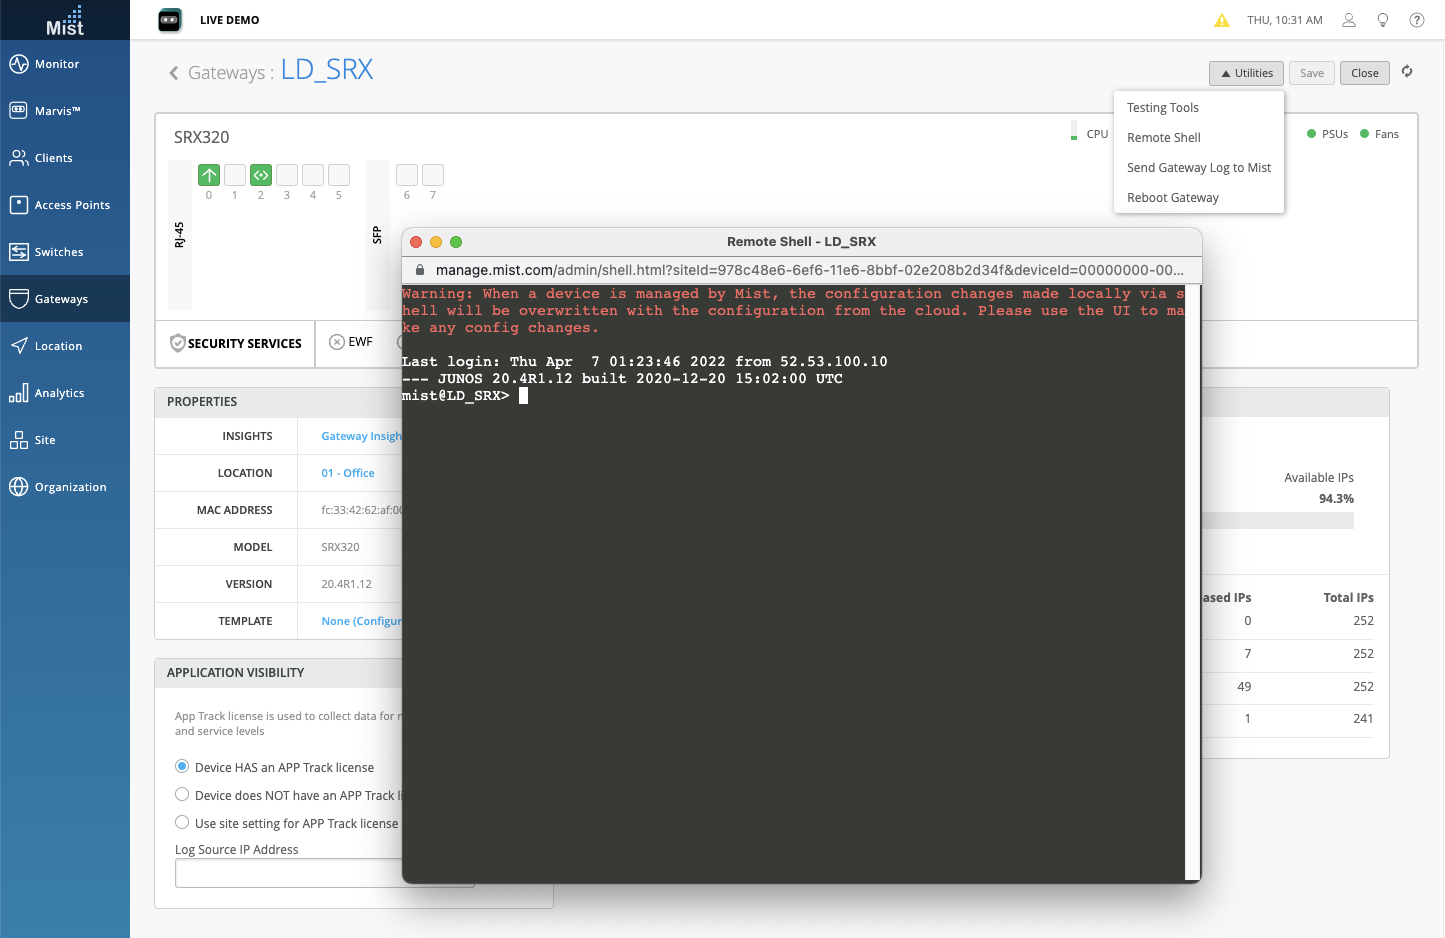
If there are commands you would like to manually enter using the CLI, simply select the Utilities dropdown and select Remote Shell. This will pop up a fully functional shell to your device. Close the window to end your shell session.